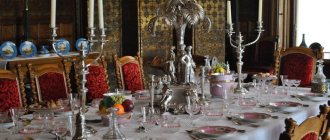
Paint can bring new life to an interior, and if you're tired of your desk, you don't have to get rid of it and start from scratch; a few coats of paint can easily transform it into a beautiful new piece of furniture. Or if you found an old table at a flea market or garage sale, you can create the table of your dreams simply by painting it yourself.
Transforming an old table with cracks and faded paint is much easier than you think. All you need is one free day and attention to detail. If you do everything according to the instructions and carefully, you will have a piece of furniture that will decorate your kitchen, dining room or other room.
Painting a table with your own hands - where to start?
If you're not sure what color to paint your table, we'll tell you. White tables with bright chairs look good in kitchens, while brighter colors can really make a delightful accent. Think about what kind of atmosphere you want to create and then choose a color that will help you achieve that look. Some shades include yellow, red, turquoise and navy blue.
Varnish
The final material needed for any repainted surface is a finishing varnish. It comes in matte and glossy. I'm not a fan of very glossy surfaces, but I wanted to test both Daria's glossy and matte varnishes, so I took both. I planned to do this: I’ll cover it with one layer of glossy, if it glares too much, then I’ll cover it with a second layer on top, but this time matte.
I’ll get ahead a little and say that matte varnish is a little shiny, so it’s better to choose it if you don’t want a too shiny surface. But you will have to take a 500ml jar, because... The smaller volume is only 100 ml (it’s definitely not enough).
Advice. If you plan to buy varnish from Leroy Merlin, OBI or another hardware store, make sure that the varnish does not yellow. Many varnishes suffer from this problem.
So, the cost of the finishing coating: 1290 rubles.
Interesting to know!
Dipped furniture is a popular home design trend that works well with kitchen tables and chairs. To try it out, paint the bottom half of your table legs. Or try the opposite: paint most of the table, but let the wood show through on the bottom half of the legs. A dipped look is a great way to introduce strong color. If you want to get really creative, consider using chalk paint on the top of your table. Children, for example, will draw while you prepare their breakfast, and adults will also have the pleasure of writing messages or reminders.
Choosing a color scheme for an old table
The choice of color depends entirely on the owner of the table and his preferences. This could be bright, rich shades, creating the illusion of a wooden texture, painting the countertop white or metallic, etc.
- Juicy tones: light green, yellow, scarlet, blue
Such color solutions will “fit” well into a modern style, where such furniture will become a bright detail of the interior of the room.
- White or black color
This is the best option for those owners who are pretty tired of the “native” color of the table or countertop and decided to make it more “neutral”.
This solution will suit any interior and will become its laconic highlight. When painting a table correctly, its wood texture will be hidden under a uniform layer of paint.
- Metallic
Painting all furniture or its parts in metallic colors is a successful solution for design in a classic or high-tech style.
How to paint a table correctly?
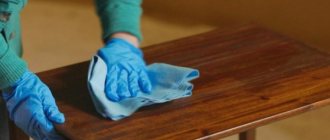
To paint your table, you want to first prepare the surface by sanding it. After you finish sanding, you need to coat the table with primer. If you're repainting a really old table, try to find a primer that blocks wood stains. For added protection, add two coats of primer to the top of the table. Let it dry for a day and then use a medium sanding wedge to smooth out any rough areas.
When it's time to paint, be sure to choose water-based enamel paint Kitchen counters take a lot of loads, and you'll need paint that can handle plates, cups, and all sorts of other items.
Paint several layers and make sure each one is completely dry. Once you've finished painting, apply a coat of water-based polyurethane or furniture wax to protect your table, then enjoy your newly refinished piece of furniture.
Painting with oil paint will take longer to dry. Open windows if you are painting indoors. You won't be able to wash the brush in the sink like you can with latex paint, so you'll need either solvent or a disposable brush to paint the table. The only downside to oil paint is that you usually can't mix colors, so you have to choose from what's available.
Painting a kitchen or dining table is not much more difficult than painting any other piece of furniture. But if you don't know what you're doing, it can turn into a big problem. Before you start painting, remember that the main goal of repainting is to make the surface durable. Kitchen tables take more wear and tear than your dresser or bookshelf. And who wants to spend hours painting only to see the paint peeling off a week later?
- If you don't take the time to sand everything down, including the beautiful table legs, you'll end up with peeling paint, an uneven surface, and possibly stains underneath your new paint.
- Before applying paint, you must apply at least one coat of shellac-based primer. Shellac is used when you coat painted wood with paint. This helps maintain color and prevents future yellowing. Make sure you use a water-based primer for latex and an oil-based primer for oil-based paint.
- A thick layer of paint tends to chip more often than several thin layers. Take your time. We recommend using a paint sprayer rather than a brush due to its ability to easily spread thin layers.
Required Tools
To paint the product you will need:
- Sprayer, roller, brushes;
- A container for paint and varnish composition;
- Latex gloves;
- Eye protection glasses and mask (if spraying is planned);
- Rubber spatula;
- Tools for disassembling furniture (screwdriver, hammer drill, etc.)
This is the main set of materials. If desired, you can purchase a finishing varnish.
Is primer required?
Prime the table using roll/brush primer. Roll-on/brush-on formulas are best for high-traffic surfaces as they tend to be thicker and more durable than spray-on formulas. Apply 1 coat of primer using a mini foam roller or medium brush. Allow this coat to dry before applying a second coat.
Primer helps the paint adhere to the wood and hides any stains or discoloration. Between layers, wrap the roller or brush in a plastic bag and place it in the refrigerator. This will keep the paint wet and save cleaning time between coats.
Be sure to fill any cracks or holes in the table with good wood filler. Be sure to follow the instructions and let the filler dry to the point where you can sand it well.
How to cover the tabletop
Having decided on the material, you need to understand that the optimal surface for the table will only be natural wood. In no case is veneer, MDF or chipboard used
Particular attention is paid to the age of the tree, its place of growth, storage conditions
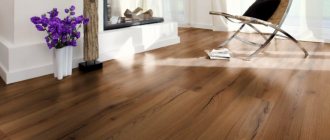
Natural wood is the best option for making countertops.
It is important to know that a laminated wood surface will be more elastic and flexible than the same surface made from solid wood. The type of raw material is also important.
Care methods must necessarily include treatment with special protective agents. What is the table covered with? It can be varnish, wax or oil.
There are three options for covering the table surface: varnish, wax and oil.
Practicality or durability
In order not to make a mistake in your choice, you should keep in mind some features of tree species. Harder ones, such as oak or beech, will last longer. However, their cost is much higher.
Hardwood furniture will last longer.
Among the democratic ones, pine, birch, ash or larch are perfect. Speaking about the latter, we should note a number of advantages. Its surface is quite dense and resistant to various types of damage.
The presence of gum in the composition prevents the growth of fungi and mold, as well as rot, which is very important considering where it will be used. Larch is also capable of absorbing or releasing excess moisture.
Larch is also optimal for countertop material.
Oil, wax or varnish
Avoiding the harmful effects of water, temperature, acid and alkali will help extend the life of a wooden tabletop. Here the question immediately arises of how to cover a wooden tabletop so that it lasts a long time.
Among those available, processing using the following means is suitable:
- oil;
- wax;
- varnish
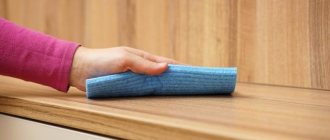
Surface treatment with oil, or rather its impregnation, is the optimal way to protect wooden products. It provides a kind of barrier that repels water from the surface. Oil absorbed into the top layer of wood will prevent it from getting wet when in contact with water. Oil compositions are not washed off, but require frequent use. At the moment, you can choose different compositions that match the color.
Oil protects wood from moisture.
Wax is a natural and environmentally friendly material. The effect of its use is similar to oil. But in addition to protecting against water, the wax coating also protects against minor mechanical impacts (scuffs and scratches). However, there are also disadvantages. A wax coating wears out quickly and requires updating and polishing more often than an oil coating. Before this, the old layer is cleaned off.
The wax coating requires regular updating.
Using varnish on a wooden tabletop is a radical method. It protects wood from water, minor mechanical damage, and exposure to ultraviolet radiation, while the structure of the tree itself does not change. The color of the surface remains the same, and a natural exchange of moisture also occurs, preventing the appearance of fungi and mold.
The varnish protects the surface from all contamination.
This coating also protects against temperature influences without flaking or cracking. To remove the varnish coating, the tabletop will have to be scraped.
Which paint to choose?
- Enamel based paints are known for being hard, durable, corrosion resistant and easy to clean.
- Latex-based paints are also easy to clean and look nice, but they don't hide damage and aren't durable.
- The oil paints we discussed above have a strong, unpleasant odor and are absorbed into the wood as they cure, making them extremely durable and easy to clean.
How to coat wooden surfaces for their decoration and protection
All wooden structures used in the construction of buildings must be subjected to coating treatment. This will not only increase their wear resistance, but also significantly improve their appearance. The paints and varnishes used for this serve as reliable protection against moisture and ultraviolet radiation, which have a detrimental effect on wood. However, they must be used at the earliest stage of construction.
Wooden surfaces experience constant loads, the degree of which depends both on the location of the building and cardinal directions, and on many other factors. The material wears out especially strongly in the coastal zone and in open spaces. At the same time, the wall of the building located in the north wears out much less than on the southern and western sides.
How and with what to coat a wooden fence for durability
Good paint is the key
Let's remember that properly preparing the surface for painting is only half the battle. A lot depends on the paint. Your requirements will be satisfied, first of all, by enamel, which creates durable coatings with high mechanical resistance. It is easy to get scratches and damage when using the table. For example, Dulux Rapidry . This is a universal, quick-drying acrylic enamel with a mild odor. A table painted with it will also be resistant to high temperatures and will not turn yellow or fade.
Black, green or red? Don't throw away your old wooden table - just paint it, preferably an attractive, surprising color.
Tassels
Brushes are very important in this matter; the texture of the coating, speed and quality depend on them. I chose the first synthetic brush, wide, but of such a size that it could easily fall into the neck of the paint can. At the nearest hardware store, I “tried on” the brush to the jar and chose the most suitable one.
The second brush was also synthetic, but for varnish (finish coating). Its size already depended on the size of the neck of the jar of varnish.
Although it was written on the price tags that one brush was for paint and the other was for varnish, I didn’t notice any difference in the bristles. Both of them are pleasant to the touch, soft and, as it turned out later, they make a layer of the same texture.
Total cost of brushes: 360 rub.
Manufacturing of countertops
In appearance, furniture made from panel material is not very different from products made from solid wood, but it costs much less. The countertop in the kitchen is exposed to water, steam, and impacts, for example, when beating meat. Even more extreme conditions are found on the countertop in the bathroom, adding humidity and the possibility of household chemicals getting onto the surface.
To make countertops, it is best to use 40 mm thick furniture panels made from oak or beech; ash or larch are also sometimes used.
A tabletop made of valuable wood attracts with its qualities:
- increased strength;
- durability;
- naturalness;
- beauty;
- heat resistance;
- resistance to temperature changes and deformation.
You can choose one of three options for furniture panels:
- extra-class (solid lamella) – homogeneous, without defects in the form of knots and cores, assembled from solid lamellas;
- grade A (joined) – without defects, has an even tone over the entire surface;
- grade B (jointed) – uniform tone, there are a small number of knots.
If two letters are used in the grade marking, for example AA or AB, this means that one side of the board meets the requirements of grade A and another B.
A table top made of extra-class and grade A looks expensive and elegant, while grade B is more natural. The last option can be used, for example, for the LOFT style.
Self-adhesive film
Another great solution is to decorate an old table with self-adhesive film. Moreover, the modern market has a huge assortment of it - from simple plain to mirrored, luminous and imitating natural textures.
To cut the film correctly, you need to use the centimeter markings located on the back side of it. It is important to thoroughly clean the surface of the table, since the self-adhesive will instantly reflect all the flaws.
Glue the film slowly, pressing it tightly and at the same time smoothing it with a soft towel so that no air bubbles form.
Photo: in.pinterest.com
Photo: styledegree.sg
10 cool ideas on how to decorate your apartment for the New Year
Decor under glass
To decorate an old table using the following method, you will have to work hard, but the result will be well worth the effort!
If the wooden tabletop is thick, cut out a recess inside and fill it with themed decor. You can, for example, decorate the seabed by laying shells, pebbles, sand, artificial seaweed, or even colorful Christmas tree decorations for the Christmas holidays. Finally, the finished “filling” must be covered with transparent glass.
If the tabletop is thin, just fill the edges with bars and paint them the same color as the table, then lay down the decor and also cover with glass cloth.
Photo: pinterest.ru
Photo: pinterest.ru
Epoxy resin
The main secret of epoxy resin is that it hardens quickly in the open air, creating the effect of an icy or amber surface.
If your old table has deep cracks, fill them with resin - it will look amazing! You can also add some decorations, for example, shells or sea pebbles.
Sophisticated creatives sometimes go even further - they introduce luminescent powder into the liquid resin composition. What do you think is happening? Absolutely right, incredible luminous surface!
Photo: mebel-mart32.ru
Photo: proraboff.rf
10 best ideas on how to decorate a room for the New Year
Decoupage
The simplest but most magnificent idea is the decoupage technique. To do this, you need to purchase napkins with patterns that will match the interior design. Multi-layer napkins need to be separated so that the material is as thin as possible.
The surface of the table, if it is wooden, must be thoroughly cleaned, sanded and made absolutely smooth. If the table is metal, it should be washed and degreased. Next, cover the surface with acrylic paint.
The design is applied quite simply: grease the tabletop with PVA glue, apply a napkin and smooth it, expelling any air bubbles that have formed. After finishing work, the table should dry well, then apply a protective layer of varnish, which will prolong its service life for a long time.
Photo: hsdeck.ru
Photo: sovkusom.ru
Core Technologies
The main restaurant methods include the following:
- Painting the table (usually special paint for wooden surfaces is used; it can be acrylic-based or enameled)
- Replacing the tabletop (the tabletop can be ordered ready-made to size, or you can make it yourself, as shown in the master classes below)
They can be used individually or combined depending on the damage and condition of your furniture.
twisted rope
This method of decorating an old tabletop is perfect for a round table. You will need any thick rope made of natural fabric (hemp, jute) and an adhesive gun.
Fix one end of the rope with glue in the center of the tabletop. Then, moistening the rope with adhesive, move around the circumference, winding circles around the center. Each next row should fit tightly to the previous one.
Photo: asusfone.ru
Photo: cpykami.ru