Tiled floors and walls are easy to maintain, but the seams require special attention. They have the unpleasant property of becoming dirty during daily use, and the question of how to clean the seams between the tiles sooner or later arises even for the most careful owner. We’ll figure out how to restore grout to its original appearance, in which cases it’s easier to do this, and what cleaning methods really cope with contamination.
The condition of the seams determines the appearance of the cladding Source tvambienti.si
Relevance of cleaning seams
Fragmented finishing of the planes allows you to easily and quickly replace one tile when it wears out, without resorting to major repairs.
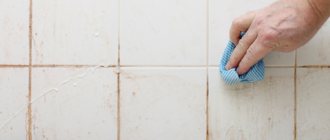
At the same time, the deep seams between the tiles accumulate various contaminants:
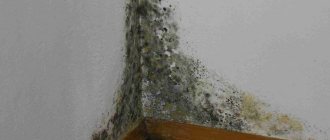
- Fungal mold;
- Soap scum;
- Lime dust;
- Rust.
While smooth tiles can be wiped and polished to a shine with a rag, you will have to tinker with the seams. The point is that dried grout is welcomed by a balanced cleaning solution.
Moreover, you will have to apply this solution with a sponge, and rub it with an old toothbrush. Harsher abrasives can damage the sealant between seams.
Corresponding damage will quickly result in the entry of dirt and moisture into the tile structure. The same effect is facilitated by the previously listed contaminants. They can be compared to a “time bomb”.
But do not forget that mold and dust harm not only the tiles, but also the users. It is difficult to breathe inside a polluted room and you may even develop allergies. Finally, dirty seams are noticeable and make the interior look untidy.
Radical methods
It may happen that no cleaning methods have given a positive result. This indicates that the grout has lost its integrity and strength, and dirt and fungus have penetrated all its layers.
It will no longer be possible to save the situation and you will have to use radical methods - completely remove the old fugue and apply a new one.
The process is implemented according to the following scheme:
- Mechanically, using a spatula or scraper, completely scrape out the affected material.
- The seams are thoroughly cleaned of grout residue and dust. It is best to vacuum the floor.
- The resulting cracks are generously treated with antiseptics. Let them dry.
- Seal the seams with suitable grout. After drying, the floor is washed with soapy water.
If, after clearing the seams, it turns out that mold has penetrated deep under the tiles, it may be necessary to replace the cladding, since after some time it will again appear on the surface, causing irreversible harm to the health of people living in the room.
Acid or alkali
Before bleaching the seams between the tiles, it is necessary to find out the nature of the contamination. Most likely, they will be mixed, so it is better to arm yourself with two means at the same time:
- Alkaline – for corroding grease and soap stains;
- Acidic - for corroding rust, lime and mold.
It’s easier to buy professional products for whitening seams - Mellerud, Master Good, Unicum. Even better is to use a water-repellent impregnation (water repellent) like Litolast after them.
The listed consumables have a safe and balanced composition. The solutions are poured into spray bottles and are easy to use according to the instructions.
The trouble is that they are quickly used up, because... seams are often laid over the entire area of one or two rooms, and the procedure itself must be carried out at least once a season. It is not surprising why the target audience often chooses folk remedies.
Little secrets
- An old toothbrush will help the cleaner penetrate deeper into the grout pores and remove more dirt. The main thing is that the bristles are not too hard. Otherwise, you can scratch the tile or damage the gloss. For example, a good alternative is a small paint brush or clothes brush.
- If you want to reduce the amount of aggressive substances (bleach, ammonia or vinegar), dilute them in water in a 1:1 ratio. Place the mixture in a spray bottle - cleaning will be much more comfortable!
- After bathing, dry the bathroom walls. The drier the room, the less risk of fungus.
- Paraffin candles will whiten and protect from moisture:
- Trim the wick.
- Swipe the tip of the candle several times until the dirt sticks to it.
- Remove any dirt from the spark plug, or cut the spark plug and sharpen the tip again, then pass it through the joints. Do this over the entire wall or floor.
- After complete cleaning, run a candle over the joints again to form a waterproofing layer.
Initial stage (preparation)
Regardless of the composition of the product, it is recommended to prepare the room. Moreover, we are talking not so much about the removal of various devices and furniture, but about the repair of utility lines with planes.
Indeed, very often they contribute to the rapid contamination of the joints between the tiles:
- Dirty ventilation ducts;
- Worn out plumbing;
- Lamps with weak luminous output;
- Worn baseboards and sealants.
If a lack of light and dirty ventilation ducts provoke the growth of mold, then old appliances and baseboards form rust and other industrial dust.
From here the following guidelines emerge:
- Grease and soap stains – found on the floor near the shower;
- Rust and lime - accumulate near plumbing fixtures or in places where structures are fastened;
- Mold - covers the finish in the corners of the room (mainly at the junction of the ceiling and walls).
It will not be possible to get rid of open and hidden contaminants without transporting and removing plumbing fixtures and furniture. In addition, it is recommended to clean the seams in parallel with the tiles.
When to change grout
Radical methods, namely replacing the grout between the tiles, have to be used in the following cases:
- Dirt does not wash off;
- it is not possible to remove the fungus;
- the grout is crumbling.
This is a labor-intensive process, so they resort to it only when necessary.
First, remove the old grout with a screwdriver, lightly tapping its handle with a hammer. Then the resulting depressions are filled with new mass. Any excess that gets on the tiles is immediately removed with a damp cloth. It is recommended to fill the seams of floor tiles with an epoxy-based compound. Dirt sticks to this grout less and is not affected by mold. Replacing grout is a difficult and painstaking, but very effective method.
Tile grout cleaning kit
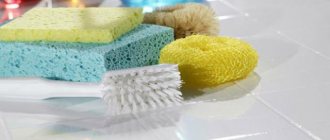
Although the length of all seams can exceed 50 meters, the set for thematic cleaning is quite limited. If you do not take into account the cleaning products themselves, the target audience will need:
- Latex gloves;
- Sponge with soft and hard sides;
- Rags;
- Worn out toothbrush;
- Containers for dissolving the cleaning agent in water;
- Spray.
The latter is convenient for applying the cleaning agent to the surface of the seam. However, you can use the soft side of a sponge or even a toothbrush for this function. Moreover, individual home remedies are easier to dissolve in a basin.
Alternative methods
Tile cladding can be cleaned without using any cleaning agents. In order to clean the seams between tiles on the floor, the following methods have been successfully used:
- Cleaning with a steam generator. Gives a good, but short-term result (lasts for several months). The tile seams are treated with hot steam, which not only displaces dirt, but also gets rid of mold. For the best effect, use a steaming nozzle; after treatment, wipe off moisture and dirt with a napkin.
- Using a melamine eraser sponge. The sponge material, foamed melamine, allows you to avoid the use of cleaning agents. When used, the sponge wears off (like an eraser) and needs to be well moistened while working.
- Seam painting. It will take a lot of time and require precision, but the result will be impressive. Tight seams are suitable for painting; they are additionally cleaned and degreased. You will need waterproof paints, which must be applied with a thin brush. The best result is obtained when using special markers or pencils; their thickness is adjusted to the size of the seam.
The marker will help restore the seams on the tiles Source prom.st
Traditional recipes for cleaning tile joints
When neglected, the seams between the tiles accumulate household grease, rust and mold. It is recommended to combat several different contaminants at the same time using an acid-base solution:
- 0.5 cups baking soda;
- 0.3 cups lemon juice;
- 3 tbsp. 9 percent vinegar;
- 1.0 liters of warm water.
First, the soda is quenched with vinegar. Next, citric acid is added to the mixture. The resulting substance is mixed and diluted in water. The prepared solution is applied to the seams for 10 minutes, after which it is rubbed with a sponge or toothbrush.
How to clean seams after repair
Kerosene or solvent can help remove traces of solutions and other stains on the tiles that remain after repair work. Wash the tiles thoroughly with warm water and dry them. We carefully clean off traces of cement mortar with a sharp object. To clean other stains, mix kerosene or solvent with water in a 2:1 ratio and cover the problem area with a large amount of the resulting cleaner. We wait 5 minutes and then wipe off the dirt. After the stain has disappeared, thoroughly rinse the surface and wipe dry.
Acidic solution for cleaning tile joints
If a professional solution for cleaning the grout between tiles is not available, you can use dishwashing detergent.
It will serve as one of the ingredients for preparing an acid solution:
- First 2 tbsp. citric acid, lightly moisten with 50 ml of warm water;
- Next, add one drop of dishwashing detergent like Fairy to the mixture;
- Mix the two ingredients and use as a paste.
A homemade solution based on citric acid and Fairy is consumed faster than its universal counterpart. However, the effectiveness of the acid gives successful results in the fight against rust, lime and mold. The main thing is to let the gruel soak into the dirt for 15-20 minutes. After this, the mixture can be ground.
Industrial household chemicals
Modern home care products include a whole arsenal of devices and detergents to combat contamination in tile joints.
Housewives can use:
- A whitening pencil-marker that not only removes dirt, but also paints over the yellowness in the joints. It is convenient to use such a quick way to solve the problem in rooms where there are smokers. Components of cigarette smoke quickly settle on the surface of the tile and penetrate deeply into the porous space of the joints, so cleaning and cosmetics may be needed much more often than usual.
- Powdered oxygen stain remover, diluted to a thick paste. It is applied in an even layer to the areas of contamination, and after drying, thoroughly washed off with water and a sponge.
- Cleaning sprays containing ammonia and hydrogen peroxide. They are easy to apply and wash off, and the solutions do an excellent job of killing bacteria and fungus.
- Cleaning gels based on chlorine or acids. Aggressive synthetic products are diluted with water, foamed and wiped over the tiles. If a lot of dirt has accumulated in the joints, mold has formed, careful application of a concentrated substance is allowed. It should be remembered that caustic chemicals can discolor the color in the grout. It is important to protect hands, eyes and mucous membranes from splashes and vapors. After cleaning, the remaining foam and stains must be thoroughly rinsed off.
- Three-phase complex means for eliminating mold. With their help, you can dissolve and wash off fungal particles, then destroy the spores using a fungicide (a chemical agent for combating fungal diseases, such as Vectra, Fundazole, Bordeaux mixture). At the final stage of cleaning, you need to treat the surface with a water-repellent compound that prevents the penetration of moisture and new spores.
- Melamine sponge, a modern expensive but very effective cleaning agent. With its help it is easy to get rid of dirt and water deposits. However, the device is useless against mold and bacteria.
When cleaning with chemical reagents, you need to protect your skin, eyes and respiratory organs well. Rubber gloves, an apron and a respirator will help avoid burns and dirt particles entering the respiratory tract.
Any industrial and folk remedies are good when it comes to routine cleaning. If a fungus has entered the house and settled in the tile joints on the walls and floor, only a radical method will help - partial or complete repair.
Alkaline solution
With constant cleaning and wiping of damp rooms, only household grease and soap stains have time to accumulate on the trim and seams.
It is better to remove such contaminants with an alkaline mixture:
- Moisten 0.5 cups of baking soda with 100 ml of boiling water;
- Mix the porridge thoroughly, apply to the seam for 10-minute soaking;
- Wipe the seam until white with the hard side of the sponge.
This product is not recommended for cleaning tiles with low chemical resistance (classes B and C), because The lye may leave marks on the tiles or change their color.
Can I use a steam cleaner?
A modern and effective way to clean seams is to use a steam cleaner. Hot steam easily destroys not only dirt deposits, but also mold and mildew. In addition, high temperature and pressure have a disinfecting effect.
A stream of hot steam should be directed at the gaps between the tiles. After this treatment, the dirt comes off the surface and can be easily wiped off with a damp cloth.
This is a very effective and environmentally friendly option, the only downside of which is the cost of the steam cleaner.
Super whitening product
In pursuit of perfect cleanliness, you have to use expensive professional products or replace them with expensive consumables.
In particular, we are talking about the combination of chemicals with hygiene products:
- 1 tbsp. whitening toothpaste;
- 1 tsp citric acid;
- 1 tbsp. soda
All ingredients must be mixed and moistened with 50 ml of warm water. The resulting mixture must be stirred again to obtain a paste-like slurry. After leaving this product on the seams for 20 minutes, the latter are perfectly polished and acquire their pristine whiteness.
