Not everyone agrees with the opinion that bed linen should be ironed. But in order to answer this question correctly, it is necessary to determine what is the benefit of this action and whether there is at least some harm in ironing. As a rule, refusal to iron clothes is due to the fact that it is a long-term and not very convenient procedure that takes a lot of effort. But if you do not take into account the discomfort and labor intensity, but pay attention to the benefit, then it can be noted that it lies in the fact that bacteria are killed under the influence of high temperatures. This is the main and really significant advantage of ironing.
In order to make your work easier, you need to learn how to properly iron bed linen and follow the recommendations of experts.
Why do you need to iron your bed linen?
Ironing advocates speak out for hygiene, citing the following arguments in disputes:
- At high temperatures during ironing, those bacteria that remain alive after washing are killed. This is especially true for those housewives who prefer to wash their clothes at temperatures up to 60 degrees.
- The second undoubted advantage is the external aesthetic appearance. It is much more pleasant to lie down on fresh, clean, ironed linen.
- In addition, bed linen should be ironed, if only to maintain its wear-resistant qualities. When ironing, the process of sealing threads and fibers occurs.
Whether or not to iron linen is a personal matter for everyone, however, there are situations in which it is absolutely necessary to iron bed linen through heat treatment. Such situations include:
- Skin and infectious diseases - from scabies to dysentery.
- Presence of newborn children in the house.
In both of the above cases, the laundry should be washed at high temperatures, it is better to boil and iron with a steamer.
Secrets of fast ironing
The thought that it's time to iron bulky sleep accessories doesn't excite many people. However, not everything is as bad as it seems at first glance! There are a lot of life hacks that will help speed up this process significantly. They are applicable to various types of bedding. Knowing about them, you will be able to cope with this seemingly difficult task without any problems.
Sheets
It is better to iron a sheet by first folding it in half lengthwise. Products made of dense material are ironed on both sides. For thin fabric it only needs to be ironed once to make it look even.
This is interesting: sheets with elastic have become increasingly popular lately. It does not slip, fits well on the mattress and is easier to iron.
Duvet covers
Many housewives do not know how to quickly iron a duvet cover after washing. There is a misconception about the complexity of this process. In fact, this is not true. This short step-by-step instruction will definitely help you:
- Carefully smooth out all folds and creases with your palms before ironing the duvet cover.
- First, iron the product on one side, then on the other, paying special attention to the corners.
- At the final stage, fold the duvet cover in half and iron it again.
Pillowcases
The process of ironing these small items usually does not cause any difficulties for housewives. The only thing that can “slow it down” is the presence of buttons. Therefore, you should first iron the areas with loops, and then move on to the main part. Don't forget to smooth out the corners well.
Why shouldn't you iron your bed linen?
To the delight of those who do not like ironing, we will tell you about the disadvantages that ironing brings with it:
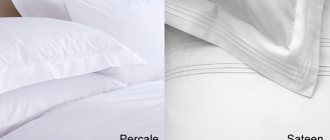
- Silk and satin are a godsend for antistatic agents. These materials have “magnetic” properties, and ironing only exacerbates this tendency. Static electricity not only causes visible discomfort, it can disrupt the quality of a person’s sleep and rest.
- Each person in a state of sleep and rest produces a certain amount of sweat, which, when placed comfortably, should be absorbed by bedding. However, some materials that are ironed lose their ability to absorb moisture.
- You are simply wasting your personal time and money, wasting it on electricity. Modern laundry detergents condition laundry in such a way that it does not wrinkle when drying if it is hung properly.
How to fold bedding so it doesn't wrinkle
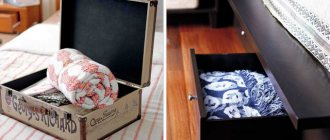
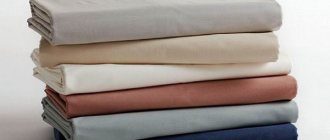
It's no secret that if duvet covers, pillowcases and sheets are neatly folded, they will be stored better, wrinkle less and take up minimal space on the shelf. Bedding items crumpled up “haphazardly” create chaos in the closet, and besides, it’s unlikely that anyone would want to put them on the bed. Find out ways to keep things organized for as long as possible.
Most housewives still use the “classic option” of folding laundry, as our grandmothers and mothers did:
- After ironing, all sets are packaged into sets. This allows you to quickly find a lost sheet or pillowcase, if necessary.
- It is better to store bed linen inside out in special drawers with dividers, which is not only convenient, but also practical.
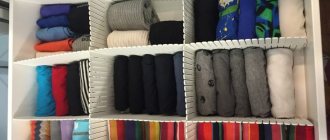
An excellent alternative to the classics is the method developed by the Chinese Marie Kondo. This is a full-fledged system, supported by 3 “pillars”, which will save not only space in the closet, but also significantly speed up the folding of bedding:
- Before you begin the process of laying out your laundry, sort it. Get rid of any that are already yellowed or torn.
- Kondo recommends separating your bedding by type: pillowcases first, then sheets, and duvet covers last.
- Place things in the closet so that they can be easily reached without touching others. In this case, each item should be clearly visible.
We invite you to try a very stylish and simple option for folding bed linen. The secret is to “pack” the duvet cover and sheet inside the pillowcase:
- Iron the linen and then fold the duvet cover to form a regular rectangle.
- Place it inside your pillowcase. Repeat the same procedure with the remaining items included in the kit.
- At the end of the process, straighten the pillowcase package, then fold its edges so that you get a “house” in which the bedding set will be located.
Tip: if you need to store your sleeping items, a canvas bag can be an excellent alternative to a pillowcase.
The question of whether bed linen should be ironed after washing remains open to this day. It cannot be answered unambiguously, because there are both obvious advantages and disadvantages to this procedure. Therefore, the final decision is always yours.
How to iron bed linen?
To begin with, you should arm yourself with everything you need, namely bed linen, an iron, an ironing board and a clean, dry cloth or gauze.
The first thing you need to do for ironing is to find out what material your bed linen is made of.
. After all, each material must be ironed at a certain temperature. Typically, information about the temperature at which linen should be ironed is contained on the label or insert in the bedding set. For those who have long thrown out all the inserts and cut off the labels, we will provide a small reminder:
- Cotton: 140-170 degrees,
- Linen: 180-200 degrees,
- Silk: up to 80 degrees,
- Knitwear: “wool” mode,
- Terry fabric cannot be ironed.
Once you have chosen the temperature for ironing, it is worth determining which side you will iron the fabric on.
To do this, remember a simple rule: natural fabrics can be ironed from the outside, but for artificial ones it is better to use the inside out.
Many housewives are concerned about the problem that the sheet and duvet cover do not fit on the ironing board.
What to do in this case? Experts recommend first folding the item in half widthwise, ironing one side, turning it over and ironing the other. Inevitably, one or another part of the laundry may end up on the floor - to avoid staining the sheet and duvet cover, place a clean blanket or blanket under the ironing board.
If you have a habit of folding your laundry in the same way after ironing, forget about it. Constantly folding ironed linen in the same way will contribute to the formation of abrasions on the bed linen. And this will inevitably reduce its service life.
Freshly ironed linen must be allowed to “rest”, that is, cool down, before sending it to the closet to its rightful place. Otherwise, it will wrinkle again and take on a deplorable appearance. A great move is to line the laundry after ironing with scented paper, which can be sprinkled with either perfume or essential oil.
“Ironing... Who would stroke me!”: 10 ways to simplify and speed up the ironing process by half
Why iron clothes if they don't meow? If this is not an argument for you, read our selection of tips that will simplify and speed up this tedious procedure several times.
Trick 1. The size of the board matters: the wider it is, the easier and faster the process goes.
The most common ironing board size is 37-38 cm. For example, these are the boards sold in Ikea. There are even narrower boards - 32-33 cm. These options come in handy when there is very little space in the apartment. And yet, even in this case, it is worth taking a wider board - from 45 centimeters. With it, in one “run” you can iron more, which means faster. For example, a children's or women's T-shirt on a wide board can be ironed in just one pass.
Trick 2. For the laziest
This life hack is suitable for bed linen, T-shirts, pants, jumpers, children's clothing and all those things that have a simple cut and do not require creases. Unfortunately, the trick won't work with viscose items.
- It's simple:
immediately after washing (!), take the damp items out of the washing machine and stack them on top of each other, and then leave it for an hour. After an hour, hang things as usual - you will see that things will look great.
Trick 3. The steam generator is better than a regular iron and steamer combined
The speed and ease of working with a steam generator is off the charts and cannot be compared with a conventional iron or steamer. With it you can iron both jeans and silk blouses without adjusting the temperature and risking burning the fabric. In addition, the steam generator is capable of ironing fabric folded in several layers (which significantly saves time and effort when ironing, say, bed linen).
For example, ironing 10 shirts, 13 children's T-shirts, 2 pairs of ribbed trousers and 5 adult T-shirts with a steam generator takes only 15 minutes including warming up. With a regular iron, you can spend at least an hour on so many things.
- A steamer is also good and can be an effective part of the system for some families. For example, it is ideal for ironing knitted items, synthetic materials, and jackets. But still, it cannot replace an iron, since it does not cope well with cotton and linen clothes/linen, your hand gets tired quickly with it, which means you won’t be able to do much ironing with it.
- Ideally, you should choose a professional tailor's steam generator. For example, Silter with a silicone removable sole. You can use tap water in it, as it has a self-cleaning function for descaling, and the device is relatively inexpensive, powerful and lightweight. Despite the fact that this steam generator is designed for the needs of a studio, it is also perfect for home use.
Trick 4. Don’t even try to iron the dry fabric.
Ironing completely dry clothes is a futile task, unless we are talking about non-capricious synthetic fabrics. Therefore, always dampen wrinkled items or use the steam function. This way the result will be better, and the process will go much faster. How to wet the cloth? To do this, you can spray the item, then fold it and let it sit for 5 minutes. The old proven method of ironing through damp gauze will also work.
Trick 5. Wash and dry things correctly
Many things don’t need to be ironed if you wash and hang them correctly.
- Washed items should be hung immediately and done carefully, straightening them out;
- To prevent wrinkles from dryer bars on T-shirts and other clothes, purchase a dryer with thick wires. For example, made of wood, like the Borstad series dryer from Ikea (see photo).
- When washing, add fabric softener to soften fabrics;
- Do not “overdry” things, try to iron them slightly damp (this will make things go much faster).
Trick 6. The dryer really changes your life
The trick is to pull out warm, dry clothes immediately after drying. Then you need to cool it in a smoothed form - on hangers or on a plane (you can on top of each other, the main thing is to straighten things out). That's all: 10-15 minutes and you don't need to iron anything, just put it in the closet.
Trick 7. If possible, use more technologically advanced boards and other devices
Today there are many devices for easy ironing in stores.


