In the modern world, an electric kettle has long become an indispensable household appliance. It has earned its popularity due to its independent shutdown when boiling and the high speed of heating water. However, like any kitchen aid, it is prone to breakdowns. Over time, an electric kettle from any brand leaks - this is due to the natural wear and tear of the material from which it was made. A leak is dangerous not only due to the constant formation of puddles around the device, but also the possibility of receiving an electric shock. In this regard, the question arises of what can be used to seal an electric kettle before purchasing a new one, because it poses a danger to users.
How to disassemble correctly
To disassemble the iron you will need:
- sharp knife;
- Screwdriver Set;
- pliers.
Depending on the nature of the problem, you may need a multimeter, sandpaper, insulating material and a soldering iron with solder and flux. It is recommended to start the analysis with visible fasteners. At the first stage, you need to unscrew every screw that comes into view. After this, remove the cover from the back.
Then you need to pull up the main part of the device, which is attached to plastic latches. The latter are prying with a knife
It is important to be careful at this stage as excessive force will cause the latches to break. If there are screws on the outside of the case, these elements also need to be unscrewed
Adviсe:
With modern kettle models, the most difficult thing to get to is the on and off button if it needs to be repaired. Remove the cover and unscrew the bolts that are located at the top and bottom of the handle
Do everything carefully and carefully so as not to damage the plastic parts. Replace the LED bulb at the same time if it does not light. If the kettle turns off before the allotted time, then in this case do not disassemble the device completely, because it’s all about scale, not breakdown
Use citric acid to clean the device: dissolve a sachet of citric acid in 0.5 liters of water and pour it into the kettle, then turn on the device with the lid open. If necessary, repeat the procedure.
How to connect an electric kettle directly to the network
There are situations when there is no time to repair or replace a particular part. As a temporary measure, you can connect the kettle to the network directly. To do this, you need to open the bottom cover of the housing and connect the power cord directly to the heater terminals. This way the kettle will operate completely manually, bypassing all automatic switches.
The power cord is connected directly to the heating element
Plugging the plug into the socket will start it, and turning it off will stop it. It is necessary to be close to such a device in order to turn off the power in time when the water boils.
Additional video on the topic:
https://youtube.com/watch?v=WeFHLS37y1I
During assembly, disassembly and testing of the kettle, personal safety measures must be observed. The mains power must be turned off. The flask should be dry, without any remaining water.
Leaking soil
Sometimes a crack may form at the bottom of the kettle. In this case, you can repair it yourself using the same sealant. We disconnect the electrical appliance from the network, clean the housing from dirt and follow the instructions.
Kettle repair:
- There should be several screws on the bottom of the case. Unscrew them and remove the panel.
- Remove the sealing rubber and heating element.
- Visually inspect the bottom for cracks.
- Seal the gap with sealant and wait until it dries completely.
- We assemble the structure in reverse order.
- Pour in water and bring it to a boil, thereby checking for leaks.
Penetration may also be at the bottom of the kettle
If there is no visible damage to the bottom, then the cause of the leak may be the rubber cushion: replace it with a new one. Sometimes it is enough to tighten the screws, thereby removing the rift between the body and the disk. It also helps to clean the elements from scale, which interferes with the normal fixation of the elements.
Crack treatment
First of all, you need to turn off the power to the device by unplugging the plug from the socket. Then wash the kettle body with warm water and soapy water. And only then begin to treat the problem area.
Crack adhesive:
- Degrease the treatment area with alcohol or solvent.
- We wipe the body dry (it is better to dry it with a hairdryer) to enhance adhesion.
- Carefully apply the sealant to the crack (it’s more convenient to use a syringe).
- Place the kettle in a warm place and wait until the sealant sets.
- Pour in water and bring it to a boil. We repeat the procedure at least 3 times.
It is worth considering that the thicker the layer of sealant, the longer it will take to dry. The rate of fixation of the composition is also affected by the level of humidity. An increased rate significantly increases the setting time.
The electric kettle is leaking - what to do?
The reasons that an electric kettle leaks while heating may be:
- Cracked body. In this case, it is best to go for a new device.
- Damaged bottom. A similar problem often arises with metal devices, since due to corrosion, a gap forms at the junction of the bottom and the body - water leaks from it. This kind of damage cannot be repaired.
- Crack on the water level indicator.
- Weak fastenings.
- The sealing ring on the heating element is damaged.
Let's look at how to repair a kettle with your own hands.
Crack on the water level indicator
To determine this failure, disassemble the roof of the device, because your task is to get to the indicator and study it. It is necessary to check the indicator not only for the presence of cracks, but also to determine if there are any leaking connections.
If you have a plastic device, then the indicator can be presented in the form of the same plastic tube, which quite often dries out and breaks at the bend. It is not possible to replace the indicator, but there is a way out - block the access of liquid to the tube using a screw. The kettle will boil water perfectly, the problem that the electric kettle is leaking will be solved, but the device will no longer show the water level.
Weak fastenings
Take a closer look at the heating element - if it is loose, you need to attach it more firmly to the wall of the kettle to solve the problem of the electric kettle leaking. Tighten the bolts and check the result. For this:
- Pour water into the kettle.
- Place the device on a paper towel or newspaper:
- If the paper is dry, then the problem is solved.
- If water still collects around the kettle, then you need to check the integrity of the rubber gasket.
Replacing the O-ring
You only need to start repairs yourself if the warranty period has expired or the kettle was purchased without a warranty. You can independently decide what to seal the electric kettle with or what to do if it leaks even if the device cannot be delivered to the service department.
We offer the following instructions for replacing the O-ring on the heating element:
- Remove the bottom of the electric kettle. On some models, the bottom is fixed with three self-tapping screws - use a Phillips screwdriver to unscrew them. On other models, variations are possible, so proceed according to the instructions for the device.
- Pull out the disk with the gasket. If the kettle is a disk one, then the heating element is simply inserted into the body. The seal in this case is ensured by a heat-resistant silicone gasket. The same gasket holds the disc.
- Remove the gasket from the disc. Carefully inspect the gasket, disk, and housing:
- If there is a defect in the body (chip, crack), then further repairs are impractical.
- If there is no rust through the disk, then we move on to examining the O-ring. If there is a defect on the disk, it will need to be replaced.
- If the seal is clearly defective, replace it. If everything is in order, then it is possible that during operation the connection between the disk and the housing has weakened (slipped down).
- Wipe the gasket, disc and housing from scale and limescale.
- Replace the O-ring.
- Insert the disk into the case until it stops.
- Replace the bottom.
- Screw the bottom with self-tapping screws, but without unnecessary zeal, do not tighten too much.
- Pour water into the kettle.
- Plug in the device and boil water.
- Check the kettle for fluidity - if everything is in order, then the device is ready for use.
Helpful Tips:
- If a new electric kettle leaks a little, then wait a while (a week or two), perhaps the resulting scale will heal the microcrack.
- To prevent the kettle from leaking, descale it regularly for as long as possible and use filtered water. Then the heating element will work longer and better, and the sealing gasket will be preserved.
Although the choice of home appliances in the market is huge, but if you want to repair an old kettle that is very convenient for you, then check out the simple steps to repair your appliances yourself.
Where is the leak coming from?
The reasons for a leaking kettle can be very diverse, but, as a rule, the following reasons are the most common.
Microcrack at the water level. To carry out such diagnostics, you will need to disassemble the cover of the device. Our goal is to completely disassemble the device and get to the water indicator. It is worth looking not only for deformation, but also for poor-quality connections, which can also be the cause of a leak. In most cases, the devices use a water level in the form of a plastic tube, which over time can dry out and form a crack. It won't be possible to replace the level, but fixing it is quite possible. To do this, it is necessary to eliminate access to the water level. Naturally, it will no longer be possible to measure the water level in the device, but such a kettle will not leak and will boil water perfectly.
Weak fastening. If the heating element is loose, then all fasteners must be tightened using a screwdriver. In order to find out the result of the work, you can use regular toilet paper, a napkin or newspaper. You should pour water into the kettle, place it on paper and wait 10-15 minutes; if the paper is dry, then our manipulations were not done in vain. If the paper is wet, this indicates damage to the integrity of the seal, which can be noticed on its own without any problems, besides, such a seal is sold in any store.
Damaged bottom. In the event of such a malfunction, the electric kettle cannot be repaired; you will have to go for a new device. This problem is often seen with metal devices, since the metal is susceptible to the negative effects of corrosion, as a result of which microcracks are cut off at the bottom.
Features of working with metal and ceramic products
Gaps in electrical metal products appear at the junction of the body and the bottom. The reason for their appearance is corrosion. A rusted body cannot be restored. If the leak is due to a defective o-ring, replace it:
- unscrew the self-tapping screws with a Phillips screwdriver;
- remove the disc along with the gasket;
- evaluate the appearance of the heating element; if there is no visible damage, it is cleaned of traces of scale;
- replace the silicone gasket;
- the heating element is returned to its place;
- secure the bottom with self-tapping screws;
- the kettle is placed on a paper towel;
- pour water;
- if after 10-15 minutes the towel is dry, the kettle is plugged in.
If the rules of operation are violated, chips and cracks appear on a ceramic flask. They are sealed with heat-resistant silicone sealant RTV 118Q. It adheres well to ceramics and retains its strength at high temperatures.
The adhesive adhesive vulcanizes at room temperature. It is produced in the form of a plastic paste. It is applied in a layer of up to 6 mm. The surface film appears after 1.5 hours, complete drying occurs on the 4th day. Mode of application:
- Clean, degrease and dry the surfaces to be bonded;
- Unscrew the cap of the tube, cut off the spout, cut angle 45°, cut diameter along the width of the crack;
- Apply the sealant evenly, without tears, to one of the surfaces to be bonded;
- connect the parts;
- Remove excess sealant.
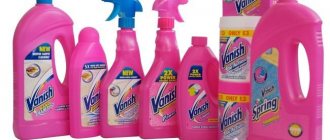
The best sealants
This segment pleases with a wide range, but experts recommend paying attention to the following solutions, which have received many flattering reviews from users.
RTV 118Q
The sealant copes well with adhesive glass and plastic, and also adheres well to metals and rubber. The product can easily withstand temperatures up to +260⁰С and retains its properties at -60⁰С. The composition is paste-like, where complete drying occurs in 72 hours. The sealant can be used to treat devices that come into contact with food.
Operating principle of an electric kettle
The design of an electric kettle, even in expensive models, is not complicated and is not original:
- The heating element located in the lower part of the body, when electricity is supplied, heats the water.
- The heating element itself is connected to the thermostat.
- As soon as the temperature reaches the set value, the kettle is disconnected from the network.
- For ease of use, an LED light is connected to the external circuit of the circuit, which indicates that the device is working.
Electrical appliances should always have a thermal fuse that will open the circuit, for example, if it overheats, or if you forget to pour water into the kettle.
The circuit diagram of an electric kettle itself is not complicated and is similar to the circuit diagram of an iron. There are not many parts in the device that can break. The thermostat is considered the most complex part, because its design depends on the specific model. If the thermostat breaks down, it is not repaired, but replaced with a new one. Other problems can be fixed at home.
Sequence of repair actions:
- First, check the cord with the stand. Make sure there is power to the device. Test the contacts with a multimeter and, if necessary, solder the contacts in the stand. If the contact group has melted, then nothing can be corrected.
- If the cord and stand are in order, then check the ring contacts on the kettle. Click the “On” button and if there is no signal, then unscrew the bottom of the device and check all the contacts inside. A non-working temperature sensor or heating element will have to be replaced.
- Check the auto shut off button. It is located on the handle. Due to oxidation of contacts, this part very often fails. Clean the contacts with sandpaper, if necessary, and the device will work.
How to properly seal a crack in glass?
When carrying out an operation such as repairing a leaking kettle, you need to follow a few simple rules:
- Before carrying out work, it is necessary to degrease the damaged area with a solvent and then wash it with warm soapy water. Be sure to dry thoroughly, as moisture weakens the adhesion of the sealant;
- It is most convenient to insert the sealant into the cracks with a syringe;
- When working with such materials, it must be taken into account that the thicker the layer, the more the vulcanization time increases;
- After the sealant has completely hardened, you need to boil water in a kettle and pour it out. Perform this procedure at least three times. Only after this will the kettle be safe to use.
The refrigerator arrived today!
Today they brought me a Liebherr C 4023 22D/001 refrigerator. I was pleased with the delivery - oddly enough, they brought him standing, tightly fastened with a belt to the body of a tall gazelle. They even dragged me into the apartment almost vertically, on the loader’s hump. The driver only slightly supported it from behind. They unpacked it, let it inspect it, but didn’t even offer to turn it on for a short time to check it. They said that it can be turned on only after 3 hours (just in case, I’ll wait a day). So praise to the delivery people - two Russian-speaking south-eastern people, one of whom was also named Max. I looked at what kind of compressor it was. ACC company (ACC was previously called Electrolux), compressor model HTK12AA.
For reference: ACC (Appliances Components Companies) was founded in 2002 with headquarters in Pardenone, Italy. Annual production of hermetic compressors 21 million units. are provided by the following plants: Elettromeccanica SpA (Mel and Rovigo, Italy), ACC Austria GmbH (Furstenfeld, Austria), ACC Spain SA former Cubigel SA (Sant Quirze and Cervera, Spain) and, finally, Zanussi Elettromeccanica Tianjin Compressor Co. Ltd (Tianjin, China) is the brainchild of Electrolux. Plus three factories in Italy, Germany and Hungary for the production of electric motors.
The soldering of the compressor tubes to the refrigerator circuit seemed to me to be of insufficient quality, with metal drips and residues of some substance (apparently an analogue of rosin):
I have not yet identified any other flaws in the assembly, but this type of soldering really worries me. Looks a lot like corrosion...
The most common faults
The following malfunctions are typical for electric kettles:
- Failure of the heating element. The cause of the defect is scale formed on the heating element, which makes it difficult to transfer heat to water, and the coil itself heats up. Heating elements of the spiral type are more susceptible to such damage than disk heating elements, which require more time to form a critical layer of scale. The reason for the burnout of the heating element can also be a violation of the operating rules, for example, if the kettle was plugged in, forgetting to pour water into it.
- The electric kettle power button is broken. There are two possible reasons for this: the formation of carbon deposits and oxidation on the contacts of the button, or a break in the rod connecting it to the power supply terminals.
- Leakage in the housing of an electrical appliance. This malfunction is more typical for kettles with a plastic body, as well as those equipped with a disk heating element. In the first case, the breakdown may be a consequence of deformation of the kettle due to overheating at the place where the heating element is attached, and with disk heaters, the cause is corrosion along the seam connecting the disk to the body of the electric kettle. Often the cause of such a breakdown is a deteriorated seal or cracked glass of the water level indicator.
- Premature shutdown of an electrical appliance. This malfunction is a consequence of scale. The water does not have time to boil, but the heating element has already overheated and the thermostat disconnects the device from the network.
- Failure of the thermostat. The design of electric kettles with a thermostat contains additional components and parts - a thermometer, temperature sensors, a memory unit, an electronic board and a control panel. The more parts a device has, the lower its reliability and the higher the likelihood of any of them breaking. In kettles with thermostats, the regulator itself most often fails, in which the contacts oxidize or burn.
Breakdowns that allow you to return the electric kettle to the store
You can return a faulty electric kettle to the store during the warranty period if during this period its significant shortcomings have appeared, namely the following faults:
- irreparable damage;
- periodically repeated breakdown of the same unit;
- a breakdown that cannot be repaired without disproportionate costs close to the cost of the kettle itself;
- a malfunction that requires a long time to eliminate, as a result of which the device cannot be used for more than 30 days throughout the year.
There can be a variety of malfunctions here, but the most serious of them are leaks not associated with mechanical damage and leaky gaskets, but arising due to deformation of the housing or damage as a result of corrosion processes.
Significant breakdowns include the failure of the heating element, provided that the kettle was used correctly and there is no scale on the heating element.
Electric kettles are household appliances that are included in the list of technically complex goods. Therefore, you can return them back to the store with a refund of the money paid only if they are of inadequate quality. When contacting the store with a written complaint, you need to indicate a breakdown that is often repeated or requires costs. comparable to the cost of an electric kettle.
The seller has the right to offer the buyer to contact the service center, but if the breakdown has not been fixed within 20 days, the store is obliged to return the money or exchange the device for a new one. The seller also has the right to appoint, at his own expense, an examination of the product, which will determine whether the breakdown was caused by the user or whether it is caused by a manufacturing defect. In the first case, the buyer must reimburse all costs for the examination. In the event of a defect due to the fault of the manufacturer, you can demand not only a refund, but also compensation for moral damages. Moral damage can only be claimed by a court decision.
The best way to glue ceramics and porcelain
I would like to extend the life of ceramics. It is not only used for its intended purpose, but also decorates the interior with its originality and uniqueness. It’s hard to say which is better ceramics or porcelain in terms of quality and durability, it all depends on various factors.
How to glue porcelain and ceramics? Which glue for porcelain and ceramics should I choose? Or maybe throw away the broken product? Should I throw away the broken vase or not? If not, how to glue a ceramic vase?
Don't rush to throw it away. You can always throw it away. First you need to try to glue the product, and if nothing works, then you can throw it away. Throwing it away is the last thing left to do.
How to glue ceramics
Various adhesives are used to repair ceramics. There are a huge variety of products available on the market for repairing ceramic cookware.
Ceramic tableware
Universal super-glue based on cyanocrylate is the optimal adhesive for ceramics, which can be easily found in any specialized store.
The following Russian-made adhesives for repairing ceramic tableware are offered for sale: “Second”, “Super-moment”, “Cyanopan”, “Glue”, “Sila”, “Monolith”, “Elephant”. There are also imported adhesives for gluing. The best waterproof glue for ceramics is MARS.
Design and principle of operation of electric kettles
An electric kettle is a household appliance, the design and operating principle of which can be understood even by a person who knows little about technology. All kettles are designed the same way, regardless of the model, and work according to the same scheme. They consist of the following main components and elements:
- the body, which is also a flask for water (some models of electric kettles have a separate bowl placed in the body);
- a heating element in the form of an open spiral, similar to a boiler, located directly at the bottom of the water container or (like most modern electric kettles) in the form of a disk heating element;
- a stand (base), on which there is a connector for connecting the kettle and a power cord for connecting to a household electrical outlet (all modern electric kettles that are cordless have it);
- power connector pads on the bottom of the kettle base, which can have a central (like most models) or side location;
- a thermostat that serves to turn off the kettle when it boils;
- power buttons.
Today on sale you can find electric kettles with a thermostat, with which you can heat water not only to 100°C, but also to any desired temperature, and even maintain this temperature for a certain time. This property is necessary for proper brewing of various types of tea (black, green, white, red), each of which requires water at different temperatures from 60 to 90°C. An electric kettle with a thermostat is an ideal purchase if there is a small child in the family. After all, preparing baby food formulas does not require boiling water, and with the help of such a device you can set the desired temperature. And for adults, repeated boiling of water is highly undesirable if they adhere to a healthy diet.
In this model, the control panel is located on a stand
Naturally, each model of electric kettles has its own design features, but they are not fundamentally different in design.
The operating principle of the electric kettle is also quite simple. When heated, the heating element heats the water in the flask until it boils. Steam is supplied through special channels to the bimetallic plate of the thermostat, made of metals with different coefficients of thermal expansion; when it bends, it presses on the button lever or opens the contact terminals, disconnecting the device from the network.
The diagram shows the movement of steam through the channels in the handle, but the tube in the kettle itself can also be used for this purpose
The best way to glue ceramics and porcelain
I would like to extend the life of ceramics. It is not only used for its intended purpose, but also decorates the interior with its originality and uniqueness. It’s hard to say which is better ceramics or porcelain in terms of quality and durability, it all depends on various factors.
How to glue porcelain and ceramics? Which glue for porcelain and ceramics should I choose? Or maybe throw away the broken product? Should I throw away the broken vase or not? If not, how to glue a ceramic vase?
Don't rush to throw it away. You can always throw it away. First you need to try to glue the product, and if nothing works, then you can throw it away. Throwing it away is the last thing left to do.
How to glue ceramics
Various adhesives are used to repair ceramics. There are a huge variety of products available on the market for repairing ceramic cookware.
Ceramic tableware
Universal super-glue based on cyanocrylate is the optimal adhesive for ceramics, which can be easily found in any specialized store.
The following Russian-made adhesives for repairing ceramic tableware are offered for sale: “Second”, “Super-moment”, “Cyanopan”, “Glue”, “Sila”, “Monolith”, “Elephant”. There are also imported adhesives for gluing. The best waterproof glue for ceramics is MARS.
Waterproof glue
For ceramics that are used to store food, you can use PVA glue for gluing. But, it is recommended that after gluing the ceramic cup is covered with a layer of varnish. For gluing ceramic products, you can use epoxy glue, F-2 and BF-4 adhesives.
How to glue porcelain
The following range of adhesives for porcelain is offered for sale – STANGE, “cosmofen ca-12”, you can also use “RAPID”. Among Russian-made adhesives, carbinol glue should be noted. Also, instead of glue for repairing porcelain, you can use epoxy resin EPOXY GLUE produced by BONDO, BIZON or similar adhesives.
China
To glue porcelain, you can use cement made from gypsum. To do this, add the white of 1 egg to the gypsum powder and mix very well. The resulting glue can be used to glue porcelain. Moreover, the gluing procedure should be performed very quickly, because this glue hardens quickly.
For gluing, you can make other glue at home. To do this, mix 1 egg white and soda. Beat Belov into foam, without adding soda. The whipped white should sit for one day, and only then add soda to the settled white and mix. You should add enough soda to get a mass similar in consistency to regular dough.
Very often, food glue is recommended for repairing porcelain, which is easy to make at home.
To do this you should:
- Take 1 liter of water. Add 100 g to water. Sugar, 100 gr. lime (necessarily slaked). Place the resulting mixture on the fire and cook over low heat for about 3-3.5 hours. The main thing when “cooking” is that it does not boil.
- Cool the resulting broth and let it sit for a few more hours.
- The water that remains after settling must be drained.
- Add 0.5 kg to the mixture. tile adhesive. Mix well and leave to settle again for 10-15 hours.
- If there is excess water, it must be drained. Boil the resulting mass one more time.
- Cool. Porcelain glue is ready.
This adhesive for food utensils is ideal.
Universal adhesives for both materials
There are a huge number of universal adhesives. These are adhesives that can be used to glue both porcelain and ceramics - casein glue, epoxy adhesives. The most popular is Porcelan Potch glue. Edible glue is often suitable for gluing both ceramics and porcelain. For example, the recipe described above can be used as an adhesive for ceramics and porcelain.
Porzellan Potch glue
Causes of failure
Of course, repairing an electric kettle can only be done by a person who understands electronics and has experience working with such devices. If these skills are missing, it is better to contact a service that deals with such repairs.
Before making a decision, it is very important to find out the reason for the failure of the electric kettle and its nature. Basically, all damage is divided into several types
Each has its own characteristic differences:
- Formation of a crack on the scale indicating the liquid level. It is usually made of plastic, which begins to crack due to high temperatures.
- Mechanical damage to the housing has occurred. For example, cold water was poured into the kettle immediately after the boiling water was drained. As a result, microcracks may appear in weak areas and the integrity of the case will be compromised.
- The heating element is poorly fixed.
- Corrosion has formed on the bottom of the kettle. The consequence of this formation is the appearance of a gap between the bottom of the device and its body.
What to do if the bottom leaks
Seeing a puddle on the table next to the kettle, they find out the location of the leak. If it flows from below, analyze the bottom. To do this, remove it:
- work with a screwdriver;
- unscrew the screws, there are several of them;
- remove the heating element and sealing gasket.
The removed parts are inspected. Determine the cause of the leak. If there is no visible damage, remove plaque from the parts, wipe them, return them to their place, firmly fix the parts, tightening the fasteners with a screwdriver. If the leak resumes, the procedure is repeated, and the gasket is replaced during assembly.
Mechanical damage to the bottom is not repaired at home or in the workshop; they go to the store to buy a new kettle. Corrosion is the cause of cracks at the bottom. It appears on household appliances with a metal body. Because of this, microcracks form at the bottom, and it is through them that water leaks.
What you should absolutely not use
There are many ways and means to troubleshoot problems with household appliances. Craftsmen often recommend using adhesive tape or electrical tape for such purposes.
Do not under any circumstances try to seal the kettle with electrical tape.
Since these materials are not reliable, there is a risk of not only breaking the kettle, but also harming your health.
An electric kettle is leaking: what to do, how to repair it yourself
The kettle, like all household appliances, sooner or later fails and breaks. The causes and consequences are unpredictable. However, depending on certain signs of damage, you can still try to repair the device yourself.
What to do if your electric kettle is leaking?
In most cases, you can make repairs yourself if the kettle is leaking. However, people who are ignorant in electronics need to contact specialists to get quality kettle repairs.
Finding out the cause
Before making a decision, you should first determine the cause of the breakdown and its nature. Signs of damage and their brief descriptions will be described below:
- Crack on the water level measuring scale. Typically, the water level is made of plastic, which can crack over time due to dryness.
- Damaged hull. Violation of the integrity of the body occurs under various mechanical influences. For example, filling a kettle with cold water immediately after draining hot water can cause microcracks in particularly weak areas.
- Weak fastening of the heating element.
- Bottom corrosion. In this case, a gap may form at the junction of the bottom and the body.
DIY repair
Now about what can be done for each breakdown considered. Repairing an electric kettle manually is possible in the following cases.
Crack on indicator:
- It will not be possible to replace the measuring glass itself, but you can try to seal the crack tightly with tape or tape, which will significantly reduce water loss.
- If the level of your kettle is a tube, then you just need to stop the flow of water into it.
- You can also try sealing the cracks with hot glue. It is enough to apply a layer of glue to the crack of the case or indicator using a special gun. Before checking the kettle for serviceability, you should wait until the substance has completely dried.
- A cheaper option is cold welding. Similarly with the previous example, apply welding to the damaged surface and let it sit. After this, pour cold water into the kettle and check the tightness of the device.
REFERENCE! This method of solving the problem is effective for microcracks in the water indicator. In other cases, specialist assistance or replacement of the device may be required.
If the case is damaged:
As in the previous example, if the crack is minor, you can try to fix the damage site with hot glue or cold welding.
Weak fastening of the heating element:
If the lower part of the kettle is “dangling”, then the problem can be solved by simply tightening the screws. Next, place the electric kettle on a napkin, paper or any other wet material. After some time, the result will be visible.
If a wet spot does form on the paper or fabric, then only replacing the O-ring will help. Below are step-by-step instructions on how to do this:
- Remove the bottom of the electric kettle. An instruction manual with a detailed description of the device’s configuration can help here.
- Remove the disk with the gasket.
- Remove the gasket from the disc.
Inspect the disk, housing and silicone gasket for signs of malfunction. There can be two situations here:
- If the housing where the disc is located is damaged, the kettle must be disposed of.
- If only the gasket is damaged, it should be replaced.
If no serious damage is found, then perhaps the connection between the disk and the case is loose. It is recommended to clean the parts from scale and put them in their original place.
It remains to check the result.
In what cases is repair not possible?
It happens that neither the proposed methods nor the technician are able to restore an electric kettle. In this case, the device must be disposed of and replaced with a new one. List of damages for which repair is powerless:
- Bottom corrosion. Rusted metal is a sign that the integrity of its surface has been compromised, which has provoked oxidation of the bottom as a whole.
- Serious damage to the hull. A broken cover or a significant part of the body cannot be repaired.
- Burnt out wiring. If, due to a short circuit, the wires inside the kettle burned out and at the same time melted part of the body and damaged other parts of the kettle, then such a device can be replaced immediately.
An electric kettle, like any household appliance, requires compliance with operating rules. This will increase the service life of the device and reduce the cost of repair or replacement.
Did you like it?
Loading…
Rules of care and use
Compliance with operating rules and proper care will extend the life of the household device. For example, glass teapots do not like cold water being poured into a hot flask. Microcracks appear on the walls. The structure of ceramics, plastic, and glass is badly affected by impacts. Teapots should not be dropped or placed rigidly on the table or stove. The parameters of the material change when overheated. It happens in 3 cases:
- The thermal fuse has failed;
- the contacts of the circuit breaker have oxidized;
- turned on the kettle without water.
A kettle with a faulty thermostat is replaced with a new one. This malfunction cannot be repaired. Oxidized contacts are cleaned with sandpaper. When operating a kitchen electrical appliance, you should adhere to the recommendations given in the universal instructions. It is suitable for all types and models of electric kettles.
| No. | Parameter | Description |
| 1 | Installation location | Non-slip, smooth, dry surface |
| 2 | Distance from outlet | Minimum |
| 3 | Water volume | Not below the “Min” indicator, not above o |
| 4 | Kettle lid | Before turning on, it is closed all the way; if there is a gap, the boiling kettle will not turn off |
| 5 | Stand | Do not use a stand from another kettle |
Limescale is the main cause of breakdowns of electric kettles. To avoid this, the water is filtered. The type of filter is selected depending on the characteristics of tap water. To prevent salt deposits, follow simple rules:
- do not boil the same water multiple times;
- at night and during breaks in operation, the liquid from the flask is drained;
- The surface is cleaned from limescale using folk remedies, a solution of citric acid, baking soda or table vinegar is poured into a kettle and boiled.
A high-quality kettle, if the operating rules are followed, does not leak and lasts longer than the period specified in the warranty card. Those who responsibly approach the choice of model and pay attention to the company and case material save their money.
Source
How can you seal a glass electric kettle?
Sometimes there is no money to buy a new kettle. Sometimes there is no time or desire to go to the store. In such cases, you can revive an old but favorite kitchen gadget. You can seal a leaky flask with a substance that satisfies a number of requirements:
- non-toxic;
- there are no restrictions for use in the food industry;
- withstands high temperatures;
- elastic;
- dries quickly at room temperature;
- has adhesive properties.
On forums, craftsmen give advice on what and how to glue a leaking teapot. You cannot use recipes that include:
During operation, they release substances into boiling water that are harmful to health. In addition, they are not plastic and become brittle when exposed to high temperatures.
Food grade silicone sealant RTV 118Q
The lower limit of the operating temperature range is -60 °C, the upper limit is +260 °C. RTV 118Q sealant is used to glue glass, ceramics, metal, rubber, and plastic. It is approved for use in the food industry. It takes 72 hours to dry completely. It is convenient to use the product. The paste-like mass is easy to apply to the surfaces to be bonded.
OTTOSEAL S27
The lower limit of the operating temperature range is -40 °C, the upper limit is +180 °C. OTTOSEAL S27 is approved for use in the food industry. This silicone sealant glues glass together without applying a primer. It takes 24 hours to dry completely.
Dow Corning 732 clear
The lower limit of the operating temperature range is -60 °C, the upper limit is +180 °C. It takes 24 hours for the sealant to dry completely. Times are based on certain conditions:
- indoor air humidity 50%;
- air temperature 22-25 °C.
Dow Corning 732 clear is approved for use in the food industry by NSF International.
Silicone food-safe sealant "Titan"
Bonds perfectly smooth surfaces well, including colorless glass. The lower limit of the operating temperature range is -40 °C, the upper limit is +200 °C. It takes 24-120 hours to dry completely. The time depends on the thickness of the applied layer.
General rules for gluing
No need to guess how to seal a teapot. The technology for such repairs has long been known and tested by home craftsmen. First of all, degrease the surface and use:
- vodka;
- White Spirit;
- solvents.
See also
How to glue wallpaper yourself, step-by-step instructions and preparation rules
The remaining solvent is washed off with warm water. Wait until the surfaces to be glued dry. Moisture impairs adhesion—the bond of glue (sealant) to the surface of the kettle. The adhesive is injected into the crack with a syringe.
Each sealant has a characteristic - vulcanization time. It is indicated in the instructions for use and depends on several parameters:
- room temperature;
- air humidity;
- thickness of the applied layer.
After sealing the crack, the kettle should sit for the required time. When the sealant is completely dry, boil the water. They don't drink it. Drain into the sink. Repeat this 3 times. This procedure prevents harmful substances from entering the body.