Why is mold dangerous for humans?
As the fungus develops in the bathroom, it leaves a conspicuous black mark on the walls, seams and ceiling. In addition, the bathroom is filled with a musty smell. Over time, the aggressive effects of fungus can negatively affect the condition of finishing and building materials, causing their deformation and destruction. This may result in the need for urgent and costly repairs.
But there are some things that “money can’t buy.” This is health.
Fungus and mold spores dissolved in the air negatively affect respiratory health and can lead to allergies and many other diseases. The impact caused by the appearance of fungus in the bathroom is especially negative on people suffering from asthma and on young children whose immunity has not yet strengthened.
Therefore, it is necessary to combat fungus and mold in the bathroom immediately from the very moment they are discovered.
Mechanical cleaning methods
You can clean the seams using mechanical methods, but it is important to act extremely carefully so as not to damage the porous grout and aggravate the situation.
Sandpaper
Sandpaper will help remove a small layer of dirt. Sand the joints well with a folded sandpaper, and then wipe the tiles with a damp cloth. During the process, be careful not to scratch the tile.
Steam cleaner
You can clean the tiled surface with a steam cleaner. Steam supplied under high pressure will effectively displace all dirt and return whiteness to the joints. After cleaning, go over the surface with a damp cloth to remove any remaining dirt.
The steam generator will help clean the tile joints, returning them clean and snow-white
Hard sponge
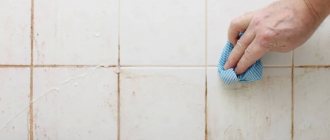
Treat the stains with the hard side of the sponge, and then wipe the tiles with a damp cloth. This method will help remove dirt and traces of mold, but will not provide disinfection.
Melamine sponge
Melamine sponges, which work on the principle of a stationery eraser, will help remove dirt of any nature. With their help, you can get rid of rust and limescale, and to clean the seams between the tiles from mold in the bathroom, you must additionally use household chemicals or folk remedies.
If you fail to clean the surface and the depressing appearance of dirty seams spoils your mood, use a radical method - replacing the grout
Why does mold appear in the bathroom?
The reasons why fungus began to develop in the bathroom are as follows:
- Exhaust ventilation in the bathroom is not installed or does not work well.
- The humidity level in the bathroom is above 90 percent.
- Pipes in the bathroom are poorly protected from leaks or serve as places where condensation accumulates (this is especially true for pipes made of cast iron and aluminum); their waterproofing is broken.
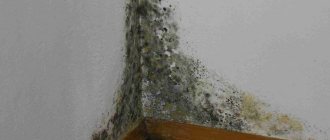
One of these conditions is enough for fungus in the bathroom to begin to develop dangerously. You can easily notice how the seams between the tiles are covered with a black coating, and on the walls and ceilings small black dots grow into spots that cause trouble to the eye.
Why does the grout darken?
Ceramic tiles are a practical material that is easy to clean and wash. Modern grout is moisture-resistant and wear-resistant. However, over time, any material loses its original properties. This happens most quickly in rooms with high humidity.
Darkening occurs as a result of:
- Settlement of small particles of dirt and dust, which gradually penetrate deeper;
- Fungus development in poorly ventilated areas;
- Accumulation of residues of cleaning products used during cleaning;
- Layers of soot from tobacco smoke and cooking.
Contaminants that have formed during the repair process can also spoil fresh grout. Therefore, before you begin cleansing, you need to determine the nature and degree of contamination.
Pre-treatment of moldy areas
Before eliminating the fungus, go through four stages of surface preparation.
- Treat the surface with a damp soapy sponge and remove the top layer of rot.
- Wipe the moldy area with a dry cloth.
- Dry rot stains using a hair dryer.
- The treatment will be successful if the air in the bathroom is dry and the water is turned off.
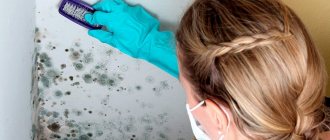
Mold is dangerous; if it gets into the respiratory tract or on the skin, it causes undesirable consequences for human health.
Before starting work to remove fungus from walls, tiles and ceilings, do not forget to take precautions by wearing a respirator and rubber gloves. If the fungus has damaged the plaster on the wall, it is advisable to remove the mold-damaged areas of the material. It is better to clean a layer of plaster from a wall or ceiling with a spatula.
Pre-cleaning of seams
Mold grows quite quickly, and begins to negatively affect the health of people living in the apartment immediately after it appears, so steps to remove it must be taken as soon as possible, at the first signs of black spots and dots. In addition to the mold itself, it is necessary to find and eliminate the cause of its appearance as quickly as possible, otherwise the mold will come back.
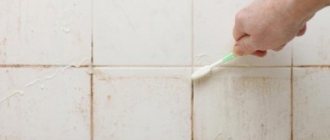
Before starting to treat the seams with mold-killing preparations, it is necessary to mechanically clean the tile seams, removing all visible stains and stains. For this you will need:
- gloves;
- respirator;
- hard brush.
Armed with these improvised means, they thoroughly clean all seams to remove traces of mold. Once cleaning is complete, it is best to throw away all these materials, as fungal spores may have become exposed to them during the cleaning process.
The first step is to clean the tile joints from visible traces of mold.
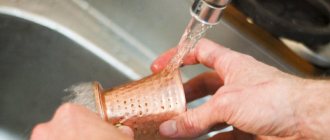
You can quickly and efficiently prepare seams for cleaning from mold using a steam generator. The principle of operation of the device is to supply water steam at a very high temperature under strong pressure - such a jet easily “knocks out” accumulated dirt, visible mold spores, and lime deposits from surfaces. After this treatment, the seams are ready for deeper cleaning and the use of antifungal drugs. All you have to do is wipe the seams thoroughly and dry so that no droplets of water remain in them.
The steam generator supplies hot water steam under pressure, which allows for high-quality cleaning of tile joints
How to use antiseptics against mold
When purchasing professional anti-fungal compounds, make sure that they are designed to eliminate mold and not to prevent its occurrence.
Read the label carefully or consult your retailer. Follow the manufacturer's instructions for the product. Among the special antifungal agents are the following:
- “Milkill” does not pose a risk to human health and allows you to treat surfaces with a very fine porous structure.
- “Antifungal” is an excellent remedy against fungus and mold, allowing you to remove fungus from walls of any structure and origin.
- “Hydrotex”, “Izotsid” - created specifically for antifungal treatment of rooms under constant exposure to high humidity.
How to treat a bath if fungus has just appeared
Provided that the fungal infection in the bathroom has not reached alarming proportions, you can use folk remedies, among which the most common are:
- Vinegar. Apply to the affected surface using a sponge or spray. After treatment, let it dry, then brush off any remaining mold and rinse with water.
- Camphor balls. They are laid out in different corners of the bathroom, the effect of them is noticeable only at the initial stage of fungal development.
- Soda and vinegar. Apply a thick layer of soda to the area affected by the fungus. Then vinegar is applied to it. When the foam settles, the surface is cleaned with a warm soapy solution.
Bleach or white will remove fungus in the bathroom
You can remove fungus from the ceiling and walls with bleach. Don't forget about gloves and a respirator.
- Add bleach to the water in a ratio of 1:10.
- Distribute the resulting solution with a sponge or spray.
- Do not wash off the bleach; it will prevent rot from reoccurring.
- Ventilate the bathroom.
Chemical substances
On sale you will find a variety of products that help cope with pathogenic organisms. Customer reviews indicate that among this abundance there are the most effective products.
IMPORTANT. The drugs contain components that are unsafe for health. Processing should be carried out with gloves and a respirator. Please note that the chlorine contained can damage metal and delicate surfaces; they can be protected by covering them with a thick cloth.
Сillit Bang anti-stain
The antiseptic copes well with old and ingrained mycelium. It softens dirt, which is then easy to clean with a brush or knife.
Move the spout on the bottle to the “ON” position. Spray the liquid, keeping a distance of at least 10 cm to the target area. Wait 15 minutes, wipe the area with a dry cloth and wash off any remaining consistency.
REFERENCE. It has been proven effective against an existing colony, however, this method will not protect against new infections.
ASTONISH Mold & Mildew Remover
The product is fast and effective.
Spray the contaminated sealant with a spray, leave it for a few minutes, then wipe the surface with a damp sponge and rinse with water.
If at the end you find particles of mycelium, repeat the procedure.
Veksa Bathroom cleaner
The concentrate not only destroys spores, but also blocks their further appearance.
Apply the drug to the target areas, wait 15 minutes. We clean off the dirt with a brush and rinse with water. If necessary, we will repeat the operation.
IMPORTANT. Do not allow the product to dry on the surface. Frequency of use – 2 times a month (for preventive purposes).
Unicum
The components of the drug are able to penetrate and act in hard-to-reach places - gaps, cracks, etc.
Apply the liquid to the sealant, wait 3 minutes, work with a sponge and wash off the dirt.
Izocid (IZOCID ANTI-MOLD)
The advantage of this drug is that it does not contain any dangerous compounds, you can work with it without personal protective equipment, and it is compatible with all types of materials. This highly effective product destroys all types of mold and has proven itself in preventing infections.
Before processing, remove large mold growths with a knife. Shake the liquid, spray evenly, moisten generously. We wait 24 hours, remove the remains of fungi with a brush, and wash the surface.
You can repeat the procedure if necessary.
Removing fungus from seams and tiles
Fungus that forms on the seams between tiles is more difficult to remove than on tiles. Stock up on baking soda, vinegar, a toothbrush, a thin brush and patience.
- Pour vinegar into an enamel basin.
- Using a thin brush, apply vinegar to the seams between the tiles.
- After ten minutes, it is recommended to rub all the seams with the hard side of the sponge and rinse off the remaining vinegar with water.
- Dip a damp toothbrush in baking soda.
- Clean the seams between the tiles with soda, rinse off any remaining soda with water, and wipe the tiles thoroughly.
- It is advisable to coat the tile seams with new grout.
Removing stubborn stains
Sometimes stains and dirt penetrate so deep into the grout that it is almost impossible to clean it. Old material must be removed, completely renewing the grout.
The renewed coating will retain its color and properties for many years. You can purchase inexpensive material at any hardware store.
Creosote will remove even the most stubborn mold.
It is possible to destroy even long-grown mold with creosote, but remember that the product is aggressive and will ruin the wooden surface. Wear a respirator and rubber gloves. Fighting moldy fungi in this way is dangerous to health.
- Dilute creosote in oil or alcohol.
- Apply to mold-damaged areas of tile and grout.
- It is better to remove the remaining yellowish mass.
Borax processing
To treat moldy areas in the bathroom, use sodium tetraborate or borax.
- Dilute one glass of borax in two and a half liters of water.
- Wipe the moldy areas in the bathtub with the solution using an old brush.
- Wipe off any remaining sodium tetraborate with a cloth.
- It is not recommended to wash off the borax; it is better to treat the surface with a dry cloth to remove moisture.
Removing sealant from mold
Intrusive mold even lives on sealant. Therefore, it is advisable to use a sealing agent with the addition of fungicidal components against fungus. We will learn how to remove mold in the bathroom using silicone sealant and clean the seams with your own hands.
- Cut off the sealant with a knife. Make cuts in the sealant and, picking up the silicone mass, pull it out of the tile joint. Remove mold by thoroughly cleaning the seams.
- Eliminate mold on caulk with cleaner and bleach. Dilute bath cleaner in a container of water and stir. Use a sponge soaked in the solution to clean the mold-affected areas. Thoroughly rinse off any remaining mold and cleaning agent. Take bleach and spread it over the sealant. After twenty minutes, scrub the surface with a brush. Rinse with clean water and dry the sealant with a dry cloth.
- To prevent the fungus from appearing again, use isopropyl alcohol. Pour alcohol between the tiles and wait half an hour. Blot the remaining alcohol with a cloth and leave overnight. After the seams have dried, you need to re-treat the cleaned areas using new sealant. You can use the bathroom no earlier than every other day.
Darkening from rust
Typically, such contaminants form in places where water pipes are located. Dealing with fresh rust stains is easy - regular cleaning products will help.
It is more difficult to remove old stains: you will have to use store-bought products that are designed to remove rust.
If the grout has darkened thoroughly, then the product will not cope with the rust, and a complete replacement of the material will be necessary.
Fungus in the bathroom on the ceiling: methods of getting rid of it
When fungus appears on the bathroom ceiling, there are only two ways to combat it. A radical method that requires capital investment. It includes the following steps:
- Using a spatula, all old whitewash and plaster are removed from the affected ceiling surface so that the floor slabs become visible.
- Prime the surface with a special antiseptic composition. In order to properly process the grooves and seams on the ceiling, it is recommended to use a brush.
- Then work is carried out on plastering, putty and re-priming the ceiling.
- Afterwards, the surface of the ceiling needs to be sanded and painted.
How to deal with mold on curtains
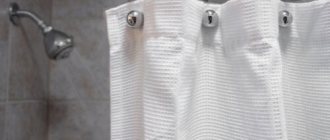
Many housewives are not aware of the existence of harmful fungi on the curtains in the bathroom. Unlike fungus on the walls, mold on a dark curtain is not visible, so the more often you wash the curtain, the higher the chances of avoiding the growth of fungi.
- You can fight moldy fungi that have attacked the curtain with white.
- Using a colorless sponge, apply Whiteness to the moldy spots and wait a couple of minutes.
- When the mold disappears, it is better to rinse the curtain under running water to wash off the whiteness.
- Next, you should wash the curtain in a washing machine or by hand with powder.
- You can remove mold from a curtain using chlorine bleach. Be careful and carefully read the instructions for use. Bleach can not only remove fungal stains, but also ruin the color of the curtain.
Folk recipes
Traditional methods return surfaces to an attractive appearance. They are available, safe and quite effective.
A mixture of baking soda, fresh lemon juice and vinegar
Cleaning grout with soda, vinegar and lemon
Soda reacts with vinegar and citric acid, helping to whiten the grout. To clean tiles, apply baking soda mixed with water to the contaminated areas. After this, spray a mixture of lemon juice and acetic acid. It is recommended to use a spray bottle. The components are left on the surface for 10 minutes and then washed off.
Ammonia
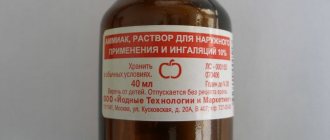
This product effectively fights mold and mildew. 150 ml of ammonia are dissolved in 5 liters of water. The solution is sprayed onto the tile joints. After 10 minutes, the surfaces are brushed and washed with water. Despite the fact that the product quickly copes with dirt, it cannot be used often. This cleaning is alternated with the use of more gentle methods.
Ammonia helps remove mold.
Whiteness and soda
You can renew the grout using liquid bleach White and soda.
The procedure is performed like this:
- Mix the ingredients in equal proportions.
- Treat all seams between tiles with the compound.
- Distribute the product using a toothbrush.
- Wait 15 minutes, then repeat brushing.
- Wash off the cleaning composition with water.
This method is not suitable for cleaning colored grout. The use of bleach can negatively affect the decorative qualities of the building material. When working with household chemicals, use protective equipment for the skin, eyes and respiratory system.
Soda, lemon, toothpaste and mustard
If the tile seams have turned yellow, you can use a mixture of 100 g of soda, 50 ml of lemon juice, 1 tbsp. l. mustard powder and 1 tsp. toothpaste. 1 liter of water is poured into a bucket, to which the indicated ingredients are added. The composition is thoroughly mixed and applied to problem areas with a sponge. After half an hour, the product is washed off and the procedure is repeated if necessary.
Hot steam
This method does not involve the use of bleach or other cleaning compounds. Hot steam helps to quickly remove plaque and restore the grout to an attractive appearance.
This product gets rid of not only dirt, but also pathogenic bacteria.
Cleaning tile joints in the bathroom with hot steam.
How to avoid mold in the bathroom
- To protect your bathroom from fungal growths, reduce the humidity level to 30%. A heated towel rail will help.
- Ventilate the room. If the ventilation in the bathroom does not do its job well, then you need to find the reason. It may be necessary to clean the ventilation ducts of accumulated debris. When choosing a new fan, you should pay attention to its power; it should be sufficient to create comfortable conditions in the bathroom.
- When one of the family members has taken a shower, do not close the door, let the moisture evaporate.
- Work to protect the bathroom from moisture is reduced to painting or replacing old pipes (it is recommended to use plastic or metal-plastic pipes). The bathroom door also needs to be painted with a special water-repellent paint or replaced with a new one with a waterproofing coating. Before laying tiles in the bathroom, treat the walls with antifungal agents that help fight mold.
- Make sure your plumbing does not leak. All pipes in the bathroom are carefully checked for leaks and condensation accumulation. It is worth paying attention to the drainage system of the washing machine, as well as the condition of the mixer, shower and other plumbing elements. After performing water procedures, do not allow moisture to accumulate, wipe the walls of the bathroom dry and ventilate the room well.
- Treat joints that are exposed to moisture with sealant.
- Do not use the bathroom to dry clothes.
- Check the condition of the furniture. If there is furniture in the bathroom that is affected by fungus, you should get rid of it. The fact is that mold spores settled in the pores of furniture are difficult to remove and in favorable conditions can multiply quickly.
- Fungus destruction work. This is the most time-consuming and painstaking stage in the fight against mold in the bathroom. Before starting work, it is necessary to dry the fungus-affected surfaces in the bathroom with a hair dryer or using a powerful heater. After this, you need to treat the surfaces affected by mold using special chemicals or folk remedies. Mold that has settled on the seams between tiles or tiles must be completely removed using a scraper or spatula.
Knowing how to clean mold in the bathroom, with some effort, you will defeat a dangerous enemy, but it is better to prevent the appearance of fungus. Follow simple rules for caring for your bathroom and you will protect your family from possible diseases.
Actions in case of severe damage
Sometimes neither folk remedies, nor industrial antiseptics, nor professional devices help - the mold is nested too deeply and tightly and does not want to leave its habitat. Then the time comes for extreme measures - completely replacing the old grout with a new one. The procedure is as follows:
- Remove old grout.
- Clean the seams.
- Apply primer.
- Apply fresh grout.
Removing grout between tiles
First, it is necessary to completely remove the grout between the tiles to destroy the mold habitat, and apply new one. This can be done in various ways:
- mechanical - using a special tool (construction knife, dremel, joint spreader, electric drill), the grout is cleaned from the space between the tiles; this must be done carefully and carefully so as not to damage the tiles themselves and the enamel on them;
- chemical - special chemical reagents are used to soften the grout composition and facilitate its removal. They come in industrial grade - special solvents that do not damage the tiles: Keranet;
- Clean Kiilto;
- MasterGood; and folk ones - made from improvised means: a concentrated solution of vinegar or citric acid;
- a mixture of one part glycerin and three parts water;
- a mixture of water and kerosene or white spirit.
When removing old grout, you must not forget about protective equipment, since in the process you can get damaged by a tool or a flying piece of grout, and with the chemical method, you can get burned by reagents.
Cleaning seams and applying primer
After removing the grout, the tile joints must be thoroughly cleaned of old material. To do this, you can use an ordinary vacuum cleaner. After this, the seams must be washed with a solution of soap or a non-aggressive detergent and allowed to dry completely within 24 hours.
Next, a layer of penetrating primer is applied to ensure better adhesion of the grout to the surface and greater surface protection.
Applying fresh grout
The next step is to apply fresh grout. To protect it from mold, there are two ways:
- use a special anti-fungal grout - it already contains all the additives necessary to prevent the fungus from appearing and spreading. Such grouts can be found in the line of companies: Ceresit;
- Fuga De-Lux;
- Kerapoxy Design;
- Litokol and others;
- Ceresit CT-10;
To be more confident, you can combine these two methods - this option will be a little more expensive and labor-intensive than each of them separately, but will add reliability and protection against fungus.
Antifungal impregnation gives the grout water-repellent properties, protects against mold and dirt
At the stage of renovation of the bathroom, when we completely changed its appearance and, accordingly, re-tiled the walls, it was decided to use a special anti-fungal grout from the company Ceresit, and in addition to it, an anti-fungal impregnation for grout from the same company. It cost a little more than if we had bought simple grout, but it paid off in the future. Despite the lack of ventilation, frequent baths and our laziness, due to which we rarely wipe the tiles dry, 5 years after the renovation we still did not know what mold is.