Household appliances of this type have long become an indispensable attribute for most households. Purchasing and connecting washing machines to sewerage and water supply has long become commonplace and most of us know how it’s done.
However, in this article we will dwell on the issue in detail and analyze all the nuances of connecting to water supply and sewerage, what methods exist, what tools and materials we will need, and how to avoid common mistakes.
But first, let's briefly learn how to connect a washing machine: the hose for connecting cold water is screwed at one end to the water pipe, and the other to the filler fitting of the machine. The end of the drain hose at a certain height is connected to the sewer system. Below, we will look at all the processes in more detail.
Materials and tools for connecting to water supply and sewerage
The need for certain materials when installing and connecting washing machines to sewerage and water supply is determined, first of all, by the location of the unit and the accessibility of the designated objects. In some cases, it is necessary to incur significantly higher costs in order to subsequently use household appliances conveniently for many years.
If you plan to lay additional branches from the water supply in the groove, you will need a fairly powerful angle grinder with a saw blade for concrete. You can use a hammer and a chisel to break out the concrete.
A pipe without joints is laid in the groove to ensure its long-term operation without leakage. Otherwise, if a leak occurs, restoring the functionality of the pipe will involve a large amount of troubleshooting work.
To connect to the water supply network, a tee with a shut-off valve is usually used, and to install it in place, a set of wrenches or a universal adjustable wrench is used. All threaded connections are sealed with tow or FUM tape.
Installing an external pipe involves attaching the pipe to the wall; for this you will need an electric drill and concrete drills. Plastic dowels are installed in the drilled holes, fastening is carried out with screws of the appropriate size.
When installing washing machines, the main requirement is that the top cover is horizontal in relation to the floor. For precise installation of the washing machine, a building level is used; adjustment is made using screw support legs.
To arrange a drain for washing machines into the sewer, you will need a drain adapter with an outlet at an angle of 45 degrees.
To connect washing machines to electricity, you will need a three-core cable with a cross-section of 2.5 square meters in double insulation and a 16-amp diffusion machine with a leakage current of no more than 30 milliamps.
In addition, it is possible to use control equipment - a voltmeter. Let’s take a closer look at how to properly connect the washing machine to the mains below.
Checking for correct installation
Before you turn on your washing machine for a full wash, you should do a test run to make sure the installation is done correctly.
First, check that the water connection is correct: the machine must fill the tank within the time specified in the technical data sheet. Leaks at the hose connections are not allowed. 5-7 minutes after starting the unit, you need to touch the glass of the hatch and make sure that the water has heated up.
It is important that the car stands in its place, does not “jump” or move. Also, during the test wash there should be no extraneous noise. If you hear the machine knocking or grinding, stop working as soon as possible; there may be a shipping bolt left inside.
After checking the connection of the washing machine, you can load laundry into the drum and start washing
So, installing a washing machine is a task that you can do yourself without turning to specialists. Carefully read the instructions for the equipment, follow the recommendations outlined in our article, and you will succeed!
Preparing washing household appliances for installation
First of all, when the unit is delivered to the installation site, it needs to be unpacked. Usually the machine is packed in a cardboard box and secured with plastic tape. It needs to be cut and removed.
After this, the cardboard box is carefully removed and the foam pads are removed from the top and sides. Next, you need to lift the car and pull out the lower foam platform.
In this case, it is worth paying attention to its design - if there is no special boss in the middle on which the device drum rests in the transport position, then in this design it is manufactured and installed separately. You need to tilt it and remove this insert.
Please note that the cardboard packaging and foam pads must be retained for the duration of the warranty. If a situation arises in which you need to replace the machine due to its defect, this operation will not take place without packaging. These are the terms of the guarantee.
Inside the cardboard package there is an envelope or folder with technical documentation. It contains:
- A passport for the purchased washing machine indicating the personal unit number and other credentials. All entries in it must be certified by the store’s seal.
- A warranty card, which is certified by the store’s seal indicating the date of sale, since the countdown of the warranty period begins with it.
- Operating instructions, starting from the moment of unpacking, and instructions on the installation procedure.
You should strictly follow all the manufacturer's requirements, since failure to comply with any of them will result in a waiver of warranty obligations.
Connecting a washing machine
The packaging also contains the components of the purchased washing machine. Typically they include:
- Flexible filling hose equipped with plastic union nuts for connection to the machine and water supply;
- drain hose for removing used water after washing and spinning clothes;
- reduction – an intermediate part for connecting the drain hose to the sewer pipe;
- bracket for fixing the drain hose on the wall;
- wrench for removing transportation screws and adjusting the position of household appliances in space before turning them on;
- plugs installed on the holes for transportation screws after they are removed.
These are the main items of the sales kit, which may differ from model to model.
If your washing machine breaks down, you can connect the motor from it to a 220 V network with your own hands.
Removing shipping screws
This is a mandatory operation before connecting washing machines to water supply and sewerage.
Their purpose is to secure the drum during transportation to prevent damage. As noted above, a tool for removing bolts is included in the sales package.
Under no circumstances should the removed screws be thrown away; they will be useful if you need to transport the washing machine to a warranty workshop. The holes where the transport screws were must be closed with the covers included in the sales kit.
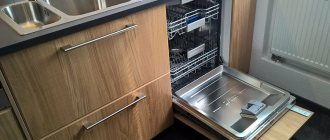
Placement options for washing household appliances
Household appliances of this kind are not purchased spontaneously; the purchase is preceded by careful analysis and preparation. First of all, this applies to the installation location.
The need to drain used water determines the location of washing machines as close as possible to the distribution of the sewer system.
Such points are located either in the bathroom or in the kitchen. There is also a water supply network there.
As for connecting to electricity, washing machines may require a separate power supply line from the input panel to the location where the outlet is installed.
Recommendations from installation experts
It often happens that equipment installed independently or by a master begins to vibrate during the spin cycle. This indicates that the installation was performed incorrectly. Therefore, even before purchasing, you need to decide on a place for the machine and read the recommendations of installation specialists.
Professional advice on installing a washing machine, as well as step-by-step instructions will help you complete the installation and connection according to all the rules.
Tip #1 - prepare the conditions for installation
When choosing the overall dimensions, type of construction and technical characteristics of the model, they are guided not by their own wishes, but by the capabilities of the room in which it will stand.
In a spacious bathroom, as a rule, there are no problems with installing a washing machine. In order to save money, it is placed as close as possible to the outlet, water supply and sewerage distribution
Necessary conditions for the operation of the washing machine include close proximity to an outlet and water. This will help avoid lengthening of electrical cables and hoses.
They also pay attention to ease of use, as well as the aesthetic component. Problems with placement most often arise in small apartments.
Tip #2 - choose the optimal room
Most users, when choosing a location, choose the bathroom as the most suitable from a logical point of view. After all, this is where the water pipes and sewer drains are located. In addition, the washing process will be hidden from view.
The washing machine can also be placed in a small bathroom, having previously decided on the size and location. In this case, to save space, the machine was installed under the sink
When choosing a location for the machine, pay attention to the following points:
- the ability of the floor to withstand vibrations;
- possibility of laying communications over remote distances;
- during measurements it is necessary to take into account unevenness on the walls;
- the space for installing the machine must be at least 1 cm larger than its nominal dimensions.
If space is limited and the dimensions of the machine are large, you should think about placing the unit in the kitchen or hallway.
Tip #3 - The Importance of Proper Connection
The issue of correctly connecting the washing machine to communications should be treated extremely carefully. Next we will consider this process in more detail.
Connecting water to the machine
Machine washing, like any other, is impossible without water. The water supply must meet two basic requirements: sufficient pressure in the pipes and clean water.
If they are not met, a pump is installed to increase the pressure, and the water is filtered. A tap is built into the pipe supplying water to the machine to shut it off. Thus, the likelihood of leakage becomes minimal.
Electricity supply issue
A washing machine is a powerful unit. Residents of old apartments in which the wiring has not been changed are recommended to install a separate cable, since the wires and sockets installed many years ago are not suitable for connecting modern equipment. The cable cross-section must correspond to the expected load.
The socket for connecting the washing machine is installed with grounding. If we are talking about a room with high humidity, for example, a bathroom, then it is advisable to choose models with a protective cover
We discussed in detail the installation and connection of a grounded outlet in this material.
Tip #4 - take into account external factors
The ambient temperature and type of flooring should also be taken into account when installing the washing machine.
High quality flooring and flooring
There are high demands on the quality of the floor. It must be strictly horizontal, hard and even.
The floor covering will have to withstand the vibrations created by the rotating drum. If there are doubts about the quality, it is necessary to strengthen it at the installation site of the machine.
Ambient temperature
In a heated apartment or house, equipment is kept warm. During prolonged heating outages, which are often observed in country houses and technical rooms, the equipment cannot be left in place.
The water remaining inside the machine after washing will definitely freeze. This will result in a rupture of the hose or even the pump and will require repair/replacement
Connecting washing machines to the water supply - several connection methods
Watch the video - the first method of establishing a connection to the water supply
How to install a washing machine, connecting the washing machine to the water supply. Video tutorial Plumber
The sales package for such a unit always includes a hose for connecting cold water. Its length is 1.2-1.5 meters and at the ends the hose is equipped with two union nuts made of plastic.
One of the ends is installed on the hose at a right angle. It must be installed on the inlet of the unit. The installation angle prevents the hose from kinking or pinching. Connection is made in the following order:
- Turn off the water supply to the water supply by turning off the tap on the riser.
- Unscrew the flexible cold water line at the sink or sink.
- Install the tee onto the supply pipe in the water supply system so that the side outlet is located conveniently for connecting the washing machine hose.
- Screw the filling hose to the tee. When tightening the plastic nut, do not use a tool, and only tighten the nut until it stops by hand. Tool installation often results in breakage of the flimsy plastic nut.
- Install the flexible mixer hose.
A test supply of water to the system with the washing machine should be carried out with the tap on the crosspiece closed, and only after making sure that there are no leaks can it be opened to check the reliability of the hose connection.
This connection option is used when the installation location of the unit coincides with the location of the sink or sink.
Otherwise, you need to bring the water closer to it. To do this, a tee is inserted into the nearest water pipe.
An additional pipe of the water supply system is extended to the installation site of the washing machine, where it is connected in the manner described above.
Often, filling the household with household appliances occurs gradually; eventually, under the sink or sink, the entire space is filled with tees and a tangle of various hoses.
How to connect a washing machine (review video)
Providing for this possibility, a manifold with several outlets is installed on the embedded pipe. An output that is not currently in use can be closed with a plug and used at the right time.
We provide water supply to the machine
Before you begin installing the machine yourself, make sure that this does not void the warranty. Many manufacturers make a requirement that the washing machine must be connected by a certified technician, otherwise if the equipment breaks down, the owner will not be able to count on free repairs. After weighing all the pros and cons, make a decision.
To begin with, the user should figure out what basic rules need to be followed. It is imperative that:
- the pressure in the water supply was at least 1 atmosphere. If the indicator is lower, installation of an additional pump will be required;
- the water was of good quality. In Europe, standards for the purity of tap water are very different from Russian ones, so it is better to install an additional filter in front of machines from foreign manufacturers (Bosch, Samsung, Electrolux, Mile, Ardo).
If there was already a washing machine in the chosen place, then connecting a new “vertical” will not be difficult. All output points have already been organized, which means that it will be enough to connect the device hoses to them and fix the joints. It will be more difficult if the machine is installed for the first time.
To connect the SMA to the water supply, you can use a crimp coupling or fitting.
The coupling is mainly used for old, cast iron pipes. It makes it possible to install a shut-off valve, which is designed to regulate the water supply to the equipment. The included flexible tube is connected at one end to the tap, and at the other end to the inlet hose of the washing machine.
The fitting is used for communications made of metal-plastic. The tee is mounted in the pipe, and the inlet hose of the automatic machine is connected to its outlet through the shut-off valve. Before starting the installation, it is important not to forget to turn off the cold water supply to the apartment.
There are models of machines with vertical loading that are connected to hot water supply. In this situation, you can resort to any of the methods described above. Use either a crimp coupling or a special tee fitting.
Sometimes the dimensions of the hose that comes with the washing machine are not sufficient to connect to the pipe - it turns out to be too short. It is not recommended to extend the inlet hose; it is better to purchase a new one of suitable length. They are sold in specialized stores.
People living in houses without an organized water supply also have the opportunity to use an automatic machine. In this case, the connection is made in a special way. For these purposes it is used:
- plastic water barrel;
- pump;
- hoses;
- shut-off valve and other components.
In this case, you can either simply place the tank 3 m above the machine, this will create the necessary pressure. A tap is cut into the container, and the inlet hose of the automatic machine is connected to it.
A more expensive connection option is using a pumping station. This method can be made cheaper by using a motor and pump from an old washing machine. The method has long been used by craftsmen at their dachas. You can find out how to organize the process on the Internet.
Connecting washing machines to the sewer - consider 2 methods
Watch the video - the first method of installing a drain into the sewer
Washing machine. Drain through non-return valve. Eliminating the siphon effect
Draining used water into the sewer system is a mandatory process in the operation of units of this kind, because the purification of contaminated wastewater is becoming increasingly important.
If we simply talk about organizing the drainage of water from washing machines into the sewer system, we can do without directly connecting these two systems.
It is enough to use a U-shaped bracket from the unit sales kit, which fixes the drain pipe on the edge of the bathtub. At the same time, the issue of the height of the drain into the sewer is resolved, due to which a water plug is formed, preventing the reverse flow of water.
Many modern units include the installation of a check valve that prevents this process.
Considering the specific location of the sewer system in a house or apartment, there are no problems with connection, but it has its own specifics.
Connecting to the sewer directly is used quite often, being the simplest to implement. But this method has its drawbacks.
To implement this, it is necessary to install a spacer to the sewer pipe in the form of a tee, and the outlet should be at an angle of 45 degrees.
The drainage hose is connected to a sewer pipe with a diameter of 50 millimeters, while its size is 22 mm. Therefore, the connection is made using a special spacer called a “reduction”.
The drainage hose of washing machines is standardized on all models and has a diameter of 22 millimeters. There are no special adapters for draining this size; this simple rubber part is used on the transition.
When the machine is located in close proximity to the outlet of a sewer pipe, it is naturally connected to it using a tee.
Do-it-yourself connections of the washing machine to water and sewerage
But if the unit is located at the opposite end of the room, the most reasonable solution would be to lay an additional PVC pipe with a diameter of 32 millimeters and then switch to size 50.
In this case, it is necessary to fulfill the requirements for a slope of this pipe of 2-3 millimeters per meter of length. A reduction with these dimensions is produced and can be purchased on the market.
In some cases, if the machine is automatic, there is no need to use an intermediate pipe, since the used water is pumped out by a pump.
In this case, the connection is made using a rubber reduction. It is a rubber bushing. The outer surface has ribs like a cuff to seal the connection. The inner hole is arranged in the same way with a diameter of the appropriate size.
In the technical documentation, if there is no check valve in the machine model being installed, the height of the drain from the floor at which a water seal is formed must be indicated.
If this parameter is not maintained, very unpleasant odors will penetrate into the room through the drain hole.
The second way to connect washing machines to the drain is to connect through a siphon. Many of these products are available with a special outlet at the top.
When sold, it is equipped with a special plug that covers the pipe. Before connecting the drain hose of the machine, this part must be removed and removed - it has purely protective functions.
The drain hose of the washing machine is simply put on this pipe and, if necessary, additionally secured with a clamp.
This product can be equipped with several taps, which allows the connection of several units at the same time.
If there is such a possibility, connecting washing machines should be done in such a way that is quite reliable and solves all problems of tightness and safety.
Call the master
In cases where there is no time or opportunity to connect an Electrolux device yourself, calling a specialist from a washing machine service company will help.
It’s easy to find such a company on the Internet by asking the name of your city in the search question.
The cost of connection work depends on the pricing policy of the company from which the master was called, and on whether additional steps are needed to insert into the system, etc.
If the master uses his own parts for connection, for example, a new inlet hose, their cost is paid separately.
On average in the capital, connecting a washing machine with the communications disconnected will cost from 1,500 rubles, and connecting a washing machine built into a set will cost from 1,700 rubles. After installation, the technician performs a test run of the work and gives a guarantee for the work performed.
Connecting washing machines to the electrical network
When making repairs in a bathroom or kitchen, you must provide wiring for connecting a washing machine or other similar equipment. It should be understood that combining water and electricity in one unit makes it a means of increased danger. Therefore, separate wires are pulled to connect them.
Connecting the washing machine drain to the sewer system, what problems and errors occur
Based on the maximum total power possible in such household appliances, you should usually focus on 2.3-3.0 kW.
What you need to connect
The list of materials for creating an autonomous network for connecting household appliances is not extensive and includes:
- Conductor products are selected from copper samples. At the same time, taking into account the place of application, they must be double insulated.
- An emergency shutdown control device that will save household appliances from failure due to voltage surges, and the building from a possible fire. The equipment will not be damaged if moisture gets into the electrical network.
How to connect a washing machine to a Miele three-phase network
To connect washing machines, a 16-amp device with a leakage current of no more than 30 milliamps is used.
- An automatic switch with the same parameters is installed in case of a short circuit and protects the network from damage.
- High security socket with moisture protection.
- Additional materials include common parts for electrical installation - clamps, terminals, junction boxes, cable ducts, etc.
Electrical installation
We draw your attention to the need to follow all the rules in order to ensure your own safety and the safety of your property and home:
- During installation, you must use only professionally designed connection diagrams.
- Do not twist aluminum and copper wires together.
- To carry out wiring, you need to use wires only of the appropriate cross-sectional power.
- Grounding cannot be done by connecting a wire to a water pipe or hot water supply.
- The sockets used must be made on a ceramic base in a waterproof casing.
- It is strictly not recommended to use an extension cord or adapter from a regular outlet to a Euro plug to connect washing machines.
- It is prohibited to connect the ground wire to the neutral wire.
- The connection wire must be laid as a separate line.
After completing the electrical installation, it is recommended to carefully check the entire circuit with a tester to eliminate the possibility of a short circuit.
Connecting the washing machine to water supply, sewerage and electricity.
Installation options for various conditions
Before installation, you need to think about the conditions and mode in which the machine will operate. Based on this, measures are taken to eliminate operational problems in the future.
Installing a machine in a private house
The layout of electrical cables and pipe routing must be thought out at the construction or renovation stage.
If the washing machine is located in the basement, its connection will be 1.20-1.50 meters below the sewer level. The problem is solved by installing conventional pumping equipment
The dry basement of a private house is the best place to install washing and drying equipment. In this case, the residents of the house do not feel noise, odors and dampness.
Installation of appliances in the kitchen and hallway
Washing does not go well with cooking and eating food. However, very often the machine is installed in the kitchen, as its design fits perfectly into the interior.
In the kitchen, the machine can be placed at any point. The most convenient option is to install it under a countertop or in a cabinet, where it can be hidden behind the doors.
When installing in a corridor or hallway, it is better to place the machine near the wall behind which the bathroom is located. This will simplify connecting the unit to the water supply and sewerage system
You can rarely see her in the corridor. It is difficult to find a place for such an installation and you will have to resolve issues regarding laying communications into the floor or walls. You will also need to hide the machine behind a curtain, place it in a built-in closet or under a countertop.
Placement on laminate or wood floors
The ideal surface for a washing machine is hard and rigid concrete. A wooden floor increases vibrations, which have a destructive effect on surrounding objects and the unit itself.
Anti-vibration mats are made from various materials, they vary in structure, but serve one purpose - to protect the unit from vibrations and prevent its breakdown
The floor can be strengthened in several ways:
- concreting a small foundation;
- arrangement of a durable podium on steel pipes;
- using an anti-vibration mat.
The listed methods will help reduce unpleasant vibrations, but they cannot be compared with concrete screed.
Features of installing a built-in machine
The built-in model is an ideal option that will fit into any interior. Hoses and wires are hidden behind the cabinet, and its front door is identical to the unit.
Built-in machines only provide a front loading option. In this case, it is necessary not only to install the machine, but also to provide space for opening the hatch
This type of equipment is more expensive than conventional equipment, so many are interested in whether and how it is possible to install or build the machine into a cabinet.
The problem to be solved is accomplished in several ways:
- by installing under the countertop;
- placing a compact model in a ready-made cabinet;
- installation in a specially made cabinet, with or without a door.
To prevent adjacent cabinets from experiencing vibration, the base must be solid.
Installing the machine above the toilet
For owners of small toilets, the idea of installing a machine above the toilet may seem strange. But there are enthusiasts who can solve even such a difficult problem.
The design for installing the washing machine should be as thoughtful and reliable as possible. European manufacturers produce powerful fasteners, but their cost is very high
When planning installation, pay attention to the following points:
- If the quality of the walls is in doubt, a steel structure resting on the floor is made.
- The hanging shelf is made from a durable metal profile.
- The shelf is equipped with a safety side so that the machine does not slide off it due to vibration.
- The retractable shelf will prevent laundry removed from the machine from falling into the toilet.
- The mounting height is such that the toilet flush pit remains within the access area.
- It is more convenient to place the machine not above the toilet, but behind it.
- It is more advisable to choose a model with shallow depth.
In order for the unit to remain suspended and not fall on its head at the most inopportune moment, it is necessary to adhere to safety precautions.
Remember that if repairs are needed, the heavy machine will have to be lowered to the floor and then returned to its place.
How to level a washing machine
This operation is final and is performed after it is connected to all communications. If this is not done, the machine will be overloaded during operation, and strong drum vibrations will occur, which will not extend its service life.
The top cover of the unit must be positioned horizontally. To do this you need to perform the following operations:
- Install the washing machine in its permanent location. The distance from the back panel to the wall should be no more than 5 centimeters, otherwise the hoses may be deformed or broken.
- Loosen the locknuts on the machine legs.
- Use a spirit level to determine the direction of rise or fall.
- Adjust the position of the unit by unscrewing or tightening the screws. The tolerance for non-parallelism of the cover in relation to the floor is no more than 2 degrees.
- Having achieved the correct position of the machine body, you need to tighten the locknuts to the body.
- It is important to prevent vibration of the unit, which can occur if there is a gap between the leg and the floor. To do this, you need to try to swing the body in different directions. If necessary, tighten the legs until the same tightening force is achieved.
Advantages and disadvantages
Advantages and disadvantages
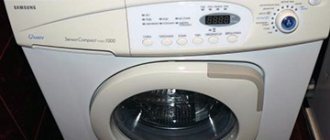
People buy top-loading washing machines much less frequently than front-loading ones - that’s a fact.
Minuses:
The choice in models is not so great. The factor of customer demand plays here
Cannot be installed under a table or countertop, saving work space
On some machines it is not possible to adjust the level of the rear legs
Pros:
Narrow and deep, perfect for tight bath spaces, closets or kitchens
No need to bend over to fold laundry
Possibility to interrupt the program and add laundry
Drum fastening - on both sides, bearings and seals will last longer
We present the features and nuances for self-repair of verticals.
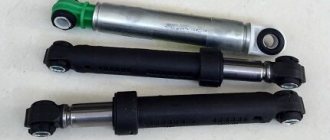
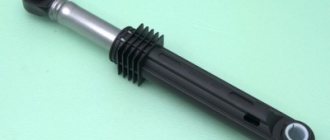
The device contains the same elements (pressure switch, water intake valve, drum, tank, control board, pump, and so on).
The drum axis is structurally made on two bearings; a self-positioning sensor is sometimes located on the tank (the drum is fixed with the flaps up).
We will show the dismantling of components using the example of Electrolux:
1. Using a screwdriver, release the control panel from the sides
2.Pull the plastic panel up and slide it towards you
3.Tilt it at a slight angle towards you to remove the wires from the board connectors
4.Remove the panel
To remove the electronic control module, disconnect the remaining wires and unscrew the screws shown in the figure.
For quick and correct assembly, take photographs of the connection points of the wire loops.
To remove the water fill valve, disconnect the rubber hoses from the clamps and dismantle them.
Unplug the wires and press on the holes from the outside to press out the valve.
To remove the side panels, unscrew several screws; do not forget to save the washers for grounding the case.
Bend the wall from below with your hand and slide it down.
After removing the two sides, access to the screws for removing the front panel appeared. Unscrew them.
To remove the NTC sensors and position the DSP drum itself, it is enough to remove the right wall and dismantle them.
The most popular according to reviews:
BOSCH Logixx 6 WOR 16153 OE
Zanussi ZWQ5100
Candy CTD 10762
Hotpoint-Ariston ARTL 1047
First start
To check the functionality of the installed washing machine, it is necessary to carry out a test wash. This is done in the following order:
- Connect the machine to the network.
- Select the desired washing mode and set it on the display.
- Enable work mode. When pouring water into the tank, monitor its filling time in comparison with the passport data. If the machine fills slowly, it is necessary to check the pressure in the water supply and, if necessary, take measures to increase it in accordance with the passport recommendations.
- Check the water heating time for the selected mode.
- When filling the tank with water, check for leaks; if there are any, eliminate the cause and repeat the tests.
The program and rules for conducting a trial run are described in detail in the relevant technical documentation. Recommendations for different models may differ, but these should be used as a guide.
Using water softeners to prevent scale
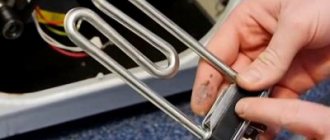
I am surprised by a TV commercial that frightens housewives by flooding an apartment due to a failed tubular heating element (TEN) as a result of being coated with scale. Physically this cannot happen. The heater fails due to overheating, as scale impairs heat dissipation. As a result, the nichrome spiral melts, the circuit opens, and the heating element stops heating the water. Failure of the heating element cannot break the tightness of the machine's tank; in the worst case, the machine will simply stop working.
To check the functionality of the heater, it is enough to set the temperature with the regulator lower than the temperature of the water in the water supply. Then the machine should work. If it works, then the heater is definitely out of order and needs to be replaced. You can temporarily continue to use the machine, but you can only wash it in cold water.
Regarding the use of emollients. Numerous conversations with washing machine repair technicians allowed me to draw a clear conclusion - the uncontrolled use of all kinds of softeners does more harm than good. It's better not to use anything
since any water softener contains a weak acid that corrodes the parts of the tank.
The decision about the need to use emollients can be made by looking into the electric kettle. If its heater or bottom (if there is no external heater in the kettle) is covered with a thick white layer of scale,
Then the water in the tap water is hard, and
softening agents must be used.
It all comes down to grounding
Reputable sales organizations often include the cost of on-site installation in the sales price. It seems to be not bad; the premium in itself is small, once the business has been put on stream. But, firstly, the “cool” ones sell – you won’t find budget models there.
Secondly, such traders are not involved in the installation of protective grounding; it must be equipped in advance, otherwise the company refuses installation (but does not return the price premium), and the warranty is immediately lost. You bought an expensive assistant, the company’s master came, saw that there was no grounding, wrote an “internal” document - and that’s it, you are without a guarantee and without a considerable amount of money.
But even if the machine was purchased from a “simple” seller without any special conditions, but it later turns out that it was operated without grounding, you will be denied warranty repairs. The installation instructions for any automatic washing machine state in black and white that its operation without grounding OR protective devices is unacceptable. OR it was highlighted for good reason, we will talk about this later.
Conclusion: installing washing machines yourself is quite possible if reliable grounding is provided in advance. If you purchase an expensive brand from a reputable trading company, then if you have grounding, they will install it for you at a ridiculous price, compared to a private craftsman, with full guarantee.
Stage 3. Leveling the washing machine
For proper operation of all components and assemblies of the washing machine, it is necessary that it stands on a solid and level base. The equipment should not wobble or vibrate while the drum rotates.
To dampen vibrations, you can use special anti-vibration stands, which are sold in household appliance stores as additional accessories for washing machines. You can also easily make such vibration-damping pads yourself by cutting them out of a piece of felt or rubber 3-5 mm thick.
When installing washing machines, it is very important to maintain a strictly horizontal position of the housing. When distortions occur, the wear of components increases, especially rapidly rotating ones: drum mounts, pulleys, rolling bearings
In this regard, the base on which the machine will stand must first be leveled.
Small unevenness in the floors can be leveled by turning the adjusting nut on the support legs to the right or left with a wrench. This allows you to change their height by 1-2 cm up or down.
To determine a strictly horizontal position, it is recommended to use a building level. The slope angle of the equipment ready for work should not exceed 2-3o.
Site selection and equipment
Before you go to the store to choose a washing machine, think about where you will place it. Measure the depth, width and height of the selected location, adding at least 1 cm on all sides (correction for uneven walls). Agree, the situation when the equipment is physically unable to stand on the prepared area cannot be called pleasant.
The most common options for the location of automatic machines are:
- Bathroom
It is convenient because most of the communications are nearby. In addition, the device fits harmoniously into the surrounding space. To save space, the machine can be installed under the sink. Then you will have to choose a special form of plumbing with a drain in the back.
However, experts do not recommend placing the machine in the bathroom if there is an alternative, since in conditions of high humidity the parts wear out much faster and rust appears.
- Kitchen
Also, all connection nodes are located nearby, there is no need to re-equip anything additional. If you think through the design of the headset in advance, you can install a built-in washing machine or hide it behind one of the cabinet doors.
There are disadvantages here: increased humidity and temperature effects from the stove and oven. Therefore, it is recommended to install the device away from heating devices.
- Toilet
Some originals manage to install the unit even in a small toilet. In this case, the machine is located above the toilet.
This option requires special preparation and thoughtfulness: you need to be confident in the strength of the walls, install a reliable podium, and provide a vibration damper.
- Corridor
The location in the hallway is more common in desperate situations, when there is simply nowhere else to put the equipment.
The location has few positive features: communications have to be delayed, equipment takes up a lot of space, noise can be heard in all rooms.
- Lumber room
If you have a storage closet in your home, you can try converting it into a laundry room. This way, the washing machine will not interfere with anyone, and will be preserved better.
Some houses have special rooms that are designed for washing. If you are the lucky owner of such an apartment, well, congratulations, you are lucky.
- Basement
Such placement is possible in a private house, provided that the basement is heated and has electricity, water and sewerage installed.
If all requirements are met, this arrangement is very advantageous: the unit is not exposed to moisture, and its operation is inaudible for residents.
When the choice in favor of a certain room is made, you should think about the surface on which the machine will be located. The floor in this place should be hard and level.
Small differences in height can be corrected with the help of screw-in machine legs or a rubber mat, but they cannot compensate for strong unevenness. Therefore, if the installation is carried out on a wooden or uneven floor, then it makes sense to think about filling the area under the device with a concrete screed or installing a pallet.
Cost of connecting the machine by third party workers
If you have no hope of relying on your own, but want to install a home washing device using professional help, you should reasonably calculate all possible financial costs and make a decision as to how feasible this may be. How much does it cost to connect a washing machine? Cost calculations for services consist of several indicators.
- Electrical work. They may be needed only if there is no reinforced grounding in the house. The price of such services is about 1,500 rubles.
- Plumbing connection. Usually the costs fit into the same amount.
- Cost of necessary materials. The purchase is usually paid for separately, and everything needed is delivered by the mother. Costs depend on the availability of existing communications and their condition. The cost ranges from 300 to 2000 rubles.
The total connection amount can reach up to 5,000 rubles. Cheaper options are possible, but are controversial, since services and materials may be of questionable quality.
What’s better, rely on your own strength and save money, or play it safe and call a specialist at home? It all depends on the skills and capabilities of the owner of the washing machine, which cannot be overestimated. It should be noted that without sufficient skills and knowledge, it is difficult to carry out the entire process correctly, ensuring complete safety in the operation of the device.
There are known precedents when users carrying out self-installation were denied warranty repairs due to alleged miscalculations during connection that led to the breakdown of the washing machine.
Such refusals should be considered unfounded. Often, accusations against clients are caused not by negligent actions on their part, but by the desire of organizations to impose additional services on consumers.
Protection against breakdown and leakage of electricity
For a washing machine, protection against leakage currents is more important than against breakdown. Modern household appliances are generally made reliably, and direct “bangs” with smoke, stench and intensive care are an exceptional phenomenon, and that’s due to the carelessness of the owners.
But the electrical capacity of a large tank with several tens of liters of water and a large powerful motor is quite large: up to 0.01 uF in older models. At 50 Hz in a 220 V network, the capacitive leakage current will be 0.7 mA - this is still safe, but already a noticeable pinch, especially through wet hands in a damp room.
To readers familiar with electricity as part of a school physics course, the given data may not seem very reliable, but keep in mind: they relate to a filled machine, and water is an anomalous liquid, its dielectric constant is very high: 80.
The leakage current does not interfere with the operation of the machine, it does not reduce its reliability, but it is fundamentally impossible to stop it, it can only be diverted to the ground. An increase in leakage current above the permissible limit is a clear signal of an impending malfunction. That is why it is forbidden to operate washing machines without protection against electrical leakage.
Aquastop and aquacontrol
The main share of leakage current comes through the drained water. Drains are also the main source of water leaks. Therefore, manufacturers recommend purchasing aquastop devices (another name is aquacontrol), which turn off the machine in the event of an electrical and/or water leak. Reputable manufacturers equip their cars with aquastops.
A complex aquastop requires a separate power supply. A box without an electrical cord and a low-power low-voltage power adapter is a primitive shut-off valve that does not protect against electrical leakage and does not protect well against water leakage.
Electronic grounding
In apartment buildings, it is often difficult, if not impossible, to arrange individual protective grounding, on the one hand. On the other hand, manufacturers are not asleep: combating leakage currents is one of the most important tasks of branded designers.
In modern, working washing machines, the leakage to the body does not exceed 10-12 µA, which is imperceptible. But in a pre-emergency situation it increases sharply. For such a case, so-called electronic grounding (circuit breakers, circuit breakers). They pass leakage current into space through themselves, just like a person, and when it increases to a noticeable limit of 0.1-1 mA, they disconnect the machine from the network.
Despite its undoubted advantages, electronic grounding has a significant drawback: its sensitivity is highly dependent on the air parameters in the room. Electronic grounding can stubbornly shut down a perfectly good machine.
With any electrical devices, 90% of malfunctions occur when turning on/off, so some manufacturers prohibit the operation of their products with electronic grounding. So when buying a car, be sure to ask the seller whether using it with electronic grounding will void the warranty.
Typical grounding scheme according to modern PUE:
Protective grounding
But the owner is shocked and frightened by the electrical leak not through the water, but onto the car body. To eliminate it, protective grounding is needed. Its type depends on the house:
- In a private house, the technically ideal option is the simplest protective grounding, see below. It does not need to be registered: in a controversial situation, the expert will check the current flow resistance, and if it is not higher than 4 Ohms, which is not difficult to ensure, the decision will be in your favor.
- In apartment buildings of previous years, from Khrushchev to perestroika, complete protection will be provided by protective grounding. A DEZ electrician will quickly and willingly do it for a small fee.
- In old houses up to and including “Stalin” buildings, if the house grounding loop is not equipped, you will have to install electronic grounding.
- In modern houses, the problem of grounding does not exist: according to the new building rules, they are necessarily equipped with a grounding loop and Euro sockets. In addition to illegal unauthorized construction for rent “with signs of multifamily housing,” as they write. But that's another topic.
How to make grounding yourself:
To do this, you need 2-4 pieces of metal pipe 1.2 - 2.5 m long, but not shorter than the freezing depth of the soil. The bottom of the pipe is driven into a stake with a sledgehammer, and a dozen 5-10 mm holes are randomly drilled in its lower third. Then they dig a trench on the bayonet of a shovel, and drive in the pipes so that they protrude 5-10 centimeters above the ground, at a distance of 0.6 - 1.5 m from each other. In a trench, below ground level, the pipes are connected with reinforcement by welding. A 6-8 mm steel wire or a 15-25 mm strip is welded to it and brought into the house - this is a grounding bus; The grounding terminals of Euro sockets are connected to it with a stranded copper wire of 4-6 sq.mm. To do this, holes are drilled in the strip and threads M4 - M6 are cut into them; the wire is pre-splashed. The seat for grounding conductors from sockets is cleaned with sandpaper and lubricated with grease; better - graphite.
Note: in summer, when the soil dries out, pour a salt solution into the pipes at the rate of half a pack per bucket. This is necessary to ensure the current flows in dry soil. At an outside temperature of +35 degrees, it is enough to fill once a week; at +30 – once a month.
Grounding diagram for a private house
What you need for installation
The operating principle for installing modern standard household washing machines is the same. To do this you will need:
- Tools
- wrenches in sizes 10mm, 17mm and 30mm, a 30mm wrench can be replaced with an adjustable wrench;
- regular flat screwdriver;
- universal silicone sealant with a gun;
- construction level.
- Additional spare parts
- drain hose with brush for washing machine;
- two automobile clamps d 16-25 mm;
- rubber adapter cuff d 50-25 mm;
- inlet hose for washing machine.
Choosing a location for installation
It is necessary to choose a permanent place for the washing machine. The choice must be approached with all responsibility, since once the machine is connected, it will not be possible to move it without investing additional costs for dismantling and new installation. When choosing a location, they are guided by the size and functionality of the room. Usually they choose a bathroom, toilet, kitchen, and there are often cases of installation in the corridor.