Installing a dishwasher is not difficult. But even this simple algorithm has a lot of nuances that need to be taken into account.
Where is the best place to place the dishwasher, how to calculate the distance, what tools are needed and how to do it?
How to install, connect and configure a dishwasher with your own hands?
Currently, there are a large number of dishwashers on the market, which differ in both quality and price.
But even the best quality equipment can fail if installed incorrectly..
Therefore, it will not be superfluous to know what actions should be taken before installing the dishwasher. So, how do you properly install a dishwasher?
To begin with, it is necessary to determine the location of its installation, provide access to connected communications and carry out the first setup before launching.
How to choose the right place for your dishwasher
To install a dishwasher, you need to know where this equipment will be located.
In the kitchen, you need to take into account various factors, including the location of communications.
It cannot be built into any part of the kitchen; the height, proximity of communications, and proximity to other large kitchen appliances are important. The simplest option would be a place in a cabinet or under a countertop.
We list the main points that must be taken into account:
- Proximity of communications: near the place there should be a 220 V socket, water supply, as well as a drain. The PMM drain hose should not be longer than 1.5 m, otherwise the load on the pump will be increased, which may cause its failure.
- It is not recommended to place the PMM near heat sources. This will negatively affect the performance and durability of the machine itself. For example, it would definitely be a bad idea to be next to an old-style electric stove - it gets very hot. But with most modern stoves such problems will not arise - the heating of the outer surface of the housing is minimal, so you need to look at the situation.
- Neighborhood with a washing machine is possible only in separate niches. They cannot be placed close together: vibration from the washing machine can break fragile dishes (for example, crystal, glass objects) and generally damage the PMM.
- You should not plan to place it at the very edge of the kitchen unit. Full-height PMM models (for example, Bosch 60 cm) are built simply under the tabletop, so then their side surface will have to be covered with something additional, and this will entail extra costs.
- Accordingly, the ideal place for a built-in or freestanding (including countertop) dishwasher is to the left or right of the kitchen sink, where all communications will be accessible at once.
How to dismantle a dishwasher
Dismantling the dishwasher may be necessary if you purchase a new appliance or before renovating your kitchen. You can do the job using screwdrivers.
- First, turn off the power to the device - remove the plug from the socket.
- The next step is to remove the narrow strip located under the dishwasher door (some models do not have it).
- Unscrew the water supply hose and place a container to drain the remaining water.
- The drain hose is disconnected from the siphon fitting.
- Fasteners are found in the washing chamber and dismantled. After this, the device will no longer be attached to the tabletop.
- To lower the legs as much as possible, remove the fixing screw.
- To dismantle the device body, pull it towards you and gently rock it from side to side.
If you have experience, the entire process according to this scheme will take no more than 15-20 minutes.
Connection to PMM communications
A dishwasher from the brands Bosch (Bosch), Electrolux (Electrolux), Beko (Beko), Hotpoint Ariston (Hotpoint Ariston), Midea (Medea), Siemens (Siemens), Hansa (Hansa) is a wonderful helper in the house. But buying this equipment is only half the battle.
Next, you will need to connect the dishwasher to the water supply and sewerage, as well as to the electrical network. The cost of such work, especially in Moscow, is quite high. Therefore, if you have the skills, it makes sense to do them yourself.
Before installing the dishwasher in place, it is better to double-check the accessibility of communications and the required length of the hoses and power cord.
Connecting a dishwasher is a matter that requires plumbing skills. And the more experience you have in this type of work, the better. You must understand that the durability and trouble-free operation of your dishwasher depends on the quality of installation.
Before you begin work, be sure to check that you have all the necessary tools and equipment.
In order to properly connect the dishwasher, in addition to a screwdriver and pliers, you may need a drill, a level, and also:
- Epoxy adhesive
- clamps;
- siphon with an additional branch;
- the tee tap is brass or bronze, but not silumin;
- wrench;
- wire cutters;
- grounded socket.
- Adjustable wrench - needed to install a tee on the water supply for connection. PMM if it's not already worth it
- Phillips screwdriver - for hanging the facade, if necessary.
As for consumables, fum tape and plumbing tape for fixing the drain hose may be useful.
The main thing is to check whether you have a flexible hose for supplying water to the PMM and how much of it is available. It must be of sufficient length for the chosen installation location, it is better to check this carefully in advance.
Such a hose can also be equipped with an aquastop protective mechanism, which prevents the risk of leakage when ruptured - such hoses are usually equipped with more expensive PMM models.
Also, if you have nowhere to connect the water intake hose, you will need to buy an additional tee and install it on the water supply to the kitchen faucet, or separate it from the manifold in the riser.
The drainage from the riser is carried out as follows:
- Connect the adapter for polypropylene pipes to the free outlet of the manifold;.
- Lay a route to the installation site of the dishwasher, if necessary; using connecting fittings and elbows;.
- Finally, mount the water socket and screw a metal elbow with a ¾-inch external thread into it;
- All that remains is to connect the supply hose supplied with the machine.
If it is impossible to connect a separate pipe to the place where the dishwasher is installed, then there is the option of connecting the kitchen sink mixer into the gap.
To do this you will need a tee with a tap:
- It is necessary to first turn off the water supply in the riser and release the remaining excess pressure by opening the faucet in the sink.
- Now you can install the tee under the sink.
Do not forget to seal all threaded connections with FUM tape.
Electricity supply
The main power in the dishwasher is consumed by a tubular electric heater (hereinafter also referred to as heating element), which heats the water to the desired temperature. During its operation, the PMM consumes from 2 to 3 kW of electricity. You can find out about this from the technical documentation or see this parameter on a sticker located on the machine body (see photo below).
The label indicates the power of the Hansa compact PMM - 1.93 kW
In accordance with these indicators, the outlet must withstand a current of at least 16 A. Moreover, it must be located in a place to which there is easy access. There are two placement options: slightly above the furniture countertop (in the case of a built-in PMM) or in an adjacent niche, while the distance to the sink should be at least 0.5 m (due to possible water ingress). One more rule must be observed: the outlet should be located no further than 1 m from the dishwasher.
The ideal layout of communications is shown in the figure below, where:
- PMM housing.
- Area of connection to the electrical network.
- The area where the PMM connects to the water supply system.
- Drainage area.
Diagram of the correct connection of the dishwasher to communications
A dedicated line must go to the outlet from the distribution panel. If it is not laid, and the apartment has already been renovated, run the wire along the wall and cover it with a decorative box. At the same time, the appearance of the interior will not be affected. The same line can be used to connect a washing machine, provided that it does not turn on at the same time as the PMM.
One of the options for connecting the dishwasher to the mains
For installation, you need to use a cable with stranded copper conductors (for example, brand VVG-nG-Ls) with a cross-section of 2.5 mm2. A residual current device (hereinafter also referred to as RCD) must be present, along with circuit breakers that operate at a current of 16 A. By the way, RCDs and circuit breakers can be replaced with one differential circuit breaker.
The need to install these devices is due to the fact that there is a danger of a short circuit in the electrical network with water and electric shock to people.
RCD and differential circuit breaker
Parameters of the protective device: 25 A, shutdown current - 10 mA. You can use an RCD with 16 A and 30 mA leakage current. The connection is performed in the same way for PMMs of a wide variety of brands: Bosch, Siemens, Electrolux, Indesit, Whirpool and others.
Important to remember during installation
Important - during installation of the PMM, you need to study the instructions that come with the specific model. It indicates the location and connection diagram of all necessary elements. The dishwasher must be installed in accordance with SNiP standards.
Each manufacturer gives its own recommendations for installation, and if they are grossly violated, you may be subsequently denied service under warranty.
As a rule, the instructions also indicate all the necessary dimensions for installation, and there may also be special recommendations for some models.
A few useful little things to consider when connecting a dishwasher:
- If you have a ground loop installed, do not forget to connect it.
- It is imperative to check if there are any leaks in the system. If water is leaking from the machine, then you need to turn it off and figure it out.
- The drain hose must not hang downhill. This may cause water to splash onto the floor.
- There should be no protrusions on the bottom of the dishwasher. It must be carefully secured with bolts and nuts.
- The drain pipe must be attached to the sewer pipe.
- To avoid leaks, you need to install a drain filter.
- You need to make sure that the dishwasher is connected to water and electricity, and that there is easy access to an outlet.
- If your dishwasher does not have an outlet, then you need to buy an extension cord that can withstand the load.
- Don't forget to connect the drain if your dishwasher has one.
The dishwasher is a fairly new invention, but it has already become an integral part of our lives. It makes it easier, more convenient and faster. Therefore, it is worth working a little to get a good result.
Water hose
The dishwasher has two hoses:
- Jellied.
- Drain.
The first (inlet) hose is designed to supply water to the machine. It must withstand operating pressure and meet temperature requirements.
So, for hot water supply lines the permissible temperature is 65-70°, and for hot water supply lines - 20°. Externally, it is a smooth hose with two threaded connecting elements at the ends (in the form of union nuts).
The drain hose ensures that waste water is discharged into the sewer system . It is not designed for high pressure, so the requirements for it are much softer.
Basically, such hoses are selected by length. As a rule, drain hoses are corrugated, and their connecting elements are of the usual bell-type type, without threads. You can learn all about dishwasher hoses here.
How to properly install PMM
To install a dishwasher, you need to carefully consider the place in which it will be installed and properly secure it to the floor and hangers.
It is necessary to do this so that during its operation water does not get on electrical equipment, electrical wiring, furniture, etc. If you choose the right place for the dishwasher, you can avoid many problems and also significantly save energy and water.
It cannot be built into any part of the kitchen. In order to properly install the PMM, you need to maintain the necessary gaps and distances. The distance between the sink and the equipment following it must be at least 5 cm.
Before purchasing built-in appliances, measure the dimensions of your kitchen cabinet. The legs of the dishwasher can be adjusted in height. Use a level to position the machine level. Some models are very sensitive to a tilt of even 2 degrees. This may affect their future work.
Mount the machine near a sink. This will make it easier to connect the drain and water without having to extend the hoses. Experts say that extending the hoses can lead to leakage and will also put more strain on the drain pump.
When built into furniture, install a metal plate under the tabletop to protect the wood from steam. Many built-in models come with a plate included.
To choose the most convenient and technically safe location, before installing the dishwasher, read the following tips:
- The PMM should not be located closer than 40 cm from the stove, oven and hobs.
- The microwave oven must be placed at a distance of at least 50 cm.
- The washing machine and dishwasher should not touch each other's walls.
These rules are related to the peculiarities of the operation of different types of equipment. For example, the washing machine produces too much vibration during the spin cycle. This may damage the dishwasher. If two appliances are turned on at the same time, there is a high probability of simply breaking all the dishes inside.
The PMM should not get very hot. For this reason, it is worth keeping a distance from stoves, ovens and any heating appliances. Under the influence of high temperatures, the seals inside the equipment will quickly dry out and become unusable.
There may be other breakdowns that will not be corrected under the warranty card due to violation of operating conditions. Microwave waves from a microwave oven can also negatively affect the operation of the PMM.
To connect equipment to the network, a separate moisture-resistant socket is used. Do not connect via extension cords or tees.
When placing equipment, we recommend taking into account the standard cord length. It is 1.5 m. Therefore, install the PMM no further than 50 cm from a moisture-protected outlet.
Drain connection and installation in the kitchen opening
All that remains is to connect the drain hose from the PMM to the sewer outlet through an adapter collar of the appropriate diameter.
Do not forget that the drain pipe must be mounted at an angle, allowing for a 1cm height difference per 1m of length.
And the drain hose itself has a bend at 70cm from the floor. That is why it is attached to the top of the dishwasher, and not at all so that it does not dangle.
All that remains is to connect the washing machine to a power outlet and check the functionality of the entire system. Then secure it in a specially prepared opening.
By the way, some models, for example from Siemens, have non-standard sizes. Therefore, think about your kitchen furniture in advance.
When installing in an opening, do not forget about the metal plate that must be nailed to the bottom of the tabletop (for the Bosch model).
This thing is mounted at the very edge and is a vapor barrier, like a screen. With it, the countertop will not swell from steam.
For some reason, many people throw it out and replace it with aluminum tape, securing it both to the table top and to the side walls of the car.
Electrolux, instead, comes with something like a piece of rubber that sticks on the sticky side.
After installation and connection, the first wash should be done without dishes, using powder or special cleaning tablets.
This procedure should destroy all bacteria and deposits formed after long-term storage in the store.
How to connect a dishwasher to the water supply
This part is the most labor-intensive to perform and requires much more time than connecting other communications. Before connecting the dishwasher, turn off the water.
Next you need to follow the following algorithm:
- Locate the location where the sink faucet's flexible hose connects to the metal-plastic pipe.
- Open these two parts.
- Take a pre-purchased plumbing tee. Wind FUM tape onto the thread.
- Connect the tee to the metal-plastic pipe.
- Attach the flexible mixer hose to the upper part, having previously wrapped the threads with FUM tape.
- Connect a fine filter to the remaining outlet. Attach the shut-off valve to it.
- Use a flexible hose to connect the resulting structure to the dishwasher.
- Turn on the water supply.
PMMs require connection only to a cold water supply system.
Firstly: the equipment itself has many different programs with its own temperature regime under which it heats the water.
How does the method vary depending on the dishwasher model?
The connection method depends on the design of the machine. Each model is designed for one or another method of water supply, which is indicated in the user manual. The basic option is to connect to the cold water line.
However, there are models designed to be powered from a DHW line or from both lines at once . The only way to determine the specifics of water supply is to carefully study the instructions and follow all its requirements.
There are some PMM models (for example, Bosch machines) that are equipped with an electric valve that cuts off the supply in emergency situations. They require special hoses with wires inside.
They cannot be cut, and the plastic housing (AquaStop system) cannot be immersed in water. In addition, we must remember that the valve will only work when the PMM is connected to the power supply.
If we consider the Bosch PMM (one of the most popular in Russia), then the instructions are very vague. The expression “preferably cold water connection” is used for models capable of receiving power from DHW lines. That is, the manufacturer allows hot water supply for this model, but does not consider this the best option.
Instructions for connecting a Bosch dishwasher are in this publication.
How to connect to electricity
PMMs belong to high-power embedded technology. This means that before installing the dishwasher yourself, make sure that the wiring in the apartment can withstand the upcoming loads.
Much attention in this matter is paid to the cross-section of copper conductors. It must be at least 2 mm. To understand the exact value, use special formulas for calculating sections or consult an experienced electrician.
The dishwasher is connected to a nearby outlet with a voltage of at least 16 A. Remember to install a grounding contact. It is provided by electricians in sockets.
Important condition: it is not allowed to connect a dishwasher and a washing machine to the same power source. This will result in high overloads, which may cause a short circuit.
What water is the dishwasher connected to?
The vast majority of dishwasher models are designed to be connected to cold water lines (CWL). This is clearly stated in the instructions.
There are models that can be connected to hot water supply lines , but this must be indicated in the machine's passport.
If it does not clearly indicate the ability to work with a connection to a hot water supply, attempting to independently rationalize the operation of the PMM is prohibited.
How to connect to the drain
You need to install a new siphon with a separate pipe under the kitchen sink. The drain circuit is connected to it.
This takes into account two important requirements:
- The drain circuit should cut into the siphon at an angle. In this case, most of the water will flow away by gravity.
- At the connection point of the circuit, you need to additionally create a small bend to prevent water from being drawn from the sink.
If the PMM is located far from the water source, you will have to install another tee. A hose will go from it to the siphon under the sink.
Choosing the optimal place to install the dishwasher
Choosing a place to install the dishwasher
Before you begin installing the dishwasher, decide where it will be located. It is better to choose a place near the pipes in order to worry less about communications.
The distance to the sewer is also important. For example, when the sewer is located a few meters from the car, there is not enough flexible wiring and dirty water stagnates inside. In such situations, plastic or metal pipes are used, which remove the sagging, but also make the installation of a built-in dishwasher more expensive.
But if not only the distance is large, but also the entrance to the sewer is high, then the equipment needs to be placed on a pedestal. This will help make the desired angle of inclination for the drain pipe. But all these manipulations can be avoided if you place the machine next to the sink.
You should not install a dishwasher in the kitchen if there is a heater, radiator, stove or oven nearby. Equipment deteriorates from high temperatures. Placing it near other electrical appliances is not prohibited, but it is not recommended either; such proximity will shorten its service life.
Also consider the location of the outlet and the length of the wire. It is prohibited to use an extension cord for connection, and making a new outlet is labor-intensive.
Do not close the plug tightly. There must always be access to it in order to pull it out in case of fire.
How to install a front on a built-in dishwasher door
There are two ways to attach the facade:
- Partial fastening. In this case, the panel covers the main part of the door, while the control panel remains visible.
- Full installation. The dishwasher door is completely covered by a panel.
The finished front panel is attached only with self-tapping screws. The use of glue, even very durable one, is undesirable. Most likely, due to constant changes in temperature, it will become unusable and lose its properties.
When using self-tapping screws, make sure that they fit firmly into the material, but do not come out of it either from the front or back side. Otherwise, there is a high risk of injury and equipment damage.
The facade is fastened starting from the handle. To carry out this work, dishwasher manufacturers make special holes on the door and also offer templates for fixing the parts.
Upon completion of installation, check how smoothly the façade is installed and whether there are any gaps. If you are satisfied with the appearance, you can begin to directly operate the PMM.
Installation diagram
Built-in dishwashers come in full-size, narrow and mini units. Their installation diagram is shown in the lower figure.
- The dimensions of full-size machines are defined as the width, depth and height of the device body. Standard dimensions W/D/H - 598/545/818-868 mm. Such dishwashing devices are built between the floor cabinets of kitchen furniture under the countertop;
- Narrow dishwashers are compact. W/D/H - 448/570/805-870 mm. They are also inserted between the cabinets under the tabletop;
- Mini cars are conditionally classified as built-in appliances. Small devices (550/500/550 mm) are installed both inside kitchen cabinets and placed on the table.
In each specific case, the dimensions of the washing units must be clarified. Manufacturers strive to unify the dimensions of appliance housings as much as possible, based on the standard dimensions of mass-produced kitchen units.
The opening between the floor cabinets, 60 cm wide, allows you to build in a full-size model with its standard height of 87 cm. Before purchasing a dishwasher, you need to consider all of the above.
Preparing for work after installation
So, all communications are connected to the PMM, and the device is built into the kitchen set. But don’t rush to load the dishes into the trays - you need to set up the device before the first start.
Setup consists of the following steps:
- Set the salt flow level according to the water hardness. The harder the water, the higher the level needs to be set. You can determine the hardness parameter using a special test (visually hard water can be determined by white stains on the sink).
- Pour salt into a container. It is located at the bottom of the machine and is closed with a separate lid. Before the first wash, you need to fill this compartment to the top with water and do not forget to screw the lid on.
- Pour rinse aid into the reservoir and add detergent. The rinse aid consumption is adjustable - for the first washes it is better to leave it at medium, but then adjust it - increase it if the dishes do not shine or dry slowly.
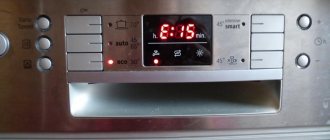
When you first turn on the PMM, the indicators will most likely light up, indicating the need to fill the compartment with salt and rinse aid.
After filling, the indicators should go out, and then you can start loading dishes and washing. After the first cycle, it is necessary to carefully check the connections between the hoses and the drain in order to immediately detect and eliminate possible leaks.
Adviсe
And in the end, we’ll give some useful tips on how to connect a dishwasher with your own hands without errors:
- You should not send the drain to the sink, although this simplifies installation. The hose could slip out and cause a flood.
- If you connect an Electrolux dishwasher to the sewer, know that it should stand as level as possible. The maximum deflection angle is 2 degrees.
- Siemens machines have a different problem. Often their models do not fit standard kitchen unit sizes, so you need to carefully compare the dimensions before purchasing.
- Do not ground the pipes! Be sure to bring it to the shield bus.
- You need to leave room for air circulation. It is correct if the distance between the machine and the walls is at least 5 cm.
- There are always instructions for the machine. It is your main guide, since when connecting a dishwasher to water supply and sewerage, some rules depend on the model and the features of its design.
- Extension cords must not be used. They are often the cause of fires and breakdowns.
- Do not connect a dishwasher or other appliances to the same outlet to avoid overload.
We hope that our instructions were useful to you!
Choosing a location
Once you have collected all the necessary tools and materials to properly connect the dishwasher, you can begin choosing the installation location. Remember, the earlier during the repair work you think about purchasing such equipment, the easier the installation will be. The only exception is the free-standing model, when installation in the kitchen wall is not required. At the stage of kitchen design and renovation, you don’t have to worry that the niche for the PMM will be small, or that the connection connectors simply won’t be installed nicely.
What to do if the kitchen is already ready? Which option is appropriate in this case? Freestanding or portable, they do not require a cabinet, which means there are no problems finding a niche for installation.
Carefully consider where exactly the machine will be located, since it is important that the PMM is located as close as possible to communications, because need access to pipes. If the equipment is far from communications, this will complicate the installation process.
We prepare tools and materials
Regardless of which PMM model you choose - compact, built-in or free-standing, to connect the machine, you will have to prepare the tools in advance according to the list. What does it take to build a machine?
- electric drill;
- screwdriver;
- knife;
- construction level;
- 2 adjustable wrenches;
- screwdriver for checking wiring (indicator).
When installing PMM, craftsmen recommend installing a leakage protection system. This is protection against accidents and force majeure in the event of some problem with drainage, sewerage, etc.
As for materials, they must be purchased in advance. There are standard situations when ¾-inch metal-plastic pipes with grounding already present were installed throughout the building. In this case you need:
- ¾" tee;
- ¾" stopcock;
- water supply tape;
- grounded socket;
- wire of optimal cross-section and length.
Additionally, you can buy a filter for cleaning. Depending on the situation, it may be that extended hoses are required, because... In the kit, manufacturers most often add very short ones that do not reach the connection point.
Grounding electrical wiring
PMM is one of the most dangerous equipment from the point of view of electrical safety. And since the kitchen has the most equipment, the tension increases accordingly. Therefore, it is necessary to have a grounding connection when installing the PMM.
If there is a grounding, there is a possibility that the phase voltage of the electrical network will appear on the device body in the event of a break in the neutral wire. This kind of situation can act as a catalyst for electric shock to a person. Now you know how to properly prepare the electrical wiring for installing the machine.
First launch of PMM
Before starting, you will have to activate the test wash, since there is a possibility that the parts and elements inside the machine are lubricated, this will allow you to wash it inside, thereby getting rid of dirt and dust. You can see how the machine works, whether it hums, how quickly the water fills, how much detergent is needed, whether it is necessary to add salt or rinse aid. If you are connected to hot water directly, look at the quality of the water, whether there are streaks or stains on the dishes.
Be sure to turn the sprayer over before turning it on to see if it rotates normally. After this, pull out the filter and see if it is intact. Fill in the gel, add salt, and on the control panel you will have to indicate the type of product you are using. We launch the PMM and observe the work. If you hear any strange sounds or see a leak, all this can be corrected. Don't forget that you will need to let the machine dry and cool. Once you understand how to use the equipment, you can start washing dishes if all defects are absent or eliminated.
Connection between drain and sewer
This method of independently connecting the dishwasher to the sewer is considered very common. In this case, the connection will be made through a siphon. The method in question requires the technician to act carefully and follow all the advice regarding connecting the dishwasher to the sewer. The drain will need to be equipped with a special outlet and a check valve. This will reduce the likelihood of water flowing directly from the drain into the dishwasher.
- The outgoing hose from the machine must be fixed to a wall or cabinet. It is best to place it 50 cm above the drain entrance.
- To drain water from the dishwasher on its own, tilt the hose at a special angle. The angle is specified in the instructions for your car model.
- We connect the drain circuit to the siphon under the sink itself.
- When there is no drain siphon under the sink, then the PMM drain hose must be connected to the sewer pipe outlet, after which the joint should be wrapped as tightly as possible with tape.
- Under pressure, the hose may fall out; to keep it tightly in the sink, you will need to use a special holder.
- To connect to the siphon, you need to use an additional fitting. In Moscow stores you can find ready-made options for PMM.
- Before connecting the drain, you will need to re-check the hose size. It is important that there is enough of it; it is better not to use a very long one, because... this has a negative impact on the efficiency of pumping equipment.