Installation and connection
The Hans dishwasher is quite simple to use. By following simple installation rules and recommendations, you can ensure long-term performance.
Basic rules for installing a dishwasher:
- Upon receipt and delivery, check the integrity.
- Before turning it on, be sure to ground the outlet; call a technician to do this.
- Check the power supply readings.
- During installation, turn off the power and water supply (close the valve).
An extension cord cannot be used; an original plug is required to connect to the outlet.
There are a number of the most important recommendations from the manufacturer that ensure the longevity of the machine:
- Before use, carefully read the built-in dishwasher manual and safety precautions.
- Restrict access to the car to people with mental and physical disabilities and children.
- Place sharp instruments horizontally or vertically with the sharp end down to prevent injury.
- To avoid damage, do not place heavy objects on the machine.
To eliminate breakdowns, it is better to contact professionals at certified centers.
Dear Customers, Before plugging in the cookware cord...
Page 2
- Image
- Text
Dear customers,
Before you plug the dishwasher into an electrical outlet and
turn on the device, be sure to read the entire instruction manual
operation and installation. The instructions it contains will help reduce
risk of personal injury and damage to the device.
Machine documentation should be kept in a safe place for correct
operation and seeking help if necessary.
These operating instructions have been prepared for
devices and the individual features described herein may
do not touch your dishwasher.
Device
Each model offered by the Hansa brand has its own characteristics, but basically the PMM scheme is as follows:
- control panel equipped with a display;
- baskets for dishes (upper, lower);
- shelf for cups;
- instrument compartment;
- dispensers for detergent, rinse aid, salt;
- filters and sprayers inside the workspace;
- drain hose;
- inner tube;
- water supply hose.
How to use
The basic rules of use are as follows:
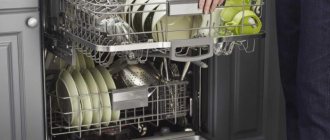
- The upper basket is designed to accommodate lightly soiled tableware made of fragile glass and porcelain. It is best to place glasses and cups here, and place cutlery horizontally between them.
- Plates and cups must be placed in such a way that they do not touch the filters and sprinklers.
- The lower basket is intended for very dirty plates, cups, for example, baking trays, bowls, salad bowls. The manufacturer recommends placing the plates upside down so that the entire surface gets water.
- Special trays (available in some models) are designed specifically to accommodate spoons and forks.
Indicators
Each Hans car has the following panel icons:
- Power supply – lights up when the equipment is plugged in.
- Half load indicator.
- Level indicator for cleaning and polishing solution (if it is on, you need to add more).
- Salt presence/absence sensor (if it lights up, you need to add salt).
Buttons
The following buttons are located on the PMM body:
- “On/Off” to stop or supply power;
- program selection button, cleaning cycle;
- half load button if less than 7 sets of dishes have accumulated;
- reboot and start.
Programs
As standard, Hansa appliances have the following dish cleaning modes:
- Standard sink for everyday use, used for dishes without dried dirt.
- Intensive mode, which makes it possible to clean even old dirt from dishes.
- Delicate mode – used for glasses and glasses without heavy soiling.
- The “hour” cycle is designed for lightly soiled dishes; there is no drying of the dishes.
- Pre-soaking – required for heavily soiled dishes, used before the main wash.
- The “eco-cleaning” mode is intended for cutlery made of crystal and porcelain to provide delicate washing and prevent chips and cracks.
It is necessary to turn on the machine only after all compartments have been loaded.
How to turn it on
Hansa PMMs are quite easy to use; in order to turn on the dishwasher, you need to:
- Plug in the power cord and check if the water supply valve is open.
- Add dishes, cleaning agent and close the door.
- Select a program, mode and press the appropriate button.
- Click "Start".
First start
The first start of the washing mode must be carried out according to the following recommendations:
- Load the dishes into the working plane of the device and, if possible, move them towards the rear wall.
- Add the tablet, powder and salt, pour in the rinse aid.
- After downloading and selecting the “Start” button, the machine will start working after 10 minutes.
If you urgently need to stop the machine and change the cleaning mode, you can do this before the device begins to flush detergent from the specialized compartments. To do this, you can open the door, and then the Hansa appliance will automatically stop operation. After this, switch the washing mode, close the door again, wait 10 minutes - the machine will start working.
How to drain the water
If the filter is clogged and water does not flow out of the machine completely, you must drain the water from the Hansa dishwasher yourself:
- Select the manual water drainage program on the control panel.
- Monitor the process.
- Disconnect the equipment.
- Close the water supply valve.
- Place rags under the device to absorb any remaining water from the work area.
- Unscrew the filter cover at the bottom of the housing and the salt compartment cover.
- Tilt the machine on one side to allow any remaining water to drain.
- Wash the inside of the device dry, leave the door open for 10-15 minutes so that it dries well inside to prevent an unpleasant, musty smell.
If the PMM is used only in the summer in an unheated room, then leaving it with water for the winter is dangerous. When water freezes inside, it ruptures the plastic pipes, requiring expensive repairs.
Identification of signs on the dishwasher
The location of the panel depends on the type of dishwasher. If this is a built-in model, the keys and indicators are located at the end of the door. Since the front part of built-in PMMs is hinged, there is no need to place the control system on the front part of the door.
Freestanding machines are a full-fledged element of the interior, so the control panel is located on the front part. Buttons and indicators may be labeled, but often these are foreign names that cannot be understood without instructions. It is more convenient when the keys are designated by symbols: pan, snowflake, asterisk. Then the user can intuitively understand the meaning of the buttons.
The variety of symbols depends on the brand of the car (Ikea, Ariston, Siemens). And also on the number of functions of the model.
Let's look at the designations of the most popular brands of dishwashers.
Bosch (Bosch)
Bosch dishwashers are the most popular on the Russian market. Manufacturers have created a wide range of models, a wide variety of modes and are introducing new technologies. Let's look at the decoding of the most common symbols (follow the numbering in the picture).
- Pan with stand (1). The symbol speaks for itself - intensive mode (70 degrees), which allows you to wash heavy dirt from pots, baking sheets, and frying pans. Duration - 115 minutes, water consumption - 21 liters.
- Auto (cup and saucers) (2). “Automatic” mode (one might say “Standard”) takes place at a temperature of 45-65 degrees. Suitable for a variety of dishes, except for items made of delicate materials. Operating time - 140 minutes, consumes 19 liters.
- ECO (Economical Cleaning) or glass and cup on a plate (3). Initially, a “Pre-rinse” is carried out, and then a program at 50°C. Lasts 140 minutes, spends 14 liters.
- A glass with a cup on a stand and two arrows to the right (4) - a quick cycle without an initial rinse at 45 degrees. Characteristics: 30 minutes, 10 l.
- “Shower” of water drops (5) – “Pre-rinse”. The program allows you to clean dishes from food residues and prepare appliances for a thorough wash. Time: 19 minutes, water: 4 l.
- One glass. Indicates “Delicate wash”, works at a temperature of 40 degrees. In this case, you can wash fragile items. Takes 75 minutes, spends 15 liters.
- Plus and minus with the letter h (6) - allow you to adjust the cycle time.
- Clock with arrows to the right (7) - reducing the duration of the mode by half (VarioSpeed).
- ½ (8) - half load mode. If you haven't collected dirty dishes for a full cycle, load only half with a 30% resource saving.
- Pan with rocker arms (9) - “Intensive Zone”. Water flows into the lower part under stronger pressure than into the upper part.
- Baby bottle (10) - the hygienic mode allows you to process dishes at high temperatures. Perfectly disinfects children's dishes.
Start and Reset keys on the panel will help you start a wash cycle or perform a reboot.
In addition, the dishwasher control is equipped with operation indicators. They inform the user about a particular program. Let's figure out how to understand the meaning of the light bulbs on the Bosch panel.
- Brush (1) – washing indicator.
- End (2) — end of the program.
- The faucet icon (3) is a water supply light.
- Wave-shaped arrows (4) indicate the presence or absence of salt in the ion exchanger.
- Sun (snowflake) (5) - presence of rinse aid in the compartment.
In dishwashers with a display, the wash modes are also equipped with lights. If they light up, the program is running.
- Icon + (1) - the ability to select a temperature in the region of +65-75°C.
- Auto (2) — automatic washing.
- “–” symbol indicates the temperature range from 35 to 45 degrees.
- Eco (4) - economical program.
- Glass and cup on a stand (5) - quick cleaning.
- Water jets (6) - pre-rinse.
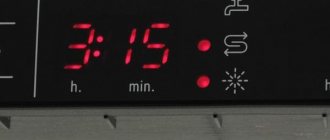
There is also a time indicator on the floor and on the display. In the first case, numbers are displayed on the floor that indicate the time until the end of the program. The latest models have a "Floor Beam" function. Instead of a sound signal indicating the end of the cycle, the machine flashes a beam.
Problems and solutions
Due to improper connection and operation, users often encounter problems and breakdowns.
Filling system problems
Such problems are always associated with blockages, so you should know how to eliminate them:
- Turn the water supply valve to the “Off” position and disconnect the machine from the mains.
- Disconnect the water supply hose from the housing and check for plugs and debris. Do the same steps with the filter and mesh.
- To remove stagnant debris, place the filter in water with citric acid.
- Carry out valve diagnostics by ringing the coils; if necessary, replace worn elements.
Checking the circulation pump
It is better to check the circulation pump when there is no water injection and it does not enter the working space of the machine, because due to the circulation pump, water flows into the rocker arms and the dishwashing function is activated. Diagnostics and repairs will be necessary if you hear knocking, buzzing, or noise.
For repair you need:
- Provide normal access to the bottom of the workspace and remove the bottom panel of the housing.
- Remove the fasteners and drain pump by turning the pump clockwise.
- Remove the special clamps with an adjustable wrench and disconnect the pump, replace the non-working equipment.
- Transfer the clamps and mounting bolt from the old pump to the new element and perform the same assembly, only in reverse order.
Hansa dishwasher indicators - E1/E4
- E1/soaking/faucet icon flashes - indicates problems: lack of sufficient pressure, the water tap to the device is closed, or the water in the house is turned off. In the absence of the listed problems, it indicates maintenance problems - a call to the technician is required.
- E4/ECO warning light - incoming water level too high/overflow, may also require calling a repair technician.
Installation and connection
The Hans dishwasher is quite simple to use. By following simple installation rules and recommendations, you can ensure long-term performance.
Basic rules for installing a dishwasher:
- Upon receipt and delivery, check the integrity.
- Before turning it on, be sure to ground the outlet; call a technician to do this.
- Check the power supply readings.
- During installation, turn off the power and water supply (close the valve).
An extension cord cannot be used; an original plug is required to connect to the outlet.
There are a number of the most important recommendations from the manufacturer that ensure the longevity of the machine:
- Before use, carefully read the built-in dishwasher manual and safety precautions.
- Restrict access to the car to people with mental and physical disabilities and children.
- Place sharp instruments horizontally or vertically with the sharp end down to prevent injury.
- To avoid damage, do not place heavy objects on the machine.
To eliminate breakdowns, it is better to contact professionals at certified centers.
Device
Each model offered by the Hansa brand has its own characteristics, but basically the PMM scheme is as follows:
- control panel equipped with a display;
- baskets for dishes (upper, lower);
- shelf for cups;
- instrument compartment;
- dispensers for detergent, rinse aid, salt;
- filters and sprayers inside the workspace;
- drain hose;
- inner tube;
- water supply hose.
How to use
The basic rules of use are as follows:
- The upper basket is designed to accommodate lightly soiled tableware made of fragile glass and porcelain. It is best to place glasses and cups here, and place cutlery horizontally between them.
- Plates and cups must be placed in such a way that they do not touch the filters and sprinklers.
- The lower basket is intended for very dirty plates, cups, for example, baking trays, bowls, salad bowls. The manufacturer recommends placing the plates upside down so that the entire surface gets water.
- Special trays (available in some models) are designed specifically to accommodate spoons and forks.
Indicators
Each Hans car has the following panel icons:
- Power supply – lights up when the equipment is plugged in.
- Half load indicator.
- Level indicator for cleaning and polishing solution (if it is on, you need to add more).
- Salt presence/absence sensor (if it lights up, you need to add salt).
Buttons
The following buttons are located on the PMM body:
- “On/Off” to stop or supply power;
- program selection button, cleaning cycle;
- half load button if less than 7 sets of dishes have accumulated;
- reboot and start.
Programs
As standard, Hansa appliances have the following dish cleaning modes:
- Standard sink for everyday use, used for dishes without dried dirt.
- Intensive mode, which makes it possible to clean even old dirt from dishes.
- Delicate mode – used for glasses and glasses without heavy soiling.
- The “hour” cycle is designed for lightly soiled dishes; there is no drying of the dishes.
- Pre-soaking – required for heavily soiled dishes, used before the main wash.
- The “eco-cleaning” mode is intended for cutlery made of crystal and porcelain to provide delicate washing and prevent chips and cracks.
It is necessary to turn on the machine only after all compartments have been loaded.
How to turn it on
Hansa PMMs are quite easy to use; in order to turn on the dishwasher, you need to:
- Plug in the power cord and check if the water supply valve is open.
- Add dishes, cleaning agent and close the door.
- Select a program, mode and press the appropriate button.
- Click "Start".
First start
The first start of the washing mode must be carried out according to the following recommendations:
- Load the dishes into the working plane of the device and, if possible, move them towards the rear wall.
- Add the tablet, powder and salt, pour in the rinse aid.
- After downloading and selecting the “Start” button, the machine will start working after 10 minutes.
If you urgently need to stop the machine and change the cleaning mode, you can do this before the device begins to flush detergent from the specialized compartments. To do this, you can open the door, and then the Hansa appliance will automatically stop operation. After this, switch the washing mode, close the door again, wait 10 minutes - the machine will start working.
How to drain the water
If the filter is clogged and water does not flow out of the machine completely, you must drain the water from the Hansa dishwasher yourself:
- Select the manual water drainage program on the control panel.
- Monitor the process.
- Disconnect the equipment.
- Close the water supply valve.
- Place rags under the device to absorb any remaining water from the work area.
- Unscrew the filter cover at the bottom of the housing and the salt compartment cover.
- Tilt the machine on one side to allow any remaining water to drain.
- Wash the inside of the device dry, leave the door open for 10-15 minutes so that it dries well inside to prevent an unpleasant, musty smell.
If the PMM is used only in the summer in an unheated room, then leaving it with water for the winter is dangerous. When water freezes inside, it ruptures the plastic pipes, requiring expensive repairs.
Replenishing salt in the dishwasher
Page 9
- Image
- Text
7
Pour salt into the container using the included watering can (Fig. 2).
Add enough salt to fill the container. Capacity
is approximately 1 kg of salt.
Tighten the plug thoroughly.
Start the washing program immediately after filling the salt container. Washing program
will prevent damage to the machine due to leakage of salt solution.
If your dishwasher is equipped with a low salt warning light, then
filling the machine with salt, the light usually goes out after a few days (water in the container
must reach a certain concentration)
Attention
Each time after replenishing the amount of regeneration salt, the program should be started
sinks
Replenishing salt in the dishwasher
Attention
To soften water, use only dishwasher salt.
The manufacturer is not responsible for damage resulting from the use of
inappropriate type of salt.
Do not use coarse salt as it will be late in reaching its proper level.
concentrations in the water, which can cause the low salt light to stay on.
Small grains or salt in powder dissolve much more easily.
Never use kitchen or table salt. These types of salt do not dissolve easily
in the water and will damage the softening system.
Remove the lower rack from the dishwasher.
Unscrew the cap of the salt container by rotating it against
clockwise (Fig. 1).
When filling for the first time, pour 0.5 liters of water into the salt container.
Problems and solutions
Due to improper connection and operation, users often encounter problems and breakdowns.
Filling system problems
Such problems are always associated with blockages, so you should know how to eliminate them:
- Turn the water supply valve to the “Off” position and disconnect the machine from the mains.
- Disconnect the water supply hose from the housing and check for plugs and debris. Do the same steps with the filter and mesh.
- To remove stagnant debris, place the filter in water with citric acid.
- Carry out valve diagnostics by ringing the coils; if necessary, replace worn elements.
Checking the circulation pump
It is better to check the circulation pump when there is no water injection and it does not enter the working space of the machine, because due to the circulation pump, water flows into the rocker arms and the dishwashing function is activated. Diagnostics and repairs will be necessary if you hear knocking, buzzing, or noise.
For repair you need:
- Provide normal access to the bottom of the workspace and remove the bottom panel of the housing.
- Remove the fasteners and drain pump by turning the pump clockwise.
- Remove the special clamps with an adjustable wrench and disconnect the pump, replace the non-working equipment.
- Transfer the clamps and mounting bolt from the old pump to the new element and perform the same assembly, only in reverse order.
Drain system malfunctions
If, after washing dishes, the water does not completely leave the workspace and accumulates below, it means that there is a problem with the drainage system. Often this is due to stuck and accumulated debris, to fix the problem you need to do the following:
- Remove all plates and glasses from the machine and pull the lower rocker towards you, carefully unscrew the upper rocker.
- Check sprinklers for debris. If necessary, clean the injectors using a toothpick.
- The drain filter and the metal mesh at the bottom of the working area should also be inspected and cleaned.
- If glasses or plates were chipped during the washing process, perhaps a splinter blocked the pump; Wearing gloves, it is necessary to carry out diagnostics.
Replacing the level sensor
In dishwashing equipment, the level sensor is called a pereostat; its function is to monitor the water level in the tank. Failure of this element may consist of physical wear, blockage, or malfunction of the electronic part.
Before a complete replacement, you need to check the element for blockages. To do this, you need to unscrew 2 screws from the bottom of the machine, the mounting clamp, and blow out the tube. The electronic part can be diagnosed using a multimeter.
Heating element diagnostics
The basis of the heating system is a flow-through heater, which is necessary to increase the temperature of the water when cleaning dishes. Its breakdown may be due to the inoperability of the heating element located under the bottom of the Hansa dishwasher. It is better to entrust the installation of the heating element to a specialist; for self-repair, the following is required:
- Disconnect the heating element with the pump.
- Unscrew the pump fasteners by turning them clockwise and remove the rubber seal.
- Remove all tubes and pipes, replace the non-functioning part and reassemble everything in the reverse order.
Leak
To eliminate leaks, it is necessary to identify the exact cause and location; for this, the following occurs:
- Carefully inspect the inside and outside of the dishwasher.
- Check the quality of door closure and the reliability of the door seals; if necessary, replace them.
- Inspect the rubber seals on the drain pump; their wear can also lead to leakage. In this case, it will be necessary to replace the seal or the pump completely.
- Conduct diagnostics of the hose at the inlet and outlet, if necessary, tighten the tightening elements or replace the hose.
Hansa brand PMMs are reliable, convenient and functional; for simple and long-term use, each model comes with detailed and understandable instructions.
Share on social media networks:
When choosing household appliances for the home, every housewife strives to choose the most reliable and easy-to-use and maintain unit. Especially when it is a dishwasher, which you will have to use every day, or even several times a day. The Hans dishwasher, the instructions for which are presented in several languages in a form that any user can understand, is German quality combined with a rich history and constant development of the brand. Let's talk in more detail about the various models of this German brand.
Basic moments
How to turn on the car? Any instructions for Hansa household appliances are quite detailed and contain about 40 pages of text, diagrams, tables and photos, which are convenient to use both when connecting the device and installing it, and during its direct operation, where you can also see how the machine turns on.
On the first pages, the manufacturer writes a greeting and gratitude for choosing the brand, as well as a recommendation to carefully read the instructions for a specific model before using it.
Instruction sections:
- symbols used in the instructions and their interpretation;
- safety precautions for handling a Hans dishwasher;
- installation instructions;
- description of the main parts of the machine;
- recommendations for preparation for launch;
- description and selection of washing programs;
- cleaning and care tips;
- possible errors and ways to eliminate them;
- device data sheet.
Any Hans dishwasher is equipped with similar information. The instructions are also supplemented with practical advice from the manufacturer.
Important! You will find similar recommendations in the instructions for any equipment from different manufacturers. If you haven’t bought one yet, but are just planning to get a dishwasher, perhaps our reviews of the best models in the following categories will help you:
Let's look at the most important points in more detail.
Basic modes and choosing the right one
The basic set of programs in all dishwashers of this brand is the same. This:
- Pre-washing, also known as soaking, is for heavily soiled or burnt dishes.
- Standard program - suitable for medium soiling and almost all types of dishes.
- Delicate - for glass, porcelain, crystal.
- Eco mode is economical and environmentally friendly, not suitable for heavy pollution.
- Night - the quietest mode, medium in duration. Typically the temperature is 50°C.
There are others, but the most popular ones are listed above.
Program selection
Different models of Hans dishwashers have their own characteristics. We list the main functions that are found in almost all devices:
- Pre-wash or pre-soak - used when you need to soak stuck or burnt-on food residues.
- High-intensity washing allows you to remove the most stubborn stains at temperatures of +65 - +70°C.
- Standard sink - for cleaning dishes from medium to heavy stains.
- Eco-wash is used for all degrees of soiling, except heavy. It features reduced consumption of electrical energy, water and detergent.
- The delicate wash is suitable for fragile items: glass, porcelain, crystal at a temperature of +45°C.
- Quick wash is half as long as the standard cycle and takes place at +55°C.
Safety precautions
In this section, the manufacturer gives valuable instructions, following which you will be able to use the device correctly and definitely not harm yourself:
- Check the packaging and integrity of the machine upon receipt. If you have any doubts about the integrity of the device, do not use it, but contact the seller for clarification.
- Before connecting the device to the network, the outlet must be grounded. Doing this yourself is strictly prohibited, so you will have to contact a specialist.
- Before turning on, check the electrical readings with the readings required for the operation of the Hans dishwasher.
- During installation or repair, it is necessary to turn off the power and water supply to the device.
- The manufacturer does not recommend using a connection via an extension cord, and also requests that only the original plug be used to plug into the network. The socket and plug must be quickly and easily accessible.
- The use of a Hans dishwasher by persons who have not studied safety precautions, or by people with physical or mental disabilities is prohibited if the danger of using the device is high for them.
- Separately, the instructions for the Hans dishwasher highlight the use of the device by children. Children over 8 years old are allowed to wash dishes in it, provided they have undergone instruction and understand the dangers that can occur if handled incorrectly. Children under three years of age are not allowed near the device. It is forbidden to play with the machine, drink water from the device, and detergents must be stored out of the reach of children.
- During use, remember that the water may be heated, so there is a high risk of getting burned when opening the door while running the program.
- To avoid injury from sharp objects, they are placed horizontally in the upper compartment or point down in the cutlery compartment.
- It is prohibited to use a Hansa dishwasher for purposes other than its intended purpose - washing dishes.
- Solvents must not be used in the device due to the risk of explosion.
- Do not sit down, stand up or place heavy objects on the door of the device - the machine may tip over.
- If repairs are necessary, you should contact a specialist.
These are the manufacturer’s main recommendations for safe handling of equipment. You can always find out more about the requirements and recommendations in the instructions for your model or use our article, which describes in detail the installation and connection processes of the dishwasher.
Proper care of your PMM
To avoid damage, use PMM only for dishes that can be washed in it. Do not load wooden or pewter items; not all dishwashers are suitable for washing plastic items. Don't forget to take care of the device. Wipe the doors, clean the filter. Of course, there are models with self-cleaning, but this also requires periodic supervision. The door seal should also be cleaned with a special product or a melamine sponge to prevent mold from forming or drying out.
Device structure
The design of dishwashers is determined by the manufacturer and depends on the specific model; it can also be built-in. In general, the device looks like this:
- drain hose and water supply hose fitting;
- filters and sprayers;
- inner pipe;
- dispensers for salt and detergents;
- shelf for cutlery;
- shelf for cups;
- lower and upper baskets;
- control panel with display.
Important! Please note that some parts may not be available depending on the model or that the Hans Dishwasher may require additions. Always check the instructions for details.
Next, we’ll look at how to properly place dishes in the dishwasher.
First start
This procedure is very important for the further successful operation of the device. First, you should read the instructions very carefully and strictly follow the recommendations given there. Here are some tips:
- The first launch should be carried out without dishes.
- Fill the ionic salt container with at least one liter of water.
- Connect the device to the network and open the water.
- Select medium temperature and the shortest program.
- Press the start button. The machine will start working approximately 10 seconds after starting.
Loading the machine
You can highlight the basic rules for loading products into the device, the observance of which will allow you to use it most effectively.
Upper basket
In this basket you can place fragile glassware, porcelain, as well as tea pairs, cups and glasses. You can also place cutlery between them. The dishes must be laid out so that they are not touched by the spray nozzles when the device is operating.
Important! It should be remembered that items placed in the upper basket should be lightly soiled.
Lower basket
More soiled items and deep dishes can be placed in this basket. For example: bowls, pans, baking sheets. As in the case of the top one, it is necessary to arrange objects in such a way that they do not touch them when the device is operating. And so that the water drains, it is better to place the products upside down.
Cutlery tray
If the machine is equipped with a special compartment, then cutlery should be placed in it. It is important to fold them with their handles up, place the longest utensils in the middle, and also make sure that they do not cling to each other.
You can find out more about the loading rules in the instructions for the Hansa dishwasher of your particular model. Our article on how to use a dishwasher correctly will also help you.
Let's take a closer look at the design of Hansa machines using the example of several models.
Hansa ZWM4577WH
This is a floor-standing, free-standing, electronically controlled device that can hold up to nine place settings. The dishwasher is equipped with five programs and five temperature settings, as well as Aquastop protection.
Control Panel
Controlling the device involves pressing the appropriate buttons and their combinations.
Buttons and indicators:
- signal and power on/off button;
- signal about the need to fill the compartment for salt and rinse aid;
- signal for switching on the half load function;
- mode selection buttons and LEDs for them.
Modes:
- The normal cycle is to wash lightly soiled dishes without dried particles. Duration: two hours.
- Intensive mode - allows you to wash strong, even dried stains. Cleaning duration is 155 minutes.
- Eco mode - suitable for washing fragile materials such as glass or porcelain. Cycle duration is 160 minutes.
- Express - a short one-hour cycle, suitable for lightly soiled items that can be dispensed with without drying.
- Rapid is a very fast half-hour program that is suitable for light soiling, without the need for drying.
Hansa ZWM 476 SEH
This is a full-size dishwasher with six different programs and five temperature settings, as well as Aquastop leak protection. The device can hold up to 10 place settings. The device control type is electronic.
Let's look at the main indicators and buttons on the control panel.
Indicators:
- Power supply. When the indicator is on, the machine is connected to the network.
- Program indicators. Indicate the selected cycle.
- ½ load. When the indicator is on, it means that the half load function is active.
- Lack of dish polish solution - if it burns, you need to add product to the compartment.
- Lack of salt - when the indicator is lit, add salt to the appropriate compartment.
Buttons:
- Turn on/off the device. By pressing this button, electricity flows into the device or stops flowing.
- Selecting a program. Using this button you can select the required washing cycle.
- ½ Load Enables the half load function. It can be used if you have accumulated less than 7 sets of dishes.
- Start/Reboot. Used to restart, select a cycle or reboot the device.
Next, let's talk about the wash cycles available for this model.
Programs
The model has six modes:
- Daily wash - designed for washing dishes without dried stains.
- Intensive mode - allows you to wash away heavy stains, but without dried food particles.
- Delicate cycle - will help wash glass or porcelain dishes, but without heavy soiling.
- Eco 50 - allows you to wash more dirty glass or porcelain items.
- One-hour cycle - designed for dishes with light soiling, without additional drying of the items.
- Soaking mode - will help get rid of dried dirt before the main wash.
Important! Switching on is possible only after filling all the necessary containers with the product and loading it with dishes. In order not to spend a lot of money on purchasing consumables, but also not to lose on the quality of detergents, use our thematic selections:
First start
In order to start the washing cycle, you must perform a certain procedure:
- Load dirty dishes into the device and move them to the back wall.
- Add detergent, salt and rinse aid to the required compartments.
- Connect the device to the network and open the water supply.
- Use the program selection button to set the desired mode.
- Press the start button to start the device.
The dishwasher will start operating approximately 10 seconds after starting.
Important! You can also change the program, but before the machine starts washing detergent out of the trays. To do this you need to open the door. The machine will automatically pause. Next, you can select the desired program and close the door. The device will resume operation in the new mode in approximately 10 seconds.
Features of the first activation of the Hans PMM
Of course, before installation and first launch, you must read the instructions. Make sure your water and sewer connections are correct, purchase manufacturer-approved cleaning products, and then get started. The very first cycle is performed without dishes. But there are nuances:
- Pour approximately 1 liter of water into the salt container.
- Plug in the device and turn on the water supply.
- Among the temperature modes, choose medium, most often it is 30°-40°C.
- Activate the shortest mode, usually Eco or Express depending on the series.
- Click "Start".
- After about 10 seconds the device will start.
Hansa ZIM 414 H
This built-in dishwasher can hold up to 9 standard place settings. The model has 4 programs and is protected from leaks.
Control Panel
Key control panel elements include:
- Washing program selection buttons.
- Program indicators.
- Indicators of lack of salt and rinse aid.
- Device on/off button and corresponding indicator.
Modes
The model is equipped with four programs:
- Intensive mode - allows you to wash very dirty dishes with dried particles. The cycle lasts 130 minutes.
- Short wash is a half-hour cycle that can handle lightly soiled dishes without starch.
- The ECO program will help wash lightly soiled dishes, but will cope with starch. The cycle duration is 160 minutes.
- 3 in 1 mode - a cycle suitable for daily washing of dishes with dried stains lasting 160 minutes.
Important! All programs additionally dry dishes, with the exception of the short cycle.
The first start-up sequence is similar to the ZIM 414 H model.
3 in 1 program option
Page 12
- Image
- Text
10
PROGRAM OPTION 3 in 1
The dishwasher has a special option for part of the “3 in 1” programs, for
work which does not require the use of regeneration salt or rinse aid
(see table of washing modes).
The only detergent you should use is a cleaning tablet.
dishwashers 3 in 1. This tablet should be inserted before starting
washing in a special container located on the top basket of the dishwasher
machines (see pictures below).
Attention:
For other programs, you can also use 3-in-1 tablets, however,
The salt containers and rinse aid dispenser must be filled, and
Adjust the water hardness and rinse level accordingly.
The use of 3 in 1 tablets is not recommended in the case of “Short” programs
due to their short duration, which leads to the impossibility of complete
dissolving detergent; see program table on next page.
1. Hang the 3 in 1 tablet container on the upper basket.
3. Place the 3 in 1 dishwasher tablet in a container suspended from
top basket, select the appropriate program and turn on the dishwasher
car.
Attention:
Do not use tablets larger than the container. Crumbled and
Cracked 3 in 1 tablets are not suitable for use in this program.
Keep detergents away from children.
Detergent should be inserted immediately before starting
programs.
2. The container should be hung in a place in the upper basket so as not to interfere
rotation of the spray blade.
Hansa ZIM 636 EH
This built-in dishwasher can hold up to 14 place settings. It has 6 programs, electronic control, and is also equipped with a child lock and leak protection. An additional pleasant bonus is the delay start function.
Control
The control panel consists of buttons and indicators. There are several more of them here than in the previously discussed models:
- On/off button and corresponding indicator.
- Warning indicator that the salt or rinse aid is running low.
- Indicator and delay start button. The delay start time can be set to 3, 6 or 9 hours.
- Indicator and ½ loading button. The button allows you to select a given program and the corresponding lamp lights up.
- Indicator of the selected mode.
Programs:
- Intensive - suitable even for dried stains. Cycle time is 140 minutes.
- Normal wash is a mode for washing every day. The utensils may have food residues, but not dry ones. The cycle lasts 160 minutes.
- Eco mode - allows you to wash medium-sized stains and is also suitable for daily washing. Its duration is 170 minutes.
- Glassware - allows you to wash lightly soiled dishes and glassware. The duration of the regime is two hours.
- Hour mode - suitable for dishes with light stains that do not require perfect drying. Duration: 60 minutes.
- Quick wash - allows you to wash lightly soiled dishes in half an hour, without using a dryer.
Important! The end of the cycle is accompanied by a sound signal.
Types of dishwashers
The Hansa company manufactures and supplies 3 types of dishwashers to the world market:
- built- in This type of dishwasher is built into a compartment of a kitchen unit, completely merging with it and not standing out from the furniture facade. The advantages of built-in dishwashers include their compactness, low cost (compared to full-sized models), and low consumption of resources. The capacity of the box is from 10 to 14 sets of dishes;
- free- standing Such equipment can be installed in any convenient place, with the possibility of connecting communications. One of the advantages of the dishwasher is the convenient location of the control panel on the front of the door. The maximum load of the dishwasher box is from 9 to 12 sets;
- desktop _ The most compact version of dishwashing equipment, with small capacity and a modest range of functions and additional options. The machine is easy to install on a table or countertop. Capacity – up to 8 sets.