Samsung washing machine diagram
The diagram becomes an assistant in repairs if you understand how to read it. For a master, working according to the scheme is a couple of hours of employment. For a beginner, it takes significantly more time, since you first need to learn what each letter means and what it refers to.
Without diagnostics, it is difficult to determine whether a washing machine is broken.
If a breakdown occurs in the machine, it is directly connected to the control module, and a letter and number appear on the display that is responsible for the problem. There is a separate scheme for it.
Only a specialist can quickly repair the washing machine.
We indicate the code designations:
- E1 - the problem lies in the water supply. Check the correct connection with the installation, pay attention to the relay and EC.
- E2 – problem with water drainage. This could be a clog, a problem with the relay, or a kinked tube.
- E3 – water in the tank overflows. The problem is probably in the relay.
- dE - either there is a problem in the locking system, or better close the hatch door.
- E4 – imbalance of clothes in the drum.
- E5, E6 – heating element is broken. Make sure it is in good working order, check the resistance, and if necessary, replace it.
- E7 – relay failure.
- E8 – the water temperature does not correspond to the selected mode.
Any washing machine can fail, especially if it has been in service for more than one year.
More complex problems, part replacements or repairs can be easily handled by a washing machine technician. Not everything can be done on your own, especially if a beginner takes on the task.
The washing machine tank is secured with bolts that can be unscrewed.
Taking out the internal parts
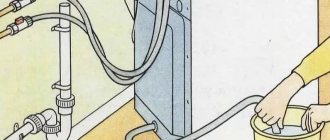
Next, according to the instructions, you should proceed to removing the drum and tank from the SMA housing. This process is the most labor-intensive in the process of disassembling the washing machine; it is better to do it not alone, but with the support of a family member. Before removing the tank, be sure to disconnect the power wires connecting it to the heating element and unfasten the tubes going to the tank. Afterwards, disconnect the electrical wires from the machine motor.
Then you have to remove the counterweights and put them aside. Finally, after completing all of the above steps, you can remove the tank and drum. Unfasten it from the shock absorber springs. After you have removed all the shock absorbers, you can call an assistant and work together to remove the reservoir. There is very little left to do - separate the washing machine motor from it, first removing the drive belt.
I would like to pay special attention to situations where there is a need to replace a bearing. This type of repair is classified as complex.
Before you begin to implement it, you should realistically assess your capabilities and knowledge in this area.
The whole difficulty is that in most SMA models the tank is non-separable and represents a monolithic part. And to disassemble it, you will have to saw the element, then seal it and glue it back together. If you are lucky and the manufacturer provides a collapsible tank in your washing machine, everything will be much simpler - you just need to unscrew the retaining screws and separate the two halves of the element.
By dividing the tank into two parts, you will gain access to the drum, on its shaft there is a bearing. To unfasten it, a special puller is used, but if such a tool is not available, the part can be carefully knocked down with a hammer.
After the bearing is uncoupled, it is necessary to clean the seat on the shaft and carefully check it for wear. When there are no deviations, you can install a new bearing.
After reading this instruction manual, you can safely begin removing parts of the automatic machine. Having the necessary set of tools on hand and having minimal knowledge of repair work, you can correctly disassemble the washing machine without any problems.
Interesting:
- Rating of Samsung washing machines
- Reviews of Samsung washing machines
- How to change a bearing on a Samsung washing machine
- How to repair a Samsung washing machine
- Samsung washing machines
- Review of a Samsung washing machine with an additional door
Reader comments
Share your opinion - leave a comment
Washing machine repair (+most common breakdowns)
When starting work, first determine the cause of the malfunction and the breakdown itself.
The heating element is most susceptible to breakdown.
The most common ones include:
- broken heating element. The reason for this: voltage surges and poor quality water. This type of problem includes the connections of the heating element and the temperature sensor. If there is a lot of scale, the sensor refuses to work, and if there is a short circuit, the contacts of the heating element will burn out.
- Malfunction of the SMA. The reason for this is the wear of the drive belt. This is indicated by the washing being stopped during operation and the drum not spinning. Replace only with the original belt.
- Broken inlet valves. When the rubber wears out, water enters the tank. If the valve is clogged, water will not flow into the machine.
- Bearing problem.
- Dirty pump.
- Drain pump.
To carry out repairs, you have to get to the internal parts.
Nothing is said about electronics. This is all due to the fact that the company creates the highest quality equipment and breakdowns in the electrical or wiring area are extremely rare.
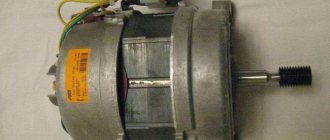
Motor failure is a serious problem.
If your top-loading machine does not heat the water:
- Observe safety precautions - unplug the machine. Unscrew the screws securing the top panel and remove it.
- Remove the dispenser tray. The bolts behind the tray need to be unscrewed.
- Remove the bottom panel.
- Remove the hatch cuff: move it, pry the clamp (metal), pull.
- Place the cuff inside.
- Here's how to properly remove the front panel of a washing machine: unscrew the screws that block the door and disconnect the wires.
- At the base you will see a heating element.
- Disconnect the heating element wires.
- Do not unscrew the central nut completely.
- To get the heating element you need to push through the central bolt.
- Pull out the thermostat.
Assembly will be carried out in reverse order. With vertical loading, such actions will not work.
- Complete the preparatory phase. Prepare your work area and tools. Don't forget about your smartphone.
- Remove the control panel. All machines have an automatic machine with vertical loading “Indesit”, “Atlant” or others, a different removal system. In some places you need to unscrew the screws on the sides and back, and in others you just need to remove the latches.
- Set the panel aside. If the contacts on it are in the way, you can take a photo and then remove them.
- The fastening screws are located behind the block.
- They (screws) need to be unscrewed and the cover removed. In some machines, this can be done by removing the side panel and loosening the door latch.
- Removing the filler valve. The clamps are loosened and the hoses are removed from their seats. The wires must be disconnected, the latch is pressed and it is possible to squeeze out the valve.
- The side panels are held on by self-tapping screws - remove them.
- The walls move down and are removed.
- Access to the front is open. To unscrew the panel, unscrew the screws.
- Access to nodes is open. You can remove the wiring that is attached to the tank.
- If a bearing needs to be replaced, this is done on site. Since the tank may not be removed.
- The drive belt is removed from the pulley.
- To get the heater you need to: turn off the power to the heating element, twist the nut and push the central bolt inward.
- We remove the motor: pull out the contact chips and twist the mounting bolts.
- We release the drain pump: loosen the clamp of the pipe and hose. We're filming.
- Turn the pump counterclockwise until the bolts come out.
You can disassemble the washing machine yourself.
You can handle the analysis of both types of loading yourself. To do this, you don’t need to make a lot of effort or buy special tools.
Repairing damage to a Samsung machine
We present to you a diagram of the device, which will come in handy for repairs. The technical content of machines of different brands is approximately the same. If you have already had to deal with replacing spare parts for a washing machine, then it will be easier for you to cope with the next repair.
List of components of the washing container: 1 – heating element (heating element); 2 – front part of the tank; 3 – front brackets, 5 pieces in total; 4 – heating element bracket; 5 – heating element spacers, 2 pcs.; 6 – screws, 3 pcs.; 7 – overlay; 8 – washer; 9 – screw; 10 – drum; 11 – sealing collar; 12 – rear part of the tank; 13, 14 – tank clamps, 9 pieces in total
Now you can start talking about certain types of breakdowns and how to repair them.
No. 1: unexpected stop during washing
The most common reason is insufficient water pressure. Then the machine stops, and to start it again, you need to turn it off and then turn it on again. If you have a lot of laundry loaded, in order for the machine to work, you just need to turn it off and remove the excess.
All problems with the washing machine stopping during operation can be dealt with quickly enough if you correctly determine the cause, which is not related to the failure of parts of the equipment
If there is a break in the power cord or an initially poor contact in the power button, then the device periodically turns itself off. The machine may also stop if it is not level and there is some misalignment.
No. 2: difficulty getting water
To fix this problem, you should first check the water pressure in the plumbing system and also make sure that the valve supplying water to the machine is well open.
If everything is in order, then you should check the filling valve, hose, and cleaning filter located at the inlet for debris and foreign objects.
You should know that the free end of the drain hose connected from below must be located at a height of more than 2/3 of the height of the device, otherwise water will immediately pour out of the machine.
No. 3: leakage from the unit
There are many reasons to explain this problem. Sometimes it is enough just to clean the powder container well - if it is clogged, water may simply leak out of it.
The most common cause of flooding caused by a washing machine is a damaged or disconnected drain or fill hose. Leaks can also occur when connections become depressurized.
If, after checking these hoses, you are convinced that everything is in order with them, then the reason lies in the o-ring.
It is necessary to check the tightness of the seals, both in the door and in the connection of the filling hose. If they are worn out, they should be replaced. Then you need to check the drain pump and hose for any foreign objects stuck in them.
No. 4: breakdowns and wear of the heating element
Therefore, the washing water does not heat up. This happens due to the failure of the heating element, but do not rush to change it - this may also be damage to the electrical wiring.
Therefore, you should carefully check the entire electrical circuit, as well as the contacts of the heating element itself, using a multimeter. If the tester shows the presence of voltage in the entire circuit, this means that the heating element will still have to be replaced.
In order to remove the heater, you need to disconnect all the wires and sensors, and then unscrew the nut securing it, then remove the heating element
The place where the heater is installed should be thoroughly cleaned, only after that it will be possible to install a new heating element.
No. 5: noise and vibration during operation
The most common cause of noise is improper installation of the machine. Because of this, the unit produces a strong hum during the spin cycle. To do this, the position of the machine must be leveled using a level.
But sometimes excessive noise can occur due to severe wear of the bearings. It is impossible to repair them - only change them. For an inexperienced repairman, this is a rather difficult task, because it may require sawing and subsequent gluing of a non-separable tank, behind which the bearing is located.
Therefore, if you are not confident in your skills, then do not take on this matter; it is better to call a specialist from the service center. But if your car's tank can be disassembled, then this task may be up to you. To do this, you need to remove the tank, then disassemble it by unscrewing the bolts and disconnecting the fastening latches.
The bearing must be removed using a special puller or hammer. We warn you that you need to use a hammer very carefully so as not to damage the parts.
After the bad bearing has already been removed, you should thoroughly clean the shaft, check whether it is worn, and then just install a new bearing.
How to disassemble a Samsung washing machine
How to disassemble a washing machine without the help of a professional? You can carry out the above steps before working with the heating element.
Use the instructions to assemble and disassemble the washing machine.
Next, you can:
- Remove the cover at the bottom of the machine. There are located: a plug and a hose. The hose is needed for emergency drainage of water, and the drain is cleared through the plug.
- To unscrew the control circuit, you need to unscrew two screws and then unfasten the fastening latch.
- To remove the electrical module (on the inside of the control panel), you need to unscrew the 3 screws of the top fastening on the front panel.
- To remove the front panel, unscrew the 4 screws on the bottom panel.
- The tank is supported on the body by shock absorbers and springs.
- An electric motor is located under the tank.
The success of work largely depends on the proper organization of the workplace.
Preparatory stage
The convenience and high-quality disassembly of the washing machine will depend on good preparation.
Learn the safety precautions to begin repairing your washer.
Therefore, without skipping or “jumping” over each of the points, complete them like this:
- turn off the power.
- Drain the water from the tank and pipes.
- Prepare your tools.
- Select a location for renovation work. It should be well lit and free so that you can comfortably move around the equipment.
For repairs you will need a spacious, well-lit place.
To repair a Samsung washing machine with your own hands, you don’t need any special tools; you have everything at home. Arm yourself with:
- Screwdrivers;
- Pliers;
- Heads of different sizes;
- Small hammer.
Use special tools to disassemble the washing machine.
The only special item you can use is a WD-40 solution; it helps remove sealant, tightly tightened nuts and CV joints. Don't throw away your smartphone. It will be needed not only to spy on the next step in the work, but also to take photos.
Carefully disassemble the machine, remembering all stages of disassembly.
The photos will help you put the machine back together later.
Troubleshooting
Failures have different manifestation patterns. They are often shown on the display in the form of a special code, which is written at the beginning of the article. All machines can be divided into equipment with and without a display.
Self-disassembly of a Samsung washing machine requires precision in completing all steps.
Machines without a display indicate the problem by glowing lights.
- The lower temperature indicator and all washing mode lamps light up. Problem: water does not fill.
- The 2nd temperature indicator from the bottom and the same lights for all modes are on. Problem: no water draining.
- All the washing mode lights are on, as well as the two lower temperature lights. Problem: too much water.
- All the washing mode lights and either the 2 middle temperature lights, or the second from the top and the 2nd from the bottom are on. Problem: the water does not heat up.
- All washing mode lamps and one upper lamp with two lower temperature sensors are on. Problem: faulty buttons.
- All the wash mode lamps and the two upper temperature sensors came on. Problem: no signal from the temperature sensor.
Removing the drum from the washing machine is not difficult.
Based on knowledge of the codes, further actions can be determined.
Safety precautions
When working with any equipment, you must follow safety precautions. All work must begin with de-energizing the equipment. It is also important to do all work with dry hands.
Follow safety precautions!
Subtleties of disassembling cars of different brands
Washing machines made by different manufacturers are generally similar and perform the same set of basic functions. However, there are significant differences in the design of the units and the arrangement of internal working parts.
For many popular washing machine models, the heating element is located in front. To get to it, you just need to remove the front cover and carefully remove the part for subsequent repair, replacement or cleaning.
For correct disassembly, it is very important to know the specific unique features of the model to be repaired. Then the work will be easy and you will be able to penetrate the fault zone without any problems.
Steps to disassemble Samsung machines
Samsung household washing machines are quite easy to disassemble. The container for loading powder is located conveniently and is held on by only two screws. The working heating element is located at the bottom of the tank directly under the front cover and getting to it is not difficult.
If the door of a Samsung washing machine does not open, the problem should be looked for in the control module. It is quite difficult to cope with such a plan on your own. It is better to transfer this work to specialists from the service center
You can learn more about repairing Samsung washing machines in a step-by-step guide, which is given in our recommended article.
The nuances of repairing models from Ariston
In Ariston products, bearings and tank seals most often fail. The design of the model is thought out in such a way that this unit cannot be repaired. But for skilled and experienced home craftsmen there are no barriers.
To replace the seal, the solid tank is flared or sawed with a handsaw. There is no other way to restore parts, except, of course, by purchasing a new tank and installing it at the company’s service center.
A bad engine in Ariston equipment is a common occurrence. To repair, you need to unscrew the bolts, remove the back of the housing, and then remove the assembly. If after diagnostics it turns out that the element cannot be repaired, you will have to buy a new one and install it in place of the old one
The latest generation Ariston washing machine models are equipped with self-diagnosis devices, which significantly speeds up the process of troubleshooting. Codes of malfunctions and operational errors are displayed on the display, notifying about an emerging or impending problem. Decoding them will help you understand what should be repaired and how.
Procedure for disassembling Atlant washing machines
Atlant brand devices are practically designed and can be repaired. At the very beginning of disassembly, it is necessary to remove the counterweight, and then remove the external control panel. The drum in these models consists of two halves, secured with bolts, so any working parts can be replaced in no time.
Models from the Atlant company have a built-in self-diagnosis system. In the event of a malfunction, the electronics displays relevant information on the display. Owners can read the message, consult documentation and determine how to fix the problem
Specifics of Electrolux brand machines
Electrolux machines are very reliable and rarely break down. Our rating will introduce you to the top ten Electrolux washing machines in sales. The front panel can be easily removed and immediately provides access to all the main components and parts.
Working bearings and oil seals are placed on separate removable supports. To replace them, you do not need to completely disassemble the drum.
If the working drum in the Electrolux washing machine does not spin, most likely the brushes, drive belt, motor or control board are damaged. You can look for the problem yourself, but the technicians from the service center will do it faster and at the highest professional level
Features of LG washing equipment
LG household washing appliances have a complex design. To remove the front panel, you will first have to use a screwdriver to unscrew the nuts that securely fix the hatch cover. Then you have to carefully remove the screw that tightly tightens the clamp to hold the cuff.
To make it easier to deal with disassembling washing equipment, you can visually study the design features of the unit by looking at this diagram
Then you will need to remove the weighting material located on top and only then carefully remove the tank to be repaired or replaced.
The South Korean manufacturer equips its new models with a self-diagnosis system. Deciphering error codes will help you quickly and accurately determine what needs to be changed and where to repair. It will allow you to immediately decide whether it is worth doing the repairs yourself or whether it is better to go to a workshop.
How to assemble a Samsung washing machine
You took it apart, but you can’t put it back together? To prevent this from happening, you should use either a notebook or a smartphone. In the case of a notebook, you will need to write down each step of your disassembly, so that later you can, reading what was written down point by point from bottom to top, assemble it.
After completing these preparatory work, you can begin to remove the tank.
The time for all the work will increase several times. This is all much easier to do with a smartphone. Take a photo of each step and at the end scroll from the last to the first photo and collect.
Each equipment has its own service life.
Replacing a part yourself
In order for the process of replacing the drum of an LG washing machine to proceed as quickly as possible, you need to properly prepare:
- assemble a set of necessary tools (screwdrivers, pliers, sealant),
- disconnect the washing machine from electricity, sewerage, water supply,
- move the device away from the wall.
Then the most labor-intensive stage begins - disassembling the washing machine (this is the only way to get to the drum).
How to disassemble and remove?
Algorithm of actions:
- After unscrewing the fixing bolts, remove the top panel.
- We take out the detergent dispenser.
- After unscrewing the screws, we dismantle the control panels (do not touch the contacts).
- Pull back the latches and remove the decorative strip located at the bottom of the front panel.
- Using a thin screwdriver, pull out the clamp holding the hatch cuff.
- We fill the rubber seal inside the drum.
- We unscrew the UBL fixing elements, remove the lock, and disconnect the wiring.
- We dismantle the front panel of the washing machine.
- We disconnect from the tank: the water intake valve, the drain pipe, the pressure switch, the wiring of the heating element, electric motor, thermostat, drain pump.
- We dismantle the counterweight and shock absorbers.
- We unscrew the fasteners, and then dismantle the motor.
- Remove the tank from the retaining springs.
After the tank is removed from the washing machine body, you can begin the main part of the repair work - replacing the drum.
The video will show you how to open the LG washing machine and remove the drum:
How to change?
Algorithm of actions:
- Unscrew the mounting bolts. We separate the tank into two parts.
- Applying a metal pin to the shaft, carefully knock the drum out of its seat with a hammer and remove it from the plastic tank body.
- We install a new drum, fasten the two parts of the washing machine tank (pre-coat the joint with sealant).
- We mount the assembled tank in its original place.
- We put the drive belt on the pulley, connect the wiring of the heating element and the electric motor.
- We connect the drain hoses.
- We return the UBL to its original place and fix the rubber cuff of the hatch with a clamp.
- We install a counterweight.
- We mount the front panel, control panel, bottom bar.
- Screw in the drain filter.
- We return the powder receptacle to its original place.
- We mount the top panel.
As soon as the last screw is tightened, you can start the test wash.
Washing machine care
You need to take care of every thing. Same with the washing machine.
Use folk remedies to clean the “insides” of the washing machine.
Therefore, adhere to 5 basic rules:
- If the load is designed for 5 kg, there is no need to load it under the top, and you should not try more than 5.
- Before depositing items, check all items for small items. They can get stuck in the car and damage it. The tray for powders and gels is easily removable and should be washed periodically. After washing, leave the hatch open so that the machine is ventilated and no unpleasant odors are created there.
- Take time to care for external parts at least once every 7 days.
- It’s worth listening to the advertising and still buying a water softener. It will not only improve the quality of washing, but will also save the internal parts of the washing machine.
- The instruction manual should always be at hand and is worth reading. Manufacturers created it with the expectation of making it easier for you to care for your car.
Contact a specialist if your washing machine breaks down.
There is no shame in giving your machine to a mechanic. But if you do the renovation yourself, stay safe and pay attention to detail.
Video
We invite you to watch a video on how to disassemble a Samsung washing machine at home.
About the author:
She graduated from the Institute of Tourism of the Federal Pedagogical University with a degree in Management, loves to travel and communicate with people. She is interested in psychology, enjoys dancing, and studies English. During the five years of maternity leave, I thoroughly mastered housekeeping, not forgetting about my own development. He skillfully uses words and can support a conversation on any topic thanks to his interest in different areas of life.
Found a mistake? Select it and click the buttons:
Ctrl + Enter
Interesting!
There are a variety of balls that are used in the washing machine. Antistatic ones will prevent the fabric from sticking to the body after washing, balls with special loops will “comb” the lint and prevent the appearance of pills, and silicone ones with pimples will prevent fluff from matting when washing outerwear.
Preparatory work
Before you begin disassembling the Indesit washing machine yourself, you should prepare the necessary tools. Various types of fasteners are used in the design of equipment, requiring different types of accessories for their dismantling:
- self-tapping screws with a 10-head head,
- clamps with screws for flat and figured screwdrivers,
- pliers,
- spanners or open-end wrenches 10,
- wire cutters,
- screwdrivers.
When it may be necessary to disassemble Indesit washing machines
During operation, the Indesid washing machine is constantly exposed to various unfavorable factors, which gradually disable the equipment until it is completely impossible to wash.
As a result of frequent operation and increased vibrating loads, the following components wear out in equipment:
- Bearings and oil seal. As a result of frequent vibration during high-speed rotation of the drum, the bearing on the drum shaft breaks, which causes a leak from under the seal.
- Heating element - when radial beats occur, the metal drum begins to rub against the heating element, which in the process of further operation can result in a short circuit.
- Control board. Due to an oil seal leak, the controller may fail, which usually occurs due to a short circuit in the tachogenerator on the engine. The fact is that the developers have structurally placed the engine right under the drum, and if a leak appears, it will definitely get to the motor, flooding the armature with the tachogenerator.
- Shock absorbers. If the machine has been in operation for several years, the vibration of the drum increases, which is associated with poor depreciation. The design of the Indesid washing machine uses 2 shock absorbers and springs on which the drum is suspended. Due to frequent vibrating loads, they are triggered, which leads to a deterioration in the quality of work, which is expressed by bouncing.
- Pipes. The drainage system of the washing machine has a drain pipe with a shut-off valve. It usually collects debris, which can cause malfunction or leakage.
- Front rubber seal. When closing, the door of the Indesit washing machine rests against a special sealing collar, which closes the opening between the body and the rotating tank. Due to frequent vibration and bouncing of the tank, it gradually becomes deformed, which can lead to tearing. Damage can also be caused by any sharp object that gets into the washing machine along with clothes.
In addition to the above, there are a lot of other problems in Indesit machines that can arise in washing machines for one reason or another. In any case, to eliminate them, you will need to disassemble the equipment, and this can be done according to the instructions presented below using the example of the Indesit wisl 86 or wisl 104 model.
Almost all produced types of washing machines of this brand have a similar device, since their design was copied from the equally famous world brand Siemens with some modifications. However, it is precisely in these modifications that breakdowns most often occur.
Basic information about disassembling equipment
First of all, it’s worth mentioning that disassembling the Indesid washing machine yourself will not take much time. As practice shows, it will take no more than 4 hours to completely dismantle all units. Unless, of course, you resort to disassembling the plastic tank to replace the bearings, oil seal or drum.
But if you still have to remove the tank to replace the bearings, the time may increase by several more hours, because in budget models, which are increasingly being offered on the market, it consists of two welded halves.
From the point of view of service centers, the tank is non-separable and therefore must be completely replaced. But the craftsmen found a way by sawing it along the glued seam with an ordinary hacksaw for metal. We’ll talk about how to disassemble the drum of an Indesit washing machine later in the article, but for now we’ll dismantle the components in sequential order.
Installation location and dismantling of the drain pump
To remove the faulty part, you need to determine where the pump is located in the washing machine and understand how to get to this unit and disassemble it. The location of the pump depends on the brand of washing machine.
- On equipment manufactured by LG, Candy, Ariston, Whirlpool, getting to the faulty element is very easy. It is necessary to turn the device on its side and remove the pan, if present, after which the pump will be visible and can be removed and disassembled.
- On Electrolux and Zanussi washing machines this process is a little more complicated. It is necessary to turn the equipment around with the back side, unscrew the screws and remove the back cover.
It is most difficult to disconnect the pump on Bosch and Siemens equipment. For these devices, you will need to partially disassemble the washing machine - remove the control panel along with the front wall
During disassembly, you should take pictures of each part before disconnecting, it is especially important to take pictures of the wiring before disconnecting. This will help prevent errors during subsequent assembly.
To get to the pump, you must do the following:
- Unscrew the screws and remove the top cover.
- Pull out the powder cuvette.
- Unscrew the screws behind the cuvette and from inside the washing machine, take a photo and disconnect the wiring, disconnect the control panel and put it aside.
- Open the hatch, pry the clamp with a screwdriver and remove it, tuck the cuff inside the tank.
- Unscrew the fasteners holding the UBL, disconnect the wiring, and remove the part.
- Detach the base panel and unscrew the screws behind it.
- Remove the front wall.
To remove the pump, you need to disconnect the wiring, unscrew the fasteners and loosen the clamps. If the part is held in place by latches, you need to press them out.
What tools will you need?
To ensure that work on dismantling the washing machine drum goes quickly, you should make sure you have the following tools in advance:
screwdrivers: Phillips and slotted (a screwdriver with attachments will significantly speed up the work);- a set of keys;
- pliers;
- hammer, chisel;
- marker;
- lubricant-cleaner and sealant.
Also, the work cannot be done without rags, a large basin and rubber gloves for hands.
Some tips
When disconnecting the power supply to the control panel or motor of older Bosch, LG, Samsung or Indesit models, do not pull the wires. Fingers must be placed on the connector body. If it does not give in, you can lightly shake it in different directions. When tugging on the wire or using force, the core may be torn off from the crimp.
Depending on the year of manufacture, manufacturer and model, the panels on washing machines are connected to the frame using additional plastic latches. To avoid damaging them when separating the surfaces, you must carefully press the teeth not with a screwdriver, but with the handle of a tool, finger or nail, since the metal can damage the surface of the part. For the same purpose, you cannot use force: if the component does not give in, it means that not all fastening elements have been separated yet.
In order to remove the front panel of a Samsung machine, no special preparation is required. All you need is a careful attitude to the task (reading the instructions), patience (hurry often harms the job) and the only tool - a screwdriver. It is worth noting that this matter is not the most difficult, but not the simplest either. However, if you follow all the instructions, anyone can handle this without the help of qualified specialists.
Eliminating problems
Disassembling the drum
The tank in the washing machine consists of 2 halves. Some tanks are fastened together, while others are soldered.
To disconnect the tank, you just need to unscrew the mounting bolts.
At this stage, the oil seal becomes accessible and if it needs to be replaced, you can remove it using a screwdriver or pliers.
It's more difficult with a bearing. It will have to be knocked out using a metal tube and a hammer. I think there is no point in talking about accuracy, and that’s understandable.
You can also replace the crosspiece, again, if necessary.
Important! Before replacing a new part with an old one, the installation site is treated with lubricant. If the tank is not dismountable, it is more difficult to carry out repairs on your own; you may need the help of a professional
If the tank is not dismountable, it is more difficult to carry out repairs on your own; you may need the help of a professional.
Changing the bearing
In what cases is it necessary to replace a part and how to remove a bearing from a washing machine drum?
For example, if a puddle has formed under the machine and there is a strong hum and vibration during operation. Why did this happen? There is a high probability that water got into the bearing and caused it to fail. In general, the service life of this part is not short, from 7 to 11 years, but sometimes trouble happens and you have to replace it ahead of time.
Troubleshooting shock absorbers
Shock absorbers are responsible for the smooth operation of the drum during washing and spinning. There should be no knocking.
How to check their serviceability?
Just. Open the car hatch and pull the drum towards you. Now let go. What happened?
If the drum, like a swing, swings from side to side and does not fall into place, this is a sure sign of the need to replace the part. Moreover, the shock absorber must be replaced in pairs.
To do this, you don’t have to disassemble the car, as is the case with bearings, but this is true only in LG, Veko, Ardo models. It is enough from the bottom, unscrew the fasteners and change the parts. But with the rest of the models you will have to tinker.
- – The top cover is removed and the dispenser is removed.
- – The control unit is disconnected.
- – Remove the rubber seal with the clamp.
- – The front part of the machine body is removed.
- - Details change.
Removing the foreign object
What does foreign object mean? It can be:
- coins, even rhinestones,
- buttons and other clothing items.
If you do not reach and free the drum from these things, the consequences can be tragic, including jamming and breakage.
What other problems can you solve on your own?
Changing the cuff
There are many reasons for cuff failure. This could be: wear due to long-term use, due to mold, due to cracks and tears, due to limescale, etc.
If there is water left under the machine after washing, check the cuff. After all, this is a dangerous business. The power supply may short out or the machine may fail completely.
What is needed to replace the cuff and how to remove the rubber from the drum of the washing machine?
Firstly, you need a new cuff, which must match the old one 100 percent, otherwise an incomplete fit may occur.
To replace an old rubber band with a new one, you need:
- Remove the front panel of the machine, remove the powder compartment, remove the front of the machine.
- Disconnect the cuff. In the usual version, the cuff is screwed to the tank with two metal clamps. You just need to pry the spring of the clamp and pull.
- After the first clamp is removed, you can remove the top of the rubber band, which ensures its correct location in the tank. The cuff will be released without any problems and can be removed after removing the second clamp.
- When installing a new rubber band, use the marks on the rim of the hatch as a guide.
- Before installation, it is necessary to carry out cleaning work on the rim of the hatch, at least with just a soap solution.
- The cuff is pulled over the hatch. If the top is pulled, the bottom is held in place; if it's down, then vice versa.
- Next, all the parts are assembled in reverse order.
All that remains is to check the work done by running the wash without laundry. If there are no leaks, everything went well and you did it!
https://youtube.com/watch?v=k43iekwVrTM
TOP stores of washing machines and household appliances:
- mvideo.ru/- household appliances store, large catalog of washing machines
- holodilnik.ru – Inexpensive store of household appliances.
- techport.ru - profitable modern online store of household appliances
- citilink.ru is a modern online store of household appliances and electronics, cheaper than offline stores!
- ru.aliexpress.com—spare parts for washing machines
Disassembly
When the repair site, equipment and washing machine are prepared, you can begin to work.
The first step is to remove the top panel of the machine. On the back side of the unit, in the upper corners, there are two self-tapping screws on which the panel is attached. Unscrew them with a screwdriver (or screwdriver), lift the back of the cover, move it towards you and remove the panel.
Then you need to remove the detergent tray. To do this, press the locking clip and pull out the container in the same way as you do for cleaning. Behind the powder tray there are fasteners that hold the control panel; by removing the tray, you can easily unscrew the bolts and detach the latches that secure it (usually one fastener is located under the tray and two more on the back of the panel)
Carefully disconnect the control panel so as not to damage the wires leading from it into the mechanism. To prevent the part from interfering with further work, it is hung on the right side of the unit using a special hook or simply carefully placed on the top of the machine
When disassembling the washing machine, carefully inspect all parts for damage. For example, quite often the water level sensor fails. It is easy to access the part if you remove the top cover of the unit: the sensor is located, as a rule, on the side wall of the machine, closer to the top, and is secured with 1-2 bolts. Unscrew the fasteners, disconnect the hose and contacts from the pressure switch (the hose is held in place with a clamp that needs to be unscrewed or pulled apart with pliers) and inspect them. If necessary, clean the contacts and remove blockages in the tube, and check the sensor itself with a multimeter.
Restoration of support
Often the door support also suffers, which is also easy to repair with your own hands. First, remove the door from its hinges and dismantle the damaged part. We continue like this:
- we connect the broken parts together and firmly fix them in a vice;
- take a nail with a diameter of 3-4 mm and shorten it to an equal length to the support;
- drill a through hole with a diameter of 2.8-3.8 mm in the combined hinges;
- we clamp the nail in pliers and heat it over an open fire to a temperature of 180 degrees;
- insert the hot rod into the drilled hole;
- quickly assemble the door (no longer than 3 minutes) and install it in place.
You can fix the washing machine door without the help of repairmen
It is enough to follow the instructions provided and act with extreme caution. But it is better not to delay the repair and follow the operating rules of the machine: do not pull the handle, carefully load/unload the machine and do not allow solid objects to get into the drum
Interesting:
- Error codes for AEG washing machines
- Door error on Ariston washing machine
- What tools are needed to repair a washing machine?
- How to open a Samsung washing machine if it...
- Water is leaking from below the Samsung washing machine
- Indesit washing machine does not heat water
Reader comments
Share your opinion - leave a comment