General rules for cleaning headphones
The cleaning scheme primarily depends on whether the headphones are dismountable or not.
In the first case, it is enough to remove the outer cover or rubber band and carefully separate the mesh, which should then be dipped in alcohol or peroxide.
If the headphone head cannot be disassembled, the cleaning process must be carried out very carefully so as not to damage the internal cables. Use a toothpick or cotton swab dipped in cleaning agent.
Dry the headphones on a paper towel for at least 3 hours.
What is the best way to clean?
To remove earwax and other contaminants, not only cleaning solutions are used, but also improvised means.
Toothpicks and needles
Thin objects with sharp tips are used to remove the removable cover from the headset body. Using a toothpick, you can easily remove stuck pieces of wax from the speaker grill. But you should be careful and act carefully so as not to damage the pads and surface of the headphones.
Cotton buds
These items are convenient for cleaning hard-to-reach parts of the ear pads and connectors. It is recommended to use a cotton swab to apply alcohol or peroxide to the speaker mesh; its soft tip is not capable of damaging the membrane and other important parts of the headset. But you need to make sure that liquid does not get inside the speakers.
Important! It is recommended to use brushes for processing small parts of components. The fibers of a cotton swab come off easily, penetrate inside and can degrade the sound quality.
Cotton pads
If it is convenient to clean the mesh with cotton swabs, then discs are more suitable for processing the outer surface of the case and wires. Use a soft object to wipe the headphones after using alcohol-containing products.
Depending on the dirt, use slightly damp cotton pads or soaked in cleaning agent. After treatment, the surface is wiped dry.
Important! Cotton pads are convenient for wiping the ear pads of large over-ear headphones.
Scotch
This item is used when soaking headphone nets in cleaning solutions to secure the elements in a certain position. The tape prevents liquid from getting inside the speakers.
Important! Particular attention should be paid to the adhesive traces that remain from using adhesive tape.
Vacuum cleaner
Suitable for removing dust and contaminants on the surface of headphones. You can use a vacuum cleaner to clean the non-removable ear pads. But the device can only be turned on at minimum power.
Important! The standard nozzle is not suitable for cleaning; you should purchase a special device or use a thin tube.
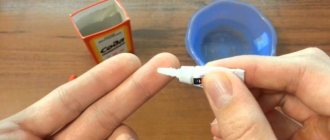
How to clean ear wax from headphones with hydrogen peroxide
To clean wax from headphones, prepare:
- hydrogen peroxide;
- small container;
- cotton buds;
- toothpicks;
- paper napkin
If the headphone model is not compatible:
- Dip the surface of the speaker into a container of peroxide and let it sit for about 20 minutes. Then remove excess moisture with a cotton swab. The method is quite risky, since if liquid gets on the contacts, there is a chance that the speakers will be damaged.
- Soak a cotton swab in peroxide and gently wipe the speaker grille. In crevices, wax can be removed with a toothpick. After cleaning the grooves, wipe the surface again with a cotton swab and peroxide.
The hydrogen peroxide cleaning method will not only help remove dirt, but also disinfect the surface.
Types and design features
The industry produces various types of headphones, which are classified according to the design and type of installed speaker (emitter), the method of connecting to the source of playback of sound files and acoustic design:
According to their design headphones are of the following types:
- plug-in (earbuds) - the cheapest type of such devices that do not have good sound reproduction quality, usually included with various mobile gadgets;
- in-channel (vacuum) – the most popular type of device when using smartphones and mp3 players, which have the best playback performance and have various attachments for installation in the user’s ear;
- overhead – fixed on the surface of the ear, but does not cover it completely, are equipped with various options for the mounting system and have fairly compact dimensions;
- full-size – completely cover the surface of the ear and are characterized by high rates of reproduction of sound information and significant dimensions;
- monitors - similar to full-size models, but have better noise insulation performance, and are used as professional equipment.
Based on the type of emitter , headphones are classified as:
- dynamic - they work on the principle of converting electrical vibrations of sound frequency into acoustic ones;
- electrostatic – characterized by high reproduction rates; a special DOK station is used for use;
- orthodynamic and isodynamic - used only in full-size headphones, they have good sound reproduction characteristics;
- reinforcement – used in vacuum models.
According to the acoustic design, headphones are of open and closed type. In closed models, the design of the device involves isolating the sound stream reproduced by the headphones from the external space (surrounding). Open versions have a lattice structure on the outer surface, which allows sounds from the headphones to enter the external environment, and external noise to the user’s ears.
Based on the method of signal transmission, headphones are divided into wired and wireless. Wired models connect to the playback source using a standard “Mini-jack” connector (3.5 mm), and wireless models use Bluetooth and Wi-Fi, as well as infrared and radio connections (for older versions).
Subtleties of cleaning various models
To fully remove dirt, it is not enough to know the basic rules for cleaning headphones. Some models require a special approach.
Vacuum
In-ear headphones are inserted directly into the ear canal, isolating external sounds. The headphones have special rubber tips that ensure the stability of the speaker in the ear and are easily removed.
Before cleaning the speakers, remove the vacuum pads, wash with a mild soapy solution and leave until completely dry.
To clean speakers and other elements you will need:
- cotton swabs or disks;
- alcohol-containing solution;
- hydrogen peroxide;
- scotch;
- small capacity.
Action plan:
- Soak a cotton pad in the alcohol solution and wipe all external surfaces.
- Since you won’t be able to remove the mesh separately, pour a little peroxide into the container and lower the heads there so that the liquid covers only the mesh.
- To prevent the speaker from being completely submerged in the product, secure the wires with tape.
- Keep the headphones in this position for at least 15 minutes.
- Remove the speakers and dry them on a paper towel for at least 2 hours.
Cleaning does not take much time, but requires care.
Earbuds
Cleaning such headphones depends on whether the speakers are collapsible or not. If the earphone can be disassembled, clean the mesh by immersing it in alcohol or peroxide. If the device model does not allow for disassembling the speakers, the mesh can be cleaned using a toothpick and a cotton pad soaked in an alcohol solution.
Invoices
Over-ear headphones with removable ear pads also require regular care. To clean the speakers, you must first remove the covers. You can remove dirt from the surface with a clothes roller or a hand-held vacuum cleaner. For more thorough cleaning you will need: cotton pads, a stiff bristle brush and alcohol.
Process diagram:
- Remove the ear pads from the speakers.
- Lightly moisten the brush in the solution and treat first the outer and then the inner surface of the device.
- Leave the headphones on a paper towel until completely dry before putting the earbuds back on.
While working, be careful not to let any liquid get inside the speakers.
apple earpods
Original wireless headphones for iPhone have a unique shape, so the cleaning process is slightly different from the standard one.
Firstly, although the model is considered collapsible, it is quite difficult to put it back together. The manufacturer decided to protect the device from liquid getting inside by depriving the headphones of open latches. If necessary, the speaker head can be opened, but only with a knife or scalpel. Reassembly will only be good if you attach the removed cover with glue. Therefore, unless absolutely necessary, do not disassemble your earpods.
Secondly, the mesh on the speakers is quite easy to damage, so you need to act very correctly and carefully. The first step is to remove dirt with a clean toothpick. A cotton swab dipped in a cleaning agent can be used only after this stage. This will prevent you from pushing dirt deep into the speakers. To prevent liquid from getting on the contacts, blot the alcohol stick with a paper napkin and only then wipe the mesh. Perform the procedure until the result satisfies you.
What can't be used?
Careless handling and the use of aggressive agents leads to complete failure of the accessory. It is worth familiarizing yourself with the list of substances that cannot be used to clean headphones:
- Water. If liquid gets inside the housing, it will short-circuit the electrical circuit and damage the device. Only waterproof headphones that are marked accordingly can be washed.
- Abrasive and aggressive cleaning agents. Baking soda, salt, bleaches and solvents can damage the coating. To clean white headphones, it is advisable to use an alcohol solution.
- Washing powder or dishwashing detergent. Liquids getting into the speakers will cause them to fail.
- Nail polish remover. Can damage the coating of plastic components.
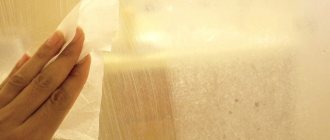
How to clean the mesh on your headphones
Before the procedure, try to disassemble the speakers. If you can remove the outer cover:
- Pour a small amount of peroxide into the container.
- Carefully separate the mesh from the speaker.
- Immerse the mesh in the solution for 10–20 minutes.
- Remove and blot off excess moisture with a cotton swab.
- Leave on a paper towel until completely dry.
- Collect your headphones.
This type of cleaning is one of the most effective.
What should I do if water gets into my headphones?
If liquid gets inside the speakers, it may damage the headset. To prevent serious damage, you must take immediate action:
- Shake out as much water as possible. The device is positioned with the ear holes facing down and gently shaken, avoiding sudden movements.
- As soon as the liquid stops dripping, you can dry the headset with a hairdryer. If the design allows, the device can be disassembled.
- Leave for a couple of hours until completely dry.
Note! You need to dry it with a hairdryer carefully, as the case may become deformed under the influence of high temperatures.
This article will tell you what to do if you washed your headphones in the washing machine.
How often do you clean your headphones?
Once a week or more often Once every two weeks or less
How to clean the headphone jack on your phone
Dirt and dust also get into the headphone jack on the phone. To remove contaminants you will need:
- alcohol-containing product;
- cotton swabs or sponges.
You can clean the nest in several ways:
- Soak a cotton swab in alcohol and blot with a paper towel. Carefully insert into the slot and twist several times. Repeat the manipulation until the cotton wool is clean.
- Divide the cotton pad into two. Soak the denser part in an alcohol-containing solution and squeeze thoroughly. Cover the plug with a damp sponge and insert it into the socket. Rotate the plug in the socket periodically replacing dirty disks with new ones until they become clean.
This procedure is suitable for any phone model.
Using a vacuum cleaner
A regular vacuum cleaner will help remove dust and dirt from the speakers. However, a standard brush will be too large and will not be suitable for small parts of the device. In such a case, a special device will help.
You will need plasticine and a thin hollow tube (such as a used ballpoint pen). Make a ball from plasticine that will be equal in volume to the diameter of the vacuum cleaner pipe. Pierce the plasticine ball with a rod and attach it to the pipe. Turn on the vacuum cleaner for a few seconds and remove dirt from the surface of the speakers.
How to update FreeBuds?
On your smartphone, go to Settings > Bluetooth, find the name of the FreeBuds headphones and tap the icon next to the name. Click the Check for updates button to go to the software updates section. If an update is available, follow the onscreen instructions to update.
Interesting materials:
How to set up iptv on philips smart tv? How to set up IPTV on Panasonic TV? How to set up IPTV on Philips Smart TV? How to set up IPTV on Samsung Smart TV? How to set up iptv on samsung tv? How to set up IPv6 on iPhone? How to configure IPv6 on a router? How to set up iTunes Store and App Store? How to set up iTunes? How to set up IVI on LG TV?
Why do headphones get dirty and how does this affect their performance?
All headphones get dirty over time, regardless of color or model. While listening to music, earwax gets into the speaker heads and accumulates on the mesh. In addition, headphones are a device that we constantly carry with us in our pocket or bag, so dust, lint and dirt stick to their surface.
When there is a lot of accumulation, the surface of the speakers becomes covered and the sound quality deteriorates. In addition, dirty headphones are a breeding ground for bacteria. To prevent such consequences, clean 1-2 times a month.
Rules of care
In order for the headphones to have an attractive appearance and delight their owner with good sound quality of the reproduced sounds, it is necessary:
- Use special containers for storage and transportation when not in use (case, case, container, etc.).
- You should not use devices at the highest possible sound level, because... this negatively affects their service life and sound quality during further use.
- Do not use in a humid environment, especially if it is wet or allowed to come into contact with water in large quantities.
- Change the attachments you use periodically.
As can be seen from the material in this article, every user can clean the headphones independently and without any problems, and the video below will show you how to do this quickly.
Tips and tricks for caring for your headphones
To minimize the possibility of contamination entering the device, follow these recommendations:
- store the device in a special handbag or case;
- change rubber pads from time to time;
- do not allow water to get inside;
- Carry out regular monthly cleaning.
The subtleties of caring for full-size headphones
Store your over-ear headphones by following the basic rules for caring for any device. In addition to the basic recommendations, make sure that the soft ear pads of your headphones do not accumulate a lot of dust and dandruff. Dry clean occasionally with a brush or vacuum cleaner. If the linings wear out over time and lose their presentable appearance, replace them with new ones.
What to do if water gets into your headphones
It happens that water still gets into the headphones in one way or another. To prevent them from breaking, act immediately.
- Try to shake out as much liquid as possible from the device. Make sure that your movements are not intermittent or sudden. Shake gently to avoid damaging internal parts.
- If water is no longer dripping, dry the device with a hair dryer or heat source. Make sure that the temperature is not too high and does not deform the housing.
- After all the manipulations, you can safely check the functionality of the headphones.
Warning!
The most important thing that you definitely should not do is pour any liquid inside. There is a lot of advice on the Internet that will lead to only one effect - damage to the device. They say that someone even suggested washing them in a washing machine. I still hope it was a joke.
In any case, when cleaning your headphones you will use liquid products. But they can be used for the case, mesh, ear pads, but not for the speaker and other elements inside.
I would also like to warn you to be careful. All parts and connections, cords, even in the highest quality device, are very delicate. There is no need to even slightly tug, press, etc. If you don’t know how to take it apart, then look on the Internet. There is no - give up this idea.
I would also advise avoiding the use of soap, dish soap and other similar cleaning products. Even if you only wash the external parts of the device with soapy water, there is a chance that a drop will get inside. When dry, the soap film has a bad effect on the parts of electronic devices, not to mention the water that gets in with the soap. The only thing is that you can wash the silicone ear pads separately in this way.
How to store headphones so they don't get tangled
If the headphones are stored without a special case, there is a chance that the wires will get mixed up. To prevent this:
- Wrap the wire around your palm several times.
- Pull your palm out and trim the edges.
- Wind the remaining part of the wire across the resulting rings several times.
- Tighten the tail into the resulting loop.
If you store the headphones rolled up, the wires will be less deformed, which means the device will last longer.
To prevent your headphones from breaking down for a long time, clean them regularly. To do this, use alcohol or hydrogen peroxide, and under no circumstances use water or aggressive substances. The specifics of cleaning include several simple steps and depend on the headphone model.
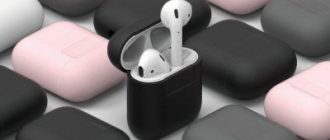
When to clean AirPods wireless headphones
Cleaning must be done not only for the sake of aesthetic beauty (since the device is white), but also to ensure that the sound quality and volume do not deteriorate due to contamination of the speakers. Cleaning is also necessary to prevent particles of dust and earwax from penetrating inside the case and damaging the speakers or batteries themselves. The manufacturer describes how to clean wax from AirPods. The procedure must be repeated at least once every 2-3 months.
On a note!
In reality, these deadlines sometimes have to be shortened. It is better to carry out the operation monthly or according to the degree of blockage, if there is a noticeable deterioration in the quality and volume of sound.