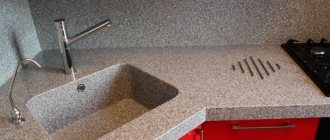
From the author: We welcome you, dear readers! Today, kitchen furnishings such as countertops, sinks and sinks made of artificial stone are becoming increasingly popular among designers and consumers.
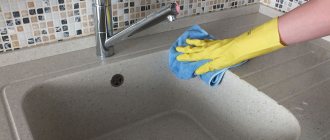
The beautiful, stylish and original appearance of the above-mentioned products placed in your kitchen is easy to appreciate. And it’s quite possible to repair them with your own hands , getting rid of almost any damage. In this article, we will discuss faux stone sink repairs.
Reasons for failure of an artificial stone sink
Artificial stone structure
Kitchen products made from artificial stone are strong and durable to use. They are characterized by increased resistance to negative external factors. However, even heavy-duty material can break or ruin its appearance.
Main causes of failure:
- Heavy objects. Do not throw large kitchen utensils into the sink - the stone will crack or split.
- Acid and alkali, due to their chemical composition, corrode the surface of the stone.
- Sudden temperature change. Do not place hot items on a cold sink. A sudden change in temperature will lead to deformation.
- Cutting food products.
Undoubtedly, artificial stone is resistant to high temperatures. But it is forbidden to place hot dishes without an additional stand, otherwise this will lead to deformation and destruction of the material.
Acrylic stone repair
Which acrylic stone is easy to repair?
Certified acrylic stone from brands produced in South Korea and America such as Corian, Tristone, Staron, Hi-macs, Hanex, Grandex can be easily repaired and in 97% of cases - on site. These stones are made using certified acrylic stone technology - they are 100% repairable for life - you can polish the surface an unlimited number of times and restore chips.
Which acrylic stone is difficult to repair?
If we talk about acrylic stones made in China, such as Akrilika, Neomarm, made in Russia - Binstone and other non-certified acrylic stones, then they are difficult to repair, but at the same time they need very frequent repairs. The reason for this is the low quality of raw materials. The composition of these stones is as cheap as possible (cheap polyester resins are used instead of expensive acrylic resins), the composition has no elasticity - it crumbles, breaks, and does not bend. Products made from these stones require constant repair due to the low quality of the stone, which ultimately increases the cost of using the products. This applies most of all to countertops, since they are used most actively.
How to repair a structure yourself
Chip on the sink
Repair of an artificial stone sink depends on the nature of the damage. Common defects that appear due to negligence:
- scratches, cracks and chips;
- chemical damage.
Such defects can be easily repaired using a “repair kit”, which is sold at any hardware store.
It is more difficult to repair a sink made of artificial stone with your own hands when part of the fragment is chipped and you need to replace the material. To do this, the necessary stone is made and glued to the chip site.
Sequence of actions for self-repair:
- Milling the required part of the sink. To do this, cut out and clean the damaged area. A recess in the sink is prepared to replace the damaged part.
- The damaged part is treated with specialized chemicals: paste, liquid or cleaner. This will help get rid of dirt and grease.
- The required part is made, taking into account its size and shape. For this, the same artificial material is selected. It is important to choose the right color of the stone so that after the repair the replacement is not visible.
- Glue the missing fragment of the sink. To do this, buy specialized glue for artificial material, taking into account its characteristics.
- Grinding the sink is the final stage in the repair. Will make the surface of the sink smooth, without flaws.
Repairs will not take much time, but will save the family budget.
Sink restoration, masking cracks
Ceramics tend to crack, impacts are especially dangerous for it, or this process occurs over time.
That’s when the question arises: how to repair a crack in a ceramic sink and give it a neat look. Specially developed sealants that are waterproof are often used for such work. You should purchase a good quality composition suitable for a ceramic sink in a store and simply cover the cracks with it.
Naturally, you should first clean the repair area from rust, mold and grease and dry it. Now you know exactly how to repair a crack and can safely go to the store for materials.
How to easily fix cracks, chips or scratches
Surface grinding
Scratches appear as a result of careless handling of sharp objects: a fork or knife. They do not interfere with operation, but spoil the appearance of the kitchen product.
The repair takes place in two stages:
- The defect is cleaned with sandpaper. It should only be medium grit.
- Polish with a felt circle. For this it is better to use a power tool.
Cautions for repairs:
- Do not put too much pressure on the tool while grinding the material;
- you must select one speed mode and not change it during operation;
- take only suitable tools;
- The polishing wheel must be new.
It is important to follow the above set of rules so as not to damage the sink, but to repair it.
Cracks and chips
Compared to a scratch, a crack is much more difficult to remove. This will require certain construction skills and a “repair kit”. It includes:
- putty;
- mastic;
- glue.
Repair work takes place in 3 stages:
- The surface is being prepared. It is dried, cleaned and degreased.
- The “repair kit” is applied.
- After the putty has dried, clean it up. In the same way as in removing scratches - sanding with a felt wheel.
If a small piece of the product breaks off, it must be found and glued. Procedure:
- The broken part is cleaned of dust, dirt, and then degreased.
- Select the required glue, it depends on the type of material.
- The piece is glued to its original place.
If the missing part cannot be found, acrylic that matches the color is glued. After it dries, sand it with sandpaper or a felt wheel.
Changed appearance
There is no need to rush into buying a new sink if the old one has changed its usual color. This happened due to improper care.
The problem is quite easy to fix. To do this you will need a grinder and a suitable circle. The product is carefully polished, after which its appearance becomes attractive again.
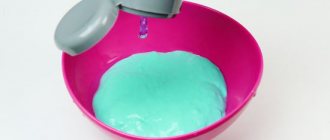
Homemade adhesives
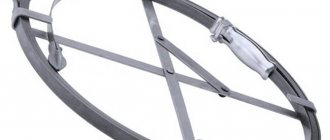
Sink structure: 1 - wall mounting; 2 - bracket, 3 - drain, 4 - wide nut, 5 - lock nut, 6 - glass, 7 - cement, 8 - sewer.
It is possible to make glue with your own hands. For example, to glue a ceramic or earthenware toilet, you can prepare an adhesive based on casein.
The first recipe. 10 parts of casein and 1 part of borax are mixed in 2 parts of water, then another 2 parts of water are added. To make a waterproof seam, you need to add a few drops of a solution of aluminum alum or formaldehyde to the finished solution. This glue hardens in 2-3 hours - during this time it should be used for its intended purpose.
In order to glue large porcelain or earthenware objects (a toilet or a cistern, for example), you can prepare the following adhesive composition:
- 1 part crushed glass;
- 2 parts of sifted river sand;
- 6 parts of liquid glass or silicate glue.
This glue is quite strong, but it is very difficult to make the seam with it unnoticeable.
Second recipe:
- 1 part quicklime;
- 10 parts chalk;
- 2.5 parts liquid glass.
This composition should be prepared immediately before use, when the surfaces are completely prepared for gluing, as it hardens quickly.
Recipe three. For future production, a different glue composition is suitable. It requires 1 part turpentine (by weight) and 2 parts light shellac. Melt turpentine and shellac over low heat, mix well and cool. Next, the resulting mass can be divided into small tiles and stored.
This glue is stored for quite a long time; before use, it should be warmed up and applied in a thin layer to the surfaces to be glued, which then need to be strongly compressed. Excess glue that protrudes is immediately removed.
Fourth recipe. A porcelain toilet or other items made of this material can be glued together with a gypsum-based compound. To prepare such glue you will also need ordinary alum. This glue is prepared as follows: burnt gypsum is soaked in a saturated alum solution for 24 hours, then it is dried, calcined and crushed, then diluted with water to the consistency of sour cream.
Types of fastenings and connection methods
Overhead method of installing a sink
Installation of a kitchen sink made of artificial stone is carried out in various ways. It is possible to install the sink yourself, without outside help.
There are four types of fastenings:
- invoice;
- mortise;
- integrated;
- under-desk.
Each of them has its own installation features.
Invoice
One of the simplest installation methods is to “lay” the sink on top of the cabinet, after first removing the countertop.
The required size is ordered in a specialized store. If it is not there, cut off the remains yourself. To do this, the material is placed on the tabletop, the excess is highlighted with a marker, and cut off.
But it’s better to order a sink and a cabinet ready for it - installation is easy and quick. There are two ways:
- adhesive;
- using brackets.
In the first case, the sink is placed on a cabinet, having previously treated the ends with hermetic silicone.
In the second case, you need to tighten the screws on the inside of the cabinet and install the brackets. The sink is positioned and the screws are tightened tightly.
Mortise
Products are cut out according to a prepared template. Inside the tabletop, moving 2-3 centimeters from the edge, draw a line. Holes are made in it, the outline is cut out, and the sawdust is cleaned. The fasteners are placed on the sink and installed in a slot lubricated with silicone.
Integrated
The sink is mounted on the same level as the countertop; they are made from the same material. In most cases, ready-made samples are ordered from factories: the sink is installed immediately with the countertop.
Bonding a Marble Sink
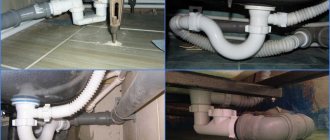
Pipe gluing.
In order to manage to break a marble sink or toilet into several pieces, these objects must at least be dropped onto a hard surface. But more often it happens that a hard, heavy object falls on them, in this case the marble will not split into pieces, but there will definitely be small chips. Sometimes this results in cracks.
To restore such objects, a paste of ground alabaster in glue water is used, which is suitable for white marble. And if necessary, add crushed slate, ocher or other fillers to give the mixture the required shade. After such putty hardens on seams or cracks, it should be polished.
Recipe five. Mix crushed gypsum in 4 parts with 1 part of powdered gum arabic. A strong solution of borax in cold water is added to the resulting mixture until it forms a batter. The item glued in this way is left for 5-7 days in a cool place.
If you need to make the seam almost invisible, then a cracked marble toilet or sink can be glued together using a mixture based on the same marble, but ground into powder.
Recipe six. Mix the powdered marble with rubber and wax in the following proportion: 2 parts marble powder, 2 parts wax and 1 part natural rubber. The mixture is heated in a water bath, then it is applied to the surfaces to be glued, well prepared, compressed and excess glue is removed.
Another recipe for gluing earthenware and glass looks like this: dissolve 100 g of slaked lime and 100 g of sugar in 1 liter of water. All this is cooked over low heat for 3 hours without boiling. Then the mixture settles and the water is drained. Add 0.5 kg of crushed tile adhesive, stir the mass and leave for half a day. Next, excess water is drained from the swollen glue, and it is placed on low heat to completely dissolve. This glue is used in a cooled state.
This glue is still inferior to synthetic glue in such parameters as water resistance and susceptibility to microorganisms. But in the absence of a synthetic adhesive composition, this one will do until it becomes possible to use a more durable one.
Of course, the provided list of synthetic ready-made and self-made adhesives is not exhaustive. In our time of constant development and innovation, other brands can be found in specialized stores.
Customer Reviews
Ivan, St. Petersburg : “I bought a sink made of artificial stone for my kitchen. But, after dinner, he threw dirty dishes at her. It turned out that the fork scratched the bottom. Fixed this problem quite easily. I needed a grinder and a circle. I quickly sanded out the flaw and the sink looks like new.”
Irina, Krasnodar : “My husband gave me a new stone washbasin. Inadvertently, I broke off a small piece on the corner. It's good that he didn't get lost. My husband bought a special glue for acrylic, degreased it and glued it in its original place. I was upset, the glue stain was noticeable. But after sanding everything went away. Now I will be careful in using it. Very pleased with the purchase."
How to drill a hole
Very often, ceramic sinks are made without a special hole for the tap. This happens because most modern faucets are installed on the wall near the sink.
But there are situations when the faucet needs to be built into the side of a ceramic sink, and then it is advisable to watch a video on how to drill a sink.
But when it is not possible to see the whole process on the screen, we suggest that you read the written version of how to drill a hole in a ceramic sink yourself.
The first step is to decide how to drill a ceramic sink; the answer is simple - a drill. This is done not with an ordinary drill, but with a special attachment for ceramic products.
A crown attachment with a diamond core is suitable for this purpose, which will allow you to drill without adding water and cooling the drill itself.
Sales consultants in the store will help you choose the right crown. If everything is done correctly, the problem will be solved. than to drill or seal a hole.
Nowadays it is important not to radically change everything during renovation, but to breathe new life into old objects that have an attractive appearance. Therefore, the question may arise of how to seal a ceramic sink for restoration.
There are such adhesive materials for ceramics:
- waterproof glue;
- silicone sealant;
- cold welding.
Use a hair dryer first to get rid of unnecessary moisture. Now you can seal the crack (for example, with waterproof glue) and leave it to dry for at least four hours.
Then you should apply epoxy putty at the joints and sand the repair area with fine-grained sandpaper.
Also watch a video with an example of restoration of a marble sink.
Price list of main types of repair work:
| Acrylic stone products | ||
| Service | Description of work | Cost of work (RUB) |
| Complex "TO Standard". As a result of the work carried out, the product acquires its original appearance. | Departure of a service technician to the site, incl. works: Grinding and polishing the surface, cleaning lime and mold around the edges, sealing cracks. | 3500/m2 (minimum departure – 5000 rubles) |
| Integrated sink update | Grinding, polishing the sink, cleaning from lime and mold | 4500 rub. |
| Working with chips and cracks | Removing chips and cracks, replacing a stone fragment if necessary (patch), grinding, polishing. If the volume of work is large, it may be necessary to dismantle and work in the workshop | From 7000 rub. |
Repairing a chipped ceramic sink
It is possible to repair a chip on the sink yourself using specialized sealants or putties. For reliable results, you should perform the following actions:
- clean the damaged surface;
- dry the repair area;
- dilute the ceramic putty according to the directions on the package;
- apply fastening material (putty) to the chip site so that it protrudes beyond the edges (the putty will dry out);
- let the putty dry;
- sand with fine-grained sandpaper until smooth;
- Paint the seam with the appropriate color, and remove excess paint from the surface with acetone.
Chemical effect on stone.
Hard water with a high content of iron, chlorine, etc., also negatively affects the surface of the stone. It is clear that you should take care of the sink, stone sinks, you must use care products wisely, and do not use household chemicals in cleaning.
But not everyone is familiar with these conditions, and here’s the problem: repairs are needed.
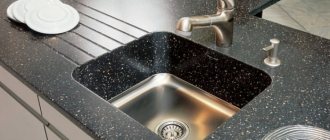
Damage options for composite sinks
- Scratches are the result of careless washing of cutting objects, cutting food on the sink, or cleaning the product using abrasives and metal sponges.
- Cracks - occur as a result of strong impacts, sudden temperature changes, and also due to violations of the product’s production technology.
- Blistering of the top layer and white spots are formed if you place hot pots or pans fresh from the stove on a stone surface, as well as when using strong chemicals.
- Chips – appear as a result of falling a heavy object or metal kitchen utensil.
The method of restoring an artificial stone sink is selected depending on the type and extent of damage.
Scheme of working with us
You can arrange the repair of sinks and sinks made of ceramics, earthenware and other materials on the website by filling out the feedback form. The technician will conduct an expert assessment of your plumbing fixtures much faster if you attach a photo of the sink to your electronic application. All technical nuances can be discussed with a specialist by phone before carrying out repair work. He will give detailed advice for each individual case and select the best option for restoring your plumbing. Restoration work using enamel or acrylic is carried out as quickly as possible. The team leaves for the work site no later than the next day after filling out the application and begins the restoration. The contract is drawn up for all types of services; a separate clause provides a guarantee for the quality of the work performed. Has your sink stopped shining, or are scratches and cracks noticeable? Don't put off until tomorrow what you can repair today! Experienced craftsmen of our company will quickly and competently carry out the restoration of your sink. A professional renovation will magically transform your plumbing and home.