Almost every mother at least once in her life bought her baby formula (usually tin cans of 400 and 800 grams) or baby food in glass jars. And of course, after use, the question arises: throw the jar away or leave it? If left, how to use baby food jars?
Many mothers save jars for months, filling cabinets and building tin locks, without ever figuring out where they can be used so that it is both beautiful and useful.
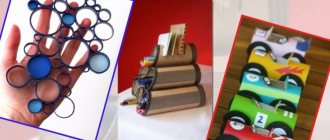
Small Item Storage
The biggest problem for craftsmen of various specialties is storing small items. And this is where small baby food jars come in handy. Firstly, due to their size they do not take up much space. And secondly, through the transparent walls you can immediately see what is inside.
These containers can be used to store beads, buttons, floss and other small parts used for all kinds of needlework. Banks are also useful for little fashionistas who have a budget for elastic bands, hairpins, bows, etc. There are dozens of charms.
Small apartments force craftsmen to make good use of every centimeter of available space. Thanks to the tightly screwed lids, baby food jars can not only be placed on a shelf, but also hung from below, i.e. use each shelf twice. Using a self-tapping screw, secure the metal cover to the bottom of the shelf. All that remains is to fill the jars with the contents and connect them with the lids - a convenient storage system is ready.
Flavor
My jars are filled with fragrant petals. Disperse fragrances in different rooms. Your home will smell fragrant.
How to use baby food jars best ideas
Here are so many different baby food craft ideas. Get inspired! And read my other articles on the website https://edfy.ru!
Facebook Email Viber Pinterest Telegram Send
Pincushion
A baby food jar can be turned into a pincushion.
To create a pincushion you will need:
- a small piece of fabric;
- padding polyester;
- thick tape;
- glue;
- needle and thread.
Cut a circle from fabric approximately 2 times the diameter of the lid. Sew along the edge using small stitches. Place a small piece of padding polyester inside and tighten the thread.
Apply glue to the lid (it is most convenient to use hot glue for this purpose) and glue the resulting ball. To cover the junction of the fabric and the lid, apply thick tape. Close the junction of the fabric and the lid with thick tape. The pincushion is ready.
Inside you can store things that should always be at hand when sewing: measuring tape, thimble, seam ripper, small scissors, etc.
For cooking
I actively use baby jars for culinary purposes. I like to fill them with salted herbs: garlic feathers, dill, wild garlic. Served with various dishes, it goes best with mashed potatoes. A jar is enough for once or twice. Read the recipe here
.
How to use baby food jars best ideas
Quite original is obtained in jelly jars from baby food. It's easy to prepare if you have fruit and gelatin on hand. You can prepare an exquisite dessert for a children's party, a picnic, or serve it to your guests at the end of dinner. Everyone will be pleasantly surprised by its simultaneous simplicity and creativity.
Delicious dessert
Jelly
I often have to prepare lunches and dinners for my husband to take with him to work. By the way, you can prepare a delicious dessert from oatmeal, milk, cocoa, fruit and ice cream. Use any available ingredients: blueberries, strawberries, pears, apples, bananas, mangoes.
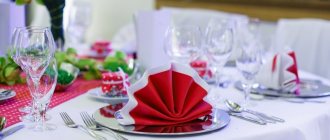
On a hot summer day, it's so nice to refresh yourself with a serving of pink lemonade with ice. 200 gram baby food jars are perfect for this. Notice that the lids have a pattern carved into them.
How to use baby food jars best ideas
Pencil holder
For little artists, baby food cans can be used to make an excellent organizer for colored pencils, crayons, etc.
To make an organizer you will need:
- glass jars;
- acrylic paints;
- large capacity;
- glue.
Choose a low container that will hold the required number of cans. Cover it with white spray paint.
Wash all jars thoroughly. They need to be painted from the inside. This can be done in different ways: with a brush, foam sponge, etc. You can try this option.
Pour some paint into the jar, then add a small amount of water. Close the lid and shake the jar well enough times to evenly coat the walls. After this, remove the lid and leave the jar to dry. Change the position of the can from time to time so that the paint dries evenly.
Glue dry painted jars to the container - this will make the organizer more convenient to use.
How I sewed my first fursuit. Part 1
New anime and the onslaught of Disney did not pass me by - furries became a part of our lives, and I could no longer keep in the depths of my soul the ancient desire to growl in animal form. Thanks to quarantine and distance learning, I finally have time. And time, as experience has shown, is very necessary.
My plans are to make a mask, tail and fur coats. And I started with a mask.
I chose a “soft head” for myself - therefore, the very first ingredient for the base of my mask is foam rubber
. I purchased a two-meter piece of the thinnest foam rubber at a hardware store.
Adhesive crystal
. The choice fell on it because its name appeared in one tutorial article on fursuit, and also because it does not dry out instantly. A very useful property, especially when fastening large parts. You will need a lot of glue. The foam base alone took three packs of 40 grams each. I recommend immediately taking a large one.
Fur.
I was very lucky with fur - I got an old fur coat and fur collars from old jackets just like that. However, I briefly glanced at the price tags in a fabric store and I think that fur is the most expensive in the entire list of materials. I have at my disposal short mink fur and long fur, presumably arctic fox.
Textile.
Everything is much more complicated here.
On the inner surface of the jaw and eyes, I used the black fabric that was on the back of the fur coat - some kind of thin black lining
. Right now I'm thinking fleece is the best option - it fits well, stitches well and will easily mold to the shape you need. The fleece is black (for the inside of the muzzle and eyes), pink/red (for the tongue) and white (for the teeth). I won’t lie, I didn’t use fleece for the tongue, but a simple sock. In general, if there are a lot of lonely single-color socks, then you can use them for this purpose. BUT: for a balaclava, the fabric lining on the inside of the mask, fleece is not suitable - it is too dense.
Needles, threads, centimeter, scissors, paper tape.
Canva –
a small piece of canvas for the eyes.
I purchased an additional permanent black marker
to draw the pupils on the canvas.
The cat has checked everything, we can start. By the way, in the photo there is a glue gun and a stationery knife. The glue gun was a mistake - it may be useful for some things, but certainly not for the foam rubber it burns. I used the knife once, it was easier with scissors.
The first step is to make a foam cylinder to fit your head, about shoulder length if not longer. This is because the ends of the resulting cylinder will have to be cut into triangles in order to later fasten them together and get a round “skull”.
Next, cut holes for the eyes and nose. I couldn't do it easily. Perhaps there was not enough ingenuity? I recommend making your eyes big - I can hardly see anything through my small ones.
The next stage will be the second cylinder - along the length of the future upper jaw. From it I simply cut out a jaw according to the shape. Next is another piece for the lower jaw. You'll get something similar. Separately, I cut out a section on the upper jaw for the future nose.
Next, highlighting with foam the important parts - eyebrows, cheekbones, nasolabial mirror, the nose itself, making the ears. The permanent marker turned out to be convenient not only for drawing pupils on the canvas.
It is at the foam stage that you will need a hell of a lot of glue - open the windows, I pray you.
The end result was something like this.
The area where the mustache should be was later refined. In total, the foam base took 3 days, 3-4 hours.
The next step was to cover the eyes and nose with fabric. You can also immediately line the mouth with fabric from the inside, but I did this for reasons known only to God in the midst of sheathing with wool. Then wool. The word pattern, unfortunately, is not familiar to me, so I simply applied the fabric and sewed the mask, cutting off all the excess. In places where folds could be a beautiful solution, I left them and stitched additionally - like here, between the eyebrows and at the base of the nose - to fix the fold in the desired position.
And that's not even the middle. In the next part we will talk about the rest of the plating and the magnificent history of difficult dental births. By the way, the sheathing stage already took me another 3 days.
Flower vases
Most vases are quite large. Where to put a small bouquet of daisies or several small flowers that the child brought from a walk? Baby food jars will come to the rescue again.
To make them more interesting, decorate the jars. You can use almost anything you have on hand as decoration:
- braid, ribbons, cords, yarn, etc. of different quality and size;
- pieces of fabric: you can either completely wrap a glass jar with them, or cut out a small strip, for example, burlap, and secure it to the jar with twine;
- buttons, pebbles, beads and other small parts can be attached to the walls of the jar with glue - and your children will be happy to help you in this matter;
- If the previous ideas are not to your liking, paint the jar or simply dip it in paint, then turn the container over, let the paint flow freely and dry it.
Summer residents often use small jars of baby food to grow seedlings, and city residents who grow herbs in their apartments grow herbs there.
Decorating a room or garden
Hanging candlesticks made from small jars look simply amazing. Both in the house and in the garden.
chandelier, decor
Hanging candlestick chandelier
Home decor
You can use glass jars left over from baby food to create decorations with colored salt.
To work you will need:
- glass jars;
- fine salt;
- colored gouache;
- baking paper.
Place baking paper and sprinkle the required amount of salt on it. Dilute the gouache with water to obtain the desired shade. Keep in mind that the salt will be lighter in color after drying. Mix the gouache with salt and place on a baking sheet. Also color the salt in other colors. After this, place the baking sheet with salt in the oven at 120°C for 20-30 minutes. While the salt dries, wash and dry the jars thoroughly.
Cool the oven-dried salt and sift through a metal colander. After that, start carefully pouring it into the jar. Use a funnel or a thick bag with the edge cut off for this job. Make sure that layers of different colors do not mix with each other. When the jar is filled to the top, close the lid tightly, because... salt is hygroscopic and easily absorbs moisture.
Maniac Strawberry made of polymer clay. Author's work
Since childhood I have loved mysticism, horror, horror, surreal, etc. I adored the film “Alien” and am still in awe of Giger’s work. Anyone who has seen my drawings will confirm that they are very unique. This spilled over into the professional sphere. More than once I had the opportunity to come up with creepy characters for labels. Strawberry is one of these.
This figurine is completely the author's work from start to finish.
Molded from polymer clay, painted with acrylic paints. The stand was turned from an idea into reality by my husband, ?
Maniac Strawberry is not one of its kind, I came up with a whole series of fruit maniacs. But the rest are still only in 2D format? I’m thinking of sculpting them all in the future.
Portioned desserts
At children's (and not only) parties, baby food jars can be used to prepare portioned desserts. We would like to offer you a recipe for one of them.
You will need:
- ready-made cupcake;
- shortbread nut cookies;
- curd soufflé;
- cream;
- candied pecans.
Break the cake into small pieces and place it on the bottom of the jar - this will be the first layer of the dessert. Crumble one cookie and make a second layer out of it. Then place the curd soufflé on it, and on top - another layer of crumbled cake. Make a nice curl of whipped cream on top (to give the cream this shape, use a pastry bag or just trim the edge of the bag). Garnish the dessert with candied pecans.
Place the jars of dessert in the refrigerator overnight so that the layers soak into each other and the flavors blend.
Beautiful “pumpkin” jars
You will need:
- acrylic paint
- glitter paint
- brushes.
1.
Start painting the jars. You will need 2-3 layers of paint. If the theme is “Autumn” or “Halloween”, then you can use orange paint (like a pumpkin).
2.
Once the paint is dry, apply a coat of glitter paint on top.
3.
You can use a brush and black paint to paint eyes and a mouth on the jar.
* Fill the jar with sweets and you're done!
New Year's decor
Baby food jars will help you decorate your home for any holiday, such as New Year.
To create New Year's decor you will need:
- glass jar;
- glitter;
- a small decorative Christmas tree (you can use any small toy instead of a Christmas tree);
- glycerol;
- distilled water.
Wash and dry the jar thoroughly. If there is writing on the lid, paint it. Glue a decorative Christmas tree to the underside of the lid using a heat gun.
Pour 1 tsp into a jar. sparkle. Close the lid tightly and invert the jar. Golden rain will begin to slowly fall onto the tree.
Candlesticks made from tin cans
For your garden, you can make original decor from tin cans, which will create a special atmosphere and comfort in the evenings. To implement this idea, you need a hammer and a sharp nail.
First, let's draw a pattern or inscription using a marker directly on the jar. If you plan to leave it in its original form without painting, then you need to print a stencil with dots.
Let's take a hammer and, while hammering in a nail, make several holes to create a pattern. Place a candle inside and that’s it, the candlestick is ready. It can be painted, hung on the veranda or placed on the table - in any case, such a decoration will not go unnoticed.