- October 15, 2018
- Crafts
- Legina Marina
If you manage to walk through the forest with your child, then this is a great chance to collect unique material for making crafts. Don't pass by the moss and birch bark. Be sure to take home some pine cones. This is an excellent basis for making candlesticks, souvenirs, and toys. They will perfectly decorate a nursery and can be given as a birthday gift to family and friends. And of course, you will need knowledge on how to glue pine cones together for crafts.
What can you come up with from cones?
Show your imagination and they will turn into a variety of figures, decorative elements and interior decorations. The creative process of creating figures will appeal not only to children, but also to their parents. Of course, before starting work, you need to decide what exactly you want to reproduce. There are a lot of options:
- Animal figures: mice, squirrels or hedgehogs. If you additionally use a bottle and plasticine, you can get a swan, a crocodile and an owl. The main thing is that any child can do such crafts. And the result will take its rightful place at exhibitions at school or kindergarten.
- Compositions for interior decor that can enliven a room and create additional comfort. Such crafts include ikebana and Christmas wreaths on the door.
- New Year's wreaths and garlands will add a special, festive mood. These could be candlesticks, garlands or Christmas tree decorations.
On the wall
This decor will help fill an empty corner in the room and create a festive atmosphere.
What you will need:
- Tinsel
- Christmas decorations
- Scotch
- Scissors
Step-by-step instruction:
- Build an outline of a tinsel tree on the wall, securing each part with tape.
- Attach decorations.
- You can pass a garland along the wall along the contour of the Christmas tree.
Master Class
To successfully solve the problem, you only need free time and a little imagination.
- We choose a cone. For this craft you will need a large copy, without broken edges. Examine it, it is best if the cone is not too mature and the scales are still tightly adjacent to each other.
- In order to make a muzzle, you need to attach light-colored plasticine to the side of the pine cone that was facing the tree. You can simply pull it out with your hands.
- To make a nose and eyes for a hedgehog, it is enough to roll several balls from plasticine mass and place them in their places. Ears won't hurt either.
- Now the paws. In this case, you don’t have to think about how to glue the pine cones together for crafts, because even if you plan to house a whole family, it will consist of individual figures. They are made from plasticine of the main color. To do this, glue the hedgehog to the base.
- Make an apple, a mushroom or a leaf and place it on the prickly back.
Decorative vase
It is perfect for placing dry sprigs of grass or autumn leaves in it. It's simple to do, but looks original and bright. You will need a plastic bottle and a bag of pine cones. Any paint and universal glue. You can buy it at a hardware store. You can try to make do with improvised means. If you are thinking about how to glue pine cones onto a bottle, then it’s probably too late to run to the store.
No big deal, just take a frying pan and heat it up well. Now place the cones on the side that should be attached to the bottle and let it heat up well. After this, carefully take them one at a time and quickly press them to the desired place. We do the same with all the other cones. They can be arranged in a chaotic order or the design can be thought out in advance. Now cover them with gold or silver spray paint. The vase is ready for use.
Quilling
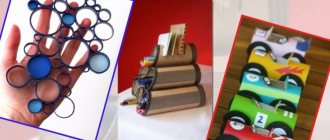
This technique involves creating applications from paper ribbons of different colors, twisted into a spiral. Photos of crafts for 4th grade using the quilling technique look like fancy impressionist paintings, and not simple children's creativity.
From a variety of paper spirals you can lay out the body of a curly sheep, completing its face and legs. Butterflies are made using this technique using the same principle - bright wings are made of paper, and the body and antennae are drawn in with felt-tip pens.
Flowers made using the quilling technique look original. To make the silhouettes more natural, the spirals can be made more elongated and given a more angular shape - this way the petals and leaves will look natural.
Making the task more difficult
If the child is older, you can make an original composition with him from a plastic bottle and pine cones. Moreover, it will become not only a decoration for the room, but also a real, homely flower bed. Let's look at what this requires.
- Plastic bottles - 0.5 l.
- Cones.
- Acrylic or gouache paints.
- Wire.
- Soil for plants.
- Grass seeds for animals.
- Scissors and glue.
- Styrofoam.
- A bottle and an old bowl for a mushroom.
That is, we are talking about a simple but fantastically beautiful composition. On a plastic bottle you need to make a cut closer to the base. After this, we cut out a rectangle, which turns it into a pot. On the nose you need to paint the face of a hedgehog. Now the most difficult part is what glue to use to glue the pine cones onto a plastic bottle. Do not use Moment, it dissolves the plastic. PVA will not work either; plasticine behaves poorly in this case. But a glue gun copes with the task easily and simply. Around the cutout for flowers, the entire surface (except for the muzzle) needs to be covered in two rows with cones.
Now let's think about methods of fastening to the surface. Since gluing cones to cardboard is quite difficult (more precisely, expecting strength from this connection), we will do it in a different way. Bend the thick wire into an arc and pierce the bottom of the hedgehog so that the sharp edges pass through the bottle and come out again. Now sew them onto thick cardboard and secure the hedgehog.
OK it's all over Now. All that remains is to pour soil into the flowerpot and sow the seeds. Green grass will grow on the hedgehog's back. If you make several such pots, you can diversify the composition with fly agaric. To do this, take another bottle, pour sand into it for stability, and cut off the top with the lid. Now glue the old salad bowl on top using the same glue gun. All that remains is to paint the hat and attach foam balls to it.
How to paint
For painting, use dried, fully opened cones; The following methods exist:
- Dye. Acrylic or gouache, applied with a sponge or brush. The sponge speeds up the work, but does not affect the entire surface of the scales. A brush allows you to get a better result, especially if several shades are used.
- A tin of paint. At the same time the fastest, easiest and most expensive way. The cone is hung on a fishing line, dipped into a jar of alkyd enamel, and hung to dry.
Painting with a brush
- Paint on a sponge. If there is a large amount of work to be done, the sponge is placed in a container and thoroughly soaked in paint; the cone is pressed against it on all sides.
- Aerosol enamels in the form of a spray. The paint is applied from a distance of 15-20 cm.
- Hairspray and glitter. Treat the surface with strong-hold varnish and immediately sprinkle it with glitter. The excess is shaken off and, if necessary, processed again.
Spray painting Source ariae
- PVA glue and glitter. Mix glue and water in a bowl deep enough to dip the pine cones into. Repeat several times, allow excess to drain, dry. Then apply glue in the right places and sprinkle with glitter.
- Wax. It can be purchased in the craft department (in the form of flakes), or replaced with cheap candles. The wax is melted in a water bath, a dye (food or oil) and aromatic oil are added to the solution. The cones are dipped in wax and dried several times until the desired result is obtained.
After spray painting Source previews.123rf
Making little men
The fantasy doesn't end there. You can create other figures, each of which will become a real masterpiece. To make a cute little man, you also need to bring a handful of dry grass from the forest. You will also need a neat onion. The cone will act as the base, the body. And your hero’s head will be an onion. Now you need to think about how to glue the bump. It can be any thick glue or plasticine.
We collect the person and begin to design the face. To do this, you can draw eyes and a mouth on the shiny, orange skin with a black marker. Make hair from dry grass. And now, the little man is ready to take his place on the shelf.
Seven-flowered flower
Another way to show your creativity. This does not require serious skills, but the small child needs your help. Prepare cones, gouache paints, and a brush. When choosing how to glue the pine cones to the base cardboard, it is best to give preference to a glue gun. But if you will be working with a small child, then choose plasticine.
Divide the pine cones into seven piles, each of which will be used to make one petal. Take a brush and paint them with different colors. Let the pine cones dry a little. Some can be left unpainted, it will be even more interesting. Now lay out the middle from ordinary cones, and the edges will be multi-colored.
Take thick cardboard and use a glue gun to plant unpainted pine cones in the center. After this, decorate the multi-colored petals in the same way. The result is a simple and effective picture at the same time.
Video description
About decorating ideas using pine cones in the following video:
Home decor
Decor made from pine cones for the home does not fit into every style, but it will add coziness to many modern trends. Outside of the winter holidays, your home interior can be diversified with interesting designer items:
- Candlestick. Use a glass or small glass vase. The candle is placed in the center, along the edges there are several cones without any decoration. Simple, stylish and all-season.
Grace in simplicity Source 1.bp.blogspot
- Decorative jar. Choose a jar of unusual shape and fill it with pine cones, painted in the color palette of the room - white, black, gray. A container of a more original shape (for example, a vintage candy bowl with a lid) can be filled with pine cones painted in an acid color. Option: the jar is filled to a third with pine cones, a skein of garland is placed on top, which is powered by a battery hidden at the bottom.
For owners of glass containers Source i.pinimg
- If you are lucky enough to get a particularly large specimen of a cone (for example, from a Coulter pine), no additional decor is required. Designers prefer to use such specimens in their natural form - natural motifs are now in trend.
- Frame. Small cones of cypress or larch can be used to frame a photograph or a child’s drawing, and hang the finished composition on a ribbon. The craft is left in its natural form, or painted in a suitable color - it will be cute and original.
Particularly large specimens Source media.angieslist
- Decor in a pot. The pot is filled with moss (or, for example, straw). Cones are laid out in rows on top and secured with glue for reliability. The structure can be given any shape - spherical, elongated, cone-shaped.
Simple and elegant Source xn--80afdb0cbapl
"Tree" of pine cones
If you want to do something original using natural materials, then try collecting a tree. It will perfectly decorate the hallway or become an exquisite gift for the next holiday. To make this craft you will need:
- A big bag of pine cones.
- Sturdy stick.
- Pot.
- Glue gun.
- Gold spray paint.
Here you need to dwell separately on how to glue the pine cones together for crafts. Since a strong connection of a large number of elements is required, it is best to use a gun. This makes the assembly process as easy as possible.
- Make two balls of pine cones. One requires a larger size, the second a smaller one. These are the branches of our tree, the main crown and the second, smaller branch. On one side, do not forget to leave a hole for the tree trunk.
- Let's prepare the pot. It needs to be coated with gold paint. You can put a beautiful ribbon around the edge.
- The tree trunk must be constructed from a dry stick. It can be additionally coated with red paint.
- Attach the large ball directly to the barrel, and the small one to the side. Pay special attention to how to glue the pine cones for the craft. The strength of the structure will depend on this. Therefore, after assembly, we glue it again.
Fill the pot with crushed stone to make the tree stable. Install the trunk and strengthen it well. Now let's start decorating. It is best to paint the cones with a spray can, and the trunk with a brush. It turns out very stylish. An excellent gift option for friends.
Drying
The final stage of the preparatory work is drying, due to which the scales completely open, taking up their final position. There are the following methods for drying cones for crafts:
- On air. The slowest method takes 2-3 weeks, depending on the moisture content of the raw materials. The cones are placed in a basket or box lined with newspaper in a layer of 10 cm (half opened - up to 20 cm). Important conditions are dry air and good ventilation.
- Express method. To speed up the process, the cones are boiled for an hour and then dried on a radiator.
Drying in the oven Source img03.rl0
- In a frying pan. Dry in a cast iron frying pan without a lid, keep the heat to minimal. The future decor is laid out in one layer, loosely, and periodically turned over. Drying may take an hour and a half.
- In the oven. It is heated to 250°C. Place the material in one layer on a baking sheet wrapped in foil and dry for 50-60 minutes. The oven door is left ajar to speed up air exchange.
- In the microwave. The raw materials are laid out in one layer on a flat plate and dried at maximum power for one minute. If necessary, turn the cones over and repeat drying.
Simple craft options Source i.ytimg
Let's play farm
You can make a huge number of little animals from pine cones. A popular option is the funny cow. To do this you will need:
- Pine and spruce cone.
- Plasticine.
- Matches.
- A little imagination.
First of all, design the torso. This means that you will have to solve the question of how to glue the pine cones for crafts. There is a simple and original option that will help out if you run out of plasticine. Prepare a piece of salt dough. To do this, simply mix half a teaspoon of fine salt and 15 g of flour. Add a little water to make a thick dough. Now you can start assembling. When it dries, the craft will hold up just fine.
So the little pine cone is the head. Now you need to decorate it with the missing details. Make horns, a muzzle, and an udder from plasticine. You can continue creating with salt dough. Make legs from four matches, and don’t forget about the hooves. They also come out great in the dough. In this case, all parts can be painted after drying. The plasticine is already colored, which is its advantage.
Illustration for a fairy tale
An excellent option for working with children. Just don’t choose complex options with a large number of characters. "The Frog and the Heron" would do just fine. Let's make heroes together. You will need cones and twigs, acorns and feathers, plasticine, cardboard. If you have varnish available, prepare that too. It will help make the composition complete. Now let's look at the workflow:
- The head and body of a heron can have cones of different sizes. You need to make holes in them to connect them with a thin, long branch. This will be the neck. Legs are like matches. The feet can be made from halves of acorns, and the tail from feathers.
- A frog made from cones is not so natural, so we will use a different material. The body can be carved from wood mushroom. Attach two large caps of acorns using plasticine to create a head. If you manage to find two more smaller caps, then they can be used as eyes.
- All that remains is to fix the craft on cardboard or polystyrene foam and varnish it.
How to pierce a chestnut?
In order to connect them, we recommend first piercing
with an awl or a needle, only then insert the listed materials into the holes.
If you use sharp tools, the chestnuts
will not crack when pierced.
2. Chestnut
can also be glued together.
Interesting materials:
Who invented Mac OS? Who came up with the name of the notes? Who came up with the image of the alien? Who takes part in the creation of the performance? Who is the producer of BTS? Who makes Redmi? Who makes Xiaomi? Who deciphered the German Enigma? Who deciphers Enigma? Who designed the new Sberbank logo?
Christmas tree made of pine cones
A bright and unforgettable craft that you can bring to work or give to one of your friends on the eve of the New Year. You will need:
- Cones.
- Thick cardboard.
- Dye.
- Glue.
- Various decorative elements.
Go to the nearest hardware store and see what you can use to glue pine cones together for crafts. But the easiest way is to get a silicone gun. It's simple and reliable. And if an element falls off, it can be quickly glued back.
Using cardboard, make a cone and secure its edges. Now start gluing the pine cones onto it with a gun. It's better to start at the base and gradually work your way up. It is not necessary to do this in one row. On top of it, between the rows, you can glue more cones. This will only make the tree more magnificent. The lifespan greatly depends on what kind of glue you use to glue the pine cones together for crafts. If the tree is planned for exhibition at school and in the garden, then it is better to use a double layer of glue to be sure.
The cones are covered with acrylic paint. You can take green, gold or silver. After complete drying, add decorative elements. These can be beads, ribbons.
Making basket-pots
A flowerpot is a decorative structure, inside of which a flowerpot with live, mainly climbing and hanging plants is placed. To begin with, select a plastic or ceramic pot, which will later be placed in a basket. The cones are fastened together or glued directly to the flowerpot itself. The handle of the basket is made higher than in a simple decorative one, so that nothing prevents the flower from growing in height. It is not at all necessary to make the bottom from natural materials - the side walls are enough. The edges of the structure are made one or two cm higher than the pot itself.
Christmas wreath
Today they are becoming very popular, and buying ready-made ones in a store turns out to be quite expensive. Why not make it yourself? This will require a little time and effort.
- Sheet of cardboard.
- Vine or flexible branches.
- Grass.
- Cones.
- Glue.
- Bunches of rowan berries, beads, bows, bells, spruce paws.
First of all, take some cardboard. Twist the branches and grass into a voluminous wreath and wrap it with thin wire. Using the same wire, secure it to the cardboard. For extra strength, go over with a glue gun. Actually, this is the answer to the question of how to glue pine cones to cardboard. The pistol is perfect for this.
Now it's time to decorate our wreath. To do this, we place fluffy spruce branches, pine cones, and beautiful ribbon bows on top in a free order. How to glue the cones to the base? You can use Moment glue. It will do the job just as well as a glue gun. All that remains is to cut out the cardboard in the center of the Christmas wreath and attach a loop to the wrong side.
New Year's candlestick made of pine cones
Another cute accessory that you can give to your family and friends for the coming holidays. You will need a stand. It could even be an old saucer. Choose nice, big buds. They will need to be attached along the edge. Since there is no need to glue the cones together, glue can only be applied to the lower part. To do this, successfully use superglue.
Leave room in the center for a candle in the glass. They are sold in different varieties, flavored and regular. It’s best to take simple ones, and if desired, add a few drops of cinnamon or orange essential oil to the bowl. On a festive evening, such a composition on the table looks especially wonderful.
Drawn postcard
Children's crafts on the theme of winter are primarily associated with postcards. On a small rectangle of thick cardboard, the child is free to depict whatever he wants.
Unusual tree. With a brush you need to draw out the trunk and spreading branches, indicating a lush crown. Then apply “snow” using a cotton swab using point movements. Perhaps, among the boiling splendor, the remains of autumn foliage will appear. The final touch is a hare or bear cub near the roots.
Figure skater. Use blue and cream colors to draw the frozen surface of the lake. Let there be clouds and mountains in the background. In the center of the picture is a boy or girl skating. It will turn out fresh and original in its own way.