Cast iron frying pans have been popular for decades. They are so reliable that they can be passed down from generation to generation. The performance characteristics are also pleasing - such dishes accumulate heat, thanks to which food remains warm for a long time, and gas or electricity is saved.
An additional advantage is that such a frying pan is suitable for any stove - gas, electric, induction. Let's figure out how to prepare a cast iron frying pan before the first use in order to make its further use as pleasant as possible.
Features of cast iron cookware
Cast iron has been used for cookware since ancient times, thanks to its amazing properties of maintaining the same temperature for a long time. In a cast iron frying pan, any dish turns out tasty and beautiful :
- you can fry anything, in any case a crispy and appetizing crust will form;
- When stewing, the products do not lose their shape.
But these are not all the advantages of such dishes. There are other advantages :
- Durability and strength. Modern specimens are very durable - they cannot be damaged even with a knife, and they will not crack if dropped on the floor. This frying pan will last for decades if you take proper care.
- Resistant to prolonged exposure to high temperatures.
- High quality food. Food retains its beneficial substances, but does not absorb harmful ones from cast iron. Again - with proper preparation and care.
However, this excellent option has a number of features that you need to be prepared for:
- heavy weight - it is necessary to take into account that cast iron cookware weighs much more than its analogues;
- it is impossible to store food in such a frying pan - otherwise odors will be absorbed into the dishes;
- instability to moisture - cast iron can quickly rust if not properly cared for;
- impossibility of washing in the dishwasher - again due to the appearance of rust;
- the need for preparation before using for the first time.
Method of calcination on an open fire
How to fire a cast iron frying pan if it is not possible to use a stove or oven for this purpose? It should be remembered that we will talk about a rather dangerous way to extend the shelf life of cast iron utensils.
You can use an open fire even while hiking. It is in such cases that they do not take dishes made of ceramics and other delicate materials with them.
Calcination over an open fire will also be the optimal solution for summer residents who are unable to purchase a stove.
Attention! This method requires special care, because the risk of burns increases many times. In this case, it is better to limit yourself to dry roasting using salt.
Why and why is it necessary to calcinate?
After purchase, any utensils must be washed before first use - everyone knows this. But for a cast iron frying pan, such care will not be enough, because during production it is lubricated with a special anti-corrosion compound, which prevents the dishes from rusting during storage in a warehouse, store or transportation.
Cast iron is a very porous material, so you can’t completely get rid of this anti-corrosion lubricant using dishwashing detergent. In addition, this lubricant has a very unpleasant aroma, which you also want to get rid of.
Thermal treatment of new dishes, namely calcination, or firing, will help with these tasks. Tempering will destroy harmful components and seal the pores of the cast iron, making the pan non-stick.
In addition, such heat treatment will serve as a litmus test that can identify defects or defects in the pan. It is better not to use the cookware if the following appears during heating :
- cracks;
- chips;
- cavities;
- violation of homogeneity;
- color change.
There are only two changes in the color of cast iron when heated, which are considered normal: to turn slightly brown or gray when heated and to turn black again when cooled.
Calcining a cast iron frying pan at home is a mandatory process before you start using it, because it:
- It will create an additional layer that will protect against the effects of alkalis and acids.
- It will create a non-stick coating, which will make cleaning your cookware easier.
- It will clog pores, destroying harmful substances of the anti-corrosion composition.
How to anneal and harden the cookware should be written in the instructions included with the purchase. Usually preferences are indicated there like:
- how to heat the oil,
- how long does it take to heat a cast iron frying pan, and so on.
If you don’t have these instructions, it doesn’t matter, since commissioning cast iron cookware is always based on the same principle.
How to prepare a cast iron frying pan for firing
It is important to initially remove the factory grease from the product. It is necessary in the production of high-quality household tableware. It will not be possible not to use it when processing molding containers. Otherwise, it will be difficult to remove the finished product from the base.
Don’t also forget that new cast iron cookware is treated with a special anti-corrosion layer. Such precautions are necessary to ensure that the product is marketable without rust.
Sounded coatings must be removed during production of kitchen utensils. If you neglect this advice, then in the future their components will end up in your food. Calcination will help to avoid the problem to destroy harmful microparticles. It is enough to wash the dishes, dry them and use one of the many methods of heat treatment.
It also makes sense to make it a rule to regularly calcinate cast iron products after thorough cleaning, returning them to their natural non-stick layer.
Attention! The firing process can hardly be called a pleasant event. During this time, it is recommended to open a window or turn on the hood.
What dishes need to be heated?
The need for processing disappears when we are talking about enameled cast iron cookware. Enamel itself is a non-porous material, and it is not lubricated with an anti-corrosion compound during production.
The exception is black enamel - experienced housewives recommend calcining such pans as well.
All non-enamel cookware must be heated on the stove or in the oven. This includes not only frying pans, but, for example, cauldrons, grill pans, and even saucepans.
How long to heat the frying pan
It all depends on the method by which the product was processed. A lot of time will be wasted if the pan is in the oven. However, this method of processing can be called safe, because the hostess is not expected to have direct contact with fire.
The traditional approach of hardening with salt will not take more than 20 minutes. The method is safe and quick to implement, but not every housewife will be able to constantly monitor this process. In addition, not everyone will like the smell of salt, which will absorb leftover food.
You don't have to record the duration of the procedure. The salt itself will indicate its end when it changes its color.
When using vegetable oil, the process can be extended if the treatment is carried out twice. Experts say that this approach to solving the problem makes the protective layer of the frying pan more reliable. Consequently, double hardening will take the housewife about an hour.
It is better to process a grill pan in the oven. The time spent will be worth it, because the dishes will then last for a long time.
The grill pan is kept in the oven for about an hour.
Preparing for calcination
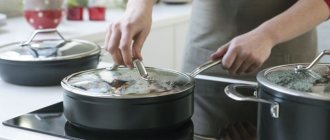
There are several ways to heat cast iron cookware, but before any of them, the frying pan or cauldron must be prepared. To do this, completely remove the original packaging and wash the dishes with a mild detergent or soap solution. It is better to avoid hard sponges so as not to damage the coating.
After this, the dishes must be wiped dry. If you choose the option of baking in the oven, you must remove the handle.
If the handle is made of plastic or wood and cannot be removed, then only the method of hardening the pan on the stove will do. The stove can be any - gas, electric or induction.
Preparing non-stick and enamel cookware
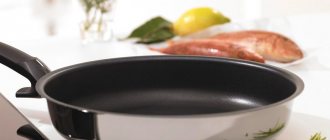
If you purchased a cast iron pan or cauldron with a non-stick or enamel coating, then do not even think about using the instructions above - they are designed solely to prepare for the first use of uncoated .
Cast iron frying pans with enamel or non-stick coating cannot be heated. Such kitchen utensils should be washed with warm water and detergent and wiped dry. In the future, adhere to the operating rules taking into account the coating. If it's ceramic, read our care instructions.
Types of calcination
The essence of preparing a cast iron skillet for “work” is to heat it under the influence of other chemical elements. Most often, these chemical elements are:
- salt - it perfectly adsorbs the grease remaining in the pores of the pan;
- oil/fat - it dissolves harmful impurities and washes them out of the pores.
Another characteristic by which the incandescence process can be divided into several types is the method itself:
- on the stove;
- in the oven.
The second option is also called calcination for the lazy, since it really requires less action from the housewife. However, this does not reduce its effectiveness. But this method is only suitable for those pans whose handles are either removable or can be baked in the oven, for example, those made of metal.
There are also more traditional, but now slightly outdated, ways to “start” a cast iron frying pan and make it non-stick. For example, heat a frying pan in the oven, and then throw it into a snowdrift. This is also an effective method, but requires more physical and time investment.
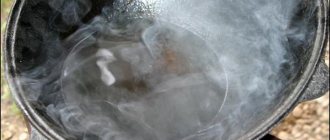
Now let's take a look at each option step by step and separately. All of them are accompanied by the active formation of smoke, so you should ensure the supply of fresh air and leave the kitchen for a while.
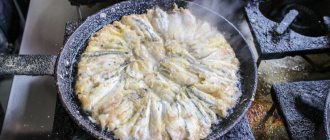
On oil
Heat treatment can be carried out not only with sunflower oil, although this is one of the most popular options. There are other ways :
- on pork lard - no smell, burns out slowly. The principle of use is simple - attach a piece of lard to a fork and wipe the surface with it;
- goose or pork fat - a perfect thin layer is formed;
- margarine - smokes less than others;
- refined vegetable oil - smokes a lot, but is easy to apply in a thin layer using a silicone brush.
The essence of any fat is that, when heated, it creates a protective film on the cast iron. The type of fat itself does not affect future performance characteristics, so you can use what is “at hand”.
Recently, processing with olive and linseed oil has become increasingly popular. It is these types that are believed to create the most stable film. But in operation this is difficult to notice.
This method is suitable not only for preparing the pan for the first use, but also for processing so that food does not stick. That is, you can repeat this procedure once a year or even every six months if the dishes are used frequently.
What should be done?
We list the main stages of hardening a cast iron frying pan:
- Wash and dry the dishes.
- Put on fire, wait for smoke to appear.
- Remove from heat, wipe with paper towels.
- Grease with a thin layer of oil or fat.
- Put it back on the fire, heat until the oil evaporates.
- Remove the burnt layer of oil with a cotton cloth or napkin.
- Repeat the procedure about five times.
- Wash the pan thoroughly after frying with a mild detergent, then dry with a towel.
Yes, the procedure will take a lot of time, but it is considered the most effective. The result of this process should be a shiny surface that looks as if it has been varnished. It is this layer that will ensure that the food does not burn.
Salt
This is one of the oldest methods of calcining cast iron. Salt is an excellent adsorbent, so it absorbs the remains of oil-based anti-corrosion lubricant. Its melting point is much higher than that of cast iron - 800 degrees versus 680.
Salt is an excellent thermostat because it can retain heat for a very long time. According to some people, it helps to get rid of damage.
For calcination, you will need ordinary rock salt, which can be found in any grocery store. It needs to fill the bottom of the pan with a layer of about one centimeter. After this, the frying pan is placed on the stove, heated and calcined for 15–20 minutes. A more accurate definition of the end of the procedure can be called a change in the color of the salt - it will become grayish.
The main disadvantage of such calcination is the possibility of getting burned. After processing, you need to let the salt cool completely in the pan. For example, if you pour it immediately into a plastic bucket, it can melt and the paper can even catch fire.
It is also undesirable to pour salt into cold water, since there is a risk of getting burned in the process. Another disadvantage of this method is the appearance of an unpleasant odor in the kitchen, so you should open the window or turn on the hood in advance.
After the salt has cooled, it must be thrown out, grease the frying pan with vegetable or animal fat, hold for 20 minutes over high heat, and then rinse and dry the frying pan.
Cast iron frying pan Biol, preparation for first use Overview pan 24cm Biol
On the stove
Any hob or stove is suitable for this procedure. This method is ideal for dishes with non-removable handles made of wood, plastic, Teflon or silicone.
The heat treatment process involves heating cast iron to such a state that it begins to change color to brown or gray. A similar effect occurs due to the burnout of the lubricant used in production.
After heating, the dishes must be immersed in a large container of hot water. Simply placing it under a stream of ice water is not recommended, since a large amount of steam can scald a person or damage furniture and trim and even the wiring above the sink.
In the oven
If the frying pan does not have a handle, is removable, or is also cast iron, then it will be much easier to heat such dishes in the oven.
- To do this, the oven must be emptied by removing all unnecessary items.
- The new frying pan is thoroughly washed, dried and wiped with a cotton cloth soaked in oil. Synthetics are not suitable for this purpose. The piece of fabric should be large - completely cover the bottom of the dish.
- To prevent oil from dripping onto the bottom of the oven, you can create a protective tier using a baking sheet lined with foil.
- The frying pan is placed bottom up, covered with an oiled cloth, and sent to the oven, heated to 180 degrees. The pan will “bake” for 20–30 minutes - this depends on the thickness of the pan.
- After this time, the oven must be turned off, but the door must not be opened for another hour.
- After this, you need to check whether the dishes are warm. It should be stored in the oven until completely cool.
- The last step is to thoroughly wash the pan with a mild dishwashing detergent.
The advantage of this option is that virtually no smoke is generated, and the process itself is almost autonomous - little is required from the housewife.
On an open fire
If by new cast-iron cookware we mean not a frying pan, but a cauldron or a roasting pan, then perhaps it will be more convenient to heat them over an open fire. You can also use this option for a frying pan. Its main advantage is that the smoke dissolves immediately in the air without filling the entire apartment.
The operating principle is as follows:
- rinse and dry the dishes;
- set on open fire and wait for the color of cast iron to change from black to gray;
- pour cold water over it or tip it into a snowdrift - this should be done carefully, as there will be a lot of steam;
- wipe dry;
- brush with oil and return to heat;
- calcinate, rinse, dry;
- repeat twice.
This option is time-consuming and labor-intensive, but you won’t have to get rid of the burnt smell in the kitchen. Instead of open fire, you can also use country stoves, where there are holes in the heating surface.
Article on the topic: Kitchen with a stove in a private house. Design and styling
Combined options
Based on the listed methods of how to heat a frying pan, housewives are coming up with more and more new options for preparing a cast-iron frying pan for the first use. Here are some of such know-how :
- “bake” a frying pan filled with salt in the oven - this way the cooling process will last even longer and will take at least two hours;
- First, heat the pan on the stove, then do it with oil, rinse and also use salt, warming the dishes again.
Some people consider these methods to be the most effective. But do not forget that the performance characteristics are affected not only by the method of calcining the frying pan, but also by subsequent care for it.
How to fire an aluminum frying pan
Products made from this metal are beautiful if you care for them properly. In terms of strength, they are definitely inferior to cast iron models. However, if the pores of the metal are regularly clogged, it can last a long time.
The most traditional method of firing aluminum kitchen utensils involves using salt of any grind. You can do without it with plain water:
- Boiling. The liquid should be thermally treated for five minutes. After this time, it is drained.
- Natural drying. There is no need to wipe an aluminum frying pan after boiling water in it. It is better to leave it to dry in a warm place.
- Applying oil. The bottom and walls of the dish should be treated with a fat base. There is no need to wash it off for a couple of days.
An equally effective way to process a product is by calcining it with vegetable oil.
Chemical cleaning agents will not be needed after this treatment.
In what other cases is it necessary to calcinate
Calcination is required not only for a new frying pan, but also for the sake of prevention and even getting rid of problems that have appeared on old ones.
- Cast iron frying pans often form carbon deposits - burnt oil. This is harmful to health, so you should not cook on such a surface. In this case, calcination will help, since it can destroy the accumulated carbon deposits, after which it will be easy to wash. Usually the question of how to properly burn a frying pan from soot is asked before cooking pancakes. This way the pan is cleared of old oil - even the first pancake will not be lumpy.
- If cast iron cookware begins to rust, then it must be properly treated to remove rust. First of all, it is necessary to clean the damaged areas. This can be done with a special product or a simple cleaning powder. After this, they are additionally sanded with fine-grain sandpaper. The cookware can then be baked to create a new protective coating to prevent future rust.
How to season a frying pan at home
It is possible to burn cast iron products at home. If you follow all the instructions, hardening it will not take much time.
Before first use
A cast iron frying pan must be subject to heat treatment before first use. Factory defects will be immediately determined by such a mini-test. If it is detected, the products must be returned urgently.
The natural non-stick layer after using the utensils has nothing in common with new products from the assembly line. Before the first use, the product must be calcined with salt, oil or vinegar solution, so as not to complain later about wasted money.
Good cast iron changes color after firing and becomes brownish. After cooling, the dishes turn black.
How to season an old frying pan
A product that has been in use for a long time may become rusty. If the metal corrosion has not gone too far, then the utensils can be saved. Rule number one in this case is long-term calcination of cast iron.
The process can take an impressive period of time until the utensils are completely free of rust. A stiff steel wool will be useful if the inside of the frying pan has particularly problematic areas. After such aggressive treatment, the product must be re-calcined.
Don't wait for old dishes to cool down. You should immediately coat it with oil to create a protective surface film.
During heat treatment, small pores in cast iron are clogged, food particles do not get into them, and food does not burn during cooking.
How to properly handle during operation
After the initial preparation of dishes for use, you should think about a competent approach to handling them during use. There are no special recommendations in this case. The process is limited to four rules: exclusion of sharp objects when stirring, drying, calcination, oil treatment.
Caring for a cast iron frying pan
There are several “golden” rules that will help pass on a cast iron frying pan to the next generation in excellent condition:
- Use only mild detergents.
- Hand wash only.
- Try to remove carbon deposits at their inception using natural remedies - mustard, soda or vinegar.
- Do not use metal jaws.
- Do not leave food in cast iron cookware.
- Soak stubborn stains in hot water.
- If there is a thick grease deposit, you can boil water in a frying pan for easier cleaning.
- Ensure that the dishes are stored in an oiled cloth.
- Always preheat the pan before adding food to it.
- After washing, immediately wipe the dishes with a towel, since cast iron should not remain wet.
- Wipe food with a paper towel to remove excess moisture.
These simple tips will help you maintain the performance properties of your cookware at the best level, making your food as tasty and healthy as possible.
Safety precautions
Despite the fact that all calcination options are quite simple, there are some subtleties that should be taken into account. Compliance with basic safety rules will help you avoid unforeseen situations:
- The utensils should not have plastic or wooden handles or other parts.
- Handle products only with oven mitts and special gloves.
- Do not leave cookware on the fire unattended.
- Carry out calcination with the hood turned on and in a well-ventilated area.
- Keep children or animals away.
The process of calcining cast iron should be as safe as possible.
What you will have to face in the process
Burning the factory coating in a frying pan, calcining it with salt and sealing the pores will be accompanied by the formation of acrid smoke. It will be easier to survive this unpleasant moment if you prepare correctly:
- It is advisable that a minimum of family members be at home while the frying pan is being fired. Think about an event for them in advance - a walk, a visit or a store.
- If you can’t do the baking of dishes alone, close the door to the room tightly and plug the gap under it with a rag so that the smoke does not spread throughout the entire home.
- Open all the windows in the room wide. It is better to carry out the procedure in the warm season.
- Turn on the hood. If it does not cope, lower the temperature, reducing the rate of calcination and smoke formation.
- If you have the opportunity to fire your dishes outside, take advantage of it.
The properties of the fat used for calcination directly affect the smell of smoke and the intensity of smoke formation. Refined vegetable oil is most often used. It can be replaced with the following products:
- A piece of lard, which is used to wipe the surface. It will not emit pungent odors, but will burn slowly.
- Rendered goose or pork fat. Does not form soot, has a mild odor.
- Margarine. However, a low-quality product contains a lot of water and can disrupt the process.
To seal the pores in cast iron cookware, it is better to use thick vegetable oils. For example, flaxseed, hemp, sesame, rapeseed, coconut. Even a rancid product that is no longer suitable for consumption is suitable for the procedure.
Heating a frying pan using oil
There are two ways to heat a frying pan using oil.
First way:
- Heat the container on the stove for 5 minutes. Carefully pour in the oil to completely cover the bottom. It is better to use olive oil: refined oil produces less burning and smoke. Instead of butter, you can spread it with lard.
- Open the windows and turn on the hood. Leave on low heat for 30 minutes.
- Allow to cool slightly, drain off the remaining oil.
- Using oven mitts, carefully place the still hot frying pan under running cold water.
- Repeat the heating procedure on the stove and water cooling three times.
- After the last, the pan is left greasy, the surface is wiped with a rag or paper towel. It is better not to use detergent, because... the carefully created non-stick coating is damaged.
The second method requires a large amount of oil and there is a danger of the oil catching fire. Therefore, it requires constant supervision.
Sequencing:
- Pour oil into a clean and dried frying pan to a level just above the middle of the side.
- Warm over low heat for at least 30 minutes.
- When the pan has cooled, pour out the oil.
- The dishes are wiped dry.
Read more ► How to effectively remove scale from a kettle: 10 proven methods
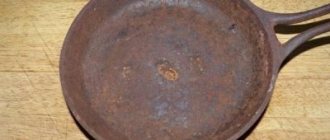
What to do if rust appears?
If after a period of use rust appears on a cast iron frying pan, this is a consequence of improper care, possibly due to contact with moisture. Dishes should be washed after use and be sure to wipe dry.
If rust does appear, it is recommended to clean the cast-iron frying pan with the hard side of a sponge, rinse it well and again carry out the procedure for preparing the cookware for use, that is, calcinate it using one of the methods. And in the future, you should definitely familiarize yourself with the rules of care and strictly adhere to them.
On a note
Interesting facts about aluminum and cast iron cookware and recommendations for use:
- Calcination is a procedure that came from Central Asian countries. The cuisine of these peoples requires special protection for utensils. Lamb fat was first used for calcination; gradually vegetable oils replaced this product. Later, the tradition of roasting came to European cuisine.
- Cast iron is prone to rust, so always wipe the pan dry after washing.
- Wash dishes immediately after cooking to prevent leftovers from drying out. This way you don’t have to resort to abrasive products that destroy the protective layer.
- Each proposed method of calcination is effective. To be 100% sure, try combining methods: first with salt, then with oil, or first in the oven, then with oil on the stove. You can combine all three methods.
- Old frying pans covered with rust can also be cleaned using these methods.
- If the purchased frying pan cracks or bubbles after 5-10 minutes on the stove with oil, you have the right to contact the store and demand a refund for the low-quality product. Cast iron and aluminum must withstand high temperatures.
- Sometimes the manufacturer calcines the product in advance, but it costs more. In any case, you should not skimp on utensils; the taste and benefits of the prepared food depend on its quality.
- In some cases, the protective film is damaged. This happens when using hard dishwashing sponges and caustic detergents. Some foods will corrode the surface of the pan if they are not washed immediately after cooking. For example, tomato paste destroys the protective layer. If it is damaged for any reason, calcination should be repeated.
A useful and easy procedure protects dishes from damage and housewives from unnecessary hassle. New aluminum and cast iron frying pans should not be used for cooking without annealing. Don’t ignore the recommendations that have helped many cooks, and your dishes will always be juicy, beautiful and flavorful.
How to choose the appropriate method
The solution to this issue depends on the model of the purchased product and some other nuances:
- Absence/presence of a handle. The method you use to process a frying pan in the oven directly depends on this factor. If there is no removable handle, you should forget about this method. The stove is suitable only in one case. It is convenient to harden models with handles made of wood and glass ceramics.
- Condition of the frying pan. In this case, it is worth assessing the degree of preservation of the old utensils and the capabilities of using new utensils. A recently purchased product from a trusted manufacturer can be calcined in any convenient way.
- Kitchen equipment. You may not have a hood at home, which is worth remembering if you want to treat a cast-iron frying pan with unrefined oil and salt.
During the calcination process, you will need to ensure high-quality ventilation in the kitchen; for this, turn on the hood.
Method 2. Oil
Before cooking in a new frying pan for the first time, heat the surface with vegetable oil. How to do it correctly:
- Place the washed frying pan on the stove and heat for 3-5 minutes.
- Pour in vegetable oil. Its layer should completely cover the bottom.
- Wait 20-30 minutes.
- Carefully drain the oil.
- Wipe the bottom of the pan with paper towels until all traces of grease are absorbed.
Advice! If your budget allows, use olive oil rather than sunflower oil for calcination. In any case, a refined vegetable product is taken.