External corners are the most vulnerable place for mechanical damage. Protection is especially required after repairs have been carried out. Gluing a plastic corner to the corner of the wall is an excellent option to prevent dirt and damage. There are many options for adhesive compositions that will cope with this task.
Which glue to choose?
Today there is a large selection of different adhesives on sale for gluing PVC corners to various surfaces. Among them are four main groups:
- liquid Nails;
- polyurethane glue;
- silicone sealant;
- liquid plastic.
In addition to the listed types, there are also two-component compositions (epoxy and polyurethane), which must be mixed independently. But since working with them is more labor-intensive, and the required proportions cannot always be obtained, in this article we will look at ready-to-use one-component products. They provide sufficient adhesion and are completely ready for application.
If the internal angle is more than 90 degrees
The problem is the same: lack of fittings. In this situation, we get out of the situation in the same two ways. We are just finalizing the connector. It will close such a corner if the internal fastenings are broken.
We take into account that we will have to glue this part, since it will not stick naturally.
Well, “artistic cutting” has not been canceled either. Having suffered quite a bit with the grinder, trying to join two elements in such a corner, you can achieve the desired result.
How to attach a plastic plinth if you need to cover the end of the podium
In such a situation, it is convenient to initially adjust the height of the podium to the height of the baseboard. At least the podium should not be lower. But this is not always possible. And it's not always worth it. If this is an exit to a balcony, then a high threshold will spoil the interior.
And with a plinth you can cover a threshold that is lower than itself. After all, plastic is easy to cut, and it is enough to accurately measure and carefully trim its lower part. It will look something like this.
If you try, it looks very interesting.
Even more interesting than in the case where the threshold was the same height as the baseboard.
Such situations when installing plastic skirting boards are still quite rare. But, nevertheless, they take place. You are now armed with the appropriate knowledge to deal with them.
How to glue an arched corner with your own hands
The topic of today's article is the arched corner. We will talk about the types, purposes and methods of attaching this finishing element.
First, let's define the terminology: which ones are called arched and what is their difference. In general, such angles are used to design curved structures made of various types of finishing and building materials.
The main purpose of these elements is to protect the decorative coating of corners. They prevent paint, wallpaper, etc. from shedding and abrasion. Also, these corners seem to highlight the shape of the structures on which they are attached. For example, arches (see), plasterboard niches, figured ceilings.
Decorative
Arched element PVC
So:
- The decorative element has a different width on each side. For example, 20x10mm or 20x5mm. From the very name of this angle it is clear that it serves to decorate arches and highlight them against the background of the overall interior of the room.
- In addition to its design function, this type of finishing allows you to hide small irregularities in arched openings. This is especially true when the arches are made with your own hands. For example, from plasterboard (see).
- And, of course, such decor protects the finishing coating of the walls from various types of influences: wallpaper from abrasion, putty and high-pressure paint from delamination and chipping from the surface of the corners.
- Decorative corners are produced with a length of 2 meters 70 centimeters. They have different colors: white, wood-like (repeating its structure), colored.
- The main material for production is polyvinyl chloride. It is the PVC arched corner that has become most widespread among finishers. You can also find cork corners for arches on sale in stores.
Perforated plastic element, photo
Plastering
So:
- This type of finishing auxiliary materials has perforations (holes) throughout its entire surface. One side has petals (like cuts). Thanks to this design, they bend perfectly.
- Basically, the perforated arched element under consideration is used to give a smooth edge to curved structures. For example, when installing plasterboard arches, figured suspended ceilings, elegant partitions. It will not be difficult to bend it, because it is very flexible.
- Corners for plaster are made of plastic. The most common length is 3 meters.
Liquid Nails
The most suitable option for gluing a plastic corner to wallpaper with a pronounced relief is liquid nails or, as they are also called, assembly adhesive. Its difference from other types is that in addition to adhesives, it contains a filler - fine clay of high plasticity or calcium carbonate. This ensures the filling of voids, and as a result, high adhesion of the plastic to an uneven surface.
Liquid nails come in brown, white and gray colors, so they can be matched to the wallpaper or the color of the corner.
There are two types of liquid nails: acrylic and neoprene. They differ in their base and some properties.
- Acrylic liquid nails are water-based, so they are water-soluble. Advantages: dry faster, no unpleasant odor. Disadvantages - they are destroyed during freezing/thawing, so they are not suitable for unheated rooms.
- Neoprene ones are organosoluble. They retain their properties at high humidity, so they can be used for gluing corners to washable wallpaper in the bathroom. Disadvantages - an unpleasant, pungent odor lingers for several days after installation. Advantages - they set faster than acrylic ones, provide higher adhesion when working on curved surfaces, that is, to decorate arched corners you need to use granule-soluble liquid nails.
For application it is better to use a special gun. Liquid nails are applied to a degreased surface in a snake or pointwise manner. The main setting occurs within a few minutes, and final drying takes up to a day. If the drying time of the glue is a critical indicator, you can purchase quick-drying liquid nails.
Basic dimensions of wall corners
The size range is also pleasing with its variety; they differ in length and also in the width of the shelves.
In length you can find products from 2600 to 3000 millimeters, the interval of possible length varies by one hundred millimeters.
Shelves can be of completely different widths, ranging from 10 to 100 millimeters, while the interval between shelf sizes can be 5 and 10 millimeters. Therefore, choosing the right type is very easy.
There are special corners created to frame arched openings. For these products, the shelves are made of different widths on the sides, so there can be the following variations: 10x20 millimeters, 5x10 millimeters, etc.
They also differ in shape, they can create sharp or rounded corners, and there are options for universal designs. They stand out because they look like two straight strips connected by a flexible element of the same color, which allows them to be bent into a comfortable position. Thus, you can use them to cover not only a 90 degree angle, but also a different shape.
There are special corners created to frame arched openings.
Silicone sealant
Sometimes silicone sealant is used instead of glue. This approach cannot be called successful, since corners in most cases are not just decoration, but protection of external corners. The sealant interacts poorly with plastic and will not provide a good result for a long time. If you still choose this option, then you need to choose not from acidic sealants (based on acetic acid), but from neutral ones.
There are brands of neutral sealants specifically designed for working with plastic, such as BARTON'S. They have high tensile strength - up to 1.2 MPa - and will provide high adhesive strength for a long period. The disadvantage of neutral sealants is their higher cost compared to acid sealants and assembly adhesive.
The sealant is applied to the dry, clean surface of the bend - in a strip - or on the flange of the corner - in dots or snakes. Setting occurs within 5 minutes, and complete drying occurs within 5 days.
Difference from other species
This type of trim is made not from paper, but from non-woven fabric. This is a non-woven gasket material based on cellulose fibers.
These cellulose fibers can be sized or not, modified or not.
There is a purely non-woven version using up to 70% long cellulose fibers and special additives.
Pros: air and vapor permeability of the material, smoothing of wall irregularities and reinforcement of microcracks.
Pasting is carried out without bubbles, without longitudinal and transverse shrinkage.
There is an option with a non-woven base instead of paper. They are classified as vinyl. The surface of such material can be smooth, foamed and embossed, ready for painting.
The downside is the airtightness of the material. Pros: leveling and reinforcing effect, possibility of wet cleaning using detergents.
If you want to update the finish, the top layer of material is removed from the wall, and the non-woven base remains, acting as a reinforced base for new wallpaper.
Liquid plastic
This type of glue is only suitable for PVC corners (made of polyvinyl chloride). For this type of decor, this would be an ideal choice, since the product glues plastic well to absorbent surfaces, ensuring high adhesion. The disadvantage of this composition is that the glue that gets on it can be removed from the wallpaper only with the help of a special solvent.
When to apply
Corners are used in the following cases:
- the need to improve visual perception of the angle;
- when there is a need to protect the wall finishing material from damage by children or pets;
- organizing protection against contamination in case of accidental contact;
- decorative design of the corner provided for by the project;
- joining surfaces when materials that require decoration are used in the interior (tiles, plastic and MDF panels);
- placing large furniture near the corner, in this case the vertical surfaces of the cabinet and walls will look harmonious.
Polyurethane glue
Not all polyurethane compounds are intended for application to plastic surfaces, in our case, corners. When purchasing, you need to carefully read the instructions. An example of a suitable polyurethane-based composition that can be used to glue a plastic corner is “Supercontact”. Advantages - reliable gluing, the ability to adjust the strip if it is not aligned correctly.
The disadvantages of this type of glue are the strong odor and higher cost. Although a tube of such glue is comparable in price to a tube of liquid nails, its packaging is much smaller and the consumption is approximately the same. There are some peculiarities in application. You need to apply a thin layer of glue to the surface of the corner and wait for it to harden. You can press it to the wallpaper after 20–30 minutes. Setting occurs within 24 hours, and complete drying occurs after 2 days.
Classification
Plastic elements vary depending on the purpose and type of finishing work.
| Name | Appearance |
| Equilateral. They are used when finishing window slopes. | |
| Versatile. Most often they are used to decorate arches. | |
| T-shaped. Used for window slopes when it is necessary to mask the joint between them and the wall. | |
| f-shaped. Used for finishing joints and for reliable fixation of plastic plates in grooves. The starting profile provides a decorative appearance to the end and levels the overall plane. f - shaped profile is used for finishing the window opening. | |
| Removable. They have a latch, which facilitates repair work that does not require removing the slope profile. |
Depending on the type of work performed, installation of corners can be external or internal.
Bonding technology
Having figured out how to glue the plastic corner, you can move on to the question of how to do it. The process looks like this.
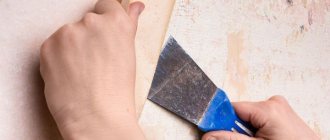
- Cut the corners. They are sold in strips of 2.7 meters, and the excess is cut off with a utility knife, a fine-tooth hacksaw, an angle grinder with a metal disc, or metal scissors.
- Apply adhesive to the plastic corner and glue (press) it to the wallpaper. If using polyurethane glue, wait until it hardens.
- Iron the corner with longitudinal movements so that the glue is evenly distributed. This can be done with a cone-shaped roller (wallpaper joint roller) or a clean, dry cloth.
- Secure the corner with masking tape.
- After a day, remove the tape and remove traces of glue if it gets on the wallpaper.
- If the wall is uneven and there are gaps left, they can be sealed with acrylic sealant. To prevent it from getting on the wallpaper, you need to cover the strip near the corner with film and secure it with masking tape.
Advice
It is convenient to cut corners using a miter box. Then, even if you have to cut the plastic at an angle, the cut will come out smooth and neat.
How to glue wallpaper in inner corners ↑
When the last strip in front of the inner corner is glued, you need to measure the distance from it to the corner and cut off a piece of wallpaper whose width is 10-15 mm greater than the measured distance.
Then you should apply a layer of glue not only to the panel, but also to the wall, carefully gluing the corner.
You need to measure the distance from the wallpaper to the corner and cut a strip of wallpaper 10-15 mm wider than the measured distance.
The prepared canvas is glued in such a way that a narrow strip of the cut (uneven) edge extends onto the adjacent wall. Excess wallpaper on top and bottom of the adjacent wall must be trimmed with a very sharp knife, and the edge of the panel should be brushed again, pressing it well against the wall and soaking it with glue. If swelling has formed on the panel to be glued, and the vertical edge extending onto the adjacent wall does not fit tightly to the wall, several cuts should be made obliquely on it and pressed against the wall again. Finally, by running a sharp knife from top to bottom along the entire height of the corner, you need to cut off the rest of the wallpaper.
The canvas is glued in such a way that a narrow strip of the cut (uneven) edge extends onto the adjacent wall.
Having measured the width of the “cut strip” and minus 10-15 mm from it, we put this value on the adjacent wall and use a plumb line to draw a vertical line with a pencil. Having applied a layer of glue to the panel and the wall, not forgetting to glue the corner, combine the smooth (factory cut) edge of the panel with the marked vertical, and bend a narrow strip of the second “uneven” edge onto the previous panel. The resulting overlap is well impregnated with glue with a brush and pressed tightly against the wall. If the wallpaper is thin enough, you can leave it like that: after the glue dries, the joint line will be invisible. If the wallpaper is dense and thick, then the blunt side of a knife or scissors is drawn along the “approach” line to the adjacent canvas and the remainder behind the line is cut off with a blade. The seam where the two panels meet end-to-end will become invisible after drying.
Having glued the panel to the adjacent wall, the resulting overlap is pressed tightly against the wall.What to choose?
The main factor in successfully gluing a plastic corner to wallpaper is the correct choice of adhesive. Today, the most common option is assembly adhesive (liquid nails). This popularity is due to the fact that the glue is easy to apply, has quick setting and good adhesion.
In addition, manufacturers produce many varieties that differ in color or additives to the main composition. So, if necessary, you can purchase instant-setting liquid nails. In this case, the stage of fixing with masking tape can be skipped. This may be important if the surface of the wallpaper is delicate and gluing with tape is undesirable.
How to properly prime walls before wallpapering?
What type of wallpaper paint can be used for painting and how to use it correctly?
How to easily and quickly remove liquid wallpaper from a wall?
Decorating corners in an apartment: how to decorate a room with corners
Options for using decorative corners in the interior design of a room depend on many factors:
- Surface materials. A white plastic corner glued to the corner of clapboard walls will look ridiculous.
- Finish colors. Under no circumstances should a red element be placed in a room designed in pastel colors.
- General stylistic solution of the interior. A polished stainless steel profile will not fit into a classic interior; a polyurethane “stucco” profile will not fit into a high-tech style.
- Purpose of the room. Silicone corners are great for children. They will keep the corners intact and help protect the child from injury.
Wallpaper design options
To complete the finishing after wallpapering, a profile made of any of the above materials can be used. The main criterion when choosing a corner will be its color. The choice of color can be approached in different ways. If the joining walls are approximately the same shade, you can choose the product to match the color of the walls; if they are different, you can match the color of the wall to which the eye is most often drawn. For example, when finishing the corner between a room and a hallway, it is more logical to choose a profile that matches the color of the room’s decoration.
One of the finishing options is decorating with a wooden corner, tinted to match the color of the doors or floor using impregnated stain and coated with varnish. Products made of MDF and PVC, decorated to look like wood, are suitable for the same purposes. When decorating a strict, laconic interior, metal corners will look good.
Solution for corners on slopes: the better way to seal corners in an apartment
To complete the finishing of the slopes, corners are used in the color of the slope, almost always white. Often the material for slopes is a sandwich panel, therefore, to ensure that the material does not differ much, PVC corner profiles are used. The width of the shelf is selected so that it covers the end of the panel or gypsum board. If there are any finishing defects near the window opening, for example, unevenly cut wallpaper, the corner is chosen to be of such a width that these errors are covered.
The angle between the wall and the slope is usually more than 90°; in order for the corner to lie flat, it should be slightly “bent” - placed on a flat surface or a large-diameter pipe and lightly pressed with your hands, moving along the corner.
In the cold season, the profile must warm up to room temperature before use.
Option for decoration under wallpaper
For walls covered with wallpaper, the option of wallpapering a corner may be suitable. For these purposes, profiles made of PVC, MDF, wood or smooth polyurethane are suitable. The profile should be a light shade, because... dark may appear from under the wallpaper. Wallpaper is pasted onto it, the glue is allowed to dry, then, no earlier than the next day, it is mounted on the wall. The wallpaper on the corner should be glued in one piece, of such a size that the wallpaper extends onto the inside of the shelves.
Recommendations from professionals
Useful tips will help beginners with DIY installation.
- Be precise when marking so that there are no gaps between the joints. To prevent this, you can increase the length of the workpiece by 0.5-1 mm. They will still fall into place due to the elasticity of the material.
- It is not recommended to fill the joints with silicone, as over time it will darken and it will stand out against the background of the slope.
- To be on the safe side, do not glue the corners right away, but first attach them with tape and take the necessary measurements.
- To create the correct shape for the arch, use a hair dryer.
- When processing areas in openings where the angle is not 90°, but more or less, it is necessary to take measurements locally and cut them with a knife.
Plastic corners serve as reliable protection for slopes from damage, and also add aesthetic completeness to the entire interior. Among the wide range of shapes, sizes and colors, it is easy to choose the best option for a specific design. And it’s also easy to attach them yourself, having all the necessary tools and work skills. Reinforce your knowledge by watching the video.