Beautiful morning. I want to stretch, smile at the sun, feel the unique taste of coffee, and crunch on fresh toast. But what is it? Instead of golden pieces of bread, the toaster spat out two black crackers, and smoke wafted through the house. Don’t despair, it’s not difficult to fix the situation: you just need to clean the inside of the toaster from crumbs and carbon deposits.
Morning Trouble
Why clean your toaster?
Household appliances require careful handling. Dust, drops of grease, and bread crumbs slowly but surely render it unusable. What happens inside a dirty device?
- Bread crumbs stick to the heating elements and burn, filling the house with a burning smell.
- Tiny particles are excellent food for bacteria and domestic insects (cockroaches and ants).
- Sticky bread crumbs do not allow the coil to heat up evenly, which can lead to its burnout.
Regular cleaning will help extend the life of your toaster. But before you start saving your kitchen appliance, read the safety rules.
Methods for cleaning internal surfaces
It is most convenient to clean the toaster on a table previously covered with a piece of film or newspaper. No matter how dirty the equipment is, you should not use sharp or metal objects (knives, screwdrivers, knitting needles, skewers).
How to clean the device from crumbs
It is imperative to remove bread crumbs from the inside. They tend to stay in the toaster after each use and accumulate quickly. Even if the model has a retractable tray, this does not help to 100% get rid of bread residues in the appliance.
Crumbs get stuck between the bars of the grill and stick to surfaces, creating a favorable environment for the proliferation of microorganisms, attracting ants and cockroaches into the house. In addition, when the next batch of toast is toasted, the remains of the old bread burn out, causing smoke and an unpleasant odor.
Step-by-step cleaning at home:
- Turn the toaster upside down and shake out the crumbs onto the countertop. Most of them will fly out on their own.
- Remove stuck particles using a toothbrush or a small laundry brush with a long handle.
- If there are still crumbs left in some places, you can get rid of them using a powerful stream of air from a hairdryer that is turned on.
Some people use a vacuum cleaner to clean the toaster, claiming that this is the fastest and easiest way. You can try this option, perhaps it will suit you best.
Do no harm
Before starting the process, be sure to disconnect the device from the power supply. Remove the plug from the socket only with dry hands. Allow the toaster to cool to avoid getting burned.
Cleaning work is carried out on a wide, flat surface, having previously covered it with paper. A kitchen table or bar counter works great.
It is forbidden to use metal pointed objects because they can easily damage the inside of the device.
Prohibited use
General rules
Since a toaster can become a rather dangerous appliance, it is necessary to follow some safety rules :
- The very first thing to do is unplug the cord from the outlet with dry hands. If this rule is not followed, you may receive an electric shock or break the device.
- You should start cleaning only after the equipment has cooled down. If you try to wash a hot appliance, you may get burned.
- To avoid damaging the coating, do not use sharp or metal objects.
- Do not immerse in water or wash under running water.
- Do not use a dishwasher or steam cleaner for cleaning.
- Before cleaning, cover the table to make it easier for you to clean up crumbs in the future.
Necessity and frequency of cleaning
Both the inside and outside of the toaster need to be cleaned. On the outside there are traces of drops of water, fat, fingerprints, and crumbs, soot and sometimes grease appear on the inside if you are in the habit of making toast with cheese or sausage directly in the toaster.
Useful to know: 15 ways to remove old stains and odors from kitchen towels
External pollution is not as dangerous as internal pollution, since, as such, they cannot cause harm to equipment. If you do not deal with cleaning issues for a long time, there may be unpleasant consequences:
- accumulation and combustion of crumbs;
- the formation of soot, which will smell unpleasant and can lead to breakdown;
- spreading bacteria and attracting cockroaches or ants;
- overheating of the coil.
For proper operation of the equipment, it is necessary to carry out 1-2 procedures per month. This must be done as carefully as possible so as not to damage the device.
How to properly clean the inside of a toaster from bread crumbs
Crumbs that have not had time to dry are removed with a hairdryer. A jet of air directed into the slots will easily remove dirt.
Modern toasters have removable trays that can be easily removed. The tray is washed with water and detergent added, and then wiped dry with a soft cloth. If the tray is stationary, then the device must be turned over and shake off the crumbs onto the spread paper.
Removable tray
Cleaning inside is carried out in two stages:
- Coarse table salt is poured through the slots inside the electrical appliance. The internal space must be filled to the very top. The body is tightly wrapped in paper, which is secured in a circle with tape. Make sure all holes are closed.
Gently shake the toaster for a few minutes to allow the grains of salt to clean the walls and heating elements of any dirt. Do not overdo it, as vigorous shaking may damage the device.
Remove the protective paper and pour in the salt. Use a toothbrush to brush off any remaining crystals from the walls and spiral. Wipe metal surfaces with a damp cloth to prevent salt residue from causing corrosion.
Salt
- Mix baking soda and water to form a thick paste. Apply the paste to the dirty parts with a brush and rub gently. Soda acts as an abrasive that does not damage metal surfaces. It perfectly cleanses burnt fat.
After cleaning, wipe the inside of the toaster with a rag. Leave the device to dry.
Preventive measures
Sooner or later you will have to clean the toaster from crumbs and carbon deposits even with careful use. But following a few rules will allow you to carry out the procedure less often and make it simpler:
- When making toast, place bread slices in the slots of the device exactly in the center. They should not touch metal walls with heating elements.
- When turning on the toaster, it is not recommended to set the maximum roasting temperature. It is better to use average settings and, if necessary, leave the slices for a second heating cycle.
- When frying bread, you need to control the device and prevent burning. If the automatic toast feed has not yet worked, but you can already see that the slices are ready, it is better to interrupt the cycle ahead of time using a special button or lever.
It is recommended to shake out the special tray for collecting crumbs as often as possible so that too much bread residue does not accumulate in it.
Remove the bread pieces from the toaster carefully so that they do not crumble inward.
Important! It is recommended to carry out preventative complete cleaning of the toaster once every 2-3 months or as needed, for example, after visible dirt appears.
Washing the body
The plastic case is wiped with a damp sponge soaked in a cleaning solution. Grease stains are cleaned with soda slurry. Do not use abrasive cleaning pastes to avoid scratching the body. After cleaning, wipe the plastic dry.
The metal case requires more attention because it is necessary not only to remove stains from its surface, but also to polish it. The metal is cleaned with a vinegar solution, after which the body is carefully wiped.
Breakfast is ready
The cleaning is finished. All you have to do is wait until the device is completely dry. Do not plug in a wet device to avoid a short circuit.
Household appliances make the life of a modern person easier. But, in turn, it requires care and careful handling. Dust particles and grease significantly shorten the life of electrical appliances. But simple cleaning steps will help solve the problem. After all, what could be better than crispy toast!
Should I fix it myself or call a professional?
If the problem is not crumbs stuck inside the device, you should definitely not tamper with electrical equipment. Firstly, you can unknowingly cause even greater harm to the equipment. Secondly, if you break the device, there is a high risk of causing a short circuit. Electrical appliances should be handled by professionals with appropriate education. True, repairs in service workshops are expensive, and private craftsmen are not responsible for the work performed. The issue of the feasibility of repairs is doubly acute if the toaster has been in use for many years. It is possible that breakdown will follow breakdown, so it is easier and cheaper to buy new equipment.
How to restore the non-stick properties of a frying pan after cleaning?
You can restore the non-stick properties of a cast iron frying pan in four steps, after which food will not be able to burn on this frying pan:
- Heat the dishes on the stove, placing them on maximum heat;
- Take a silicone brush and coat the entire surface inside the frying pan with vegetable (sunflower) oil;
- Turn off the stove and let the pan cool slightly without resorting to various cooling methods;
- Wash the pan with water, without using soap, and wipe dry with a towel.
Soda Ash
- If you want to clean the inside of the pan only, pour about a liter of water into it and add about 100 g of baking soda. If you want to clean the dishes both inside and outside, then use a large metal basin or bucket and fill it with soda solution at the same rate - 1 liter. water/100 g soda.
- Place the frying pan/basin with the frying pan on the fire, bring the solution to a boil, and then forget about cleaning for another 20 minutes.
You will need three tablespoons of the powder of this product, half a spoon of any washing powder, one tablespoon of office glue (PVA is not suitable). Pour water over all ingredients and shake thoroughly.
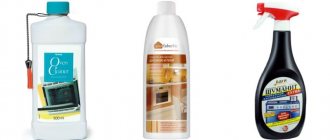
Which brand of fat remover is better to choose?
Among the companies that produce high-quality and effective products for cleaning the house, there are both Russian and foreign manufacturers. The rating includes budget, mid-price and premium products.
This is the list of leading companies in the field of household chemicals production:
- Synergetic is a Russian brand of household chemicals created on the basis of German developments in the field of environmentally friendly and biodegradable products. It produces products in the mid-price category with highly active substances: a complex of plant H-tensides, soda, water and some others. All this is produced in translucent packaging with a dispenser for ease of use and economical consumption.
- Sanita – this brand sells household chemicals for delicate washing of dishes, ovens, stoves, and hoods. It is popular because of its fast action, gentle care, and cleaning of almost any surface (metal, plastic, ceramic). The main advantages of the products of this brand are the absence of a pungent odor, concentration, and the content of highly active substances. They remove soot, fresh and old fat, and yellow plaque.
- Bagi - the company's history began in 1988 in Israel. Today it produces liquid and powdered kitchen cleaning products that remove grease, eliminate yellow deposits, remove unpleasant odors, and destroy bacteria. They are quite in demand due to the optimal combination of price and quality, gentle effect on contaminated surfaces, safety for humans and economical consumption.
- OfficeClean is a brand under which household chemicals and household goods are offered. We are talking about universal products that effectively cope with old fat deposits, soot, carbon deposits, and water deposits. They are actively used in the care of both external and internal surfaces in contact with food. Among the advantages of its offerings are convenient packaging with a dispenser, large volume (from 400 ml), and a pleasant smell.
- Frosch is a German manufacturer of environmentally friendly household chemicals based on natural ingredients of natural origin, including the best grease removers. He received a certificate confirming the “purity” of his products back in 2003. He has more than 20 organic products for cleaning pipes, countertops, sinks, and hoods from fresh and old grease, carbon deposits, and scale. They are in demand due to the removal of stubborn dirt, disinfecting effect, and economical consumption.
- Clean Home - the brand's philosophy is to create environmentally friendly, effective and universal care products for tiles, stoves, ovens and many other types of surfaces. Its grease removers are available in large packages of 400-500 ml, which are equipped with a convenient dispenser. They fight oily stains, yellow deposits, and unpleasant odors without significant mechanical effort.
- Nevskaya Cosmetics - it produces a wide selection of home care products, including grease removers. This series includes Sarma household chemicals, which are presented in the form of powders and liquids. They are distinguished by their concentration, the ability to be diluted with water without losing their cleaning properties, and safety for almost any surface, humans and the environment.
- Biolan - this brand belongs to a large manufacturer of household chemicals, Nefis Cosmetics. This line includes washing powders, detergents, products for removing grease, soot, carbon deposits and other contaminants on the external and internal surfaces of microwaves, ovens, hoods, etc. They are characterized by slow consumption, absence of marks on the coating, safety for humans and various materials.
- Kao is a Japanese manufacturer of household chemicals at affordable prices; it produces products for the care of countertops, hoods, ovens, stoves, and microwave ovens. The products are sold in the form of powders, gels, creams, sprays in volumes of 250, 400, 500, 900 ml. With their help, unpleasant odors, grease, and limescale are removed.
The best hoods for the kitchen
Household appliances for washing batteries
If the housewife is interested in how best to wash the battery from dust and dirt, then the answer will be as follows: with household devices. After all, cleaning will go much faster if you use a vacuum cleaner or steam generator.
What home “helpers” are effective:
- Hair dryer. Everything is logical - dust particles are well blown away by the air flow. And to prevent them from scattering around the room, you should hang a damp cloth behind the heating device. Then all the rubbish will settle on her.
- Vacuum cleaner. Quite a useful device. Just a few minutes and the result is ready: the batteries inside are clean. And for convenience, you can use a small attachment, which almost every manufacturer adds to the package of a vacuum cleaner, or make one from improvised means, for example, toilet paper rolls.
- Steam cleaner. Surely every neat person dreams of him. In this device, steam is injected due to high pressure. The result is a powerful and very hot jet. Therefore, if you are wondering how to wash an accordion battery, then a steam cleaner will definitely help you in this difficult task. However, you should remember safety when working with it. It is necessary to avoid contact of the jet with the skin, otherwise burns cannot be avoided.
- Electric kettle. If you pour boiling water from a kettle onto a cast iron radiator, most of the debris will be washed away. But at the same time, it is worth placing a tray under the heating device to collect water - a baking sheet or a large basin.
Prevention
The tray in the appliance must be cleaned after each toast preparation. Every week you should shake out the dirt from the toaster or blow it out with a vacuum cleaner.
To disinfect the device, it must be turned on empty once a month at maximum power.
The kitchen should always be perfectly clean and kitchen appliances should be in perfect order. Simple remedies and useful tips from experienced housewives will help you keep your household appliances for cooking hygienically clean.
Source
How to heat a frying pan after cleaning or before first use?
By cleaning the frying pan from carbon deposits and grease, you will also remove its natural non-stick film, which protects food from burning. This applies to all types of frying pans, except for stainless steel frying pans (they are not subject to corrosion). Calcination is especially necessary for cast iron frying pans and cauldrons. To create a non-stick layer after general cleaning or before first use, you need to bake the pan. Here are a few methods to choose from.
For a cast iron frying pan or cauldron, as well as a frying pan made of white or blue steel (except for stainless steel utensils)
Before calcining, make sure that the frying pan has not been washed with an aggressive cleaning agent. It is best to wash the frying pan with laundry soap or dishwashing liquid before this procedure.
Method 1. How to heat a frying pan in the oven (for cast iron and steel utensils):
- Preheat the oven to 180-200 degrees;
- While the oven is heating up, completely (!) rub a clean and dry frying pan/cauldron with vegetable oil using a paper napkin or cloth;
- Turn the pan upside down, place it in the oven on a rack and leave for 1 hour;
- After the set time has passed, allow the pan to cool naturally without removing it from the oven.
Method 2. How to heat a frying pan with oil and salt on the stove (professional cook method):
- Fill the bottom of the frying pan with a 1 cm thick layer of vegetable oil. Next, add coarse sea salt - there should be enough of it so that it absorbs almost all the oil.
- Place the frying pan over medium heat and cook until the salt darkens (about 20-30 minutes).
- Turn off the heat, let the pan cool, then remove the salt and rub the remaining oil into the bottom and sides of the pan.
For Teflon frying pan or frying pan with any other non-stick coating
Heat a Teflon frying pan over low heat for about 30 seconds, then turn off the heat and grease the bottom and inner walls with a teaspoon of vegetable oil using a paper towel or clean rag.
I wash the dishes with Coca-Cola, just pour it and boil it. My relative has worked in the tanker fleet all his life. They carry aggressive chemicals. Once they brought orange concentrate from America, and this nasty thing ate up the tanks. There is no acid, but “it” has eaten away. They were repaired later. Then I watched an English program for housewives, the same advice. By the way, after this my relative doesn’t drink orange or Coca-Cola. And good health to you.
For the sake of experiment, I cleaned Tefal’s frying pan like this: I put the frying pan in a large galvanized bucket of water, added soda to it, while the water was heating up, rubbed another half bar of laundry soap into it, threw the shavings into the bucket, boiled it a little and then left everything for 20 minutes as instructed. The result is superb, both inside and outside the frying pan is like new! The carbon deposits came off on their own, without even rubbing. Thanks for the tip.
Preparation for the procedure
The toaster must first be disconnected from the power supply - your hands must be dry. The cleaning process begins only after the device has completely cooled down. Otherwise, you may get severe burns. It is recommended to cover the working surface with thick cloth or newspaper - in the future this will make it easier to remove all the bread crumbs.
It would be a good idea to read the instructions for the device, which contain safety rules and recommendations for caring for the equipment.