Schoolchildren and students, office workers - everyone who is associated with paper media uses proofreaders today. The first samples of these products appeared in the fifties of the last century. The Japanese and Americans are still fighting for the palm of this invention.
Over the past half century, the barcode has changed significantly. Several types of stationery “paint” have appeared, each of which has both advantages and disadvantages. Today, correctors are divided into dry and liquid. The first includes the most modern development - correction tape, the second - a pencil and a liquid stroke.
Correction fluids
They are produced in small bottles, with a brush, applicator, and sponge applicator built into the cap. This type is simple and easy to use: shake the bottle, dip the brush in the liquid and paint the desired area.
However, in our time, such a product is considered an outdated type, since for a long time manufacturers have been producing more ergonomic and convenient forms of putty.
Pencil corrector
It looks almost no different from a regular pen, but instead of paste it is filled with correction fluid, which comes out through a small hole (1 mm) in the metal tip.
The advantage of this type is that it allows you to make point corrections to the smallest details of the text and even correct character flaws. But deleting a large piece of text with a pencil is not very convenient. In this situation, it clearly loses to liquids with a brush.
How to fix shoes if they are torn on the side
Some psychological treatises claim that shoes are the “face” of a person. The way he takes care of his shoes can tell a lot about him as a person.
If you can’t part with your favorite shoes that are already covered with scratches and cracks, give them a second life, repair them! And thanks to the tips from our article, you can cope with this task on your own.
How to repair cracked leather on shoes?
Road dirt, dampness and improper storage - all this greatly wears out even natural leather. The color becomes faded, and cracks and scratches appear along the fold lines. These shoes look untidy. If you don't have time to take your shoes to a repair shop, try solving the problem with the following tools:
- Transparent nail polish. This method is suitable for gluing large and thin pieces of leather. Apply a little varnish to a cotton swab and apply it to the torn piece on the back side. Gently smooth the skin over the area of the tear and hold for 2-3 minutes. To prevent your finger from sticking, perform the action through a cloth. Upon completion of the procedure, use shoe wax that matches the color.
- Super glue. A shallow crack can be filled with superglue. After drying, all you have to do is paint over the uneven spots and rub the boots with a special polish.
- Acetone. If cracks appear on the shoes in places where there is a natural crease (rise of the toe), use acetone. Moisten a cotton swab with the product, and then use light and slow circular movements to walk along the crack. This action will help smooth the surface of the skin and eliminate minor imperfections.
To prevent the leather from deforming and cracking, pay attention to care. After each wear, wipe your shoes with a damp, clean cloth and then apply water-repellent cream. If your shoes are very dirty and you cannot do without a thorough wash, use a brush previously steamed in warm water. You need to dry your shoes naturally, away from direct sunlight.
Reference! Before the existence of special creams, people took care of their shoes using fish oil and castor oil. These oily products protected shoes from moisture and gave the skin a well-groomed shine.
Repairing boots at home
Despite the abundance of different workshops, many people prefer to repair shoes themselves. This saves not only money, but also time, because you don’t have to wait in line. Let's consider professional methods of “resuscitation” of shoes, which can be applied at home.
Using Liquid Skin
Liquid leather is a polymer mixture based on rubber resin, alcohol and water that fills the “voids” on the surface of the shoe, creating a new, elastic material. A repaired product takes on the appearance and properties of a new one.
The product visually resembles gouache, packaged in metal tubes or plastic “washers”. Unlike the usual shoe polish, liquid leather is intended specifically for repair, and not for daily care. The operating rules are as follows:
- Choose a color. Modern ones have a fairly wide color palette, but if your boots are a rare color, you can try mixing several shades.
- Clean your shoes. Remove all dirt and degrease the surface of the shoes. This step is necessary for better and better adhesion of the composition to the skin.
- Protect your hands. “Liquid skin” is a very sticky and viscous substance that easily settles on the palms at the slightest contact. Be sure to wear disposable medical or household gloves. If contact with skin cannot be avoided, immediately wash your hands with soap.
Instructions may vary depending on the manufacturer and the specific product, but the main points are the same in most cases.
- Scuffs . Cover problem areas with a thin layer of “liquid skin” and smooth with a piece of cloth or a dry sponge. Leave until completely dry. Repeat if necessary.
- Cracks . Use your fingers to connect the edges of the crack and apply the compound with a brush. Level, and without waiting for complete drying, repeat the procedure.
Important! Remember that “liquid skin” dries out very quickly, so make sure that the container with the product is tightly closed. Two to three hours is enough for the tube to dry completely.
Restoring leatherette after reagents
In winter, roads are sprinkled with special anti-icing agents. These chemicals have the most detrimental effect on the condition of shoes, especially if they are made of leatherette.
Even new boots can take on a worn and worn look. During this period, special attention should be paid to preventive measures: daily cleaning, treatment with water-repellent compounds and drying.
If you cannot avoid damage to your shoes, adhere to the following rules:
- Try to keep the original drawing . A small damaged area can simply be painted over with a thin brush. If we are talking about treating a large area, use a dry sponge - it better imitates the roughness of leatherette.
- Apply “liquid leather” in two stages: the first layer will fill the voids, and the second will level the surface of the product and create a water-repellent film.
- Don't neglect protection . If you need to use an aerosol pigment, wear a respirator or protective mask. You can wear plastic gloves on your hands.
Correction roller tape
This is the latest development in the world of correctors. It is a dry composition, which is enclosed in a convenient and ergonomic roller. Correction tape will correct the desired section of text in a matter of seconds: the tape applied to the paper (provided that the corrector is of high quality and is used correctly) will be invisible, not only by sight, but also by touch.
This type has its drawbacks: it will not help in correcting small point errors, its width is standard (4-6 mm), so when correcting small font with small line spacing, you can easily go beyond the edges of the lines.
How to repair corrector tape
The corrector is designed to instantly correct text on any paper surface. Stationery paint is available in liquid and dry form. Dry ones are presented in the form of a pencil or roller tape.
The rollerball is the latest development, more convenient than its predecessors. The stroke is covered with white opaque paint tape.
The dry composition allows you to write immediately after such correction, nothing will spread. A new tape is fed, and the used one is wound onto the drum due to the frictional force of the paper.
The roller will correct the desired section of text in a second. Corrections with tape are invisible even to the touch.
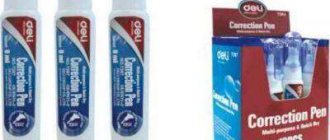
Liquid corrector
A small plastic bottle with a brush, 20 ml. Operating principle: dip the brush into the liquid and cover a symbol or an entire entry in the text, done! The design is simple, it is very convenient to use. What can fail in such a corrector?
Sometimes the brush becomes detached from the cap to which it is attached. In this case: wipe the brush from masking liquid and insert the rod tightly until it stops.
If something happened to the fibers and they began to stick out in different directions, then a simple fishing line will come to the rescue. Measure a small length of fishing line, 10-15 cm. Tie the fibers at the base of the brush, pulling them tightly, cut off the excess fishing line. This will give the brush a neat appearance and will leave thin lines when applied.
Corrector device with tape
- a housing that houses two reels,
- corrector tape,
- applicator head (the tip that places the tape on the unwanted area of the text).
The mechanism inside is quite simple. These are two rollers with a tape stretched between them. The belt tension is provided by a gear transmission.
The tape from the large roller, after it has finished working, is wound onto a smaller roller.
A small number of manufacturers offer devices that are characterized by an ergonomic shape and resistance to impact, accidental throwing or falling from a table.
How to fix a corrector tape with your own hands?
If the roller of the new tape does not unwind, that is, it slips, but the other roller continues to spin, the corrector needs to be repaired.
- Using a straightened paper clip, remove part of the used tape, approximately 3-4 cm;
- we stretch a new tape (the used one will be pulled in), make sure that both tapes stick out a little outside, 2-3 cm;
- cut a piece of tape with a margin, 2 times wider than the tape;
- glue both tapes, wrap up the extra tape;
- fold the tape like an accordion and repeat the procedure, the used tape may bend a little - it’s okay, it will be tightened by the roller;
- after that you need to hide the place of gluing, to do this we slowly scroll the tape;
- we try it on a draft, do it several times, after two or three turns the excess tape will go inside.
Source
How to fix a putty tape if it is torn: How to fix a corrector with your own hands - useful tips
The corrector is designed to instantly correct text on any paper surface. Stationery paint is available in liquid and dry form. Dry ones are presented in the form of a pencil or roller tape.
The rollerball is the latest development, more convenient than its predecessors. The stroke is covered with white opaque paint tape.
The dry composition allows you to write immediately after such correction, nothing will spread. A new tape is fed, and the used one is wound onto the drum due to the frictional force of the paper.
The roller will correct the desired section of text in a second. Corrections with tape are invisible even to the touch.
how to fix putty tape if it breaks
My wife and I have been married for a little over a year. At the time of my marriage, I had two apartments and two cars. But when we were married, I bought another three-room apartment.
But in the process of marriage, I began to understand that my wife married not for love and not to create a full-fledged family, but to enrich herself, and to profit from me, and then get a divorce and receive half of the property.
Since she doesn’t want children, she wanders off, constantly threatening to divorce and take away what they have acquired together. How can I protect myself? What can be done to recognize the marriage as fictitious?
How to terminate an installment purchase agreement and return the money or exchange the goods. Before the new year we went to the store to look at the kitchen. When we were choosing, they offered us an expensive but high-quality and comfortable kitchen, and we agreed. Moreover, they could provide us with the kitchen in installments.
The down payment was not very large and we paid it right away. But we were told that it would take time for the kitchen to be delivered. we agreed. On January 6, 2016, the kitchen was delivered to us. The assembly was done by assemblers who were provided to us by the store.
But after assembly, our whole family was shocked and completely in disbelief at what they had assembled for us and what they had brought to us at all. The kitchen differed in the color that we initially chose, it also did not match the dimensions that were originally, and there were also many details missing.
We told the collectors this, and with them we drew up a report on the shortcomings by hand. We contacted the store to replace the kitchen or terminate the installment plan and return the money.
but the store said that the kitchen was already assembled and that they would not cancel anything, they could only deliver the parts that were not enough for complete assembly. Our whole family is completely incompetent and shocked by such a seller and this kitchen. please help me in this situation.
On what basis can one obtain Russian citizenship in a simplified manner?
My wife and I have been married for a little over a year. At the time of my marriage, I had two apartments and two cars. But when we were married, I bought another three-room apartment.
But in the process of marriage, I began to understand that my wife married not for love and not to create a full-fledged family, but to enrich herself, and to profit from me, and then get a divorce and receive half of the property.
Since she doesn’t want children, she wanders off, constantly threatening to divorce and take away what they have acquired together. How can I protect myself? What can be done to recognize the marriage as fictitious?
How to terminate an installment purchase agreement and return the money or exchange the goods. Before the new year we went to the store to look at the kitchen. When we were choosing, they offered us an expensive but high-quality and comfortable kitchen, and we agreed. Moreover, they could provide us with the kitchen in installments.
The down payment was not very large and we paid it right away. But we were told that it would take time for the kitchen to be delivered. we agreed. On January 6, 2016, the kitchen was delivered to us. The assembly was done by assemblers who were provided to us by the store.
But after assembly, our whole family was shocked and completely in disbelief at what they had assembled for us and what they had brought to us at all. The kitchen differed in the color that we initially chose, it also did not match the dimensions that were originally, and there were also many details missing.
We told the collectors this, and with them we drew up a report on the shortcomings by hand. We contacted the store to replace the kitchen or terminate the installment plan and return the money.
but the store said that the kitchen was already assembled and that they would not cancel anything, they could only deliver the parts that were not enough for complete assembly. Our whole family is completely incompetent and shocked by such a seller and this kitchen. please help me in this situation.
Corrective tape Attache
This device is produced by the Russian umbrella brand Attache, under which it offers customers office supplies in the mid-price category, as well as high-quality economy-class goods. The history of the stationery brand Attache began in 1997. The company's products are produced at large enterprises in Europe, Southeast Asia and Russia.
The Attache correction tape allows you to write immediately after correcting the text. A removable cap protects the working unit from drying out. Has an increased length (20 m). Tape width - 5 mm.
This correction tape is easily and accurately applied to the desired area of text. How to use? Everything is extremely simple: remove the protective cap, place the tip of the working unit at the starting point of the line to be deleted. Lightly press the corrector onto the paper and draw a solid line of the desired size. The dry layer is applied softly and easily. First, try correcting the text in your draft.
corrector tape video Video lessons
Gently and accurately corrects any type of writing. Does not require drying, you can write immediately after application.
video instructions for using a tape corrector.
Purchased here: https://ali.pub/mruif You can join the affiliate program and make money on YouTube.
Corrector Datum D1410 https://notsi.com.ua/pismennye-prinadlezhnosti/korrektor/korrektor-lenta-datum-d1410.
In this video I show you how to use a correction pen and correction tape!
link to product - https://ali.pub/dxlu9.
The tape on the grinder runs out. We will help you set up and adjust. Look!! You can purchase: https://www.mos-grinder.ru.
the moment when a classmate is trying to fix a proofreader, which who the hell knows how broke, because.
Translator mini stickers – SUPER COOL for diary decoration! We bought it here: https://ali.pub/2qax4 and here.
Online store https://adenparadise.com/ address: Ukraine, Zaporozhye, Trade Union Square 2/23 tel. +38 (068) 0796 – 398.
Corrector tape Skiper SK-805.
I take apart the tape and am shocked by its length. It's about 3 meters there. Yes, yes.
Corrector-tape Leo L1808 20 ml https://notsi.com.ua/pismennye-prinadlezhnosti/korrektor/korrektor-lenta-leo-l1808-20-ml.
How to use a corrective roller. Testing Attache and Kores. Read the full article on our blog https://dart.
I bought school supplies on the Aliexpress website. One of the purchases was a tape corrector. By purchasing.
Checking the voltage corrector KN-3.
video on correction tape video Video lessons
1 month ago
The tape on the grinder runs away??? We will help you set up and adjust. Look!! You can purchase: https://www.mos-grinder.ru...
5 years ago
video instructions for using a tape corrector.
12 months ago
In this video I show you how to use a correction pen and correction tape!
2 years ago
Purchased here: https://ali.pub/mruif You can join the affiliate program and make money on YouTube...
4 years ago
Everything about the nail world - training videos on acrylic and gel extensions, rules for proper manicure...
4 years ago
In the video I showed these stickers - https://ebay.to/1vH9yPM You can buy them through Simplum - https://bit.ly/1vvUTW0 INSTRUCTIONS:...
6 months ago
How to use a corrective roller. Testing Attache and Kores. Read the full article on our blog https://dart...
2 years ago
the moment when a classmate tries to fix a proofreader, which who the hell knows how broke, because...
2 years ago
Gently and accurately corrects any type of writing. Does not require drying, you can write immediately after application,…
1 years ago
Instagram: https://instagram.com/nastya_svirskaya ✨ VK group with competitions: https://vk.com/nsvmake PRODUCTS BELOW (click “More”): ✨ COUPON FOR 289.29…
4 years ago
The master class was devoted to cutting coniferous plants, and acquiring topiary forms, and the story about this can...
3 weeks ago
On September 6, taking advantage of the stormy wind blowing in the direction from the Ukrainian positions to the village of Komin...
2 years ago
Transparent stationery tape tesafilm® from tesa SE. This universal office tape has optimal...
3 years ago
Kinesio taping. Knee-joint. Instructions Learn the practical uses of kinesio taping...
3 months ago
You can order MARY SENN BOX here – https://mariawaybox.ru/ THERE IS delivery to the CIS countries, Ukraine and Kazakhstan Ask all questions...
3 weeks ago
Find out more at the link: https://news-front.info/2018/09/07/kominternovo-pod-ognem-vsu-goryat-doma/ We now have applications for Android...
videouroki.su
using video tape corrector Video tutorials
video instructions for using a tape corrector.
Gently and accurately corrects any type of writing. Does not require drying, you can write immediately after application.
In this video I show you how to use a correction pen and correction tape!
Purchased here: https://ali.pub/mruif You can join the affiliate program and make money on YouTube.
The tape on the grinder runs out. We will help you set up and adjust. Look!! You can purchase: https://www.mos-grinder.ru.
How to use a corrective roller. Testing Attache and Kores. Read the full article on our blog https://dart.
How to fix a messed-up tippex easy correct Cómo arreglar un tippex easy correct.
Corrector Datum D1410 https://notsi.com.ua/pismennye-prinadlezhnosti/korrektor/korrektor-lenta-datum-d1410.
Online store https://adenparadise.com/ address: Ukraine, Zaporozhye, Trade Union Square 2/23 tel. +38 (068) 0796 – 398.
the moment when a classmate is trying to fix a proofreader, which who the hell knows how broke, because.
Hello. Don't forget about #vp - Mutual subscriptions Previous video - https://www.youtube.com/watch?v=evwVm8drA8I Competition - https://www.you.
link to product - https://ali.pub/dxlu9.
Corrector tape Skiper SK-805.
I take apart the tape and am shocked by its length. It's about 3 meters there. Yes, yes.
Translator mini stickers – SUPER COOL for diary decoration! We bought it here: https://ali.pub/2qax4 and here.
Corrector-tape Leo L1808 20 ml https://notsi.com.ua/pismennye-prinadlezhnosti/korrektor/korrektor-lenta-leo-l1808-20-ml.
Review of correction tape. SOMETHING WENT WRONG! video
The tape on the grinder runs out. We will help you set up and adjust. Look!! You can purchase: https://www.mos-grinder.ru.
video instructions for using a tape corrector.
In this video I show you how to use a correction pen and correction tape!
Purchased here: https://ali.pub/mruif You can join the affiliate program and make money on YouTube.
Translator mini stickers – SUPER COOL for diary decoration! We bought it here: https://ali.pub/2qax4 and here.
in this video you will find out what is better.
Gently and accurately corrects any type of writing. Does not require drying, you can write immediately after application.
Heeeeeey! My name is Julia! And I'm 11 years old))) Here are the links to the products: 1) https://ru.aliexpress.com/item/Kawaii-Cartoon-Triangle-My-Pencil-Case-Classical-Bla.
Checking the voltage corrector KN-3.
Hello. Don't forget about #vp - Mutual subscriptions Previous video - https://www.youtube.com/watch?v=evwVm8drA8I Competition - https://www.you.
Hello! In this video I disassemble the tape corrector)
How to use a corrective roller. Testing Attache and Kores. Read the full article on our blog https://dart.
I bought school supplies on the Aliexpress website. One of the purchases was a tape corrector. By purchasing.
Online store https://adenparadise.com/ address: Ukraine, Zaporozhye, Trade Union Square 2/23 tel. +38 (068) 0796 – 398.
I take apart the tape and am shocked by its length. It's about 3 meters there. Yes, yes.
Schoolchildren and students, office workers - everyone who is associated with paper media uses proofreaders today. The first samples of these products appeared in the fifties of the last century. The Japanese and Americans are still fighting for the palm of this invention.
Over the past half century, the barcode has changed significantly. Several types of stationery “paint” have appeared, each of which has both advantages and disadvantages. Today, correctors are divided into dry and liquid. The first includes the most modern development - correction tape, the second - a pencil and a liquid stroke.
How to seal a leather jacket at home if it is torn or cracked
You can repair an item if it is torn using universal glue (for example, “Moment”) or liquid leather. Before starting work, it is necessary to tear off the section of the lining opposite which the damage is located. It is advisable to flog along the seam. The skin around the break is degreased with a solvent. Traces of the solvent itself are washed off with water and wait until the surface dries.
To repair a leather jacket at home, in most cases a patch is used. Jackets are often sold complete with a piece of leather, which is intended for installing patches. If the product was sold without a patch, use dublerin or artificial leather. After installing the patch, the lining must be sewn up.
In addition to adhesives, a brush, spatula and gloves are used. A brush is needed for applying glue to large areas, a spatula for small ones (it can be made from any hard material: cardboard, a piece of plastic, etc.). Gardening or rubber gloves will help protect your hands from adhesives and dyes.
Where to go if you have a jacket and a sofa?
Leather jackets are repaired in specialized workshops. There are professionals working there who select the best option for eliminating damage to the product.
Contact any clothing restoration shop.
In the case of a sofa, you need to contact a company that specializes in furniture restoration, reupholstery and assembly. Usually the process does not take much time, and specialists can work at the client’s home.
Each item requires careful care and attention, especially when it comes to leather versions of the product. A leatherette jacket should only be stored on hangers, and it should be cared for by dry cleaning. It is better to cover a sofa made of this material with a special cover that protects the product from damage. Take good care of your things and they will last you a long time.
How to seal tears
If there is no skin, minor damage can be repaired using a fabric patch. It is advisable to choose fabric of the same shade as the leather product. But if this is not possible, the material is repainted. Preference should be given to synthetic dense fabrics.
A piece of material is folded in half and the middle is soaked with glue. The resulting flap should exceed the diameter of the tear. Glue is applied to the edges of the patch and applied to the tear from the wrong side. After this, the repaired area remains under pressure for 12-16 hours.
Basic methods of repair at home
The skin is sutured, sealed, and a patch is applied. Also, damage is hidden with a coloring spray.
What and how to seal a hole
Minor damage can be sealed with special glue. It is applied to the front and back sides for strength. This is the easiest and fastest way to repair a jacket.
Moment
Superglue is not suitable for repairing leather items as it contains cyanoacrylate. The substance hardens when it dries, and the canvas loses its elasticity. It is better to use the regular Moment 1 Classic. The moisture-resistant and heat-resistant product does not affect the plasticity of the product. The glue is produced in tubes of 30 milliliters. A small volume is enough to repair a jacket.
To glue a part with Moment, you need to press it firmly, and then put a press on top. Unlike superglue, when using Moment, it does not matter how many minutes you hold the part for gluing. The oppression will help keep it straight and without wrinkles.
Double-sided tape
How to repair a minor abrasion or tear:
- prepare a patch;
- secure the edges of the tear on the outside with transparent tape;
- place the product face down on the table;
- cut a piece of double-sided tape with a diameter 1-1.5 centimeters larger than the patch;
- stick a patch on one side of the tape so that there are free centimeters at the edges;
- Apply the other side of the tape to the wrong side of the tear.
Using double-sided tape, you can seal the cut with any piece of fabric. The renovated space will remain flexible. If the tear is noticeable from the outside, it should be touched up.
We remove the hole using a decorative seam
In order not to bother with glue and selecting patches, you can sew up a torn jacket. There are two ways to tidy up your product:
- sew a straight, even cut with thread along the front side;
- Place a thin strip of leather over the torn edges, and also sheathe the top.
A regular “cross” is suitable for decoration. A more complex but dense goat stitch looks bright if you embroider it with threads of two colors. A decorative trim strip can be used to beautifully cover torn leather near pockets.
How to mend a gap
A large hole with a completely torn out piece of leather is covered with a patch from the outside and from the inside, under the lining. Repair method:
- tear off the lining along the factory seam;
- glue the backing on the inside and wait until it dries;
- cut out a piece of leather or substitute that follows the contours of the hole;
- insert into the hole on the front side so that the edges of the patch coincide with the edges of the hole;
- Fill the gaps between the insert and the edges of the gap with glue;
- When the outer patch is dry, sew on the lining.
If the outer workpiece is different in color, it can be painted with cream or spray dye.
The gap, closed with a piece of leather of the same color as the jacket, must be lubricated with a softening cream so that the product does not become brittle from the hardened glue.
How to seal a cut
When cutting, one backing is enough. Repair method:
- open the cut from the inside out;
- bring the edges together and seal the outside with tape;
- stick a patch on the inside;
- hold it under a load;
- After the substrate has dried, peel off the tape;
- Use a toothpick to apply glue between the edges of the cut.
Once dry, the damage will be almost invisible. You can completely hide the cut using a coloring spray.
What to do if part of the material is torn off
How to repair a torn corner tear:
- put the torn piece back in place and seal it with tape;
- turn the jacket inside out;
- tear off the lining on the torn part of the product;
- degrease the gap from the face and back;
- stick a patch on the back side of the tear;
- peel off the tape and sew on the lining.
How to seal a cut on a leather jacket
The patch should have an oblong shape. As in previous cases, the flap is glued from the inside out. If a cut appears on your jacket, you need to take immediate action to prevent it from getting even bigger. But since it is not always possible to use special material for repairs, it is permissible:
- Cover the damage with adhesive tape. Repair tape should not be used. It comes off quickly. Using an adhesive plaster is a temporary measure. The jacket needs to be repaired as soon as possible. It is worth sealing the skin both from the inside and from the front side.
- Sew it up with thread. This measure is considered an extreme measure: after stitching, there remains a seam on the jacket that is difficult to miss. It is necessary to use threads that match the color of the jacket. Only a thick needle is suitable for stitching.
Basic Tips
When repairing leatherette, you need to follow a few simple rules. This way you will definitely be able to avoid negative consequences. After all, mistakes during repairs can only worsen the situation.
- Before gluing the patch, degrease the surface. Regular alcohol will do. This will provide a more reliable grip.
- Apply liquid artificial leather in two stages. Let the first layer dry. Then apply the second one.
- Recreate the surface relief. You can use a regular napkin for this. Otherwise, you will not be able to glue the product together unnoticed.
After wearing for a long time, scratches and abrasions appear on a leather jacket. Thin leather breaks if caught on a sleeve in transport. You can repair your favorite biker jacket at home if the damage is minor.
The main difficulty is to choose a patch that matches the color. To make a beautiful repair on a leather jacket, you need to figure out how to use glue, tape, and liquid leather.
You can also use applique, fabric or decorate the item with a decorative stitch.
Repairing the collar
If there are loose areas of skin, they need to be cut off. Repairing the collar is complicated by the large amount of dirt that accumulates on this part of the jacket.
To clean dirt, you should wipe the collar with gasoline (preferably aviation gasoline). To completely remove dirt, the procedure is repeated at least 2 times.
Then the collar is cleaned of gasoline residues with a sponge and soap solution.
Since it is inconvenient to place a patch on the collar, paint is applied to the damaged areas. It is advisable to do this with a sponge. To ensure that the paint sticks, it is recommended to apply varnish on top. If you don’t have a special one, you can use a transparent manicure.
Is it possible to sew it up?
They resort to using a sewing machine if the jacket is torn along the seam or if there is a fairly large hole with a torn out piece of material.
First of all, you will need to rip the gasket, and then process the edges of the hole so that they become even. A flap should be cut out of ordinary fabric, which will be 2-3 millimeters larger than the damage on the jacket.
This piece needs to be applied from the inside. In the same way, you will need to cut out the leather material and lay it on the front side of the item.
Next, you need to arm yourself with a strong needle, which is designed for stitching leather products. When using a regular needle, there is a possibility of damaging your jacket or sewing machine.
Then you should make a neat seam that will combine the leather and regular material. However, this method is not considered a panacea, since the patch is clearly visible.
So that the result is not too noticeable, they put a few more patches all over the jacket.
Repair using liquid leather
You can seal a leather jacket at home with liquid leather. It is a polymer compound based on water and alcohol.
Rubber resin in the leather makes the treated surface elastic, which prevents the material from detaching. The skin can withstand temperatures up to 55ºC. For work, choose the product of the desired shade.
If the required color is not commercially available, products of other shades are mixed to obtain it.
If for some reason the patch needs to be removed (for example, it turns out to be the wrong shade), a solution containing alcohol is used, which must be used in the first 10-15 minutes after installing the patch.
Despite the fact that liquid leather dries out in half an hour, you can use the jacket no earlier than 8-10 hours after it has been repaired. It is advisable not to wear the item for 1-2 days.
What kind of glue can I use?
Not all types of glue will work. Do not use superglue or PVA. The first option will create a too rigid connection, which is not suitable for elastic skin. PVA will last until the first rain. This glue dissolves with water.
In order to seal a cut on dermantine, it is better to use adhesives that are not afraid of water and retain elasticity after drying. Among the most popular options:
- classic "Moment". I most often use this glue to repair leatherette at home. It is reliable, not afraid of temperature changes and moisture;
- glue for shoe repair. It can be used to repair artificial and natural leather. You can consider SAR 30E glue. It is moisture resistant, elastic and provides high strength joints. It can be used to glue leatherette to metal, rubber and other materials;
- adhesive based on polyurethane resin. For example, you can purchase Desmokol. Various dermantine items are repaired with this glue. It is highly moisture resistant and creates strong elastic joints;
- spray glue. One of the best options for repairing their leather products. It is easy to apply, guarantees a strong bond and dries very quickly. You can seal an item with an aerosol in a couple of minutes. Consider 888 Ultra glue as one option. The domestic aerosol “Multi-Spray” is also suitable.
Using these compounds you can easily seal artificial leather. But there are more complex cases, for example, when a hole appears on the surface. In this case, ordinary adhesive is not enough.
Correction fluids
They are produced in small bottles, with a brush, applicator, and sponge applicator built into the cap. This type is simple and easy to use: shake the bottle, dip the brush in the liquid and paint the desired area.
However, in our time, such a product is considered an outdated type, since for a long time manufacturers have been producing more ergonomic and convenient forms of putty.
Pencil corrector
It looks almost no different from a regular pen, but instead of paste it is filled with correction fluid, which comes out through a small hole (1 mm) in the metal tip.
The advantage of this type is that it allows you to make point corrections to the smallest details of the text and even correct character flaws. But deleting a large piece of text with a pencil is not very convenient. In this situation, it clearly loses to liquids with a brush.
Correction roller tape
This is the latest development in the world of correctors. It is a dry composition, which is enclosed in a convenient and ergonomic roller. Correction tape will correct the desired section of text in a matter of seconds: the tape applied to the paper (provided that the corrector is of high quality and is used correctly) will be invisible, not only by sight, but also by touch.
This type has its drawbacks: it will not help in correcting small point errors, its width is standard (4-6 mm), so when correcting small font with small line spacing, you can easily go beyond the edges of the lines.
Face corrector: how to use, palette, colors, step-by-step instructions
The corrector is designed to instantly correct text on any paper surface. Stationery paint is available in liquid and dry form. Dry ones are presented in the form of a pencil or roller tape.
The rollerball is the latest development, more convenient than its predecessors. The stroke is covered with white opaque paint tape.
The dry composition allows you to write immediately after such correction, nothing will spread. A new tape is fed, and the used one is wound onto the drum due to the frictional force of the paper.
The roller will correct the desired section of text in a second. Corrections with tape are invisible even to the touch.
The most common models
The corrector pen is now one of the most common office supplies. All well-known companies producing such products produce many models. There are several of the most common ones that are popular due to their high quality, ease of use and low price.
- The best correction pen is Erich Krause. Many users trust this company. Reviews note that this corrector has virtually no drawbacks. It is odorless, beautifully shaped, and easy to use. The metal tip does not scratch the paper and allows you to apply correction fluid precisely. This correction pen is also called arctic white because of its snow-white color.
- Correctors from BRAUBERG are also popular. They are distinguished by a stylish design, a comfortable tip and a soft body that allows you to easily squeeze out the correction fluid. And the metal ball inside prevents it from freezing.
- Many users choose inexpensive correctors. These include products. Despite their low cost, they are of high quality, odorless, and the liquid dries quickly.
You can choose any corrector pen. If you know how to use them, then no mistakes in the text will be scary. They can be easily covered up with a high-quality corrector.
The work of any office involves the preparation of paper documents. In this case, there is no escape from errors, blunders, and typos, which can be corrected using clerical putty, clerical putty, or putty, without additional retyping. Office proofreaders, having the main function of correcting defects and errors, differ somewhat from each other.
How to glue a thick-bound book
This process requires perseverance and accuracy. First, the book is disassembled so that the bound pages and the cover are separate from each other. The place where the pages are stitched and glued is cleared of old glue. Then it is coated with PVA and a piece of gauze is glued along the entire length, possibly in several layers.
Cut out the flyleaf - a sheet the size of a book spread, folded in half. If necessary, restore the cover using the methods described above.
All that remains is to cut out a strip for the spine from leatherette or fabric.
The dimensions of the strip are easy to calculate - we add two centimeters from the top and bottom to the height of the book sheet, and we also add two centimeters from each side to the thickness of the spine.
Glue the strip to the spine of the cover exactly the size of the side allowances, glue the top and bottom excess to the inside. Place the book in a new binding and secure it with PVA.
Glue the endpapers. One half of the endpaper is completely glued to the cover from the inside, the other to the title page, but not entirely, but half a centimeter. Check that there is no excess glue. All that remains is to put the book under the press and wait for the glue to dry.
You can bind homemade notebooks in the same way.
The book is in “disassembled” form - pages and cover are sewn together separately from each other
Corrective tape Attache
This device is produced by the Russian umbrella brand Attache, under which it offers customers office supplies in the mid-price category, as well as high-quality economy-class goods. The history of the stationery brand Attache began in 1997. The company's products are produced at large enterprises in Europe, Southeast Asia and Russia.
The Attache correction tape allows you to write immediately after correcting the text. A removable cap protects the working unit from drying out. Has an increased length (20 m). Tape width - 5 mm.
This correction tape is easily and accurately applied to the desired area of text. How to use? Everything is extremely simple: remove the protective cap, place the tip of the working unit at the starting point of the line to be deleted. Lightly press the corrector onto the paper and draw a solid line of the desired size. The dry layer is applied softly and easily. First, try correcting the text in your draft.
The Attache tape corrector is a compact device that can easily be placed in a pencil case or pocket. It is equally effective on any type of paper. After photocopying it is completely invisible. The device has a removable block, which can be easily replaced with a new one after using the coloring composition.
Repair of rubber products
To repair ruptures in rubber pumps used for watering streets, plants, etc., the following composition is recommended: finely chopped rubber is dissolved in turpentine, chloroform, gasoline or kerosene; Rubber in these liquids does not completely dissolve, but softens to such an extent that it acquires the consistency of a dough-like mass.
You will find other recipes for adhesives for repairing rubber products in this article.
Then the punctured and torn edges of the pump are slightly heated and rubber softened in one of the mentioned liquids is applied, after which the edges are compressed.
If after the first sealing the seal is not completely sealed, the rubber is allowed to dry and the operation is repeated.
After careful work, the damaged parts are completely repaired, so that the pump is once again suitable for continuous use.
Repair of rubber cushions, balls, etc.
The mentioned rubber products with a more or less thick shell are corrected in the following way.
First, their surface must be thoroughly cleaned of dust and dirt, then take rosin and dissolve it in 90% alcohol until a thick mass is obtained.
Carefully coat the cracks with the resulting mixture and allow the putty to harden properly. This method can be used to repair old rubber pads, knee pads, balls, etc. rubber products.
Repair of rubber raincoats
To repair rubber raincoats and other thin rubber shells, take a piece of thin sheet rubber, the size corresponding to the area to be repaired, and spread it on one side, as well as the adjacent area on the surface of the object, with turpentine.
The lubricated surfaces are placed on top of each other and placed under a press for a day.
The repaired areas then turn out to be just as impervious to water as they were before when undamaged.
It should be noted that it is most convenient to cut fresh sheet rubber with a sharp knife moistened with water.
Repair of rubber tubes
Small holes are moistened at the edges with gasoline and then filled with a piece of rubber softened in gasoline, which is then smoothed with a hot iron.
After repair, the tube can serve for a long time, and the repair site itself can, with some skill, be made completely invisible to the eye.
To prevent drying out and cracking, rubber tubing should always be kept at room temperature.
Repair of galoshes
Galoshes are thoroughly washed, dried and cleaned with a fine file. Then cut out a patch of the appropriate size, lubricate it with glue for rubber products, press it to the desired place (if necessary, tie it with twine) and allow it to dry for two hours, after which the cleaned area or the entire galosh is covered with rubber varnish.
Repair of rubber hoses
A rubber sleeve that is cracked on the outside is cleaned of dirt with warm water using a brush and thoroughly dried. It is then placed on a board and rubber repair adhesive is applied to the cracks until all the cracks are filled with it.
Attention!
Condoms cannot be repaired!
Each new layer is applied after the previous one has dried.
When the last layer begins to dry, the sleeve is wrapped in this place with canvas braid moistened with the above-mentioned glue.
If the hose has cracks on its inner surface, then the described method is unsuitable, since a thickening forms in the repaired area, around which dirt collects and a “plug” can form. In this case, cut out the damaged piece and splice both ends, inserting them into a short piece of rubber hose of larger diameter, tightly enclosing the repaired hose.
Rubber shoe repair
The rubber patch that you want to stick on rubber shoes and the damaged area are rubbed with sandpaper so that the surface of both becomes rough; then they lubricate both surfaces with glue for repairing rubber products, after which they are left alone for half an hour and then squeezed tightly.
To make the repair stronger, the patch should be cold vulcanized.
To do this, coat it after the above operation with hydrogen sulfide, to which a little sulfur chloride has been added, and then quickly press on the damaged area.
Gluing soles to boots
The following putties are suitable for gluing rubber soles to leather shoes:
- Cut 10 parts of rubber into small pieces, place them in a tin placed in a water bath and heated to 30°C, and add 140 parts of carbon sulphide. When the rubber has dissolved, add a mixture prepared as follows: fuse 10 parts of rubber with 10 parts of crushed rosin and then add 35 parts of turpentine. This putty should be stored in a hermetically sealed bottle.
- By fusing equal parts of ordinary resin and gutta-percha, a putty is obtained, which is applied hot and which adheres well to leather, rubber and various other materials.
- Dissolve 10 parts of gutta-percha in 100 parts of gasoline. This solution is poured into a bottle containing 100 parts of drying oil, and everything is shaken vigorously.