Spray paint is widely used by home DIYers and professional renovators. When working with it, things and other surfaces are not always kept clean. Using available means, stains are removed. But it is important to know the correct application so as not to spoil the contaminated surface.
From this article you will learn how and how to clean spray paint (aerosol) from the surface of a car.
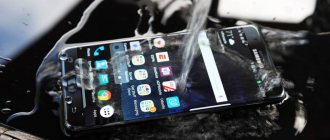
There's nothing worse than waking up to find that your car's finish has been ruined by mischievous kids with a can of spray paint. When vandals attack, don't panic. There are many ways to remove spray paint, but the most effective are acetone nail polish remover, detailing clay, and carnauba wax.
Acetone-based nail polish removers
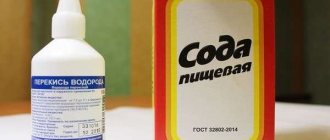
Get a bottle of acetone or nail polish remover containing acetone. You may not have acetone on hand, but you may have a bottle of nail polish remover. The latter is designed to remove a layer of enamel from your nails, which is essentially what you're trying to do to your car's trim. Any brand will work, and the higher the percentage of acetone, the better.
The Mediterranean diet is not only good for your overall health, but also for your brain.
Varnish, metal, perforation: trendy shoes for mid-spring 2021
German cake in the form of a twisted ring - an ideal treat for tea
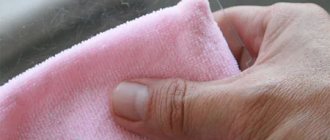
Saturate a piece of cloth with acetone or nail polish remover. It's best to choose a terry towel or microfiber cloth to avoid scratching the clear coat or paint on your car. You will need to keep the fabric damp at all times, so if it starts to dry out, add more product.
Use gloves to protect your hands.
Modern methods of damage removal
Along with folk methods, there is a whole class of professional car care products that can be easily purchased in specialized stores.
Some of them are useful to adopt now. 1. A fairly common remedy is scratch removal paste . However, few people know that it is effective not only in combating mechanical damage, but also can erase traces of paint. Apply the product to a dry cloth and wipe the areas stained with paint until the stains disappear completely. It would be optimal to purchase a special microporous sponge along with the paste.
Clay for car cleaning is becoming increasingly popular . As a rule, the kit includes not only the clay itself, but also wax, polish and a suitable rag. This greatly simplifies the preparatory process for the car owner.
Because of its composition, clay copes well with “other” paint, while preserving the varnish of the “native” body.
The clay is rubbed over the damaged surface, left for a while, and then washed off with water. After drying, the part is polished.
3. Automotive experts say that a brake pad cleaner spray . You need to apply the product to a rag, treat the stain with small fragments and wipe with a dry cloth.
This product is well suited for the type of stain where the paint mark is easily pressed through with a fingernail.
Rub the paint with a rag
Gently wipe off the spray paint with a rag. Use small circular motions to remove spray paint from your car. Rub very carefully or you risk removing the clear coat or paint, not just the aerosol. The paint will transfer from your car to the fabric, so change your fabrics often.
Wash your car after removing the spray paint. You should wash and rinse your car thoroughly after removing the spray paint. Pay special attention to the spray-painted area and remove all traces of paint and any nail polish remover used.
Honor is going to release a flagship smartphone with maximum specifications
Neptune will bring extra pounds: a special forecast from Vasilisa Volodina
The 22-year-old student graduated from college with her grandmother. Both with honors
Important Tips
To safely and effectively dispose of spray paint, follow these guidelines:
- Strictly follow the instructions for use. Do not leave compounds on surfaces longer than recommended. It is better to repeat the treatment if it was not possible to remove the stain the first time.
- Avoid contact of the skin of your hands and mucous membranes with caustic substances. Many of them require thorough ventilation of the room.
Gasoline, acetone, white spirit and similar compounds are flammable. You need to work with them away from sources of fire.- After using the solvent, the treated surface is rinsed with water.
- If several layers of aerosol paint are applied to the product, then before applying the cleaning composition, the surface is rubbed with sandpaper. This advice is valid only for walls, garage doors, ceilings and other structures that are not afraid of mechanical impact.
- You need to clean the stain along its edges, moving towards the center.
- Do not rub the paint with a dry cloth. Due to this treatment, the pigment will penetrate deeper and will be more difficult to remove.
Using Clay
Wash and dry your car. This step is important to remove surface contaminants before applying the clay. You can wash your car manually or through an automatic car wash. If the spray paint is very fresh, hot water and soap may even remove some of the paint.
Detailing clay is a polymer abrasive that will remove anything sitting on top of the paint on your car without scratching or damaging the surface. There are several varieties available.
Buy a smooth surface clay kit that includes a detailing spray (which you will use as a lubricant for the clay), as well as wax and a microfiber cloth.
These detailing clay kits should be available at your local auto parts store.
Knead the clay
You only need a small flat area about the size of your palm, so if you bought a new block, you should cut it in half. Then seal it in a ziplock bag and place it in a bucket or bowl of warm water, which will warm the clay so you can manipulate it more easily. Take half the bar and knead it in your hands. You want to form a pancake or pie with clay.
It is calculated: Russians’ salaries in January decreased by 29% compared to December
Biker jackets, overalls, flared jeans: how to wear spring fashion trends for women 50+
Seedlings will climb up without soil: a simple way to recognize “strong” seeds
Apply clay lubricant
Lubrication is necessary to ensure that your clay glides over the paint rather than sticking to it. Shake the can, then spray the clay as well as the paint on your car. Use just enough so that the clay doesn't smear all over the car.
Rub the clay over the spray paint. Hold the clay in your hand so that your fingertips are not covered - it should be slightly lower in your palm. Rub the clay back and forth with firm pressure, as if you were rubbing a bar of soap onto your skin. Continue rubbing the clay over the spray paint until it is removed.
When the clay is completely covered with contaminants, fold it and knead again to form a clean cake.
How to paint an old or contract bumper with your own hands
For painting you will need:
- everything is the same as for painting a new bumper
- a grinder or grinder with an attachment for sanding discs
- grinding discs
- sanding blocks of different sizes (70*400 mm rigid, 70*400 mm flexible, 70*200 mm, 70*125 mm, and a small sanding barrel)
- sandpaper of varying hardness for sanding blocks (starting from P120)
- putty
- set of spatulas of different widths
- marker
- brush
- solvent
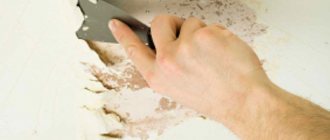
We dismantle the bumper. We remove all third-party elements (fog lights, radiator grille, fasteners, etc.). We clean the bumper from dirt. We choose a grinding wheel with a hardness of P120, and using a grinder or grinder we begin to evenly remove the old coating. In hard-to-reach places, use a sanding block with appropriate sandpaper.
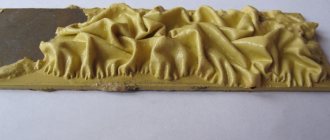
Photo of removing old paint
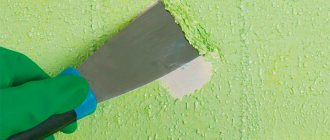
When the coating is removed, degrease and find problem areas - depressions that violate the plane of the bumper. It is difficult to find them visually, but if you run the entire plane of your palm across the bumper, you will feel the unevenness. Circle the places you find with a marker so you don't have to look for them again. Let's start puttingty. For each problem area, choose a spatula wider than the unevenness found. Apply the putty not strictly from the beginning of the depression, but a little earlier, and with one confident movement, pull the spatula through the entire dent and onto a flat area. It is better to make a slight bulge out of the dent so that you do not have to wait for the putty to dry and apply a new layer. To prevent the bulge from becoming too large, use a hard metal spatula and hold it at an angle of 45° in relation to the bumper.
After the putty has dried, you can begin to level the planes. For this purpose, use the largest possible sanding block and P120 sandpaper. If you choose a block that is too small, or do not use blocks at all, holding the sandpaper in your hands, you may get a new dent, and you will have to repeat the filling procedure again. When restoring planes, try to position the sanding block diagonally so that the edges extend beyond the plane. When the planes are restored, check the entire bumper again: if there are holes left somewhere, do the same with them. Then sand the surfaces with blocks of P180 sandpaper and sand with a soft sander and P240 sandpaper. Blow off dust from the bumper and degrease. You can move on to the next step - priming.
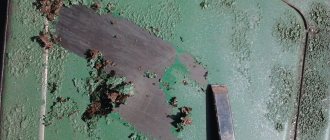
Progress of work in the photo
Starting with priming, the procedure is the same as with a new bumper. Apply primer, wash, degrease, cover with several layers of paint and varnish, wait for it to dry and enjoy the look of a freshly painted bumper.
Wax
Claying your car will remove previous wax, so it's important to wax your car to protect it from further damage and restore the shine of the clear coat. Apply the wax in a circular motion using the tool or sponge that came with the wax, or use a soft rotary buffing tool.
Manizhi Sangin's video has already received more than a million views and took third place
Poems-pies from Vladimir Ivanov can lift your spirits and more
Suitable for everyone: 4 myths about black clothing that are imposed on women
Using Carnauba Wax
Purchase liquid carnauba wax. These products contain carnauba oils, which will attack the spray paint. The wax will not scratch the paint or clearcoat, but will simply remove the spray paint from the surface of your car. You'll likely find liquid carnauba wax at your local auto parts store, but if not, you can order it online from an online retailer.
An oil-based wet wax can remove dried paint from a sprayer without removing unnecessary layers of clear coat. If there is still some spray paint left, try using a compound like V36.
Apply wax to sponge
Apply a sufficient amount of liquid wax to a soft sponge or cloth. Add more as you go, and don't be afraid to use a lot of wax as it is needed to break down the paint.
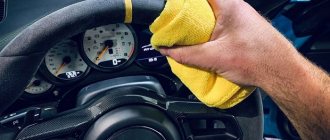
Use a sponge to wipe off the spray paint. Using firm pressure and circular motions, rub the wax with a sponge into the affected area of your car. Make sure you wipe off all excess paint and any stray dots or drips. Turn the sponge over to the other side once its surface is covered with spray paint.
Sand off the wax. After removing the spray paint, you need to wipe the wax off your car. Use a clean microfiber cloth to polish. Rub the waxed area using small circular motions.
Found a violation? Report content
If all that remains of the bumper is the name: damage repair
If your plastic bumper is full of cracks and holes, then do not rush to throw it away and buy a new one. Even if the bumper falls to pieces, it can be fixed if desired.
- everything that is required to paint an old bumper
- industrial hair dryer with narrow nozzle
- soldering iron with a wide tip (1 cm or more)
- flat electrodes (take several types in stock)
- putty for repairing plastic
- heat-resistant tape
- drill
Just like when painting an old bumper, we remove the coating with a grinding machine with a P120 wheel. In places where there are cracks, remove the coating completely, down to the plastic. We remove dust and degrease the area of the crack, connect both parts and glue them to the outside of the bumper with heat-resistant tape. We turn the bumper over and work on the inside. At the crack site, we use a soldering iron to make a groove into which we will place the electrode. Do not press the soldering iron too hard, do not hold it in one place for a long time, so as not to tear the bumper. Make the groove 2–3 centimeters longer than the length of the crack. When the groove is ready, select an electrode of suitable thickness, apply it to the beginning of the groove and start heating it with an industrial hair dryer. When the electrode “floats”, pressing it, place its beginning in the groove, and thus, heating it at the base and pressing it, place the entire electrode. Wait until the plastic hardens and cut off the excess.
Photo of the restoration part
Remove the tape and repeat the same operation on the outside of the bumper, choosing a thinner electrode. When the plastic is dry on the outside, use a special attachment on a drill to cut off the excess, go through the sander again, blow off the dust, degrease and start filling with a special putty, which is then sanded with a block of P120 sandpaper. After you have treated all the cracks in this way, continue to work as with a regular whole bumper that requires painting.
Remote on video
Let's summarize. You can paint the bumper with a spray can. Despite its apparent simplicity, the process cannot be called quick and easy. If you are new to this business and the bumper you are painting is not new, be prepared to spend several days to get a high-quality result. Be prepared for the fact that newbies always make mistakes and it takes extra time to correct them. You will probably have to deal with drips of paint and varnish, and redo the work. The cost of one can seems low, but it is significantly more expensive than materials that you need to mix and dilute yourself for use in a spray gun. The consumption of materials from a spray can is higher than from a spray gun: taking all this into account, get ready that the total amount spent on materials can be comparable to the cost of painting in a car service center. But if you still decide to try, we hope that the article will help you with this.
We recommend using a spray can only for partially painting the bumper: it is convenient and beneficial when you need to remove a couple of scratches, but car repair shops ask for money as much as for painting an entire part.