Wallpapering the ceiling or, for example, tiling is done only after the work surface has been cleaned of the old finish. Many types of materials can be removed quite easily, such as wallpaper. But getting rid of paints, especially oil and alkyd ones, is not so easy. They adhere tightly to the surface, so it is quite difficult to wipe them off. This article will talk about methods and tools that will help you quickly clean the ceiling of old paint. Let's look at each method in detail.
Construction hair dryer
This method is also called thermal. It is often used for acrylic paints. In other cases, the method also works, but you will have to spend a lot more time and effort.
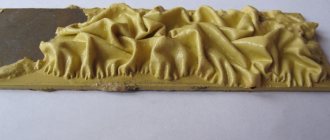
The ceiling surface is heated with a hair dryer until the coating begins to bubble. Under the influence of high temperatures, the finishing material swells, and adhesion to the base overlap weakens. Heat up a small area of the ceiling at a time, and immediately remove the resulting film using a spatula. If you use a hairdryer over large areas, the consequences can be the opposite: after cooling, the paint will only gain strength and bond more firmly to the concrete.
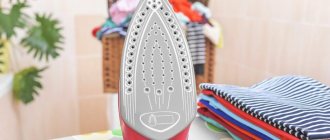
A hair dryer can be replaced with an iron. You will also need a piece of foil, which is placed under the sole, otherwise the device will deteriorate.
This method has a number of disadvantages. So, the concrete slab needs to be heated up very much. Not every hair dryer can cope with this task. In addition, if you use the method for other types of paintwork materials, you can only strengthen the adhesion. When heated by a hairdryer, harmful substances may be released. Therefore, when resorting to this method, the room should be well ventilated.
Along with hair dryers and irons, burners are used. But this is a risky undertaking due to the increased fire danger of an open flame and poisoning by toxic substances released when burning paints and varnishes.
How to remove paint from a ceiling that has rust
In this case, the work is done like this:
- Remove the old coating. To do this, use one of the previously described methods. The coating is removed to the base - concrete or drywall.
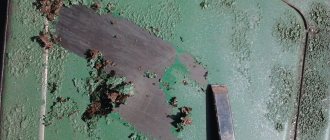
- If rust stains remain on the floor slab, prepare a solution of chlorine bleach (the product is diluted with water in a ratio of 1:1) or copper sulfate (the substance is mixed with liquid in a ratio of 1:4). Moisten a sponge with the prepared mixture, which is pressed against the rust stain for 5 minutes, after which it is rubbed in a circular motion.
- Large rusty stains are removed in several stages, treating sections one at a time.
When working with bleach, the stain should lighten; applying copper sulfate promotes the appearance of a greenish tint. This means that the ceiling is ready for repainting.
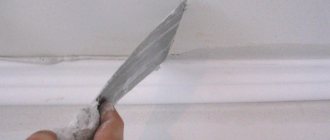
Special scrapers
The tool consists of a handle and a working part in the form of a spatula. For roughing large areas, models with replaceable blades are sold, which reduce sharpening time.
Experts recommend choosing scrapers in which one of the edges is adjacent to the blade at an acute angle: thanks to this design, it is more convenient to work and the process is accelerated. It must be taken into account that the spatula is not suitable as a replacement: it has a blunt working edge.
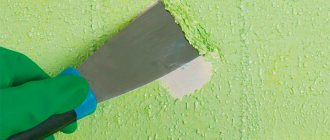
The process looks like this: the blade is positioned at an angle of 25–30° and they try to pry off the coating along with the plaster. To get rid of putty, first soak it with water, and then pick up the scraper again. To remove latex paint, the ceiling can be pre-moistened with warm water.
What not to do and why
There are actions that should not be taken, otherwise the final result will be of poor quality. Experts identify the following prohibitions:
- Do not heat the oil layer with a burner, it may ignite;
- It is undesirable to work with a water-based emulsion with a power tool; you may disturb the evenness of the ceiling covering, and you will have to putty the surface;
- You cannot select a knife with a tool; the plaster layer will also be removed;
- When choosing chemicals, you should not ignore safety rules; you may end up with health problems;
- It is important to remove paint from the entire surface; small residues can lead to cracks.
You cannot select a knife with a tool; the plaster layer will also be removed.
Drill with wire brush
Acrylic, oil, and water-based paints are removed using special attachments - wire brushes. They are hand, disc and cup.
The disadvantage of cleaning with a drill is a large amount of dust and noise in the apartment. The process is long, since every 5-10 minutes you need to stop working and wait for the cloud of dust to settle. But it should be noted that the problem has been partly solved, since dust collector attachments can now be purchased.
When working with a drill with such attachments, you must not exceed the speed specified in the instructions. This is a prerequisite for safe operation. If you increase the rotation speed, sparks are formed and hot metal scatters.
You also need to be careful when using a drill if large brushes are used. Due to the rapid movement on the surface, the tool is difficult to hold in your hands.
Chemical method of surface cleaning based on reagents.
In this case, special alkaline solutions are used to soften the paint layer, which can be purchased at hardware stores. They are applied with a roller, brush or sponge. After application, you will need to wait the time specified in the instructions and remove the remaining softened paint with a brush or spatula.
This is an effective way to quickly clean the surface, the only but significant drawback of which is the aggressiveness and toxicity of the solvents used. They can damage the floor if drops get on it, and will also require additional protection against chemical burns for working craftsmen.
Grinder with grinding disc
This stripping method has the same advantages and disadvantages as the previous one. Angle grinders are equipped with abrasive attachments that remove paint from the ceiling.
For grinders, several types of discs are used:
- rough diamond;
- brushes with thick wire (generate a lot of dust);
- cup-shaped brushes;
- twisted rollers (with steel wire brushes on the sides);
- sanding with sandpaper of P40 grit and higher;
- emery flaps.
Features of getting rid of whitewash
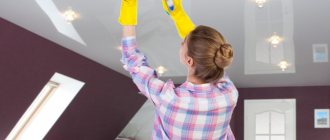
Having prepared the necessary equipment (stepladder, sponges, rags, bucket), covering the floor and pieces of furniture (if they could not be removed from the room), not forgetting to use personal protective equipment (robe, protective glasses, respirator), you can begin the process of cleaning the ceiling. There are several ways to quickly remove old whitewash.
We use water
To work, you need to prepare a spatula, a spray bottle with water and a rag . Using a sprayer, the ceiling surface is moistened.
With a break of ten minutes, the ceiling is moistened twice. After the whitewash layer has softened, it can be easily removed with a spatula. The clean surface is wiped again with a damp, clean cloth.
Do not wet the ceiling too much. Otherwise, during the removal process, the whitewash will flow down your hands and not come off in layers.
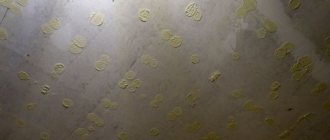
Newspapers with paste
To implement this cleaning method, you need to prepare a paste . To do this, dilute flour in a small amount of water (you should get a white liquid). Then pour the flour liquid into a separate pan of boiling water in a thin stream until a solution with a consistency resembling batter is formed.
The already cooled paste is spread over old newspapers, which are glued to the ceiling. Important: one corner of the newspapers must be left unglued. After the newspapers have grabbed the whitewash, with a sharp movement, grabbing a clean corner, they are torn off.
Along with the newspaper, the old whitewash will also be removed from the ceiling. Residues can be easily removed with a damp cloth.
Applying wash
In construction supermarkets you can purchase a special remover for removing whitewash.
It must be used strictly following the manufacturer's instructions:
- spray the product on the ceiling;
- wait until a crust forms on the surface;
- scrape off the crust along with the whitewash with a spatula.
A vinegar-soap solution can replace store-bought detergent (dissolve a spoonful of vinegar and two tablespoons of liquid detergent in 5 liters of water).
Rotary hammer with chisel attachment
Red strippers are produced for the device that resemble a tool with the same name. The working part is made in the form of a spatula or spear. They are convenient because they do not wash the coating into dust, but remove it in large pieces. Thanks to this, you can work more productively than manually: in an hour you can cover up to 4 square meters. m.
Cleaning is carried out as follows: a furrow is cut with a chisel, highlighting a strip 5–7 cm wide, then the hammer is turned on in rotation mode, and the coating from the wall is cleaned with the blade of the same attachment. We recommend watching the video, this process is clearly demonstrated there.
Tool preparation
Before starting work, you should cover furniture, interior items and floors. All paint removal methods are quite dusty.
Isolating a room will make it easier to clean in the future. You can cover floors, sofas and cabinets using plastic film. Alternatively, you can use paper sheets. If none of this is available, regular fabric will do. But it must be tight. The joints should be sealed with tape to prevent dust from penetrating into them.
To remove the old coating you will need the following tool:
- reliable stepladder;
- set of spatulas;
- sponges, brushes, rollers of different sizes;
- material removal agents;
- safety glasses (required), respirator, gloves.
To prevent dust from falling on your hair, you need to wear any hat. If the coating is applied in several layers, a sander with a rigid attachment may be required.
Set of spatulas
Brushes and roller
Means of protection
Axe
An old-fashioned method that is used on brick and concrete when other mechanical methods have failed.
Cleaning the ceiling from stubborn paint is carried out as follows:
- Notches are made with a small hatchet, destroying the integrity of the coating.
- Spray warm water onto the surface.
- The base and paint get wet.
- Clean off the finish with the edge of an ax or a chisel. You can use a spatula, but only for water-based coatings.
The method is quite labor-intensive. It is especially inconvenient to hold a heavy tool above your head - your hands get tired quickly. In addition, the ax leaves behind deep cuts, so later you will also need to level the ceiling using putty.
What not to do
Some actions cannot be performed when washing off paint.
Main restrictions:
- Do not use open fire to remove oil paint. This increases the likelihood of the surface and surrounding objects catching fire.
- Water-based coatings cannot be removed with a grinder or drill, otherwise the plaster layer may be damaged, which will have to be restored by repeated puttying.
- The use of sharp objects such as knives is prohibited. The blade, along with the paint, removes the plaster.
Chemistry
This option in most cases helps to get rid of any paint if the coating is not older than 5 years. It may not work on an old finish, since it reacts poorly even to very aggressive agents.
Removers are based on substances that weaken the adhesion of paint to the ceiling. They can be universal - for all types of paintwork materials, and specialized. Therefore, before use, you should read the manufacturer's instructions. This option is also suitable if you need to remove paint from a plasterboard ceiling, where mechanical methods cannot be used.
The method has several disadvantages. During work, you need to use protective equipment - a respirator, goggles, gloves, and ideally a gown. Liquid contacting the skin causes chemical burns and allergic reactions. Another disadvantage is the persistent smell that lingers in the room for several days.
There are different types of washes:
- ready;
- organic - help remove oil paint from the ceiling;
- homemade from quicklime (3 parts) and sodium carbonate (1 part) - help wash coatings that have begun to peel off from the ceiling;
- liquid glass - allows you to cope with a loose layer of paint;
- iodine solution (10 ml per 1 liter of water) - effective against water-based compositions.
Processing is carried out in this order:
- Remove lighting fixtures and fittings that can be dismantled.
- Apply the rinsing solution with a roller or brush.
- Wait until the paint softens (the exposure period is indicated in the instructions).
- Scrape off the coating with a spatula.
Removers have different drying times. If the period is short, then it is better to work with small areas so as not to miss the stage of maximum softening of the coating.
When is it necessary to remove the old coating?
When finishing the ceiling, the apartment owner is faced with a choice: leave the paint on or remove it. The first option is used when installing tension or frame structures. The supporting profiles are attached to the floor slab with dowels or other devices. The coating of the base does not matter.
In all other cases, paint removal is required. Old decorative coating impairs the adhesion of wallpaper or plaster. Over time, the decorative material comes off. Before applying a new layer of paint, remove the old one if it begins to crack.
Table of application methods depending on paint
| Way | Type of paint |
| Construction hair dryer | Acrylic, latex |
| Special scrapers | Any |
| Drill with wire brush | Any |
| Grinder with grinding attachment | Oil, alkyd, water-based |
| Rotary hammer with chisel attachment | Oil, alkyd |
| Chisel, hammer | Oil, alkyd |
| Axe | Oil, alkyd |
| Chemistry | Any |
To thoroughly clean the ceiling of old paint, you can combine these methods, using more aggressive methods in difficult areas, and less labor-intensive methods on the rest of the surface.
What you need to know before you start cleaning
Before you understand how to remove old paint from a ceiling, you need to understand why you should do it. It is necessary to clean the coating so that the adhesion to the new material is at a high level, otherwise the finish will not last long; often the previous layer becomes covered with cracks, which makes fixing the plaster layer or paint impossible.
It is permissible to skip the surface cleaning step only if suspended ceilings or a material mounted on a frame, for example, plasterboard, are selected.
When removing the finish, you need to take into account the following work features in advance:
- The work involves the formation of a large amount of dirt; before repair work, all interior items are removed from the room; if any item cannot be removed, then it is covered with film material or newspapers;
- If you are not going to renew the floor covering afterwards, then the floors are also well covered with film or paper;
- The master must also protect himself by wearing a respirator, protective clothing, glasses and a scarf on his head.
It’s convenient to work when your clothes have large pockets where you can put tools. You can wear an apron for this purpose.
It is necessary to clean the coating so that the adhesion with the new material is at a high level, otherwise the finish will not last long.
Preparatory work
Cleaning the ceiling during renovation is a top priority . They need to be addressed first before moving on to the walls and floor. So, first of all, it is necessary to remove, if possible, all the furniture from the room. The one that has nowhere to go must be well covered in all possible ways - with any available materials, or with thick polyethylene.
Be prepared for the fact that this furniture will need to be moved throughout the room so that it does not interfere.
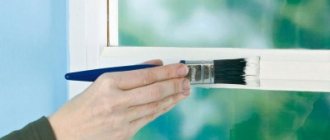
It is also worth covering all openings: door and window openings, thresholds and window sills. If there are lamps that cannot be removed, in order to keep them clean, do the same with them as with furniture and openings.
Next, you should prepare the necessary tools. First of all, you need to take care of eye protection. Since it will fall out often, and it will all get mostly in the face, be sure to wear glasses. A simple hat and gloves are also required.
Advice. If you are going to work in long sleeves, you need to make sure they fasten tightly at the wrists. This way, all the garbage will not end up in your bosom, but will rest on the floor.
The most necessary tools you will need:
- paint roller;
- paint brushes;
- a set of spatulas is required - the more of them, the better;
- a light stepladder (the lighter it is, the better, because you will have to carry it everywhere).
Washing off with water
If the old paint is not waterproof, you can wash it off with plain water.
To work you will need:
- ladder;
- putty knife;
- roller on a long handle;
- brush with metal bristles;
- bucket with water;
- respirator and glasses.
Preparatory work
A good start is the success of the whole business. Simple actions at the very beginning of work will facilitate the entire subsequent process and save effort and time.
So:
- floors, furniture and things must be covered with protective film;
- prepare a stepladder or table;
- fill a bucket with water;
- wear goggles and a respirator.
Soaking old paint
- Using a roller on a long handle, wet the old layer of paint with water and leave it for about 15 minutes, after which you need to walk the wet roller over the ceiling again. The coating should become wet and pliable.
- Using a spatula, scrape off the wet mass, periodically re-wetting the stubborn areas.
- Sand the stripped ceiling down to the very base.
Advice. You can make it easier to soak the old layer by adding a bottle of iodine to a bucket of warm water. And if you then create a draft in the room, the paint will swell and it will be easier to clean the ceiling. The acrylic-based composition will be easier to remove if you add vodka or salicylic acid to the soapy water.