Before refinishing the ceiling, the old coating must be completely cleaned off. A ceiling made of foam tiles is easy to clean with a regular spatula or a sharp knife, but getting rid of glue residue is more difficult. In this regard, the person doing the repairs has a question about how to clean the ceiling from the adhesive of the ceiling tiles. First, you need to make sure that this really needs to be done, because a new ceiling covering may not require such thorough preparation of the base. If you decide to decorate the ceiling with wallpaper or paint it, you will have to not only tear off the tiles, but also clean the base thoroughly. We will tell you how to clean the ceiling from foam tiles, as well as how to get rid of glue residues.
How to remove glue residue from the ceiling
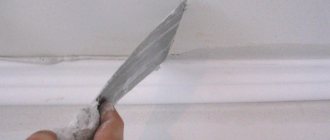
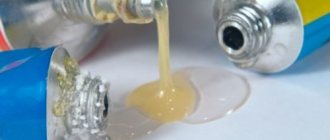
Usually, after removing the tiles, 3-4 or even more areas of dried glue remain on the ceiling.
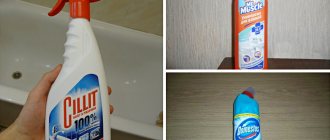
The surface is cleaned with an acetone-based solvent or ordinary nine percent vinegar. Professional products are also suitable, for example, Mellerud, Keranet, Atlas Szop or pharmaceutical dimethyl sulfoxide, which perfectly dissolves the adhesive composition.
To remove the glue you will need:
- Coat dried marks with solvent.
- Use a spatula to clean the “islands” with pieces of tiles.
- If the solvent does not help, use a grinder and a grinder.
After applying chemicals, you must wait a few minutes. The liquid is applied using a sponge, brush or old toothbrush. When the solvent starts working, carefully scrape off the softened mixture with a spatula. Repeat as many times as necessary.
To soften dried glue, use a dishwashing detergent such as Fairy (made by Procter & Gamble), which almost always includes sodium laureth sulfate, polypropylene glycol, and other solvents. 1-2 caps of product per 1.5-2 liters of water is enough. After this, we remove the old glue using a hammer and chisel.
If all else fails, you will have to use a grinder, sandpaper or brush. In this case, a mask and a respirator will come in handy, as there will be a lot of dust. Before starting work, wet the ceiling with water using a spray bottle. It will be much easier to tear off the remaining tiles.
You should not set fire to dried glue, thinking that this will soften it faster. This is dangerous and will not lead to the desired result. Be patient and treat the glue with water or solvent and gradually it will begin to yield. The softened pieces are scraped off with a spatula, and then the surface is cleaned with other means.
What products dissolve glue?
Not only professional products, but also folk recipes will help you remove glue from the ceiling with your own hands.
For example, suitable for dissolving:
- technical alcohol;
- sunflower oil;
- gasoline, turpentine, ammonia;
- a mixture of soda and water;
- hot soapy solution;
- table vinegar.
These products are applied to the remaining glue and wait from a couple of minutes to half an hour. As soon as the substance begins to soften, it is cleaned from the ceiling with a spatula. Sometimes, for faster removal, the treated area is covered with plastic wrap and waited for several hours. Soda paste, oil, vinegar last the longest, but these options are considered one of the most effective.
It is possible to clean the ceiling from glue using the methods described above only if the mixture is not very old. In more complex cases, professional products and serious mechanical cleaning will be required. But if there are only a few problem areas on the surface, then you can really deal with them with water and vinegar or regular oil.
Is the solvent effective?
Not every solvent can handle ceiling tile adhesive. Typically, an acrylic base is used for this composition.
Pick up a solvent for acrylic paint in the store; it is most effective in combating this glue. The product must be applied with rubber gloves; it can corrode the skin upon direct contact. If the solvent turns out to be ineffective or there are traces of dirt in some places, they need to be scraped off with a spatula.
Main types of ceiling tiles
Today on the building materials market there is a wide range of products for covering and decorating the surface of a room. But you always need to choose the option that suits you both in terms of quality and price. Ceiling tiles are classified according to two main criteria - the principle of their manufacture and the type of surface. As for the first option, it is customary to distinguish the following types of this material:
- stamped or pressed tiles;
- injection type of material;
- extruded tiles.
Injection tiles have a denser texture and a clear and pronounced pattern.
The pressed type of material for covering the surface of a room belongs to the class of inexpensive and low-quality options for decorating your ceiling. It is made from polystyrene foam blocks using the stamping method. This tile is quite fragile and can absorb dust and dirt, and its thickness is 7-8 mm. This type of material is not recommended to be washed with water, but water-based paint is often applied to it.
Injection tiles have a regular and clear geometric shape and have high quality indicators. Its thickness is 10-15 mm. It is a very good insulating agent and belongs to the class of environmentally friendly products. One of the disadvantages of this type of material is its high cost.
Extruded tiles are thin but durable. A relief pattern, paint and polymer film are applied to the tiles.
The main feature of extruded tiles is their absolutely smooth surface. The material is considered the highest quality, durable and expensive type, which is used to cover the surface of the room. This type of tile comes in a variety of patterns and color options. It has insulating and protective properties.
Regarding the criterion of surface type, as a rule, laminated, seamless and mirror ceiling tiles are distinguished. Its first type has good waterproofing qualities and is available in various colors. This type of tile has a special laminated surface. The main advantage of the seamless type is its simplicity and convenience, as well as the invisibility of the seams between the plates. Mirror type - its main advantage is the visual expansion of the room. This ceiling tile consists of a mirror layer on the front side and can be rectangular or square in shape.
What types of ceiling tiles are there?
Pressed ceiling tiles
Stamped ceiling tiles
- Pressed or stamped ceiling tiles are panels 6 to 8 mm thick.
- The tiles are made by stamping from foam sheets.
- After manufacturing, the tiles have the correct shape, which allows them to achieve symmetry when laying them on the ceiling.
- When stamping extruded polystyrene foam, it is possible to leave a wide variety of patterns on the tiles, which is what manufacturers actually do.
- The product is usually characterized by a low price and high quality.
Injection ceiling tiles
Injection tiles are more embossed
- Injection ceiling tiles are not much different in appearance from pressed ones.
- It is made by baking granules in a special form.
- This type of tile has a deeper, more embossed pattern and is thinner stamped.
- The panel has 500x500mm along the edges and from 9 to 14 mm in thickness.
- Due to their thickness, such tiles are more convenient to work with, as they do not require special careful handling.
- It is a good sound insulator and can be easily cut with a construction knife.
Extruded or extruded ceiling tiles
Extruded tiles
Extruded tiles, wood look
- Extruded ceiling tiles also differ little in appearance from stamped or injection ones, but at the same time they are the thinnest and are only 2.5-3 mm thick.
- The tiles are very durable, as they are made using the extrusion method. A relief pattern and paint are applied to the smooth surface of the tile.
- Often such tiles are produced with a laminated coating, although even without this coating they are quite hard.
https://youtube.com/watch?v=IsoPqRusu_o
Cleaning methods
During cleaning, the tray must be kept under a roller or sponge to prevent drops from falling on the floor.
What tools can you use to clean ceiling tiles? One possible method would be vacuuming. Vacuuming ceiling tiles is very convenient because it does not dirty the floor and saves time on cleaning. There is a significant drawback to using a vacuum cleaner. It is impossible to clean rust stains or marks left by neighbors' floods or roof leaks. In this case, it is necessary to use detergents to clean the ceiling.
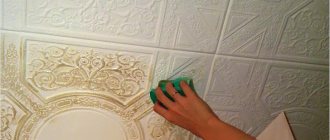
Of course, it is good to wash ceiling tiles using a soft fluffy brush, which allows you to clean dirt even in hard-to-reach areas of the ceiling pattern. Using this cleaning method, it becomes necessary to wash the furniture and floor, since dust from the top will fall down.
The ceiling is washed using a damp sponge or rag, but do not forget that when wet cleaning, each type behaves differently.
In order to wash the ceiling, various detergents that are used in everyday life may be suitable. Do not use detergents or powders with abrasive particles. Such particles can leave marks and cause great damage to the coating. It is better to wash the ceiling using gel detergents or soapy water.
How do samples behave during wet cleaning? Injected and extruded withstand moisture and mechanical stress during cleaning. It is not recommended to wash stamped ceiling tiles as they are fragile; cleaning in this way is allowed only when absolutely necessary.
The process of washing the ceiling is carried out using a sponge or cloth. For wetting, prepare an aqueous solution with detergent. All elements of the pattern are filled with soap composition, then the composition is washed well with clean water. If there is any water left in the pattern relief, it is very easy to get rid of it using paper napkins or toilet paper. It is imperative to remove moisture, as once it dries, it can leave dirty marks. It is not recommended to wash the ceiling using chemically active, aggressive detergents - this can destroy the structure of the material.
You can wash the tiles from glue or putty during repairs using a spatula. If the putty has not yet dried, you can do it with a rag.
103583
Methods for cleaning non-washable slabs for suspended systems
If non-washable panels are used when constructing suspended ceiling structures, then there is no answer to the question of how to wash suspended ceilings, because they cannot be wet at all. To clean the coating, use only dry cleaning. A vacuum cleaner with a soft furniture attachment is ideal for these purposes. The unit must be set to minimum power so that the finish does not move away from the base due to strong attraction. A vacuum cleaner simply removes dust and cobwebs from the surface. Do not rub foam boards intensively.
Many housewives like to perform dry cleaning using a Duster brush, the bristles of which have a negative charge and attract dust well. This product is optimal for dry cleaning of textured surfaces, because the bristles of the brush collect dust in all recesses. Thanks to the negative charge of the bristles, the collected dust does not separate from the brush and does not fly in the air, settling again on surfaces. After cleaning, shake the brush well outside the house.
Tools and necessary materials
To remove particularly difficult contaminants from the surface of slabs made of non-washable materials, you will need the following devices:
- dry rags;
- metal spatula;
- eraser;
- stepladder or table;
- cleaning wipes for suspended ceilings;
- microfiber cloths;
- ammonia for glossy surfaces.
Step-by-step technology for cleaning suspended coverings
Depending on the type of contamination, the following surface cleaning technology is used:
- Dried tile adhesive is very difficult to remove from any materials (washable and non-washable), so it is recommended to remove it without waiting for it to dry. To do this, use a dry cloth or sponge. Detergents or water should not be used.
- Dried glue is more difficult to get rid of. To remove it you will have to use a spatula. You just need to use the tool very carefully so as not to damage the surface of the finishing material.
- To add shine to glossy surfaces, use ammonia or sprays containing it. Lightly moisten a soft rag with the solution and wipe the ceiling. After this, the panels are immediately polished with a dry flannel cloth.
Use of power tools
The easiest way to remove remaining glue from the ceiling is to use a grinder. If you had to glue the tiles using a large volume of glue, this method is better than others. A suitable sandpaper is installed on the machine, and a stepladder is placed at the desired area of the ceiling. Next, the top layer of coating can be removed without difficulty, and together with it you can remove stains of any glue.
What to do if you had to glue the tiles using “liquid nails” type glue? This product is very durable, has high adhesion to the surface, and is not easy to remove from the ceiling. A grinder with a grinding wheel (hard wire disk) is ideal for this purpose. Even stubborn dirt will be removed, after which a new coating can be properly applied.
Working with power tools generates a large amount of dust; you should not work indoors! Hand gloves should be very durable and thick to protect them from injury and vibration from equipment.
Tools for work
The better the ceiling is cleaned before wallpapering, painting or other types of repairs, the longer the new coating will last. To do the job without difficulty, you should prepare the necessary tools in advance. Here is a sample list of devices:
- putty knife;
- chisel (replacement - metal brush);
- grinding machine (replacement - sandpaper);
- Bulgarian;
- ladder (step-ladder).
To protect your face, you will need a mask or respirator, and glasses to protect your eyes. Gloves are put on your hands before you start cleaning. Consumables may include putty and solvent.
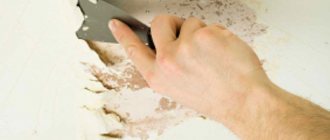
Using a spatula
Mechanical cleaning of the ceiling will have to be done if power tools are not available. The easiest way to clean the ceiling is with a spatula. A spatula with a short handle is very inconvenient to use; the work will be labor-intensive. It is better to purchase a tool with a long handle, or attach an existing spatula to a stick. This way you can work without a ladder, the work will go faster.
The procedure is as follows:
- Moisten the ceiling well with water.
- Wait 15–30 minutes.
- Clean the surface.
- If necessary, add water by sprinkling onto dry areas.
After using the spatula, you should use putty or primer, after which you can glue a new tile or perform another coating. You can also remove dried glue using a construction float. It is held at an angle of 90 degrees to the ceiling, movements are made diagonally.
Compositions for washable suspended ceiling tiles
To work, you will need a container for water, the cleaning agent itself, gloves, sponges and rags, as well as a long-handled brush. Before cleaning washable suspended ceilings, you need to shake off dust from them - this is easiest to do with a long-haired brush on the handle or a vacuum cleaner.
Now how and how to wash a suspended ceiling - liquid dishwashing gels are suitable
It is important to select a composition without fragrances or fillers. Soap products such as Cinderella and Fairy quickly dissolve in water, wash off grease and other stains and gently clean the surface
It is strictly forbidden to use hard brushes, sponges, abrasives, or solvents. If you don't have any gel on hand, hair shampoo will do. Washing is carried out with a soft cloth, then washable suspended ceilings should be rinsed from soapy water and wiped dry.
And a few more tips:
Stamped foam tiles do not tolerate excess moisture, so the rag must be wrung out
It is better to use dry shampoos, which quickly remove dust and other light dirt. Extruded, injection slabs withstand moisture; here, soap solutions with a slightly higher concentration of soap substance are suitable for cleaning. If there is no gel, you can use laundry soap - grate and dilute in warm water. Apply the solution to the surface carefully and rinse off without zeal, so as not to damage the decor. Remove remaining foam and moisture with paper or cotton towels. Toilet paper or regular napkins will come in handy - they do not leave streaks or cellulose fibers. To get rid of gray deposits from cigarette smoke, you need to dilute 2 tbsp in 1 liter of warm water.
l. salt, 1 tbsp. l. baking soda and wipe down the tiles.
Damage options and repair methods for PVC ceiling tiles
The polystyrene foam part is a fragile element; it must be handled with care, not bent or pressed during installation. In addition, the parts absorb water, become loose and may begin to fall off.
The most common defects:
- moistening part of the part or the entire lamella;
- mechanical damage;
- cracks;
- peeling off the edges and entire tiles;
- splits and chippings of parts;
- grease stains and other contaminants that cannot be cleaned.
The downside is that you will have to make a replacement, the upside is that the work is simple, everything is done in a short time with your own hands.
How to repair foam ceiling tiles depends on the type of damage:
- If the parts are slightly moistened, but the material does not become loose, the lamella does not begin to fall off in pieces, drying is enough. Use a hair dryer or a good heat gun.
- In case of contamination, water-based emulsion or other paint that matches the color will help. But there is a nuance here: if yellow stains from the grout have come through the suspended ceiling, change the tiles - such rusty streaks cannot be painted over, but the glue that has appeared is covered with a correctly selected shade. When choosing paint, give preference to water-based, water-dispersed or acrylic-based opaque compositions.
- Fill small and shallow cracks with putty, let the composition dry, sand and paint with water-based emulsion. If the crack covers the entire lamella or splits into several small ones, replace the part.
The lamellas will also have to be changed in cases where a large piece or corner breaks off.
The work algorithm is as follows:
- use a cutter or knife to cut in several places and remove the damaged lamella;
- cut off the top grooves of the tiles;
- clean the base from the adhesive mixture;
- prepare a new element, glue;
- Lubricate the die with the composition, carefully place it in place and hold it.
If the adhesive mixture is squeezed out through the edges of the lamella, it must be immediately removed with a napkin or sponge. It is best to apply glue to the center of the tile, pointwise to the edges with an indentation of 5-7 cm, and also coat the ceiling where the replacement will be installed. This way you can stick elements in any area of the ceiling, restoring a fairly worn coating. To ensure that the decor does not differ in color, paint the surface with several layers of water-based emulsion.
Is it possible to glue new PVC tiles onto old ones?
It is possible, but with a preliminary assessment of the old decorative layer. Stages of repair work:
- Visually assess the integrity of the coating. If necessary, update the parts in the manner described above.
- Feel the lamellas with your hands, checking the strength of adhesion. If necessary, glue the slabs by squeezing the adhesive composition from a syringe - this is a convenient option for spot gluing.
- Remove the skirting boards and ensure the integrity of the parts. Sometimes moisture accumulates behind the ceiling plinths and mold appears - in this case, the base will have to be cleaned and soaked with an antiseptic, then dried well.
- The gluing technology is simple: on the back side of the element, apply 4 glue dots in the corners, 1 in the center, then, in accordance with the instructions, press the part to the ceiling, hold for a while and release.
How to glue ceiling tiles onto old ceiling tiles with a raised pattern:
- measure the height of the pattern;
- if the parameter is no more than 3 mm, the new decor is mounted on gypsum putty or silicone sealant;
- heights of more than 3 mm should be cut off, the cut areas should be sanded, then the surface should be covered with new tiles.
If the new ceiling tile does not stick or falls off during installation on a base with a convex pattern, the master made mistakes:
- Poor sanding of the base. After the pattern is cut, the surface must be thoroughly sanded - this will increase adhesion.
- Too thin or too thick putty is used. A thick layer of composition is just as bad as a thin one. It is better to choose liquid nails or silicone sealant.
- Pressing too hard on the part will cause the old lamella to deform, resulting in an air gap between the elements and the tile will fall off.
To prevent defects, you should carefully apply the adhesive mixture to the corners and in the center of the new part, attach the lamella to the ceiling, smooth it out and press lightly
After completing the process, fill the joints and seams with sealant, paying special attention to the outer rows. The final stage is the installation of ceiling plinths
Moldings will provide additional protection against the decor coming off.
Having clarified the question of whether it is possible to glue ceiling tiles onto old ones, you should not rely only on a visual assessment of the integrity of the old coating. Sometimes the defect is hidden under the decor: plaster falling off, cracks drying out. Installing a new layer of decor will lead to the entire structure collapsing in a short time.
Description of the washing procedure
You can wash the products using, for example, a sponge. The material is dipped in water with liquid detergent. First of all, the relief elements are “soaped”, after which the mixture is washed off with a sponge dipped in water.
If water remains on the surface, it can be soaked using paper-based napkins. This must be done, otherwise stains may remain in these places.
Solvents must not be used under any circumstances. This will contribute to the destruction of the tiles. If there is putty or paint on a foam product, it can be removed with a rag when it is fresh, otherwise a spatula should be used.
“Dry” care is preferable
If you intend to regularly care for ceiling tiles in the kitchen or bathroom, then it is better to do it in a “dry” way. And the “wet” option is best left as a last resort if vacuuming is not satisfactory. This reduces the risk of damage to the surface, since washing in any case is accompanied by pressure on it.
The vacuum cleaner should not be used at full capacity right away. You need to start with the minimum, and then observe how much dust the equipment absorbs, and whether the tiles fall off. Having chosen the optimal mode once, you should stick to it for further cleaning.
Suspended ceilings are very popular because they allow you to hide defects in the base and utility lines, level the surface well and are quickly installed, and allow you to mount different lamps. Despite the ease of maintenance of many types of ceiling tiles, owners of such ceiling systems still wonder how to clean a suspended ceiling. Since ceiling panels are made from different materials, some products can be washed, while others are subject to dry cleaning only.
First, we will figure out how to wash washable suspended ceilings. The work is carried out using the following materials and tools:
- soft kitchen sponges and flannel napkins;
- container with water (basin or bucket);
- latex gloves;
- suitable detergent;
- protective glasses;
- a window squeegee or a soft brush with a long handle.
Since all work will have to be carried out at height, you will need a stepladder, table or small scaffolding. A stepladder is not very convenient for the reason that you cannot place a container of water and detergents next to you, so you will constantly have to go up and down the steps. A scaffold or table is much more convenient due to the large, stable surface on which you can place all the tools at hand.
The question of how to wash foam ceiling tiles is especially relevant in the kitchen, where surfaces are often contaminated with grease and soot. In other rooms, dry cleaning of dust and cobwebs is sufficient. If we talk about how to wash foam ceiling tiles, then liquid detergent solutions for washing kitchen utensils, gels for washing clothes, and shampoos are suitable for these purposes. These products dissolve grease stains well and do not damage the surface of the foam.
Loose stamped tiles cannot be wetted too much, so before washing, wring out a rag or sponge well. Injection panels and products made from extruded polystyrene foam do not absorb moisture so much, so they can be generously moistened with water.
If you don’t know exactly how to wash ceiling tiles, first try a regular soap solution. To prepare it, grate traditional laundry soap and dissolve the flakes in warm water. To wash loose tiles, it is better to use only foam so as not to wet the surface too much.
The sequence of washing stamped panels made of loose foam:
- First, prepare a soap solution with a large amount of foam.
- Apply a little foam to the surface of the tile using a sponge and easily wipe away dirt. It is not recommended to rub loose tiles vigorously.
- When the stains come off, gently wipe the surface with a dry soft cloth. This removes any remaining foam and water.
- If after wiping there are residual detergent residues, then wipe the panels with toilet paper or soft paper towels. Dry, loose paper absorbs remaining moisture well. If drops of water and foam are not removed, stains will remain after drying.
For painting stamped slabs, only water-based emulsion is suitable, which is applied in two layers, and injection tiles can be painted with different paints that do not contain solvents that are aggressive to foam plastic. Laminated panels cannot be painted.
How to prepare to remove old wallpaper?
The preparation is no different - it is necessary, firstly, to free up a working space for yourself, so that you have access to all the walls in the room. And secondly, to protect the things remaining in the room, interior elements or already finished surfaces from unnecessary contamination or getting wet (water will be used quite widely during the removal process).
Everything is very simple:
- Furniture, of course, even more so - with the prospect of subsequently covering the walls with new wallpaper, it is better to take it out of the room. If this is not possible, then it is moved closer to the center of the room, so that there are fairly wide passages along all the walls in which it will be possible to work without interference.
- All pieces of furniture are covered with a thin film - such a protective coating, intended specifically for such purposes, is easy to purchase in a store.
- Of course, it is better to cover the floor with thicker plastic film so that it does not tear under the soles of shoes. A thickness of 75 microns is usually quite sufficient. To avoid slipping on the wet film, you can also cover it on top with pieces of packaging cardboard or even just old newspapers.
- Skirting boards are often forgotten. If you do not plan to remove them, then the preservation of the appearance can be ensured with strips of applied masking tape. By the way, they can also fix the film laid on the floor around the perimeter of the room.
If it is not possible to completely empty the room of furniture, then it, like the floors, should be covered with film
- To prevent dust and dirt from spreading throughout the premises, a damp cloth should be placed on the threshold. You can keep the doors closed, or cover the doorway with a piece of damp cloth.
- Removing old wallpaper, preparing walls, and installing new trim involves removing sockets and switches. There are “wet procedures” ahead, so you need to protect yourself from electric shock. Either the room is completely disconnected from the home electrical network, or steps are taken to reliably isolate current-carrying parts and wiring.
You need to immediately prepare the necessary tools so that they are already at hand. It is difficult to give an exact list of all the required “arsenal” - much depends on specific circumstances. So, depending on the type of wallpaper pasted and the strength of its retention on the wall, the following can be used for work:
- Spatulas, narrow and wide (up to 250 mm).
- A container for water, detergent or other ingredients, which will be discussed below. It is convenient to apply water to the walls with a spray bottle.
- Sponges or foam roller, rags.
- To perforate waterproof wallpaper, you will need a needle roller or a special tool - the so-called “wallpaper tiger”.
- Often you have to resort to steaming glued fabrics. Here you can use an iron, regular or, better, with a vertical steam function. Special wallpaper steamers (steam strippers) are very convenient, and if you have the opportunity to rent such a device, you should not neglect it.
- A sufficient supply of garbage bags should be prepared so that the removed linens and rags should be immediately placed in them.
- A considerable proportion of the total volume of work will be carried out at height, under the ceiling. This means that you will need a reliable stepladder or, which is much more convenient, sawhorses.
- It is better to carry out wall cleaning operations while protecting your hands with gloves.
The list may be broader if, for example, it comes to harsh mechanical cleaning of old canvases that cannot be cleaned properly.
When is it necessary to remove old foam tiles?
Before we tell you how to clean the ceiling from tile adhesive, we’ll figure out in what cases this needs to be done. To begin with, let's say that dismantling the ceiling tiles is not required if you decide to install tension coverings, suspended or false ceilings made of gypsum plasterboard, plastic panels and Armstrong ceiling tiles.
All these coatings do not require careful preparation of the base base, because they completely hide it and all existing defects. It is necessary to dismantle the tiles only if there are poorly fastened elements that could fall onto the tension fabric and damage it.
You will have to remove old tiles and thoroughly clean the surface of tile adhesive in the following cases:
- If you decide to paint the ceiling with interior paint or whitewash it. In this case, the question often arises of how to level the ceiling after tiling, because painting requires a perfectly smooth and even surface. The only way to prepare the surface for painting is to dismantle the coating, clean the ceiling of glue and putty it.
- The question of how to clean the ceiling from foam tiles should also concern you if you decide to cover the ceiling surface with wallpaper. In this case, thin paper and vinyl wallpapers require especially careful preparation of the base. Thicker non-woven coatings, embossed wallpaper for painting, liquid wallpaper and products made from cork or bamboo do not require careful leveling because they hide minor defects in the base.
- If you decide to tile the ceiling with ceramic tiles or cover the surface with a new foam coating, then you should know how to remove the ceiling tiles and remove the glue, because you cannot glue a new coating over such a finish.
- You will also have to dismantle the old coating, clean off the glue and level the surface if you decide to cover the ceiling with self-adhesive film.
Preparation
- The option of soaking the tiles is suitable only for thin elements that are “tightly glued”. A solvent that is carefully applied to the decor will come in handy. You only need a little money to pry up the corner of the element, and then remove the entire tile from the ceiling.
- How to tear off a tile from the ceiling if it sits firmly and is not thin - a hammer or chisel will help here. Insert the tip of the chisel into the seam, punch it with a hammer, and remove the part.
- Also, durable tiles can be removed using a drill. Drill 4-6 not very deep holes, and then remove the part with a spatula or chisel. This option is useful when the tile seams are too thick and strong - it’s easy to widen the seam with a drill or hammer drill, and then tear off the tiles.
After all the cleaning methods, the ceiling surface will have to be washed, dried well, re-primed, and puttied to get rid of minor irregularities. Only after this is your ceiling ready for a new coating.
The first stage of any construction work is surface preparation. When it comes to the ceiling this can be quite difficult. For example, if there was wallpaper or tiles attached to the ceiling with glue. This type of ceiling design is used due to its positive qualities. Such as low cost, aesthetic appearance, practicality.
About 10 years have passed since the time when ceiling tiles began to be used. The time came when they began to dismantle it due to the fact that it went out of fashion. Or the tiles have darkened, begun to crumble, and look worse. The question arose about how to get rid of glue and its traces.
How to clean a suspended ceiling from glue
A huge number of solutions and compositions for special and general purposes are offered on the market to combat adhesive residues. True, the effectiveness of reagents can only be judged by the advertising of the drug.
Cyacrine can be removed only with special solutions
In the process of choosing suitable means with which you can remove glue from a stretch ceiling, you must immediately exclude the following methods and reagents:
- Chlorinated hydrocarbons, acids, ethers. For example, dichloroethane and chloromethane are all suitable for removing cyacrine super glue from the surface of metal, fabric or some types of plastic. Using strong polar solvents to clean a stretch ceiling will result in a disaster for the decor;
- Abrasive powders, cleaning products for tiles and dishes. A mixture of salt and dish cleaning powder can easily wipe off the glue from your fingers; clearly visible stains and abrasions will remain on the stretch ceiling.
It's best to try to clean off the glue using proven chemicals. For example, aqueous solutions of DMSO.
Propylene carbonate or dimethyl sulfoxide
Both reagents are considered the best of all existing means designed for “subtle” removal of glue from the surface of the tension fabric. The easiest way is to try to remove drops of glue with dimethyl sulfoxide. A solution called "Dimexide" is a medicinal product and is freely sold in pharmacies.
Cleaner from the first aid kit
Inexpensive and effective enough to buy it before installing a stretch ceiling and have it on hand just in case. With prolonged contact with the skin of your hands, the drug can cause burns, so before you try to remove glue stains from the ceiling, you should at least use latex gloves.
The second reagent is propylene carbonate, which is part of the Secunda anti-glue. The effectiveness is quite high, but only if no more than 10 minutes have passed between the appearance of stains and the attempt to remove traces.
The cap must not be screwed onto the thread
Acetones, gasolines and removers based on them
The most unpredictable type of cleaning materials. If you don’t know how to use it, you can remove glue stains with a decorative layer of varnish. It is best to use pure acetone; nail polish remover will not remove the glue. If there is no glossy layer on the stretch ceiling, then acetone is best suited.
The only limitation is that you should not overuse gasoline-acetone mixtures; they do not dissolve PVC, but lead to swelling of the vinyl.
Proprietary ways to remove glue
Almost any good quality cyacrine glue is sold complete with a cleaner. Since most adhesive compositions have similar compositions, once purchased, a stretch ceiling cleaner can remove stains and drops from the surface.
The most common brands of cleaners you can use are “Secunda”, “Anti-Glue”, “Contact”.
Universal wash option
American “Z-7 Debonder” glue removers are considered more effective.
Suitable, but not for all plastics
Among the new Russian products, we can mention the washes from RTLINE. The composition of the mixture is quite complex, therefore, despite the effectiveness of the product, you need to work with it with gloves and under forced ventilation.
Advice from professionals
Any removers designed to quickly remove glue have a strong irritating effect. Inhaling acetone or a gasoline-acetone mixture can lead to mild toxic poisoning, so an attempt to remove even one stain should be carried out at least with the windows open.
Checking the effectiveness of the composition
The third rule that must be followed is that any composition for removing glue must be tested in advance on scraps of material. It will take a maximum of half an hour to test it, but you can be completely sure that this glue has its own antidote, you can always wash off or remove the drops if necessary.
Third, drops of cyacrine remover that fall on clothing or flooring, not to mention the skin of your hands, very quickly dissolve paint on linoleum or laminate. Therefore, the use of plastic film and latex gloves will clearly be useful.
In what cases do you need to remove old foam tiles?
If the owner plans to stretch PVC film or a fabric ceiling, make suspended structures from plasterboard or other sheet materials, there is no need to tear off the cladding. The only exceptions are elements that have fallen into disrepair - tiles with creases, coming off the ceiling or with water stains.
Also, there is no need to dismantle the cladding in a separate step when stripping the surface to the base - concrete floor slabs or wooden base ceiling; the finishing is removed along with the plaster layer.
Here are the cases when dismantling ceiling tiles is necessary:
- Before painting the ceiling. The evenness of application of the coloring composition depends on the smoothness of the base, so you need to not only remove the decor and glue residues, but also then putty the surface.
- Before pasting with wallpaper or self-adhesive film. Here, too, you need a perfectly leveled surface, so the tile trim needs to be removed.
- Before finishing with new plates of PVC, polystyrene foam, and other piece material.
Having figured out when to remove the decor, let's look at how to remove tiles from the ceiling and remove the adhesive tracks.
Manual method
You can use not only electric, but also mechanical tools for work. These include a spatula, chisel, and metal brushes. The main advantage of using this equipment is the ability to process large area ceilings, reducing the immediate time required to complete the work.
A universal solution can be called a spatula. If you thoroughly soaked the ceiling with water before starting work, then you will not have problems removing the glue. A brush may be required to work with traces of the composition that have penetrated deep into the structure. Metal bristles are excellent at removing serious dirt, but working with this equipment takes a huge amount of time. Therefore, it is recommended to use it not as a main, but as an auxiliary tool.
An additional long handle should be installed on the spatula. It will allow you to easily process large areas without moving stepladders, and this will significantly speed up the work process.
How to clean hard-to-reach areas?
During processing, there are always areas that are difficult to process with a grinder or spatula. You should use a regular chisel to remove the glue in the corners of the room and along the walls.
If the chisel does not allow you to achieve the desired result, then thoroughly wipe off the stubborn glue with a wire brush. Of course, processing the ceiling takes a lot of time, but the result will justify the effort invested.
Not in all cases it is necessary to remove the adhesive and remove the tile altogether. If you want to equip suspended ceilings, then the old coating will not prevent you from doing this. Moreover, the ceiling tiles will act as additional sound insulation and protect the apartment from excessive noise.
Material care
Ceramic tiles are the easiest to care for. It can be washed with any means: dishwashing detergent, powder, and soap solution. The catch is that nowadays few people use ceramics for ceilings. Foam squares are very popular. Under normal operating conditions, foam ceilings can be easily cleaned with a vacuum cleaner. To do this, use a furniture nozzle. Laminated boards can be washed with water after dissolving soap in it. To avoid streaks, the glossy surface should be wiped dry. But how to wash the ceiling tiles in the kitchen if traces of soot appear? Of course, you need to take into account the characteristics of the material from which the ceiling is made. You may have to resort to more radical methods: repainting and replacing individual elements.
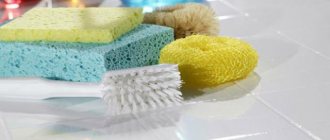
For moderate contamination you will need:
- soft sponge;
- cloth for wiping, kitchen napkins;
- liquid detergents appropriate for the type of ceiling surface;
- gloves;
- glasses for eye protection.
You need to wash the ceiling tiles first with a liquid detergent, and then go over it again with a sponge soaked in a solution of water and bleach. We dilute bleach at the rate of 1 tbsp. l. for 4 liters of water. Rinse the tiles and dry them with a soft kitchen cloth. Heavy contamination can be removed with a mixture of ammonia, water, vinegar and liquid detergent in equal proportions. An effective remedy can be made from a mixture of 1 tsp. citric acid, 2 tbsp. l. baking soda and water. Apply the solution to the stains, leave for a few minutes, and rinse with clean water.
The kitchen is the personal space of every woman. This is where most of the free time from work is spent. Every housewife wants her kitchen to be cozy and sparkling clean. To ensure that the ceiling remains clean for a long time and does not require regular repairs, it is better to acquire a high-quality hood. And the main thing is not to leave preparing dishes unattended.
A ceiling made of any material needs care, and for each material there are some means that help keep the ceiling clean by removing dirt from it. To the question, “How should you wash ceiling tiles?”, some answer that they do not, but this is not true, since such tiles are not only cleaned and wiped, but also washed.
Folk remedies
At home there is always a replacement for ready-made store-bought formulations. What can you use to clean tiles? Let's look at the simplest and most affordable options.
Laundry soap
Grate a bar of soap on a coarse grater, dilute the shavings in hot water. The concentration should be like jelly. Cool the liquid, foam, apply to the tiles and let stand for 5 minutes. Then remove the remaining dirt with foam with a napkin, rinse the coating with water and vinegar.
Soda
Baking soda is great for removing any type of stain.
Loading …
- to remove yellowness, dilute 2 tbsp. l. soda in 0.5 liters of warm water;
- to eliminate local contamination, clean the dirt with soda and vinegar - 1 tbsp. l. add 2 drops of vinegar to soda, spread foam on the stain, wipe off the dirt after 2 minutes;
- to remove greasy dust, mix 1 tbsp. l. soda with 1 tbsp. l. salt, dilute with 0.5 liters of warm water, rinse off dirt.
Ammonia alcohol
What you need is alcohol, not tincture.
To remove dirt, soak a cotton pad or napkin in alcohol, and then carefully wipe the dirt off the tiles.
Expert opinion Evgeniy Katyshkin Specialist in housekeeping and subsidiary farming
Alcohol can be replaced with vodka without additives. To remove difficult old stains, it is better to apply with a spray bottle, immediately removing the dirt with a napkin.
Eraser
This stationery accessory cleans as well as any product. You can wipe off black dots and yellow spots with an eraser. The eraser will not cope only with greasy stains, the rest will be removed without a trace.
Lemon acid
Concentrated solution of 1 tsp. lemons, 2 tsp. soda and 0.5 tbsp. water will wash away persistent yellowness. The gruel should be evenly distributed over the surface of the tile, after 15 minutes, remove the dirt with a napkin, and rinse the coating with water and vinegar.
Knowing how to wash and clean the tiles, it is better to prevent the formation of persistent dirt. Cleaning the ceiling of dust once a week will eliminate the hassle of cleaning.
Features of glue stains on a stretch ceiling
The problem of eliminating traces of fabric gluing is not to remove dirt
It is important to do the cleaning as carefully as possible so that you do not end up having to completely change the stretch ceiling or mask the stains with decor.
In fact, the surface of the decorative cladding consists of two layers:
- Vinyl or PVC plastic is the basis of a stretch ceiling;
- Decorative varnish coating.
In the case of matte and satin films, there may be no varnish, so you can wash superglue on a stretch ceiling even using modern detergents. Stains on varnish surfaces can only be removed chemically, subject to preliminary testing of the reagent on the remaining scraps.
Important! Final polymerization in superglue does not occur in seconds, as is commonly believed, but within 30-40 minutes or even longer. Therefore, if you don’t put off dealing with stains for a long time, removing glue from a stretch ceiling will be almost 100% guaranteed.
Practice shows that if you manage to notice drops or stains during gluing in time, then within 20 minutes with the help of special chemicals you can remove even glue from the stretch ceiling without any consequences
Therefore, if you do not put off dealing with stains for a long time, removing glue from a stretch ceiling will be almost 100% guaranteed. Practice shows that if you manage to notice drops or stains during gluing in time, then within 20 minutes with the help of special chemicals you can remove even the glue from the stretch ceiling without any consequences.
Treatment after removing glue
Once you have gotten rid of traces of glue, you need to prepare the surface for decoration. All holes larger than two millimeters will need to be filled with putty. Next, apply a primer. It is better to do this in two layers to ensure the best result. After such a thorough final treatment, the ceiling is completely ready for finishing work.
Now you know how to remove glue from the ceiling. This process will require a certain amount of time and patience, but the end result will definitely please you!
- Author: Julia
Rate this article:
- 5
- 4
- 3
- 2
- 1
(9 votes, average: 3.7 out of 5)
Share with your friends!
Stages of removing glue from the ceiling
The glue can be removed from the ceiling with ordinary sandpaper. To make the work go faster, use a special attachment for a drill.
It should be noted that the work of cleaning the ceiling from glue is a rather labor-intensive process, which consists of the following steps:
- Prepare a grinder for work and attach a special disk to it (you can also use a grinder with sandpaper).
- Using a sprayer or roller, sponge and brush, moisten the ceiling with warm water (if necessary, repeat several times after 10-15 minutes).
- Using a primer, level the surface of the ceiling; if you plan to glue new tiles, then additional putty is not required.
- If there is no grinder and other necessary tools, the ceiling surface can be cleaned with a metal brush, iron spatula, or chisel.
- Removing tile adhesive from the ceiling is quite inconvenient, so it is recommended to attach a long handle to the spatula. If you use this trick, you won’t need to use a stepladder while working.
- You can use a chisel to clean hard-to-reach places. It will be most convenient to get rid of small pieces of glue.
- If the glue layer is thick enough, then you can use a special device - a hair dryer. Use it to heat layers of glue on a small area of the ceiling. Under the influence of heat, they will crack and move away from the slabs. Remove any remaining glue using an iron spatula.
- Inspect the ceiling and clean up any remaining glue using sandpaper or a wire brush.
What will you need?
To work you need the following set of tools and equipment:
- Chisel and wire brush.
- Sanding machine and sandpaper.
- Putty and spatula, primer.
- Ladder.
- Bulgarian.
- Additional protective equipment - goggles, respirator and gloves.
The work is very dusty, so it is best not to start it without protective equipment. Goggles and a respirator will be required to prevent damage to the visual and respiratory organs. Gloves are required to work with the tool.