There are several types of foam ceiling tiles - stamped, extruded and injection. Before installing a new ceiling finish, the old foam covering must be removed. But if tearing off the products is not difficult, the question of how to clean the ceiling from the glue of ceiling tiles worries many apartment owners. There are several ways to remove tile adhesive. Their choice depends on the type of future finishing.
If you want to achieve ideal smoothness of the base ceiling, then the old tile adhesive is cleaned off especially carefully. We'll tell you how to do it correctly.
When is it necessary to remove old foam tiles?
Before we tell you how to clean the ceiling from tile adhesive, we’ll figure out in what cases this needs to be done. To begin with, let's say that dismantling the ceiling tiles is not required if you decide to install tension coverings, suspended or false ceilings made of gypsum plasterboard, plastic panels and Armstrong ceiling tiles.
All these coatings do not require careful preparation of the base base, because they completely hide it and all existing defects. It is necessary to dismantle the tiles only if there are poorly fastened elements that could fall onto the tension fabric and damage it.
You will have to remove old tiles and thoroughly clean the surface of tile adhesive in the following cases:
- If you decide to paint the ceiling with interior paint or whitewash it. In this case, the question often arises of how to level the ceiling after tiling, because painting requires a perfectly smooth and even surface. The only way to prepare the surface for painting is to dismantle the coating, clean the ceiling of glue and putty it.
- The question of how to clean the ceiling from foam tiles should also concern you if you decide to cover the ceiling surface with wallpaper. In this case, thin paper and vinyl wallpapers require especially careful preparation of the base. Thicker non-woven coatings, embossed wallpaper for painting, liquid wallpaper and products made from cork or bamboo do not require careful leveling because they hide minor defects in the base.
- If you decide to tile the ceiling with ceramic tiles or cover the surface with a new foam coating, then you should know how to remove the ceiling tiles and remove the glue, because you cannot glue a new coating over such a finish.
- You will also have to dismantle the old coating, clean off the glue and level the surface if you decide to cover the ceiling with self-adhesive film.
Which adhesive is best for foam ceiling tiles and its cost
Important! If new plastering and puttying of the surface is carried out, then there will be no need to thoroughly clean the ceiling of glue, because its remnants will be removed along with the old plaster.
Method for cleaning the surface of a ceiling made of foam boards
Before starting work, it is recommended to assess the condition of the ceiling surface. In the absence of severe contamination and mechanical defects, you can cope without wet cleaning. A vacuum cleaner is used to remove dust. A brush with soft bristles is suitable for the same purposes. This tool allows you to remove dirt from hard-to-reach areas.
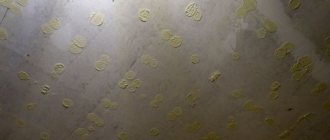
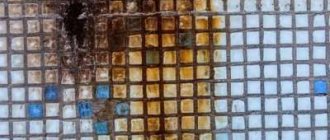
However, in the kitchen, tiles are always exposed to steam and grease, which causes soot to form. In this case, cleaning agents are used. In this case, the work algorithm will be as follows:
Each spot should be vacuumed to remove any remaining dirt and dust. Sooty and greasy stains are wiped with a dry sponge. This will allow the particles to leave the surface of the slab. It is strictly forbidden to use a damp cloth or sponge at this stage, as... The water will be absorbed into the slab, but the stains will not become soaked. Preparation of mixture for cleaning: 1 l. sodium salt is diluted in 5 liters of water. Soak a large sponge in the solution and wring it out. Then the area with the stain is blotted
It is important to maintain uniform pressure on the plate. No need to rinse
Repeat 2-4 times until the yellow color disappears from the stain. Removing unpleasant odors from foam boards. The surface is wiped with a mixture of vinegar and water. The emphasis is on difficult places. No rinsing required.
In addition, stores offer special sponges for removing soot from foam plastic. These tools are impregnated with chemicals and make the stain removal process much easier.
Any modern type of finishing allows you to obtain the necessary aesthetic and practical qualities, but each requires certain care. Many people believe, for example, that foam ceiling tiles do not need to be washed or cleaned. However, in reality this is not the case.
Description of methods for dismantling old tiles
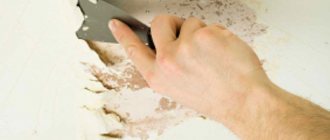
First of all, you need to clean the ceiling surface from the tile covering itself. If a not very resistant glue was used to glue the finish, then there will be no questions about how to remove the foam tiles from the ceiling. The coating is simply lifted with a spatula and peeled off.
But before you start work, the room needs to be prepared. To do this, cover all pieces of furniture that you decide not to remove from the room and the floor with plastic film. This method of protection is good because after work, the film can be rolled up and thrown away along with the garbage.
After that, we get to work. Using a wide spatula, we remove the foam products from the ceiling surface, starting from the corner of the room. For work in hard-to-reach places we use a narrow spatula. Polystyrene foam is a brittle material that tends to stick to everything around it, so protective clothing and glasses will not be superfluous.
Important! If you glued the tiles with PVA glue, then after drying it becomes very hard, so when cleaning the surface you can injure your hands on the sharp edges. To prevent this from happening, use gloves.
If you cannot remove the coating with a spatula, you can use a hammer and chisel. If the glue in the tile seam is very strong and you can’t get a chisel or spatula in, unstitch the seam using a puncher or drill. To do this, just drill a few shallow holes.
Puttying
If putty is chosen to fill the cracks in the ceiling made of foam squares, it is better to use the finishing variety. It has a finer texture and is easier to apply than coarser mixtures.
Both ready-made and undiluted mixtures are sold. The differences between them are minimal and the main criterion will be the price - the dry mixture can be significantly cheaper. It is diluted with plain water and there is nothing complicated about it. The main thing is to observe the proportions in the solution indicated on the packaging.
With ready-made putties everything is simpler - you just need to check its consistency. If the solution is liquid, it will be extremely difficult to apply it to the ceiling. In order for it to acquire the required consistency, it is enough to hold the package open for a while - the moisture quickly evaporates and the required thickness will be achieved quite quickly.
When the selected composition is ready for work, you can begin to seal the gaps. As already mentioned, the best tool when performing such a simple operation is your own finger. A little of the composition is applied to the fingertip and the gap that needs to be sealed is evenly filled.
Filling it evenly will be the most difficult part. It will take a little practice and everything will start to work out as it should. But, while the hand is not yet “stuffed”, the sealing may be a little uneven. It is better to start with a less noticeable area of the coating.
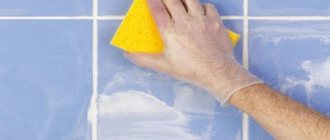
Having finished a small section of the ceiling in this way, about five or six tiles, you can begin to finalize the seams to perfection. To do this, you need to wipe the filled joints with a damp sponge. There is no need to be overzealous with pressure - you can wash the applied layer of putty.
When the entire ceiling has been treated, you just have to wait 10 - 12 hours until the grout dries completely and after that, carefully rinse the entire surface with water. The water must be changed often enough so that there are no chalky stains left on the surface of the coating.
Tools and materials for work
Before tearing tiles from the ceiling, stock up on the necessary materials and tools. You will need:
- narrow and wide metal spatulas;
- construction scaffolding or stepladder (scaffolding is more convenient because it has better stability, but takes up more space in the room than a stepladder);
- a basin or other container with water;
- garbage bags for storing torn tiles;
- polyethylene film to protect furniture and other indoor surfaces;
- safety glasses and gloves;
- chisel or hammer;
- drill or hammer drill;
- grinder with grinding attachment.
If moisture-resistant glue remains on the ceiling, it will be more difficult to get rid of it. To do this, you will need to buy special removers or solvents for the adhesive mixture.
Choosing adhesive for PVC tiles and how to lay them correctly
Attention! It’s good if you remember what glue you used to glue the tiles with, then it will be easier for you to choose a solvent to remove the remaining adhesive mixture from the ceiling surface.
Introduction to the topic
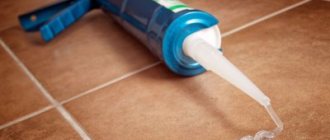
Adhesive mixtures have high strength, firmly fix the glued fragments and dry quickly. Therefore, it is recommended to immediately wipe off excess glue with a dry cloth. If contamination is not noticed immediately, the stain will be difficult to remove without damaging the surface.
Before wiping off liquid nails, you need to find out the composition of the adhesive substance, taking into account the following features:
- The solvent-based product has improved adhesive properties, emits a sharp, specific odor, and firmly bonds any surface.
- Water-based glue is environmentally friendly and does not have a specific odor, but it glues objects less efficiently and does not last as long.
- To choose a suitable remover and remove residual liquid nails, you need to carefully read the characteristics of the composition on the packaging and the manufacturer’s instructions for removing glue.
To effectively wipe off liquid nails, manufacturers of adhesive products recommend purchasing a special remover along with the polymer sealant. This is not a waste of money, but a quick solution to the problem of how to dissolve liquid nails. The cleaner dissolves dried glue well, after which the softened product is easy to remove from the surface.
Attention! To remove glue, you can use improvised means or solvents. A fresh stain that you notice immediately can be easily washed off with warm water and a foam sponge.
Is the solvent effective?
So, it has been decided that the old wallpaper must be removed. How this is done will be described below. And here, depending on your luck, completing a task may require an hour of time and turn into a very protracted action. But nothing can be done…
Expert opinion
Ekaterina Korneva, expert in the field of care, cleanliness and beauty
I will help you understand all the intricacies.
That is, it is difficult to predict what its reaction will be with the composition that will be used when gluing new wallpaper. The tension surface must be monitored regularly so as not to accumulate dust or other contaminants, which are then much more difficult to deal with. Treatment after cleaning the ceiling from glue If you have any questions, please contact me, I will be happy to answer!
How to Remove Leftover Adhesive from Foam Tiles
Now you know how to remove tiles from the ceiling, but the adhesive mixture that was used to glue the tiles often remains on the surface, so you will also have to completely clean it off. Getting rid of the remnants of the adhesive mixture is more difficult than tearing off the foam product.
Advice! The easiest way is to soften the remaining glue using a suitable solvent. This method is suitable if you know what mixture the coating was glued to.
Moisten the adhesive stain with a solvent and wait some time until it softens. After this, the glue is easily removed with a spatula and not even a trace remains of it. This cleaned ceiling can be primed and painted.
It will be more difficult if you don’t know or don’t remember what you glued the tiles to. In such a situation, you can use one of two methods:
- Try scraping off glue stains with different tools - a grinder, grinder, chisel. Of course, after such radical measures, the base surface will have to be puttied again in order to achieve the ideal smoothness that is required for some types of finishing.
- You don’t have to scrape off the glue stains, but simply re-level the ceiling with plaster mortar. This method is suitable if there is no old thick plaster layer on the ceiling, that is, the tiles were glued to the concrete surface of the floors, and also when you planned to level the ceiling anyway, so the labor intensity of the process and costs do not scare you.
After all the cleaning methods, the ceiling surface will have to be washed, dried well, re-primed, and puttied to get rid of minor irregularities. Only after this is your ceiling ready for a new coating.
An equally important preparatory step is treating the ceiling with antifungal compounds. It is advisable to treat the affected areas several times. If there are traces of mold on the base surface, do not neglect this step, so you can protect yourself from fungal damage to the ceiling in the future.
Treatment after removing glue
- If the suspended ceiling is matte, then it is enough to rinse its surface with clean water. Stains do not remain on a non-shiny canvas. But if we are talking about a glossy or suede version, they do it differently: they also wipe the canvas with clean water 2–3 times, and then wipe it dry with a napkin.
- Another good way to avoid streaks is to use alcohol-based glass cleaning solutions. The photo shows a working moment of cleaning.
Of course, no one can forbid the owner of an apartment, if he is carrying out renovations himself, to paste new wallpaper without removing the old ones. But then all that remains is to hope that, as they say, it will “carry over”, and the finish will turn out to be both neat and durable.
Folk remedies Recipes for masks At home Hair loss in women How to stimulate growth Causes of hair loss Hair loss in men Review of vitamins Helpful tips
Simple Ways to Fix Horrible Ceiling Tiles
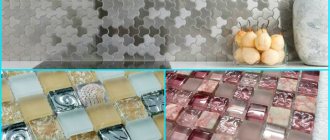
You can restore the beauty of the ceiling without major repairs, if the flaws are minor. Stains and stains on the polymer coating are removed using detergents. In some cases, painting can help fix terrible ceiling tiles. If individual elements of the composition are deformed, it is recommended to update them by replacing them with new foam samples, although this option cannot always be called simple.
Painting as a simple way to correct defects
Painting foam tiles allows you to hide stains and marks with minimal effort. To do this you will need the following set of tools and materials:
- roller with a long handle;
- paint tray;
- brush;
- masking tape;
- water-based paint.
Important! In order not to be disappointed with the results of painting, you should first experiment on the rest of the tiles or paint a small area from the edge of the ceiling. If necessary, you can tint the composition by adding the desired pigment.
Sequence of work:
- You should prepare the surface by removing dust from the tiles using a cloth or vacuum cleaner. The walls around the perimeter must be protected by applying masking tape.
- The perimeter of the ceiling, baseboard, areas near the chandelier and other hard-to-reach areas are painted first. The work is done with a brush.
- Next, begin painting the main surface using a roller.
Important! An interesting result is obtained when painting ceiling tiles with a sponge, highlighting the relief pattern. However, a coating with a 3D effect looks good only in spacious rooms with high ceilings.
It is necessary to prepare personal protective equipment, including glasses, taking into account the specifics of the upcoming work.
Fixing Horrible Ceiling Tiles with Washing
This method is accessible and simple, does not involve additional costs, but takes a lot of time and requires physical effort.
The nuances of washing a foam ceiling:
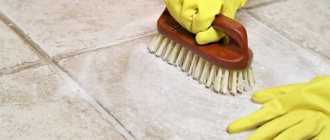
- The tiles are washed with warm soapy water using a soft sponge or brush;
- do not use abrasive products;
- complex stains need to be treated in several approaches;
- It should be taken into account that with strong mechanical impact, the formation of dents and other deformations is possible.
Advice! If it is difficult to clean the seams between the tiles, after the surface has dried, you can touch up the problem areas with a water-based composition using a paint brush.
Using a spatula
Mechanical cleaning of the ceiling will have to be done if power tools are not available. The easiest way to clean the ceiling is with a spatula. A spatula with a short handle is very inconvenient to use; the work will be labor-intensive. It is better to purchase a tool with a long handle, or attach an existing spatula to a stick. This way you can work without a ladder, the work will go faster.
The procedure is as follows:
- Moisten the ceiling well with water.
- Wait 15–30 minutes.
- Clean the surface.
- If necessary, add water by sprinkling onto dry areas.
After using the spatula, you should use putty or primer, after which you can glue a new tile or perform another coating. You can also remove dried glue using a construction float. It is held at an angle of 90 degrees to the ceiling, movements are made diagonally.
What to wash with
If cleaning with a vacuum cleaner for some reason did not give the desired effect or the dirt could not be completely removed, you can resort to a more radical method - washing.
The question may arise: is it possible to wash ceiling tiles, and if so, then with what? The answer is simple - of course, you can wash it. The polystyrene and foam from which it is made will withstand contact with water perfectly. Do not use only alkaline detergents or other solutions whose components can melt polyurethane foam or polystyrene.
The best cleaning solution is regular soapy water. It will cope well with standard contaminants: dust, cobwebs and other types of dirt that can be found in every home.
In kitchens, standard surface cleaning methods don't work very well. This is due to a thin film of fat that will inevitably appear if the kitchen is used for its intended purpose and food is prepared there.
How to wash the ceiling tiles in this case? Very simple - the same as for greasy dishes. That is, a detergent designed for this purpose. Any will do, as they do not contain strong chemical components that can damage the tiles.
You can also use liquid laundry detergents. Just make sure that they do not contain a bleaching component. It can ruin the appearance of the tiles.
It is not recommended to use powders, even without active ingredients. Especially with glossy and laminated types of such coatings. Powder particles can scratch the surface, ruining the appearance.