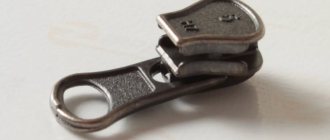
Slider device
The slider is an integral part of the zipper, which serves to connect parts of clothing.
It is this that allows you to close its links for fastening jackets, leather goods and shoes. It is quite easy to put a slider on a zipper if you first understand its structure and classification. The slider is made of several elements:
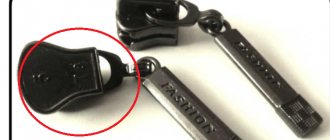
- a slider or housing consisting of an upper and lower part, between which there is a Y-shaped channel for connecting and disconnecting the links;
- a puller keychain to open and close the zipper;
- a latch that protects the clasp from inadvertent unfastening.
The slider, like the zipper, can fail or break, rendering the garment unusable. Very common causes of zipper failure are deformation of the links or wear of the edges of the slider, when it stops closing it. These are extreme cases that require complete replacement of damaged parts.
Types of zipper
The runner varies in structure. The most common types are:
- Tractor. Outwardly, it resembles the tracks of the voiced car. Its main distinguishing feature is the fastening of plastic teeth to a textile tape.
- Spiral fasteners. Synthetic fiber becomes their basis. The product also consists of a spiral, which replaces the teeth of a zipper.
- Metal runner. In appearance, such a dog can easily be confused with a tractor. The difference is the presence of nickel or brass teeth with increased structural strength. The result is a practical and secure fit.
- Secret slider. In this case, there is no need to look for the teeth when they are hidden behind the fabric on the same jeans. In sports dances, such zippers and their twisted base are indispensable when choosing a costume.
With so many varieties available, replacing the slider depends on the cause of the zipper failure.
Metal repairs are least likely to be needed.
After all, we are talking about the practicality of the model.
Types and markings
To quickly repair or install a zipper puller on clothes at home, you need to know the type of zipper itself. Its species difference depends on the variety of the product.
Typically, tractor zippers are used for the manufacture of large backpacks, bags and tents, metal zippers are used for jeans and jackets, and twisted or hidden types are used for sportswear, trousers and women's skirts, easily hidden in the fold of the fabric. In addition, different types of sliders will be used depending on the type of zipper.
Zipper sliders can be classified according to:
- designs;
- number;
- type of lightning;
- labeling.
Based on the design, runners can be haberdashery, automatic or semi-automatic. Haberdashery accessories marked NL are most often used in the manufacture of bags, wallets and backpacks.
This type of locks is characterized by easy movement and a convenient slider for their movement. The two-lock pattern is used in tents and sleeping bags, the reversible pattern is used in reversible jackets and vests.
Automatic locks are usually marked AL and have a lock to protect the zipper from unintentional opening. Semi-automatic sliders are marked PL and are used in shoe zippers and outerwear zippers. They have a tight action and a short slider.
To put a zipper slider on, you need to know the size of its links. It is written on the back of the zipper and has standard numbers: 3, 5, 6, 7, 8, 10. This number indicates the millimeter width of the zipper links in the fastened position, which can be measured using a regular ruler.
When replacing the pawl, you first need to pay attention to the type of zipper.
Based on its type, runners are divided into 3 main types:
- tractor;
- metal;
- spiral.
Runners with a tractor head have a semicircular shape at the base, those with a metal head have a triangular shape, and those with a spiral head have an oval shape on the bottom side.
Sometimes manufacturers mark the sliders with different letters indicating the type of lock and zipper. For example, A is a permanent zipper, L is a permanent zipper with one lock, H is a permanent zipper with two locks, B is a detachable zipper with one lock, C is a detachable zipper with two locks.
Usually the most common are haberdashery locks, which are easily distinguished by their type. Automatic products have beautiful sliders and are used in outerwear, while semi-automatic products are used in shoes.
Lock and different types of zippers
Stronger and more reliable snakes are used when sewing outerwear - coats, raincoats, jackets. Plastic tractor zippers adorn sweatshirts and shirts.
Metal split clasp
The teeth of this fastener are made of metal - nickel or brass. The basis of the zipper is a thick wire. The teeth of metal fasteners have an uneven shape: protruding and concave. This zipper is highly durable, but sometimes it can get stuck. In a detachable zipper, the limiter has a special socket where the “counter” tape is placed. In the lower part, more pressure is exerted on the snake; if it is not fastened sufficiently, it can break.
Twisted lightning
A twisted or spiral fastener is made from synthetic fiber that is twisted into a spiral and wound or sewn onto a braid. When forming a fastener, protrusions are created in the fiber structure, which are connected to each other on 2 sides.
One-piece zipper
One-piece zipper can be metal or synthetic. The fastener has a simple design and can withstand quite a lot of tension. At the bottom of the metal zipper there are fastened metal links. It is used in sewing sportswear and jeans.
The synthetic one-piece zipper has a soft, plastic structure and is also fastened with links at the bottom. The design is used on things made from thin fabrics. A permanent fastener with small synthetic links located on the inside of the braid is called “invisible”. It is used in the manufacture of various women's clothing.
How to put on a zipper puller using a fork
If the slider on some item of clothing has failed, then before taking it to the workshop for repair, you can try to fix this defect yourself.
You can put the zipper slider on using a fork.
If there is no plug on the zipper and the lock has simply fallen off, you can put it back using a fork.
- First you need to fix the fork on the plane, and then put the upper part of the slider on its 2nd and 3rd teeth.
- After this, you need to thread both parts of the zipper into the grooves of the slider. As a result, the sides of the zipper should connect, and the kitchen appliance can be removed.
Slider repair
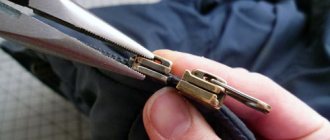
Using pliers
Align both sides of the zipper
as carefully as possible. The easiest way to do this is on a smooth, flat surface.
Push the cloves through
from the escaped half into the runner as far as possible.
Holding the pliers at the top (the inside of the pliers should touch the outside of the slider), carefully insert the disconnected half of the zipper into the slider. By this point it should be almost completely in the runner.
Drag the slider up and down
How to put a slider on a plastic zipper
Plastic zippers are similar to metal zippers, only their teeth are made of thermoplastic. Before replacing the slider, you need to determine the cause of the defect. If the teeth are in order, but the slider gets stuck and the zipper comes apart, then it needs to be replaced.
To do this, you need to remove the upper limiter. If it is metal, then it is advisable to separate it with a screwdriver and carefully remove it with pliers so as not to damage the fabric. If the stopper is plastic or is not there at all, then you need to carefully remove several zipper links to make room for the slider to enter.
After replacing it, this place must be stitched with threads or a metal stop must be installed. A safer option comes down to steaming and freeing up the place where the slider will be inserted.
How to prevent zipper failure?
In order to avoid having to repair the zipper on your boots or the pawl on it in the future, you should use the fastener very carefully. There are certain rules for using the lock that will prevent damage:
- it is necessary to regularly clean the lock with a small brush from dirt and dust that somehow gets on the shoes;
- do not allow trouser fabric to get caught in the zipper, as this may damage the teeth or pawl;
- periodically lubricate the lock with a paraffin or wax candle or the lead of a simple pencil - this procedure helps the slider move smoothly along the zipper;
- When fastening the lock, you should keep your hand straight, do not pull it to the side, under no circumstances tug or apply excessive force;
- To eliminate minor problems in a timely manner, especially when the pawl moves tightly along the teeth, it is enough to slightly unclench the slider and lubricate it, rather than completely breaking it later.
How to put a slider on a metal zipper
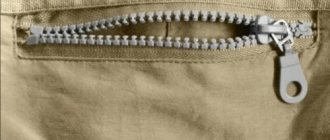
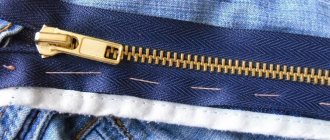
Metal zippers are more practical than plastic ones. They are durable and wear-resistant because they are made of brass, aluminum or nickel. They are most often used in the manufacture of jeans, jackets and work clothes.
There are several ways to put a metal zipper on a zipper:
- If the ends of the zipper at the top are sewn into the clothing, then you need to prop up one side of it, and then remove the slider and put a new one in its place, finally sewing up this place and putting a metal stopper.
- If there is a metal stopper on the zipper, then you just need to remove it with a screwdriver, and then change the slider and put it back.
Method 2. Lightning correction
If the slider comes off the end and the zipper remains closed, the slider can be returned to its place with minimal damage to the zipper.
Open the ends of the zipper slightly.
Approximately 5-6 cloves. You can connect them by pressing them together at the right angle if you suddenly open up too much.
If you can find the right tool, grab one end of the open zipper and cut off the bulges from the 5 or 6 teeth you removed.
Now the very bottom of the zipper will not close.
Bring the ends together again and begin to push the runner back.
This way the aligned ends fit into the narrow part of the runner.
Continue to pull the zipper and the zipper should begin to separate inside the slider,
because you cut off the thick spots.
If you continue to pull, the slider should slide into the working part of the fastener.
and it is normal to separate the halves of the zipper.
Use a pin or mend the zipper/sew the fabric,
to stop the slider the next time you fasten it.
Warning
- Pliers: Sometimes pliers can damage a slider beyond repair.
- When you force the disconnected half back into the slider with pliers, the teeth on the normal half can be damaged. It will then be impossible to zip the zipper further than this connection point.
- Use only if you can avoid tearing the fabric. If the item is quite expensive and you do not want to take risks, it is better to completely change the zipper.
By the way, if you urgently need to fasten a zipper, you can use pins,
to connect the separated halves.
How to put a slider on a rolled zipper by meter
Rolled zippers are most often used to make wallets, bags and backpacks. Although it is made of nylon spiral, it is strong and durable due to the perfect fit of the links. It is sold in rolls, measuring 1 m or more.
Putting a slider on a zipper of this type is not particularly difficult:
- First, you need to cut the ends of the fastener and burn them with fire so that they do not fray. One side of the slider is put on the left side of the zipper, its other side is threaded through the other part, and both sides are aligned by pulling the pawl along the zipper.
- After the lock begins to open and close the zipper smoothly, and its edges are aligned, a metal stopper is placed at the base or this place is stitched with thread.
- Next, the required size of the zipper is measured, it is cut, its edges are cauterized and stoppers are placed on them.
Now it is ready to be sewn into the product.
The right place on the fabric for the zipper
The work ahead depends not only on the type of clothing. It’s good if the work technique is supported by correct calculations. We focus on the following parameters:
- Sizing. The length of the item purchased is important. It’s still worth leaving a couple of cm of zipper in reserve. An even stitch is ultimately ensured and it will not be difficult to cut off the remaining tails.
- Correct markings. For a hidden or open zipper, it is important to mark the lines in the intended areas. You can draw them with a piece of soap or chalk.
- Note for the base of the garment. A similar method is needed with initial knowledge of surface treatment. You will have to sew in the zipper during basting and remove it after basting.
- The final touch. After the points voiced, it will not be difficult to complete the work efficiently. Now, manually or using a sewing machine, complete the repair of the broken areas.
It is important to remember that the side for the zipper: bottom, top, side in size and its location matters. From the side, its scale can become significantly smaller when processing trousers and other underwear.
Replacing the slider on a hidden zipper
In hidden zippers, the dog is not visible, as it is hidden by the braid. The slider and zipper are matched to the color of the clothing. It is most often found in dresses, skirts and trousers. Its structure is the same as that of the most common spiral lightning in the world.
A characteristic feature of a hidden fastener is that its teeth are located on the inside.
- Therefore, you need to take it so that the links are facing away from you, and the slider is directed with the keychain opposite to you, and put it on one part of the zipper, and then on the other, having previously aligned them.
- Now you need to grab the ends of the zipper with two fingers of one hand, and grab the slider completely with two fingers of the other hand and pull it down.
- After it begins to close normally, you need to put latches on the bottom and on the top edges.
DIY repair materials
Repairing a hidden fastener does not require a lot of materials, the main thing is to choose a suitable lock. You will need:
- slider of the required size;
- candle or lighter;
- scissors;
- needle with thread.
IMPORTANT ! If the zipper is broken on the finished product, take a lighter. It is not safe to scorch the edges with a candle, because you will have to lift the entire product and hold it over the fire.
Replacing the zipper slider
The flip runner is designed for reversible items such as bags and jackets. They can be turned inside out, so it is equipped with a reversible slider. The process of replacing such a slider is similar to a conventional lock.
Due to the fact that such sliders are built into large things, according to their classification they are usually of the tractor type and are placed on the same zipper. The metal stopper is removed from the top of the zipper; if it is plastic, then it is carefully bitten off with pliers, and a new pawl is put in place of the old one.
Such sliders often come with a side lock on which the key fob is attached. If the zipper is detachable, then in order to insert the second side into the pawl, you must first press this latch. This is the main difference between this type of locks and all others.
What to do if the zipper on your bag comes apart
Has the lock on your favorite bag come loose?
This is not a reason to urgently look for a replacement for a convenient accessory. There are several simple ways to solve the problem using improvised means and even without contacting a specialist. First you need to understand what exactly is the cause of the breakdown. There may be several of them:
- The “dog” itself has broken, for example, if the slider is of poor quality or there has been mechanical damage.
- Due to frequent use, the slider has become somewhat loose. This is one of the most common and easily correctable reasons. When the zipper is loose, it cannot connect the edges of the zipper properly and, as a result, cannot close. Sometimes it can even pop out completely.
- It happens that the lightning diverges due to the fact that the teeth have been damaged - in this case, there is only a way to the master.
It is also better to leave the bag to a qualified specialist if you yourself cannot understand the cause of the breakdown.
If the slider is simply loose, you just need to gently tighten it so that the zipper works as it should again. To do this, take pliers, pull the slider to the bottom edge of the bag and unfasten the lock. Now grab the top and bottom edges of the dog with pliers, and then gently press. There is no need to make any serious efforts so as not to break the “dog”. If the slider is plastic, the steps remain the same. But remember that plastic is much more fragile than metal, and therefore you need to act much more carefully.
But this method, unfortunately, can only be used a few times. After which the slider may break.
| Passo Avanti bag | Poshete bag | Poshete bag | Ecotope Belt Bag |
How to put on a double-sided zipper puller
The double-sided slider belongs to the haberdashery class and is used in the manufacture of sleeping bags and tents, which use opening and closing zippers from the front and back.
You need to put the zipper slider on top, after slightly pushing back its upper part. It is placed with the head shape and size corresponding to the fastener.
For example, for a tent with a tractor zipper whose teeth are 8 mm wide, you will need a double-sided slider No. 8 with a semicircular head at the base. After replacing the lock, a stopper is put on the upper part of the zipper or this place is simply sewn up with thread.
It happens that a tractor-type roll-up zipper is built into the tent. Then, at the place where the pawl is inserted, several teeth are removed so that the slider can be inserted without hindrance.
Causes of lock malfunction
The most common lock problems are:
- At some point he stopped moving normally, jumping out from the other side of the tape.
- If the zipper catch breaks, it gets stuck or slides off the teeth.
- The dog stopped being fixed when fastening, moving out of the fastener.
In some cases, if it breaks, only the slider needs to be replaced. If the fastener has torn or damaged teeth, it will need to be replaced.
How to put on a zipper puller on a jacket
Manufacturers most often install tractor or metal split-type zippers on jackets and overalls. After selecting the appropriate slider, the scheme for replacing it remains the same.
You need to put the zipper slider on the side where the stopper with the socket is located. First, the upper stopper is removed from this side or several teeth of the fastener are bitten off. Then a new runner is put on. It is lowered down to the socket and the second side of the zipper is inserted into it to check the progress of the slider.
If the fastener closes normally, then a metal stop is placed at the top or this part is hemmed. Now the jacket has been repaired without contacting a specialist.
Why does the slider fly off?
If the slider has completely fallen off the zipper, then there are two possible scenarios for solving the problem: insert a new slider, try to repair it, and put on the old one. To make the right decision, you need to understand the reason for what happened. There aren't many of them either. Most often, the problem is in the slider itself; its lips can weaken and have poor contact with the zipper. In this case, it is enough to tighten them and reinsert the pawl into the system. The reason may lie in the absence of teeth on the zipper or the absence of stoppers. Then you will have to completely change the zipper.
How to put a zipper slider on a boot or boot
When making shoes, manufacturers usually install metal or coil zippers on women's models. They are one-piece and last a long time, but the runners often fail.
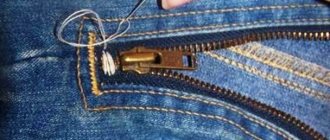
After selecting the slider of the desired number according to the color and type of zipper, it is necessary to remove the stops at the upper ends using pliers, wire cutters or a thin screwdriver. Next, you need to insert both parts of the zipper into the slider and, applying force, pull it to the very bottom. Now, when you pull the pawl up, the zipper should close easily.
If at the initial stage the slider does not go down with the zipper open, you need to take the old lock and do this operation with it, first loosening it a little with a screwdriver. In the end, you need to remove the old slider from the closed zipper, put on a new one, install metal stops, and the boots will be repaired at home without the help of a specialist.
How to insert a pawl into a zipper
Only high-quality zippers from YKK, RiRi, with sliders made of good metal. They can be reused by inserting the working part of the zipper into the slider connector. A pawl made of lower quality metal needs to be replaced. The fastener must be carefully inspected to identify any deficiencies that are incompatible with subsequent long service life:
- The chain links must be intact; missing teeth will make further use, even with a new runner, impossible.
- The braid on which the teeth are located must be intact.
- In a detachable fastener, the reinforcing tape and socket cannot be repaired. The lock will have to be flogged and replaced completely.
Important! When purchasing a new dog, the seller is informed of the number of the broken one. This is usually a number engraved on the back. Zippers from different manufacturers may differ even if the slider number is the same. When going to the store, it is better to take the product with you.
Look at the number on the dog - this is the easiest way to choose the right replacement option
For work you need to prepare the following tools and materials:
- pliers or pliers;
- slider that matches the fastener links;
- flat screwdriver;
- limiter (you can carefully remove the old one);
- needle and thread of a suitable color.
The pawl should be replaced in good light. The item should be laid out on the table.
How to put a zipper slider on a bag
When replacing the slider on a bag, you need to choose the appropriate type in accordance with the type of zipper. Bags, like shoes, have permanent zippers, so it is advisable to first close them with the old slider, and then, after removing the stoppers, replace them with a new one.
In the event that the slider is completely broken, it is necessary to unclench the parts of the lock and, inserting the ends of the zipper, pull it to the very beginning, and then clamp them again with pliers so that it can be closed. There is an option in which the slider is put on one part of the one-piece zipper and lowered to the bottom stop.
Then the second part of the slider opens up a little and the opposite side of the fastener is threaded through it. After clamping the slider, it extends to the upper stops and fastens the zipper. At this stage, all that remains is to install the upper stops and the product is ready for use.
How to lubricate a zipper on a bag to make it move better
If you experience that your zipper sometimes jams or jams, this problem is also easy to fix. Like almost any mechanism, the performance of a zipper can be improved by lubricating it. But what - it depends on the material of the fastener. Let's look at all the available options:
- A plastic
zipper can be treated with a regular paraffin candle or any soap (the main thing is that it is dry and hard enough). Walk along the back of the zipper and you will quickly notice how easy it is to close the zipper. Wax crayons are also suitable and can be used similarly to a paraffin candle. If the problem occurred outside the home, try using hygienic lipstick for the same purpose. - The metal
fastener will be saved by the most ordinary lard. Especially if your bag is made of genuine leather - natural fat will not harm it. Gently run a piece of lard along the teeth, and the zipper will fasten easily and effortlessly. Excess fat can then be removed with a paper towel. However, if the accessory is made of textiles, be careful that the lard does not leave greasy stains. - To make the iron
zipper easy to fasten, you should use a little camphor oil. It is enough to apply a little on a cotton swab or disk and walk it along the zipper. Also here a pencil lead will come to the rescue, with which you need to go along the teeth. But only if the lightning is black or gray.
The most important thing is that if the clasp suddenly begins to perform its function poorly, try not to get nervous and not tug the lock too hard. In most cases, this will only make the situation worse. And with a plastic zipper - it will quickly break the pawl and teeth.
There are also methods of care and prevention that will keep the zipper in working condition for as long as possible:
- Immediately after purchase, pay attention to the design
of the clasp. Carefully open and close the lock several times so that the dog slides easily and without obstacles. - Regularly try to inspect and clean
the space between the teeth from dust, dirt, and hair (if you have pets at home). - If you have a textile bag and want to iron it after washing, do not touch the zipper with a hot iron
, especially if it is plastic. High temperatures cause plastic to deform. - If the zipper is stuck, don't worry, carefully check if any objects are stuck
, lubricate the teeth depending on the material of the fastener. Attempts to tug or pull it can only lead to breakage. - Plastic zippers can be damaged as a result of mechanical damage
or falling of the bag. - If you notice that one or more teeth are missing
, it is better to change the fastener immediately. If the teeth are just bent, you can carefully try to tap them with a hammer, first placing a cutting board or other similar hard object under the fastener. If this does not help, all that remains is to replace the zipper.
Remember to carefully inspect all accessories before purchasing a bag.
If at this stage you already see distortions or damaged fragments somewhere, it is better to choose another accessory. A broken zipper is not a death sentence for your favorite bag. Any studio or small workshop will be able to change the zipper quickly and not too expensively. But most often you can cope with the breakdown yourself and at home. And for this you do not need any special skills or special tools. A few minutes of your time is enough.
| David Jones bag | David Jones bag | Passo Avanti handbag | Poshete bag |
Share:
How to put on a trouser zipper
In most cases, metal or coil zippers with size 3 and 5 links are used on jeans and trousers. To put a slider on a permanent zipper of trousers, you first need to remove the stoppers from the upper ends of the fastener.
If the zipper does not open and the slider is able to close it, then you need to pull it to the top so that the zipper remains closed. Now at the top of the zipper you can easily remove it and install a new one.
If the zipper comes apart, then both ends need to be inserted into the slider, and forcefully push it all the way down so that the zipper can be closed on the return stroke.
When pulling the pawl down, you can open it a little for ease of movement, and when closing it back, press its sides again. After these steps, you need to put back the upper stops, and the fastener will be repaired.
Do I need to vaporize the zipper?
In order to carry out this procedure, it is not at all necessary to remove the snake from the bag. The methods proposed below will allow you to put the slider in place without such tedious work as steaming and then sewing in the zipper. Not every woman will be able to cope with these operations on her own, because you need to work very precisely, without basting or adjusting.
To “return” the dog, we leave the zipper in place . You may have to slightly prop it up or trim it during the process.
Life hacks: how to extend the life of a zipper and quickly fix the slider
One of the reasons why lightning gets stuck is the temperature difference in the house. To avoid this defect, it must be lubricated with candle wax. Another reason for damage to the fastener may be its teeth falling out or breaking. In this case, you can try replacing them with artificial ones.
In a plastic zipper, a thick fishing line, wound several times, is inserted into the gap. Then several knots are made at the end, which are burned with a lighter and crimped using pliers approximately in the shape of the teeth of the fastener.
This method will not be able to extend the life of the zipper for a long time, but it will postpone a visit to the repair shop for a while.
The process of repairing the teeth of a metal zipper occurs by inserting identical teeth from other fasteners in their place. To do this, you need to use pliers and a small screwdriver to carefully loosen the required number of links on the old zipper, and then move them to the empty space of the new fastener, squeezing them tightly, but not tightly, with pliers.
Of course, there are few people who want to spend their time repairing clothes in this way, but if the item is leather and expensive, then this option is quite acceptable.
It happens that over time, the teeth of the zipper slightly move in different directions, and they begin to interfere with the passage of the slider. Then you need to open the lock and place it on a hard surface, then tap the links lightly with a hammer. This should return them to working position. However, this option only applies to metal clasps.
In a situation where the key fob on the slider has broken and it has become inconvenient to open and close the zipper, there are two options for getting out of this situation. In the first option, a small ring, reminiscent in principle and shape of a key ring, can come to the rescue. It is inserted into the upper part of the runner, and any keychain can easily be put on it.
In the second option, a small cut is made in the keychain. Its sides are unclenched and inserted into the upper part of the pawl, and then returned back.
If the zipper diverges, but the teeth remain intact and unharmed, the cause of the breakdown lies in the slider itself. To do this, take pliers and, with the clasp closed, gently press the slider along the sides on both sides. Now you can put the slider on the zipper without fear, because this operation will help bring the teeth closer together and they will not separate.
How to carefully insert a new runner for clothes and bags
The new component will have to be inserted into place when it is completely deformed.
Typically, breakdowns occur when there is a detachable zipper.
Helpful tips in this regard:
- Materials and their preparation. Use a needle, threads in an identical tone, and a slider of the required size when further working with pliers.
- Putting on a zipper strip. The new slider is placed exactly in this place. Look for a zipper stopper that can also be secured with pliers.
- Fixation on the other side. It is enough to secure this edge of the zipper with a piece of fabric.
- Do-it-yourself fixer-limiter in place. A few stitches will be enough. It is important to insert the zipper slider so that it does not fall out and the contacts do not separate.
All processes can be done independently.
On pants or a backpack, this way out works.
Replacing the pawl on a one-piece zipper
The permanent fastener is used in such types of clothing as trousers, skirts, and dresses. The clasp is also used in leather goods - in bags, backpacks, wallets. You can try to insert the popped pawl in the plastic zipper from above by inserting both parts of the braid with links into the slider connectors and carefully moving the slider down to the bottom stop. If this cannot be done without damaging the plastic teeth of the zipper, the pawl is installed in the same manner as for a metal fastener:
- Removing the lower limiter. Unlike the upper limiter, the lower one on quality products is made of durable and hard metal. To remove it, you need to apply force. For work, pliers and a flat-head screwdriver are used.
- The slider is positioned flat side down. Both parts of the braid with links are simultaneously inserted into the connectors from above.
- The dog carefully moves up. The teeth of the chain close and the zipper closes.
- The removed bracket of the lower limiter is installed in its old place.
Installation of the lower limiter is necessary only on the leather fastener, where it is visible. A permanent zipper in clothing, such as trousers or a skirt, is partially hidden under the seam allowance. The link chain can be fixed by fastening with several stitches of strong thread.
Similar to a regular zipper, a pawl is inserted on a secret fastener in a woman's dress or skirt. This zipper is made without a lower stop. In the lower part, the teeth are fused into a single whole; to separate them, just pull the ends of the zipper with force in different directions. The slider is inserted from below. This is possible, since the machine stitching does not reach the bottom of the chain 3 cm. After closing the links, the zipper is fixed with a needle and thread.
