Shortening a fur coat. Brief instructions for use
Lay the fur coat on the table, fur side down, carefully straighten it from the collar, straighten the lining with your hand. Support the lining from below. There you will probably find insulation. It will have to be cut off along the bottom side - you can’t bend it like that, otherwise it will turn out rough.
Carefully cut off 3-4 cm of insulation (the data is based on the calculation that the main length of the product will be reduced by 5 cm). It turned out that the length of the lining is equal to the length of the fur coat, however, so that it does not peek out, it also needs to be shortened. Use temporary stitches to baste the bottom of the lining.
Fur preparation
Before you alter a fur coat with your own hands, you need to see what kind of material you will have to deal with. Rate how good your fur is:
- Find out which pieces can be used and which should be removed.
- To determine the strength of suspicious areas, moisten them with warm water and leave them alone for half an hour, and then try to carefully stretch the flesh. If it does not start to tear and all the hairs remain in place, the fur can be safely used.
- Choose a style.
- Calculate how much fur you will need and what other materials you can add.
- Spread your fur coat.
Rip out the fur coat
The first step is to tear off the lining. You don’t need any special equipment for this - a simple tailor’s ripper is enough.
Important! It is not very advisable to use a blade; you can damage the flesh.
Lay out the fur coat pieces and the pattern pieces on them. See if there is enough fur or if you have to combine.
How to cut?
When considering options for how to remake a fur coat, consider several features of this material. Such knowledge will be useful when working with muton, nutria, and mink. New parts are cut using the flesh, not the fur. This is done like this:
- Place a piece of fur with the flesh side up.
- Place the pattern piece on it.
- Pin together the parts - in this case, not tailor's pins, but the most ordinary pushpins are more suitable.
- Cut the piece with allowances using a sharp furrier's knife, barely touching, so as not to cut the pile.
Important! Never press the fur against the table.
How to stitch?
Transforming old fur coats into fashionable ones with your own hands is a rather monotonous task and requires a fair amount of patience. Be prepared to sew by hand. The following seams are used to work with fur:
Important! Why is hand stitching better than machine stitching? Everything is very simple. The pile will have to be constantly tucked in so that it does not remain on the wrong side. In this case, the seam should be on the skin, and not on the pile - the fur hides your work. The thread should be tightened very carefully. The stitches should be neither too tight nor too loose. In the first case, you risk tearing the membrane, in the second, the seam will not hold.
Seams that bear a large load must be strengthened. Dublerin is used for this. You can also use special adhesive pads for leather and fur; they are also sometimes sold in sewing and furrier shops. The seams will have to be carefully aligned. For this you need:
How to mark a cutting line for a fur coat
Next, outline the length of the fur coat. Mark the length that we will shorten with chalk directly on the skin. Check how clearly the insulation is cut. It is better to cut the skin not along the intended strip, but by retreating 3-4 cm more than the required length. We cut the skin with a special knife in a canopy, in no case with scissors.
We will cut a 3-4cm strip of lining fabric that matches the color of the original lining of the product. We place the fabric face to face on the fur, and baste with large stitches along the entire length. This part will be folded under, so there is no need to pull the fur out of the seam.
When basting, do not stretch the skin, otherwise the finished hem of the fur coat will form an unsightly wave. You can sew the seam by machine. We sew on the fabric, because the machine will slide on the leather, stretching it. Sew at a distance of 0.5 cm from the edge. Now you can remove the basting.
How to bleach a faux fur coat at home
To restore white fur to its original radiant shine and color at home, use hydrogen peroxide. Required:
- 2 bottles of peroxide 3-6%;
- warm water;
- Toothbrush;
- measuring cup and spoon.
Take 100 grams of warm water into a glass, add 0.25 grams of 3% peroxide (1 tablespoon), shake.
- Important! Peroxide can ruin natural fur. It is safer to clean mink, arctic fox and fox coats at home with semolina.
The toothbrush is dipped into the resulting solution and brushed along the length of the fur. To whiten a small fur coat (size 42-44), 2 bottles of peroxide are enough. Heavily contaminated fur is bleached in several stages, allowing the fur coat to dry. You can enjoy the visible result of cleaning after the first time, but it may take several days to bring the product into proper shape. The dried fur is combed with a comb.
New buttons are sewn onto the cleaned fur coat and worn with high boots and a cute scarf. If necessary, the bleaching procedure can be repeated, but you should not get carried away with the process, since peroxide is far from the most harmless substance (the fur coat can become noticeably bald).
As mentioned above, peroxide can be used if we are talking about artificial fur; it is better to dry clean products made from natural fur.
Processing the bottom edge of the fur coat. What is important
Let's return to the strip drawn along the flesh; we will bend the skin along it. Let's start from the side. Carefully fold the fabric on the edge to create a smooth edge. If there is something in the way inside, or the layer seems too thick, don’t be afraid to cut off the excess.
We bend the main board and baste the edge of the board. Focusing on the line we made, we bend the edge and baste along the entire length to the other edge. It is better to make a basting with a colored thread, so it is easier to remove it later. Time for the next fitting - we check that the bottom of the fur coat is even, including along the sides.
Getting ready for work
Regardless of what you do with an old fur coat, you will need some things, and it is better to prepare them in advance. Before altering a fur coat from a mouton with your own hands, as well as from any other fur, prepare:
- a pattern for what you will sew;
- furrier's knife (with retractable blade);
- tweezers;
- high-quality cotton threads No. 40 or No. 45;
- skin needles.
As for the materials, you will have some of them with a guarantee - the very fur coat that is to be remade. But fur alone is not enough. You need:
- viscose fabric for lining;
- if the design idea requires it - pieces of leather;
- accessories (buttons, snaps, etc.).
What length of insulation on a fur coat is needed?
Check again to see if the length of the insulation is in the way. We remove the excess, level the fur coat on the table, and baste the strip sewn to the fur onto the insulation. We seal both sides. Let's straighten the fur coat on the table and check the length of the lining. If the fur coat is flared, the lining will need to be sewn in according to the width of the product.
We do this by basting from the inside of the lining, in two seams on the sides, then stitch it by machine. Let's check the lining: there should be no large folds or tension.
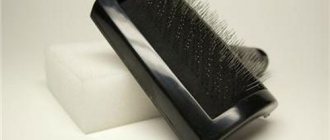
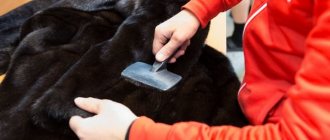
Take a thread that matches the color of the fur coat, and hand sew the bottom basted strip of fabric to the fur coat, piercing and catching the fur. Then remove the basting from the bottom of the hem. The lower corners of the bead must be sewn on by machine, and then be sure to comb with a special brush to straighten the fibers caught in the stitching.
How to shorten a fur coat made of natural fur
You should not undertake a complete recut of a natural fur coat at home. Only a specialist - a furrier - can handle this work. Therefore, it is better to contact a fur studio.
But, if the bottom of the sleeves or the bottom of the fur coat is worn out or damaged by the salt that is abundantly sprinkled on our streets, then the fur coat can be helped by shortening the bottom. It's not as difficult as it seems. All you need is desire and patience, because almost all the work is done manually.
For work we need
- blade or sharp knife;
- short and sharp needles for handwork;
- strong threads to match the color of the fur coat lining;
- a thimble and cotton braid 1-2 cm wide, equal in length to the bottom of the fur coat.
Step 1
So, first you need to carefully examine the bottom and mark all the damaged areas, then try on the fur coat and determine its new length.
You can either shorten it a little or solve the issue radically - make a short fur coat out of a long fur coat. The operating principle is the same.
Then you need to tear off the lining at the hem just above the marked new hem line. As a rule, the lining of fur coats is made to be loose (not sewn on the bottom).
Step 2
Lay the fur coat out on a flat surface, fold the lining up and use a pen to draw a new hem line right along the flesh. It is better to do this by measuring the required distance from the old bottom line.
Use a blade or a sharp paper knife to carefully cut the flesh, being careful not to damage the fur.
Immediately after cutting, vacuum the edges of the cut to remove all excess hair.
Step 3
Put the fur coat on yourself or a mannequin and mark the hem line on the lining exactly along the bottom of the fur coat.
Step 4
Trim the bottom of the lining 4 cm below the cut edge of the fur coat.
Lay the fur coat out on the table and level (cut more precisely) the bottom of the lining. The cut piece of lining (if it is more than 20 cm) will be useful to us, do not throw it away.
Step 5
The mesh is quite elastic, so it can stretch under the foot of a machine or overlocker. Using a not very hot iron, carefully glue a strip of non-woven fabric to the bottom of the fur coat using a not very hot iron.
Important! The core shrinks under steam, so we glue the strip without steam, using a dry iron. First try this on a cut piece of fur.
If the core is changed under the iron, then it is better to baste the non-woven strip by hand.
Step 6
Apply the cotton braid from the fur side and sew it with a narrow overlock using an overlocker (you can do it manually over the edge or using a machine). Place the stitch from the side of the braid.
Step 7
Fold the bottom of the fur coat with the braid inside out and pin it. In the corners of the hems, fold the corner so that the hem of the bottom does not peek out from the front side, i.e., like an envelope. The width of the hem can vary from 1 to 4 cm depending on the style.
Step 8
We hem the bottom, basting the braid. This is not easy to do, the flesh is difficult to pierce, so we take a short needle (it will not bend) and a thimble. We make the stitch so that it is shorter along the core. This way the stitches will not be visible from the front side. Then we manually sew up the corner at the hem. Comb the fur along the bottom, removing traces of stitches.
Step 9
We iron the cut piece of lining; if it does not fit, take a new lining in the same color and cut out a strip 20 cm wide to match the shape of the bottom.
Long sections of the lining must be ironed inside out.
Step 10
Place the lining on the bottom of the fur coat and pin it on top of the braid. At the edges, we tuck short sections of the lining strip under the edges.
Step 11
Sew the lining to the braid along the bottom using a blind stitch. The core is not caught, so sewing is not difficult.
Sew the top edge of the lining strip to the inside of the fur coat. This work is more difficult, so we use a thimble. We take threads that match the lining, so the stitches will not be so noticeable.
What is this lining for? Firstly, the inner layer is light; when the lining is removed, it will not be visible at the bottom. Secondly, the lining strip will protect the inner layer from wear and contamination.
Sewing from genuine leather: master class
Step 12
Fold the bottom of the lining twice so that it is shorter than the bottom of the fur coat by the width of the hem of the fur and iron it.
Stitch the hem of the lining. The width of the hem is 3-4 cm. You can lay any decorative stitch along the bottom of the lining.
Step 13
Sew the torn lining to the lining. It also has cotton tape, so the lining is sewn on top of the tape.
This is what should happen. Only the lining is visible at the bottom. Mezdra is protected.
Step 14
Grab the lining on the sides of the fur coat using long stitches with wrapping - brids.
Ready! The fur coat will still serve and keep you warm in the cold.
You can also shorten the sleeves in the same way.
Svetlana Khatskevich
Svetlana graduated from a university with a degree in Sewing Technological Engineer.
She has been teaching sewing technology for over 20 years. He is a senior teacher at Burda Academy. We know Svetlana from her work on the site since its inception. She generously shares her knowledge and infects with her love of sewing. Sewing is creative, fun and educational. Welcome to this bright and interesting world! Author of the master class and photo: Svetlana Khatskevich Material prepared by Yulia Dekanova
Processing the side of a fur coat with decorative braid
All that remains is to seal the lower part of the side with decorative braid. Take a matching thread and hand sew the border with invisible stitches along the very edge. Then carefully hand sew the braid on. Remove all bastings. The lining should float a little.
Working with mink fur is always very responsible and painstaking work. If you do not have the necessary furrier skills and are afraid of ruining the product, contact Mobile Tailor, we will be happy to help you.
<< Back to Lifehacks Studio
How to alter a mink coat with your own hands?
It’s especially disappointing to part with expensive fur. A mink coat can be updated while maintaining the maximum number of details. If there is a lot of fur, nothing prevents you from making a short sheepskin coat or a mixed fur coat with inserts. But there are other options.
From such fur you can sew:
- a skirt, complementing it with a leather jacket with inserts from the same mink;
- a hood with a shoulder or a short medieval cloak;
- plaid;
- shoes;
- mittens, a hat and even a scarf;
- decorations;
- bag.
Important! Mink is beautifully dyed, so you may not have to change anything - yellowed fur can be dyed a different color, and the fur coat will look like new.
About sleeves
In what situations is it necessary to shorten the sleeves of a fur coat:
- if they are longer than required from the very moment of purchase;
- a decision was made to change the style of the fur coat;
- if the edge of the sleeve is worn out, worn out;
- when the sleeves turned out to be different lengths.
Shortening the sleeves
Shortening the sleeves is not a problem
Short sleeves are no longer a disadvantage, it is fashionable, elbow-length or three-quarter length sleeves are trending. Therefore, the decision to shorten the sleeves on a fur coat is quite relevant.
Roll up the bottom of the fur coat
How to do it at home:
- put on a fur coat, determine the required sleeve length, mark with colored thread. Compare both sleeves and make sure that their length is the same;
- Carefully tear off the lining, remove the threads and braid, unbend the sleeve and straighten it out;
- Fold the edge to the required length and secure with temporary stitches. Put on a fur coat and check the length obtained;
- Carefully measure using a ruler and draw a fold line with chalk or a pen;
- step back 3-4 cm from the resulting line to make a hem, and cut off the rest without touching the fur. Cut off the lining too, leaving a hem of 2-3 cm;
- We attach the braid (can be adhesive) to the fold with tight stitches so that it is not noticeable from the front side. To have some volume, you can attach batting or padding polyester to the fold;
- sew the hem to the sleeve using basting stitches, and carefully sew the lining to the sleeve. The cut off fur may be useful in the future for repairing a fur coat.
Fur coat repair in the studio
Although such work will be done professionally in a studio, if the work is done carefully and accurately at home, the results will be good and the savings will be significant.

