Share on social media networks:
Have you lost weight without taking care of your wardrobe in advance? It's okay, this is an absolutely standard situation. You don't have to run to the store in search of new clothes. You can review your wardrobe and find something that can be reduced in size or simply made smaller on the sides. Never done this? It's not fatal either. Any business has to start somewhere, so why not with your favorite skirt, which began to fall off your waist? We will discuss how to properly sew clothes in our article.
What do you need to get stitched?
If you want, you can reduce the size of all things:
- skirt;
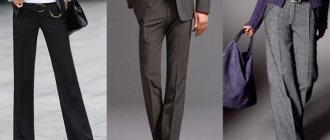
- trousers;
- shirt;
- blouse;
- blazer;
- dress;
- coat;
- down jacket;
- jacket
The most difficult thing is to adjust the jacket and coat; for such work you need some skills in working with different materials and good command of a sewing machine. Therefore, you need to start with something simpler - for example, with a skirt. But in any case, it makes sense to take care of some accessories that will certainly be useful to you. You need:
- sewing machine (preferably with an overlocker);
- threads matching the color;
- good tailor's scissors;
- pins;
- ruler;
- chalk, soap or water marker;
- basic patterns;
- tape measure.
Calculating the fabric
Creating a pattern also involves calculating the fabric for purchase. We will need to cut out the future product from it. When calculating how much material you will need for a new robe, keep in mind that for products with a wrap, which include one-piece or sewn edges, the fabric consumption will be greater than for products with a seam on the shelf. The approximate amount of fabric for our product is the length of the product multiplied by two, plus the length of the sleeves.
The fabric cut will look like this:
This is interesting: Pattern Fur vest Sizes 46 and 50
Patterns
They are not always needed. For example, a skirt or shirt can be adjusted without patterns, directly on the figure (or, even better, on a mannequin). But if we are talking about a dress, coat or jacket, then, as they say, options are possible. It is possible that you will be able to do without a pattern, but it depends on which parts of the clothing you want to sew.
The question always arises, where to get patterns. There are several answers:
- In the magazine;
- in the Internet;
- in the studio;
- in your own closet - there will probably be something there that is ideal in size, but no longer suitable for wearing;
- build it yourself.
The last option is wonderful, but complicated. It is tempting to order patterns from the studio; you will need them more than once. But, unfortunately, not everyone has this opportunity. As for cutting from ripped items, this method is good if you need to sew something new, but is not very suitable for remaking existing wardrobe items. Therefore, the easiest way is to take a pattern from a magazine.
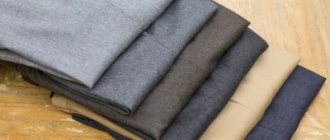
Wool
Most often people are looking for an answer to the question of how to reduce the size of clothes made from wool. Every resident probably has such things; they keep you warm in cold times, but they stretch out quickly.
Wool items are expensive, so don't throw them away. It is enough to learn a few tricks to help restore them to their previous shape and appearance.
Several ways to make knitted clothes smaller:
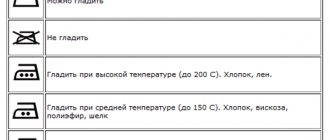
- Using temperature mode. The maximum temperature for washing wool items is 30 degrees. If you want her to sit down, increase the degrees. Experienced housewives advise raising the temperature to 55–60. The hot liquid compresses the wool fibers and the garment shrinks.
- By washing. There are cases when adult things turned into children's things. You can shrink a woolen item so much if you know how to wash it in an automatic machine. To make a dress, sweater or skirt shrink a little, first wash it in hot water, then set the rinse cycle to 10 degrees, and dry it using a dryer.
- Using air conditioner. After the temperature regime, you can use fabric softener. Add 1 cap of conditioner to 5 liters of water at 40 degrees. Soak in liquid for 5-10 minutes.
- Emergency. If you urgently need to shrink a woolen dress, after washing and drying it in an automatic washing machine, hang the product on a heating device (heater or radiator), just cover it with a cloth first. This way you can shrink the item evenly and avoid deformation of individual parts of the dress or sweater.
These techniques only apply to items made from 100% wool. If the composition contains synthetic fibers, these methods are not recommended. It is unknown how clothes will behave during such heat treatment.
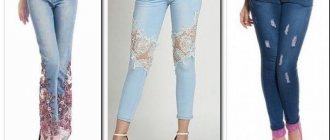
Adjusting the skirt
If, when ordering a skirt through an online store, you were not sent exactly what you needed, do not rush to send it back. It may well be that you will be able to redo the thing so that no one will notice. There can be only a few situations:
- the skirt fits at the waist, but is too wide at the hips;
- the skirt is wide both at the hips and at the waist;
- In the hips everything corresponds to the size, the belt is loose.
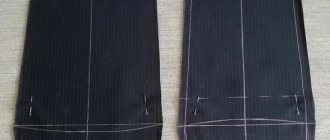
Option 1
This is the easiest case. You don't have to rip anything, just change the lines of the side seams. Just don’t forget that they should be symmetrical (of course, if you don’t have noticeable scoliosis, then you’ll have to look for other ways).
How to properly sew a skirt:
- Try on the skirt, turning it inside out.
- We adjust it so that the middles of the front and back parts are where they should be.
- We cut off the side seams as they should be located.
- Carefully remove, trying not to drop the pins.
- We draw lines along the pins - they should be even.
- Sew the side seams according to the markings.
- We turn it inside out and try it on.
- If everything is satisfactory, cut off the allowances at a distance of 0.5-1 cm from the stitching.
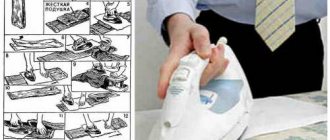
- Iron the seam allowances to the sides.
- We sew the cuts.
Option 2
In the second and third cases, the belt will have to be torn off. If the skirt is wide at the hips, we do the side seams in exactly the same way as in the previous method. But with the belt everything is much more interesting:
- We measure the waist circumference.
- We add an allowance for the fastener to it.
- Shorten the belt.
- We sew down fresh cuts, not forgetting to trim the corners, and iron the seam.
- We baste the inside of the belt to the skirt and attach it.
- We attach the front part to the seam.
Important! For a pleated or full skirt, only the waistband is shortened; everything else is adjusted by the fit.
Blouse and shirt
If you need to reduce the size of a blouse or shirt, a lot depends on the style - the number of decorative details, the shape of the sleeves and the neckline. But practice shows that in most cases this task can be overcome. There are two main situations:
- the back consists of two parts;
- The back is one-piece.
Option 1
If the back part consists of two parts, it is more convenient to stitch along the line of their stitching. In this case, it is quite possible to do without a pattern, but it is better to do this work with an assistant:
- We try on the blouse (it is not necessary to turn it inside out).
- We cut off the middle so that the blouse fits well.
- Remove and mark a stitching line along the wrong side.
- Align the line with the ruler.
- Sew, trim and overcast the edges.
Option 2
Theoretically, in this case, you can make a seam in the middle of the back. You can even make a fold - this is exactly what you should do if you have to sew a men's shirt on the yoke. But you can change the position of the side seams - it will be much easier, especially if the darts are in their places. The process is no different from sewing a skirt - you need to try on, pin and stitch in exactly the same way. But if you have a pattern, it will be even better, because you can draw all the lines along it.
If the darts are not in place
It also happens that you can’t simply sew a blouse or dress. This task is somewhat more difficult than the previous one, because part of the product will still have to be ripped apart. You definitely need:
- flog the sleeves;
- open the shoulder seams.
As for the side seams, then, as they say, options are possible. Maybe they won't need to be touched at all. Most often, their position also has to be changed, but this is done in the same way as when simply changing the width of the blouse. Once you have flogged the sleeves and separated the shoulder seams, the process continues as follows:
- Using the pattern or figure, mark the position of the shoulder seams.
- If you made this from a pattern, baste the seams.
- Try it on - if everything suits you, stitch it together.
- Cut the allowances to normal size, that is, no more than 1 cm.
Sleeve fit
Perhaps the most difficult stage. Having a basic pattern can make your life a lot easier. If there is a pattern, trace the edging along it, leave an allowance and trim the part.
Important! Don't forget about the alignment points - they should be on both the armhole and the sleeve.
Then, as with any other garment, sew the casing with a basting stitch, using small, even stitches, and pull lightly. After this, baste the part, aligning the necessary points, try it on and sew it in.
It's a different matter if you don't have a pattern. Then everything has to be done by eye. Don’t rush to cut the sleeve right away:
- Sweep it along the edge at a distance of 1-1.5 cm from the previous line, parallel to it.
- Then pull the gathers slightly and try to sweep them in.
Don’t be discouraged if it doesn’t work out right away - without a pattern the process is much slower, and the exact position of the sleeve can be determined exclusively empirically.
Mandatory measurements
Before you start cutting fabric, you need to take basic measurements.
1. Circumference:
- breasts—OG,
- waist—OT,
- hips—OB,
- neck—OSH.
2. Length:
- products—DI,
- from shoulder to waist—DT,
- sleeves—DR.
3. Back width—ShS.
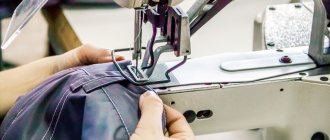
Trousers and jeans
Sewing trousers is a much less exciting activity than changing the size of a skirt. There aren't many situations where you can do without a major overhaul. This will work if the fabric is thin and you need to adjust them just a little:
- Try on the product and see exactly how much it needs to be narrowed.
- Draw lines parallel to the instep and side seams, at a distance of 0.5 cm from the existing ones - this is the maximum that you can afford without ripping.
- Sew the details along these lines.
- If the seams are not puffy, the old stitches can be left.
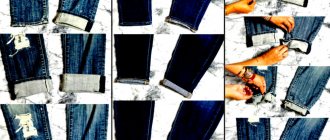
Fundamental alteration
With jeans and trousers made of thick material, you are unlikely to be able to do without cutting and ripping, especially if you need to narrow them not by one size, but by 2 or 3. At the same time, an inexperienced craftswoman should not immediately take on jeans, because repeat on a typewriter branded seams are unlikely to work. Jeans are best left to professionals.
But you can do trousers:
- Open all the seams, trying to do this as carefully as possible.
- Remove all threads.
- What to do with darts depends on the situation; sometimes it is not necessary to rip them out.
- Trace the patterns - be careful not to mix up the details.
- Then everything is done in the same way as when sewing, that is, first the trouser legs are sewn together, and only then the middle seam, while one trouser leg, turned inside out, is inserted into another, with the front side on top.
- Lastly, sew on the waistband.
Important! If there is even the slightest opportunity not to touch the fastener, it is better to leave it as is, because this is the most complex detail that is difficult to perform accurately.
From the history of the robe
Today we perceive the robe primarily as a piece of home clothing (with the exception of kimono jackets, which have come into fashion not so long ago). Now it is primarily the personification of elegant and comfortable underwear, especially in demand after water procedures.
But many people know that the history of the robe dates back to the dawn of centuries, in the depths of Eastern civilization. Even the name “robe” has Turkic or Arabic roots, and translated simply means “clothes.” In a dusty, arid climate, but prone to sudden changes in air temperature, it was difficult to do without this type of protective clothing. Robes protected not only women, but also men from heat, cold and wind; they were sewn from thick fabric.
Having appeared in Europe and Russia, dressing gowns almost immediately began to occupy an “intermediate” position between underwear, in which it was impossible to be seen outside the bedroom, and weekend clothes. That is, having breakfast surrounded by family members in a dressing gown was considered acceptable for nobles.