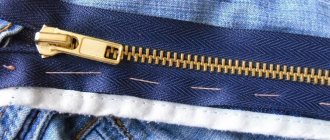
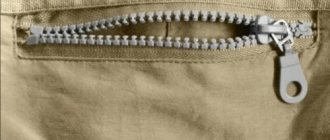
The zipper is often used as a fastener on garments. Other possible names are zipper and snake. Zippers come in different lengths, from different materials (most often metal or plastic) and different colors.
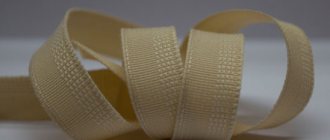
Choose a zipper depending on the product. For thin fabrics - a narrow zipper with small teeth with a light braid. For heavy and thick fabrics, a zipper with thick teeth and a wide braid is better suited.
Above : Zipper with plastic teeth. Bottom : Concealed zipper. Next to each of them is a suitable paw
The zipper consists of two strips of tape connected by teeth that align with each other when you pull the keychain on the slider. The zipper can be detachable (two strips of tape can be completely separated) - these are used on coats, jackets and accessories that need to be unzipped completely. On a one-piece zipper, both strips of tape are connected at the base. The zipper can be hidden: after sewing in, only the slider keychain is visible from the outside.
There are limiters at the beginning and end of the lightning, the distance between them determines the length of the lightning.
How does a hidden zipper work?
The hidden fastener consists of a pair of textile tapes with plastic links installed on them, which are connected and separated when the sliders move. The width of the hidden fastener link when closed determines its type.
Classic hidden spiral zippers are the third type, as their link width is 3 mm. The length of the fastener is determined based on the cut for installing the zipper, which should be 2 cm longer than it.
Sometimes difficulties arise in finding a fastener of the required length, and in this case, a fastener is used, which is additionally located on the zipper (not all manufacturers do this, but only some).
By moving this clamp upward, you can change the length of the fastener to fit the size of the cut. If there is excess length left on the zipper after the fastener, then it can be cut off and the cut processed with tape.
Sew both parts of the fabric together where the zipper will be
We have to do one more preparatory operation, stitching these sections together. Moreover, this stitch will have to be removed at the end of installing the zipper, so it is advisable to do it without fastening, at the maximum length and with noticeable contrasting threads.
The seam allowance must correspond to the main allowance of this side or back seam of the skirt, dress, trousers and other products (1 - 1.5 cm).
After this, press this seam slightly. By the way, allowances must be overcast before installing the zipper. And only for closed products (with lining) this operation is not necessary.
Basic rules for installing zippers
Even if a hidden zipper is invisible from the outside, its shade should always be matched to the color of the product itself, since the slider will be visible in any case, and the fastener will look better from the inside.
Before installing the zipper, be sure to iron its base, which will prevent the fabric from tightening or shrinking. The seam allowances on which the zipper will be installed should be strengthened: This will be especially necessary if the fabric is cut on the bias or is too loose.
Another rule is the inevitability of basting and stitching the zipper with the fabric from top to bottom.
A couple of options are being considered for at what stage it is worth installing a hidden fastener: in an open seam, or in an already stitched one. It is believed that it is best not to touch the main seam; You can also leave a couple of centimeters of it untouched before the lightning starts.
- Some sewing machines of our time include a foot designed for sewing on zippers.
- But there is also a specialized foot exclusively for sewing in a hidden fastener.
- If such a foot is not included in the kit, then it is worth purchasing it at any sewing accessories store.
You can purchase paws made of both plastic and metal. The first ones cost less, but those made of metal are more reliable: The metal is unlikely to appear damaged, which could affect the quality of the foot sliding over the product.
Although this unique foot simplifies the process of installing a hidden fastener, it can be done with a classic one.
Preparing the area for attaching a zipper
First of all, you need to accurately determine the position of the zipper along the upper section of the skirt or trousers, that is, along the waist line. The zipper should be sewn so that the seam line of the stitched waistband is located almost close to the top fastener of the lock.
To do this, mark the position of the lower zipper fastener on the fabric in advance. And be guided by it, basting or immediately sewing on the fastener tape
Even an experienced seamstress without a guide will find it difficult to sew a zipper exactly along the connecting seam line. And for a beginner, you just need to baste both zipper strips before sewing them on the sewing machine.
Moreover, we will sew it on the front side of the skirt or trousers or dress. It is advisable to make such markings for the future seam using a fabric pencil.
Features of the zipper foot
The unique blind clasp foot is a flat sewing machine foot. In its center there are a pair of grooves, each of which is as wide as the teeth of a lightning bolt.
These grooves help keep the clasp portion of the clasp unfolded if it is constantly folded to the wrong side when the clasp is open.
Thus, the grooves help to lay the stitching as close to the teeth as possible, without putting much effort. This helps speed up the process of installing a hidden fastener, as well as making the result more neat and high-quality.
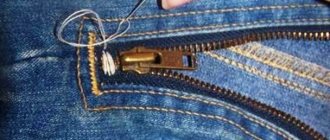
Remove the basting threads from the zipper
Now you need to remove the basting threads.
This can be done with an awl. But sometimes these threads need to be cut into short segments, since they can get caught in machine stitches and be difficult to pull out.
Remove pieces of basting thread caught in the machine stitch carefully so as not to tear the main stitch.
Tools and materials
In this case, you can’t do without them, and here’s what you may need when sewing a hidden fastener:
- Sewing machine;
- One hidden zipper;
- Fabric or product in which you need to install a hidden zipper;
- Machine foot for installing a fastener (you can use either a regular foot or a special one for sewing in a hidden zipper);
- Pins (their number depends on the length of the zipper);
- Threads;
- Scissors.
Processing fabric sections before sewing the zipper
It is advisable to strengthen the cut sections of fabric where the zipper will be sewn with a special adhesive tape or web that has glue on only one side.
Attach the zipper fastener to the top of the product and just below the bottom zipper fastener, make a mark on the fabric.
Marks must be made on both sides of the cut. They mark the lower boundaries of the adhesive strip.
You need to glue and reinforce fabric sections along the wrong side of the fabric. In order not to confuse the sides of the fabric that have a barely noticeable difference, I recommend marking the reverse side with marks. Iron the ribbon through a thin calico fabric (iron).
Now the sections of the skirt fabric are ready to install a hidden zipper in it using a special zipper foot.
Step-by-step instructions on how to sew a hidden zipper
- Step 1. It is necessary to secure the edges of the seam with a non-woven edge if the fabric of your product stretches, frays or is cut on the bias. Then they need to be sewn with a zigzag or using an overlocker. Now you should completely sweep away the seam of your product.
- Step 2: Press the seam allowance open and then place the clasp on top of it so that its teeth are aligned with the seam in the center. The zipper slider should only be one millimeter below the marked edge.
- Step 3. Pin the clasp with the product under the teeth using pins.
- Step 4. Baste the fastener to the fabric in the middle of the braid, taking only the allowance of your product. Remove the pins and mark a center seam line along the entire length of the clasp. Now open the zipper.
- Step 5. Insert the clasp foot into the machine, and then place the machine needle in the far left position. Then unscrew the cloves and place the needle as close to them as possible. If your foot is intended exclusively for hidden fasteners, then there is no need to worry about this, since it will bend the teeth on its own.
- Step 6. Sew along the entire length of the fastener until the foot reaches the runner; fasten. Sew the second half of the zipper in the same way, but in this case you need to move the needle to the far right position of the foot. After this, you should close the clasp and check whether it is peeking out from the product: if the answer is yes, then you should stitch it again, but closer to the teeth of the zipper.
- Step 7: Sew a base seam under the clasp. To do this, you need to put the needle in the extreme right position and start the seam about 5-10 millimeters above the end of the fastener stitch. The needle needs to be inserted one millimeter from the zipper seam.
- Step 8: The final step is to finish the seam all the way down to the bottom. Press the seam allowances from the inside out. Your hidden zipper is ready!
How to choose the right jacket lock in the store
You can buy a zipper that fits your jacket at a sewing accessories or fabric store - to do this you need to measure the non-working old zipper on the jacket. To make the task of choosing a lock easier, you can use a ripper to remove a non-working lock from your jacket and bring it with you to the store for a sample.
There are several types of locks in the store: tractor and spiral, detachable and permanent, metal and plastic. In my master class I will use a metal tractor split lock, you can choose any one depending on the old model of the zipper. The main thing is that it is detachable. When purchasing, check the suitability of the new lock: you need to unfasten and fasten the zipper once or twice to the end, also checking the connector.
The price of a lock (metal zipper) in the store will cost you much less than what they will offer in the studio. Therefore, if you decide to replace the zipper on your jacket in a studio, it will be more economical to come with what you purchased.
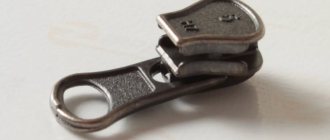
Photo of a hidden zipper on clothes
Types of presser feet
All types of presser feet are divided into elements for basic operations and for performing certain types of decorative work. The paws for basic operations include:
- for straight stitch;
- for sewing on buttons;
- for making a hidden seam;
- for processing loops;
- for sewing bias binding and hems;
- for zipper.
Among the elements for decorative work, the most popular are the feet for ribbons and elastic bands, beads, fringes, folds, embroidery and decorative stitches.
Most sewing machines are equipped with a universal foot by the manufacturer. It can be used to make straight seams, as well as for zigzag stitches.
The foot is so convenient and versatile that experienced seamstresses often use it to sew on zippers. However, it is recommended to use a special foot for this purpose.
LiveInternetLiveInternet
—Categories
- 1000. +1 tip (309)
- Tips for all occasions (104)
- Little tricks of big cooking (86)
- Note to the hostess (122)
- Self-development (88)
- Memory development (48)
- Life tips (18)
- Time management (11)
- Communication Skills (9)
- Speed reading (3)
- Dancing (83)
- Latina (29)
- Zumba, dancing for weight loss (16)
- Dance elements (7)
- Club dancing (5)
- Go-Go (5)
- Oriental dance (25)
- FAQ (83)
- FAQ video (20)
- Useful (1)
- LiRu (2)
- Decoration (6)
- Memo (27)
- Our smaller brothers (667)
- Dogs (35)
- “They live like a cat and a dog” (25)
- My beast (5)
- From the life of cats -1 (156)
- From the life of cats-2 (35)
- Interesting things about cats (64)
- Kittens (19)
- Cats (pictures) (238)
- For cat owners (38)
- These nice little animals (75)
- On the World Wide Web (328)
- MuzCollection (33)
- How far has the progress come? (8)
- I want to know everything (114)
- Creative (17)
- Myths and facts (37)
- You can't make it up on purpose (3)
- Passionate faces (43)
- Amazing things are nearby! (14)
- Showbiz (40)
- Everything about everything (39)
- Life is a joy (679)
- Live easy (188)
- Rituals, fortune telling, signs (132)
- Holidays, traditions (101)
- Money Magic (73)
- Man and Woman (51)
- Simoron (36)
- Numerology, horoscope (28)
- For the soul (25)
- Feng Shui (17)
- Esoterics (4)
- Palmistry (1)
- Shrines (5)
- ABC of Faith (108)
- Health (834)
- Help yourself (382)
- Self-massage according to all the rules (82)
- Diseases (71)
- Qigong, Tai Chi Quan, Tai Chi (66)
- Acupressure, reflexology (44)
- Is old age not a joy? (27)
- Vision correction (9)
- Traditional medicine (9)
- Oriental medicine (8)
- Live healthy (136)
- Traditional medicine (50)
- Cleansing the body (43)
- Last cigarette (24)
- Israel (146)
- Cities (33)
- Promised Land (11)
- Useful information (5)
- Izravideo (21)
- Photo reports (11)
- Yoga (214)
- Yoga complexes (127)
- Yoga solves problems (43)
- Exercises (30)
- Asanas (9)
- Yoga for fingers (mudras) (7)
- Tips (2)
- Beauty without magic (1262)
- Gymnastics for the face, exercises (273)
- Luxurious hair (138)
- Massage techniques (100)
- Japanese beauty, Asian techniques (88)
- Secrets of youth (63)
- Original manicure (22)
- The path to glowing skin (122)
- Cosmetic bag (56)
- Flawless Makeup (105)
- Problems (45)
- The art of being beautiful (38)
- Style (139)
- Care (287)
- Cooking (785)
- Baking (97)
- Side dishes (18)
- First course (13)
- National cuisine (9)
- Dessert (56)
- Snacks (119)
- Dough products (84)
- Food served (51)
- Meat (118)
- In a hurry (31)
- Drinks (76)
- Vegetables and Fruits (118)
- Recipes (25)
- Fish, seafood (34)
- Salads (62)
- Sauces (8)
- Terms (16)
- Useful sites (11)
- Photos (8)
- Photo editors (3)
- Food (7)
- Useful links (7)
- Programs (11)
- Through life, laughing. (139)
- Video jokes (34)
- Photo jokes (3)
- Toys (24)
- Rugrats. (thirty)
- Tricky stuff (31)
- Just great! (17)
- Needlewoman (211)
- Knitting (22)
- Handicrafts (11)
- Repair (3)
- DIY (81)
- Create comfort (37)
- Sewing (72)
- Poetry and prose (252)
- Lyrics (154)
- Proverbs (68)
- Aphorisms, quotes (25)
- Prose (4)
- Catchphrases (1)
- Perfect body (655)
- Bodyflex, oxysize (121)
- Pilates (42)
- Aerobics (26)
- Callanetics (22)
- Milena. Fitness (18)
- Gym (17)
- Bodytransforming (5)
- Anatomy (1)
- Tips (70)
- Fitness program (90)
- Stretching (41)
- Exercises (249)
- Photo world (63)
- Artists (5)
- Nature (5)
- Photos (16)
- Photographers and their works (31)
- Flowers (8)
- Photoshop (5)
- Let's challenge excess weight (563)
- Trapped by diets (66)
- Laws of nutrition (121)
- Eat to live. (76)
- Healthy lifestyle (16)
- Products (73)
- Losing weight the smart way (130)
- The path to ideal (106)
Preparing to replace the lock
It is not necessary to change the lock if it is jammed in one place or if it has split into two parts; in this case, the lock can be repaired. But if damage occurs to the spirals or links, then replacement is required. First of all, make sure that you have all the necessary tools in your arsenal for further work:
- sewing machine;
- scissors;
- paperclip or clip.
The first step is to flog the old fastener and mark the location of the new one. Achieving the desired result largely depends on the correct organization of work. Make a plan and follow it, then you will be able to avoid surprises and enjoy the process.
How to flog an old zipper?
One of the simplest, but most attention-requiring steps is getting rid of the old zipper. To do this, you only need small scissors (you can use nail scissors). Next, you should turn the jacket inside out and pull down the zipper; upon careful examination, you can see the threads with which it is secured. Then, depending on your desire, you need to:
- cut one stitch and carefully pull out the thread to the end of the fastening (loop by loop);
- chaotically cut off all the threads, separate the lock and remove protruding elements, the main thing is not to touch or tear other parts.
For naughty kids
Hello everyone, beloved readers of my site. Today I want to share a small tutorial on “how to change a zipper on a jacket without undoing it.” It often happens that zippers on children's clothing deteriorate faster than the clothing itself. And then the zipper on the jacket suddenly broke. What to do?
Maybe run to the studio? But this is not an option for us needlewomen. Moreover, sometimes the cost of replacing a zipper is higher than the cost of the item itself.
What if it happened in the evening? For tomorrow I need a jacket with a normal fastener, but I have absolutely no time to undo everything. Sometimes it happens that you have time and you have ripped everything apart, but here a small catch awaits you. There is a block or button right on the zipper and it is impossible to flog it carefully. There will be a hole.
I suggest using my MK
Methods for sewing in a zipper
They can be divided into two types - when lightning is visible and when it is invisible.
- The easiest way to become invisible is with a hidden zipper, that's what it's designed for. The teeth of the hidden zipper are located on the reverse side and are not visible from the outside. Most often, such a fastener is used in the side seam of skirts or dresses.
- If a regular zipper is used in the seam fastener, it can be closed with a fold and secured with a finishing stitch. This technology is used in skirts, dresses, trousers with a fastener on the side or back, at the bottom of the sleeves.
- In outerwear, for example in jackets, if the zipper needs to be closed, they use strips that are fastened to the main part of the product with buttons, buttons or Velcro.
- The zipper in the trousers is not visible thanks to the fastener processing technology.
- In welt pockets, the zipper is closed with facings.
- If the zipper in your model is a decorative element or you just want to leave it open, then use the frame processing method. For example, this method is used when making welt pockets.
Now let's talk in more detail about the technique of sewing in a zipper.