A leather jacket is a stylish wardrobe item in the modern world.
This is a very practical, comfortable thing that can be worn both for a walk and for going out. There are various styles of the product, but the classic cut and biker biker jackets are at the top of fashion houses. There is a huge variety of color options, from the usual black and white, to neon light green and pink. Of course, you can buy a finished product at any store you like, but we will tell you how to make an exclusive leather jacket with your own hands. In order to make a men's or women's jacket, you must have sewing skills and have a special sewing machine in your arsenal. Since leather, although of high quality, is still a capricious and expensive material. If you are a beginner needlewoman, it is better to try your hand at faux leather or sew a jacket from an old raincoat.
Exclusive. Biker jacket. Instructions for sewing and printing patterns
Women's jacket, interseasonal, fitted silhouette, 15-20 cm long below the waist line.
The jacket is lined, stitched along the bottom line. The shelf with an offset side fastener with a zipper braid consists of a central, middle and side part. The middle parts of the shelf have framed welt pockets fastened with a zipper. On the right shelf there is an upper finishing (non-functional) pocket with a frame. Back with detachable side parts. The lower section of the jacket is finished with a stitched belt.
Turn-down collar with a detachable stand. Two-seam set-in sleeve. The elbow seam of the sleeve has a vent that is fastened with a zipper. Shoulder straps are inserted into the seam of the sleeves, fastened at the shoulder seams with a button.
Difficulty level: medium, experience required.
Constructive increases: to chest circumference – 12 cm up to size 52, 15 cm starting from size 54; to waist circumference 10 cm; to hip circumference – 5 cm up to size 52, 6-7 cm starting from size 54.
Materials: the product can be made from natural or artificial leather, suede, duplicated knitted fabric, jacket or coat fabric, etc. For the lining you will need any lining material in a color combination with the main material.
When ordering a pattern you receive 3 pdf files:
- A file with instructions for printing a pattern, containing a control square and the measurements according to which the pattern was constructed;
- File with pattern in A4 format, for printing on a regular printer
- File with a pattern on one large sheet - for printing on a plotter
Pattern sample:
* PRINTING ON A4 FORMAT PRINTER:
*PRINTING ON A PLOTTER:
When printing a pattern on a plotter, open the pattern file in Adobe Reader (or Foxit Reader). Click on the "File" menu item, then select "Print". Select the Poster print mode under Page Sizing and Handling. Make sure the Segment Scale field is set to 100%. Check the boxes for Cutting Marks, Shortcuts, and Split Large Pages Only.
The following designations are used on the pattern:
Parts Specification
- Back – 1 piece (with fold)
- Lower part of the back – 1 piece (with fold)
- The middle part of the shelf – 2 parts
- The central part of the shelf and the border - 4 parts
- Cut-off side part of the shelf - 2 parts
- Cut-off side part of the back - 2 parts
- Front part of the sleeve – 2 parts
- Back (elbow) part of the sleeve – 2 parts
- Belt and waistband facing – 4 parts
- Collar – 2 parts
- Collar stand – 2 parts
- Hemming of the bottom line of the back - 1 piece (with fold)
- Shoulder strap – 4 parts
- Finishing a welt pocket into a frame – 4 parts
- Valance of welt pocket in frame – 2 parts
- Finishing the top pocket into a frame – 2 parts
- Valance of welt pocket in frame – 1 piece
- Wedge insert into the sleeve section - 2 parts
Attention! When cutting, add 10mm seam allowances along all cuts.
To make the product you will need 1.3-1.5 m of base material, depending on size and height, 1.2-1.3 m of lining material with a width of at least 1.5 m.
Layout of cutting details
Attention! In the technological sequence, the processes for duplicating parts are not indicated, since the need to use adhesive methods is determined by the properties of the material.
Technological sequence for processing a sports jacket
- Sew the bottom of the back to the top. Press the seam allowance towards the bottom and sew a finishing stitch along the seam.
- Hem the edge of the side of the right shelf, inserting a zipper under the stitching.
- Stitch the edge of the left shelf edge.
- Hem the top edge (ledge) of the front lapel. Turn the corner right side out and iron it.
- Finish the welt pockets into a frame.
— please check that the pocket application parts are cut correctly (Fig. 1).
Attention! The blue outline indicates the original line of the part, and the black outline indicates the outline of the part being cut out of the material. The width of the seam allowance is 10-12 mm.
- draw the stitching lines for the facings on the shelf (these are the lines that are marked as dotted lines on the pattern);
- iron the facings in half lengthwise;
- baste and then stitch the facings to the front along the marked lines (Fig. 2, lines 1 and 2);
- cut the entrance to the pocket and turn the facings right side out;
- sew the zipper tape to the seam allowances for the facings (Fig. 2, lines 3 and 4);
- secure the corners of the pocket;
- Stitch the smaller piece of pocket burlap to the seam allowance for stitching the bottom facing to the front (Fig. 2, line 5);
- Stitch the pocket valance to the seam allowance of stitching the top facing to the front (Fig. 2, line 6);
- sew a finishing stitch along the contour of the pocket (Fig. 2, line 7);
- sew the smaller piece of pocket burlap to the valance along the bottom edge (Fig. 2, line 8);
- sew the burlap parts on three sides
Attention! If the lining material is fraying, then the seam allowances need to be overcast
- Baste and then stitch the cut side piece of the front to the middle piece. Press seam allowances.
- Turn the facing edge right side out and press.
- Baste and then stitch the cut side back piece to the side front piece. Press seam allowances.
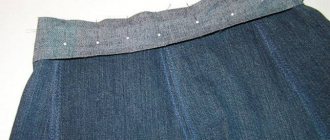
- Sew the waistband to the front along the bottom edge. Press the seam allowances toward the waistband and sew a finishing stitch along the seam.
- Baste and then stitch the center part of the right front to the middle one. Press seam allowances.
- Baste and then stitch the center part of the left front to the middle one, inserting the second part of the detachable zipper.
- Process the top finishing pocket “in the frame” of the right shelf.
Attention! Processing the pocket is similar, but lines 5, 8 and 9 are not performed, i.e. All operations associated with stitching the pocket burlap parts must be skipped.
- Baste and then stitch the cut side back piece to the middle back piece. Press the seam allowances towards the cut side part.
Collar and shoulder strap preparation
- Sew the top collar stand to the top collar. Press and stitch seam allowances.
- Stitch the bottom collar stand to the bottom collar. Press and stitch seam allowances.
- Stitch the top collar with the bottom one along the flap. First press the seam allowance and then press it towards the bottom collar.
- Stitch the ends of the collar. Press seam allowances. Turn the collar right side out and iron it ready. (This processing sequence is optimal from the point of view of ensuring symmetry of the ends of the collar).
- Sew a finishing stitch along the collar.
Cape pattern
We sew an original cape using a simple pattern! If you are a fan of loose, comfortable products, we advise you to take a closer look at the model presented in this lesson. The cape, made of two types of dense knitted fabric with a stand-up collar and a zipper, is quite capable of replacing a jacket or light coat, because, among other things, it is complemented by knitted sleeves and large buttons that secure the side slits. When walking, traveling, shopping - wherever you are - you will always feel comfortable in such a cape. The cape pattern is in this lesson. Constructing a cape pattern Since the model has a very loose silhouette, the back and front are built one at a time…
16
Patterns of jackets and jackets
Oct 29, 2018
The main rules for sewing a jacket made of genuine leather
How to work with leather? How to sew a leather jacket correctly? You can think and reflect on this topic for a long time, or you can take it and sew a leather jacket with your own hands. As they say: “Until you try it yourself, you won’t know!” Genuine leather is a noble material that is also practical and durable. Things made from genuine leather are much more highly valued compared to artificial ones. Have you noticed that a leather jacket fits better on your figure than a regular one?! And after several times of use, it takes on the contours of your figure.
Genuine leather is an organic material, so its properties provide excellent fit, comfort, chic and versatility. A leather jacket can be combined with any thing and it will always be a winner, and the image will become unique. In this article I want to share my experience on how to sew a leather jacket with my own hands and give some useful examples. In this case, we will consider sewing a men's jacket made of genuine leather for a athletic figure.
Stage 3
Cutting fabrics and preparing to assemble the product
After all the elements of the product are cut out, they proceed to the preparatory work.
All stitching lines on each part are transferred to the other side. To do this, place safety pins along the contours and trace them on the second part, while not forgetting to place control marks.
We must not forget about the center lines so that your product does not warp. A line is laid along them, the stitch length of which can reach 2 cm.
Now you can move on to basting. If the jacket is planned to have insulation, then immediately sew it together with a lining. Sweep away all the details, focusing on the control marks, which must match on all the parts.
Once all the main parts are connected, it is necessary to try it on to ensure a good fit on the figure, to clarify the length of the hem and sleeves. If everything is in order, then you can proceed to stitching - joining the parts with a permanent stitch.
Choosing skins for a leather jacket
Before you start sewing a jacket made of genuine leather, you need to decide on the choice of material. There are a lot of varieties of leather, it all depends on the manufacture and processing. Modern technologies make it possible to obtain high quality natural leather, elastic and in a variety of colors. In my case, these are kid skins, they are very soft and thin in thickness.
After selecting the skins, you should decide on their quantity. To do this, you need to prepare a pattern in advance, taking into account the style, all decorative details and the size of the figure. Then lay out the pattern (in the store) on the skins. This way you will understand how much bottom material it takes to make a jacket. Don’t forget also about the lower parts: hem, lower collar, facings, etc.
Stage 1
Taking measurements
Measurements must be taken with special care if you plan to make patterns for a specific figure. But you can also sew a jacket using ready-made patterns, which greatly simplifies the entire work process. Nowadays there are many programs for creating patterns.
The following measurements are needed to create a pattern for a men's jacket (some of them are optional, for example, half-waist circumference), since it all depends on the chosen style:
To sew using a finished pattern, you need to take only six measurements to accurately determine your size and compare them with data from tables from magazines:
Size Chart
Size
| cm | 44 | 46 | 48 | 50 | 52 | 54 | 56 | |
| Height | cm | 168 | 171 | 174 | 177 | 180 | 182 | 184 |
| Og | cm | 88 | 92 | 96 | 100 | 104 | 108 | 112 |
| From | cm | 78 | 82 | 86 | 90 | 94 | 98 | 104 |
| About | cm | 90 | 94 | 98 | 102 | 106 | 110 | 115 |
| dr | cm | 61 | 62 | 63 | 64 | 65 | 66 | 67 |
| Osh | cm | 37 | 38 | 39 | 40 | 41 | 42 | 43 |
Choice of style and decorative elements
The main styles of jackets and the most preferred types of fabric used for tailoring:
An important factor when choosing fabric for a jacket is the level of thermal insulation, high wear resistance, and moisture resistance.
When choosing insulation for a jacket, you should know that they are divided into three types: synthetic, natural and mixed.
The first type is hypoallergenic, shows good wear resistance and keeps its shape. However, it should be borne in mind that good quality material has these characteristics.
Despite this, many prefer natural materials to artificial materials, believing that they are safer and warmer. If we consider down and feathers, they will warm well, but this environmentally friendly insulation can cause allergies and is an excellent breeding ground for bacteria and mites.
The lighter the insulation fibers, the more air there is between them, which means that it will be very warm.
Decorative and functional elements are selected based on the selected jacket style. The main thing is that everything is appropriate.
Cut the jackets
After purchasing the material, we move on to cutting the jacket. Before cutting, outline with chalk areas of holes, unpainted areas, defects, etc. If the skins are in limited quantities, then the places with the least expressive defects can be used for the lower parts where they are not noticeable. The details of the pattern are cut out on the skins in the longitudinal direction, along the ridge. At this point the skins are less extensible than in the transverse direction. It is better to outline the patterns with chalk or a special pencil for leather. The handle leaves marks on the front side. You should cut from the front side, so defects on the skins are immediately visible and you can work around them.
The strongest part of the skin is the area along the ridge, so try to cut out parts that are subject to the greatest stress in these places. The abdominal area of the skin, i.e. on the sides, more delicate, it can be used for small finishing parts and in places where the load is less great. If you have a large amount of material, then this area can be completely excluded.
Idea. Creative sources
The idea to make an exaggerated leather biker jacket with a voluminous skull, decorated with appliqués of embroidered flowers and holnitens, came to me personally after seeing a leather jacket from the luxury brand “Philipp Plein” in TsUM. The jacket caught my eye because it was very fancy: embroidery, rivets, skulls, and even rhinestones. It was the rhinestones that I didn’t like. I love rhinestones, but not in everyday life. And the second factor that I didn’t like was its exorbitant cost - 370,000 rubles, which not every girl can afford. Having tried on the “Philipp Plein” biker jacket, I decided to sew a jacket in the same style, but changing some details and, above all, the shape. I decided to make an oversized model.
I really like the video of the foreign singer Kovacs “50 Shades of black”. There a girl dances in a leather jacket, as if “from someone else’s shoulder,” and in big boots. I decided to make the shape of my biker jacket just as exaggerated.
Preparing for the first fitting
After all the details are cut out, it is necessary to try on. Some sources write that before cutting, you should make a mock-up of the product from simple fabric and only then transfer the finished template to the material. This is done for high-quality tailoring, since the leather cannot be basted; punctures from the needle remain on it. Therefore, all changes are made to the layout and the product is cut out from the finished parts, which is sewn directly under the machine. But if you are confident in your experience and the accuracy of the pattern, then making a mock-up can be avoided. In addition, there are very soft and thin skins on which punctures from needles do not remain at all. Test this on a small piece of paper in advance.
You can prepare the product for fitting without removing the details, for example, by joining it with a stapler, tape or a special adhesive pencil for leather that does not leave marks.
How to properly try on a product, read the link.
Embroidery on lining
Sew on the lining. We embroider the customer's name on the lining. And we also decorate with applique. At the very end we put a button on the pocket. The jacket is ready.
Sewing a leather biker jacket is a rather complicated process; you can’t do it with just a household sewing machine. It is still better to sew leather on special industrial sewing machines.
When sewing a leather jacket, you can do without a special press for installing eyelets and eyelets, but use tongs to install them, which are sold in almost all sewing accessories stores. If you are sewing a jacket for yourself, then you can get by with tongs, but if you are sewing a jacket for a customer, then I still advise you to purchase special presses for installing them. Using a press, installing fittings is of higher quality and takes less time than using tongs.
Thank you for reading my article. I hope it helps you create the jacket of your dreams.
Sewing a jacket
After fitting, the seams are sewn down using a Teflon foot; a regular foot does not fit; it does not slide on the skin.
Then the seams are pressed or ironed, depending on the model, and the allowances are fixed with glue.
The glue for such cases is only suitable for leather; other glues roughen the seams when they dry. If necessary, the glue can be easily removed with acetone. To reduce the thickness of the seam, the seams are carefully pounded with a hammer. If you need to add finishing stitches along the seams, also use a Teflon foot. Choose threads and needles depending on the type of leather, as well as the processing and model of the product. The finishing stitch width is recommended from 4.0 mm. , it depends on the model and your wishes. Do not use machine fastenings on leather to prevent the stitching from unraveling; cut the threads, leaving 0.5 cm , and singe the ends. The main feature of leather jackets is a lot of decorative finishing, for example, small details, figured seams, metal rivets and zippers. Genuine leather can be combined with various fabrics: knitwear, guipure, chiffon, drape, etc.
Taking measurements, building a structure
I needed the following measurements:
- OG - chest circumference
- OT - waist circumference
- OB - hip circumference
- Opl - shoulder circumference
- WZp - wrist circumference
- DlR - arm length
- Ll—product length
- ShSp - back width.
After taking measurements, I built the design of the jacket and modeled its shape. This all needs to be done before purchasing leather, otherwise you will not know how much leather to buy. I decided to make the jacket longer than the classic biker jacket. Accordingly, you need to buy more leather for this.
How to iron natural leather?!
Iron natural leather very carefully at low temperatures without steam using a dry iron, both on the front and back sides. Excessive moisture and heat will lead to deformation of skin areas. On a separate patch, check the skin for sensitivity to heat treatment.
Helpful Tips:
- After finishing the work, all chalk lines can be easily removed with a damp cloth, and the appearance is created using a can of leather paint.
- When cutting a men's leather jacket, you need to take into account the activity in the shoulder girdle. Therefore, larger increases are made in the chest and back width than in the waist and hips. Also, the amount of increase depends on the thickness of the lining and the clothing worn under the jacket.
- Lining for leather jackets, choose from natural fabrics or containing natural fibers. Since it is synthetic, it does not allow air to pass through well, which increases sweating.
- Sewing genuine leather should be done on a production machine; household machines have a weak motor, which will lead to breakage or poor quality sewing of the product.
- Nonwoven or knitted adhesive can be used as cushioning and adhesive materials.
- Additional slip on the skin will be provided by lubricating the stitching area with vegetable oil.
You will find even more useful recommendations in my article: “Keeping up with leather fashion - sewing tips!”
Here's what happened in the end:
The technology for processing parts, seams and knots is basically the same as in ordinary clothing. To achieve the desired result, you must adhere to the rules listed above. Then the success of sewing a leather jacket with your own hands will be guaranteed!
For more information about the properties of genuine leather, watch the video:
PS Questions?! Wishes?!
With friendly greetings, Maria Novikova
Hello! My name is Maria and I am the author of this article.
Stop being a gray mouse, join the ranks of the fashionable and stylish! Don't know how? I will help you! Right now, place an order for a personal pattern or consultation on sewing and cutting clothes. Including consultation on the choice of fabric, style and personal image.
My contacts. I'm on Twitter. Watch on Youtube.
A master class for the Casket website was prepared by Svetlana Zhigaleva.
To sew a women's insulated jacket you need:
1. Raincoat fabric.
2. Lining fabric
3. Insulation. In this case, padding polyester with a density of 120 g/sq.m for the lining and padding polyester with a density of 150 g/sq.m for the top material.
4. Zippers, threads, buttons, faux fur for the edge of the hood.
Stages of cutting and sewing.
On the pattern, we mark with notches the place where the facing and facing will be sewn on, for me it is 6 cm.
Fold the sleeve in the center, the edge of the front of the sleeve from the center is smaller than the edge along the back.
Add 1 cm to the seams
We cut the facing separately from the sleeve, adding 1 cm on all sides; we also do the bottom of the shelves and back.
We cut the sleeve completely together with the marked facing and add 1 cm to the seam. We cut the facing separately.
We make the bottom of the front, bottom of the back and sleeves with the same facing width.
We cut one upper collar from the base, the lower collar can be cut from fleece, knitwear, etc.
We cut the front facings, combining the side and the central part in one piece, putting 1 cm on the seam. We also cut the back facings.
Place notches on the front of the facing so as not to mix up the sewing side.
We cut the lining, backs and fronts to the notch + 1 cm per seam.
Cut off the pattern of the barrel shelf and add 1 cm to the seam.
We stitch the lining according to our wishes.
We sew the shelf lining and lining with one line to the padding polyester.
We give a fitting line according to the selection.
We sew a butt plate onto the back. I changed it, it’s easier this way.
The pod is ready, leave a hole in the sleeve.
Combine the details of the shelf and barrel up to the pocket line.
The following shows how to sew a hidden zipper into a pocket. If you want to make pockets with a leaf, as suggested in the model, it is recommended to use the video tutorial on this page - https://materials.tell4all.ru/vykrojka-stegannoj-demisezonnoj-kurtki/
Sew a hidden zipper from and to the pocket entry line.
Sew the other side of the zipper.
This is what the pocket looks like when closed.
Gather the burlap in a circle.
The pocket is ready.
Sew facings placed on padding polyester to all details of the front, back and sleeves and stitch by 0.1-0.5 cm
Gather the shoulder seam.
Assemble the sleeve with the armhole, fitting along the edge.
Gather the side seam.
Sew the cuff into the sleeve.
Fasten the bottom of the sleeve, the side part.
Assemble the top and bottom collars and sew a locking stitch along the inner collar.
Sew a zipper for the hood and sew a placket on it.
Sew the collar into the neckline.
Prepare the central bar. The top is not synthetic padding, we glue the bottom and mark the hidden buttons.
Rework process
Attention! The leather is ironed at low temperature without steam; you can use an ironing iron (a piece of cotton fabric).
Attention ! The pattern needs to be tested; it will be almost impossible to make further changes during sewing. Traces of old stitching can ruin the best work.
The procedure for sewing a leather item is not much different from any other item:
When sewing seams on leather, there is no way to iron them out like on fabric, so we use prepared glue to secure the seam allowance. The allowance itself and the part along the seam are processed with glue, the allowances are laid out and pressed.
Important! After hardening, the glue should retain the plastic properties of the skin and not turn into a hard crust.
Before stitching, we tap complex knots where there are several seams with a regular hammer, or with a mallet if the leather is delicate and easily damaged.
LiveInternetLiveInternet
—Tags
—Categories
- MUSIC (137)
- Folk music, romances (20)
- Scriabin, Rachmaninov; XX century (17)
- Schubert, Chopin, Schumann, Mendelssohn (16)
- Author's song (15)
- Miscellaneous (14)
- French songs (12)
- Baroque music; Bach (10)
- Mozart, Beethoven, Haydn (8)
- Early music (7)
- Brahms, Elgar, Tchaikovsky (5)
- ORTHODOXY (123)
- Orthodox psychology (21)
- Orthodox saints and elders (21)
- O. Andrey Kuraev (17)
- Church singing, Orthodox films (17)
- About false spirituality (10)
- Patristic teachings (10)
- Metropolitan Anthony of Sourozh (9)
- A. I. Osipov (9)
- Miscellaneous (8)
- Church life (6)
- St. Ignatius (Brianchaninov), St. Feofan the Recluse (6)
- HEALTH (82)
- Healthy eating, cooking (54)
- Medicine, useful tips (27)
- SKILLFUL HANDS. APARTMENT. DACHA (53)
- DIY (18)
- Garden and vegetable garden (11)
- Handicrafts (3)
- DESIGNING A DIARY. LIRU (44)
- LIRU (30)
- Diary design (14)
- PSYCHOLOGY (40)
- PHOTOGRAPHY (39)
- My photos (17)
- Photo collections (16)
- Photography and photo editing lessons (6)
- LITERATURE, LINGUISTICS (36)
- Literature (29)
- Linguistics (6)
- BOOKS (35)
- Books on sewing clothes (17)
- Books on processing leather, fur and wool yarn (8)
- Books on drawing, hand-made, etc. (4)
- NATURE. ANIMALS AND PLANTS (33)
- COMPUTERS, INTERNET (29)
- PAINTING, GRAPHICS, PHOTO (26)
- Painting, graphics (16)
- Movies, audiobooks (16)
- Other (11)
Raglan sleeve pattern without top seam
Products made from knitted fabrics are the easiest and fastest way to start sewing yourself. And there are a lot of arguments in favor of using knitted materials for beginning craftswomen, for example, such materials forgive almost all sewing flaws, patterns for knitted products can be created in literally 15 minutes, and the finished items fit just perfectly! There are also no problems with sewing in sleeves, since the manageable knitwear is very easy to fit. In this tutorial we will show how easy it is to model a raglan sleeve without a top seam for...
32
Patterns of jackets and jackets
March 21, 2018
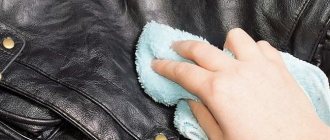
Sewing: Secrets and techniques for working with leather
Working with leather: techniques and secrets
Leather items are stylish, beautiful and extremely comfortable, especially in the fall! They have one more advantage: high-quality leather is a durable material. Even if the style is outdated or the appearance is damaged, the skin can be revived. In extreme cases, it will be useful for creating other products.
The article uses recommendations from experts from the forum. It talks about how to work with leather and how to give old things a new life.
Approximate leather consumption for outerwear:
- Women's coat (fur coat) - 370-380 sq.dm.
- Women's jacket - 250-260 sq.dm.
- Men's coat - 400 sq.dm.
- Men's jacket - 270-280 sq.dm.
- Women's jacket - 250-270 sq.dm. (for Russian sizes 46-50) 1 sq. dm = 10 sq. cm
If you want to buy leather, we do not recommend purchasing pieces larger than 100 square meters. dm. As a rule, defects are more numerous over a large area; coloring and finishing may be uneven.
Before you start cutting
Skin preparation. Pieces of leather, no matter whether old or new, should be moistened on the reverse side with a solution consisting of 20 g of table salt, 20 g of glycerin per 1 liter of water, water temperature 30-40 C.
Moisturized skin is easily restored. We can easily tighten up all the unevenness and bulges. We fix the tightened skin and let it dry for several hours. You can fix it with ordinary pins on any surface, the main thing is that the area allows it. Carefully! The pin leaves a mark.
Pattern: Seams on the leather cannot be ripped out - stitch marks will remain, so use only a “tested” pattern. It is better to prepare all the details of the pattern in a complete set: 2 front parts, 2 sleeves, etc. Each detail is cut out separately, and errors will be excluded.
Be sure to iron the leather before cutting it, because it shrinks.
We work around defects. You can cut either from the wrong side or from the front side, but in any case, you need to mark all the thin places and holes on the leather.
How to decompose? The closer to the center, the stronger the skin. Taking this into account, select the most worn parts of the future product. Stella sent me a diagram of the correct layout of the pattern pieces on the skin. Use leather pieces of matching quality for the front and sleeves. The thickness and nuances of coloring should not be ignored, especially for shelves.
Follow the direction. The skin stretches more in the transverse direction than in the longitudinal direction. It is better to cut all the parts along the lobar (along the ridge), deviations are allowed up to 10%. Don't skimp on quality.
Seam lines, markings and allowances. The contours of parts and allowances should be marked with a soft pencil or ballpoint pen, or with finely sharpened chalk. Allowances of the same width make it easier to sew together the cut pieces. Make small allowances along the main cuts: 1 -1.5 cm; You can allow 2.5-3 cm for the hem of the bottom; armhole, sleeve cap – 0.5 cm.
Cut the skin with sharp scissors or, better yet, with a special circular knife. With such a knife, you must make the cut on a special substrate: you can use a sheet of thick cardboard or a piece of linoleum.
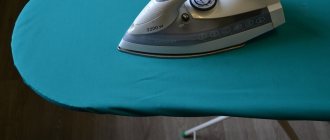
The leather is ironed from the wrong side with a moderately heated iron, without steam, through an ironing iron. First, of course, be sure to try it on an unnecessary scrap.
The ironing process will make “unsticking” and “breaking” easier. The seam allowances are opened, glued to the main product with ordinary rubber glue, and then tapped with a hammer on a marble slab (special small hammers are available for sale, but regular ones will do). You need to knock with gentle pressure so as not to break the skin. Thanks to this operation, the seam becomes thinner and neater.
To prevent the tip of the dart from tearing when tapped, glue or attach a piece of material to the top of the dart.
During the “unsticking” operation, it is better to apply the glue with a brush or a wooden spatula in a thin layer, wait a couple of seconds (so that it does not stick to your fingers) and then glue it. Before stitching, it is necessary to dry the glue for an hour, otherwise the needle will get stuck and the quality of the stitch will be poor. Use rubber cement - when it dries, the seams will remain elastic.
Be very careful! Rubber glue comes off well from the front side of the leather, but you can’t get it off the back side, and especially from velor! It must be stored in a tightly closed jar (it thickens when exposed to air). If the glue has thickened, dissolve it with a small amount of acetone. You can buy rubber glue at any shoe store.
It is better to use a special adhesive interlining for leather, which is ironed with a moderately heated iron without steam. The skin remains soft and elastic over the entire area. It is possible to glue not the entire surface, but only the seams, but if there are thin places on the skin that are difficult to get around, they should be reinforced with adhesive interlining. The belt is completely glued.
The details of the leather cut are not swept away, but cut off according to allowances or joined together with ordinary paper clips. For basting, double-sided leather tape and an adhesive pencil for leather are also used.
The leather is machine stitched with large stitches about 3mm long; a small stitch perforates the leather too much and the seams tear. Thin leather can be sewn like fabric using a regular No. 80 needle, turning out the details. However, allowances must be glued or stitched to ensure they lie smoothly.
Sutures on thick leather are made with a special leather needle with a triangular point. The needle number depends on the thickness of the skin. They scribble it “openly”. One piece has a seam allowance, while the other does not. On the wrong side of a part that is cut out without an allowance, use a pencil to mark the width of the allowance of the other part. Glue the parts on the wrong side one on top of the other with rubber glue and then stitch them together.
The edges are not turned clean, but are set one on top of the other (we are talking about sewing from thick leather). To do this, the parts are first cut out with seam allowances.
The edge of the upper part (collar, side) is wrapped and glued to the lower one. The bottom part is glued to the seam allowance with the top wrong side, then attached from the side of the top (wrapped) part. The protruding part of the allowance is cut off close to the stitching stitches.
Do not glue the bottom hem to its entire height, but leave the top 1-1.5 cm open.
If your sewing machine is not feeding the leather well or produces uneven stitches , try these possible solutions:
- use a Teflon or roller foot;
- use breaking. Tap the seam on a small metal block with a hammer and the thickness will noticeably decrease;
- iron a narrow strip of interfacing over the seam line;
- you can stitch over tissue paper;
- or wet the seam area with soapy water.
If you are stitching: - You can place a straight strip of cardboard under one half of the foot so that the finishing stitch does not catch the cardboard.
- For coated leather only. The stitching area can be lubricated with oil (vegetable or machine). This cannot be done on aniline leather - it will leave a cloudy mark.
All kinds of handbags are my passionate love, says Brina. The starting point was a second-hand jacket: a dated style and lots of great leather. The book “Encyclopedia. Leather" Techniques, techniques, products. Elena Cherkizova. “AST-press book” 2004. The book contains a lot of useful information and various subtleties that I have not seen in other sources..
Stage 2
Preparing patterns for a men's jacket pattern
Once all the measurements have been taken, the type of product and its style have been determined, you can begin preparing the patterns. They can be made on special scaled paper, tracing paper, cardboard or X-ray film.
You don’t have to make a pattern yourself or buy a ready-made one, because if you have an old jacket available that you like the fit of, you can make patterns based on it.
There are two options: either tear it apart, if you don’t mind, and trace everything on paper, or go further and use the method below.
The procedure for removing patterns from the finished product:
Important! Immediately mark on paper which side of the product you removed the pattern from.
When using a finished pattern, it is also transferred to tracing paper or another more preferable material and cut out.
The placement of the pattern pieces is determined by the presence of a complex pattern. With such drawings you will have to adjust. Placement of patterns on the material and preparation for cutting
Important! Material consumption is determined by its width.
Calculate the required amount of fabric for sewing the product, taking into account the style, length and decorative elements. For a shoulder product with a sleeve, take the length of the product in its final form plus the length of the sleeve with seam allowances.
Reference! If the product involves additional finishing, for example, patch pockets, various flaps, briefcase pockets, non-standard collars, or fabric with a pattern, pile, checkered, or striped is used, then the fabric consumption increases by about 0.3-0.4 m.
There are several rules for preparing for cutting:
Important! The lining and insulation parts are built and cut in the same way as the main ones! If the insulation is planned to be voluminous, then the main parts are built one size larger.
ADVICE! When going to the store to buy fabric, you can take paper patterns of the product with you, so when choosing a fabric with a pattern, you can recalculate the fabric when choosing it.
How to sew a leather jacket?
Sewing a biker jacket is not particularly difficult (see also “Sewing a Biker Jacket” and “How to Cut a Biker Jacket”).
First, we assemble the “top” of the product (Fig. 1) - grind and iron the seams.
If the material cannot be ironed (natural leather, leather substitutes, suede, velor), lay out the allowances of each seam and glue them with leather adhesive tape. Don’t forget that the “zipper” is sewn directly into the right relief of the shelf. In this case, the lower end of the zipper should not extend into the allowance at the bottom.
Please note: the allowances at the bottom of the parts are different: at the bottom of the “middle part of the shelf” only 0.5 - 0.7 cm is enough.
The product can be tried on or put on a mannequin to mark the position of pockets, belts and straps, if any.
After making pockets and other decorative parts, we assemble the collar (Fig. 2): we grind and iron the middle seam of the lower collar, grind the collar and iron it. There is no need to delay yet.
We assemble the lining (Fig. 3): we process a pocket on the shelf part. The easiest way to make it an invoice according to the size of your passport.
It is desirable that the edge of the pocket falls into the seam of the barrel-shelf.
Pay attention to how the middle back seam should be stitched. In Fig. Seam 3 is shown with a red dotted line.
It is advisable to duplicate the hem cut along the “middle part of the shelf”. And after that, stitch it to the already assembled lining.
Assembling the sleeves is not difficult. We duplicate the allowance of the “top” of the sleeves along the bottom and iron it upward (Fig. 4).
We sew down the “top” of the sleeves and iron the seams. Sew down the lining and iron the seams. We sew the “top” and lining of the sleeve along the bottom edge.
We cover the bottom of the “top” and secure it with adhesive tape or blind stitches. The sleeve is ready!
Now the most interesting part is connecting the “top” of the jacket and the “lining”.
We start by sewing in the collar. Attention! Only the lower collar needs to be sewn in. Then, after checking that the stitching is correct, sew in the lower collar.
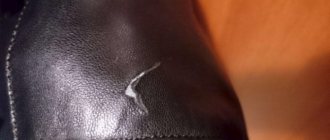
Bringing back the shine
The last step in restoring a jacket is bringing back the shine. If you are planning to apply it at home, you can safely proceed. The procedures are simple, anyone can do them.
To restore the shine to the jacket, you need to take 2 egg whites, shake and apply to the surface with a sponge.
Ground coffee will make your skin glow. This method is used only for dark material. The coffee grounds are collected in a woolen or flannel cloth and rubbed on the leather surface.
Another way is to rub clothes with laundry soap dissolved in warm water with the addition of a few drops of glycerin.
Castor oil also has a rejuvenating effect. First, the item is cleaned from dust with soapy water or ammonia. Then the sponge is soaked in castor oil and the entire product is rubbed.
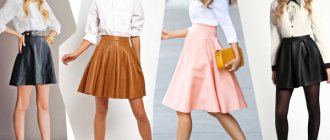
Pattern of a double-breasted jacket
Every woman should have a piece in her wardrobe that makes you feel completely special when you put it on. Your mood rises, you are filled with vital energy, melodies begin to sound in your head and you just want to turn all this energy that has unexpectedly poured into us into active action! Voluntarily or involuntarily, you ask yourself the question: is clothing really capable of influencing us that much? We suggest conducting a simple experiment. To do this, you just need to model the pattern and sew this bright double-breasted jacket.
7
Patterns of jackets and jackets
Oct 23, 2017