Home / Articles / How to iron a shirt collar - tips for real craftswomen
15 Feb 2018
Category: Articles
No comments
It’s not for nothing that they say that “you meet a person by his clothes” - the first thing people pay attention to when they meet is their appearance. That is why men's and women's shirts should look amazing, be well ironed, fresh and clean.
It seems that such things are easy to iron, but this is only at first glance! Let's look at how to iron a shirt collar, sleeves and other elements so as not to spoil the product.
How do you start ironing shirts?
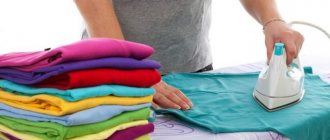
The process of ironing shirts is not that difficult and can be done quickly if you prepare everything you need in advance. In addition to the iron, you need to take:
- ironing board;
- spray;
- water;
- cotton fabric.
It is also important to choose the right iron, because with its help you will iron not only shirts, but also bed linen and other things that require different temperatures and modes. If possible, it is best to purchase a good, albeit expensive, iron - it should have a temperature regulator and the ability to supply steam. The weight of the equipment will not affect the ironing process. And do not forget, of course, before use to clean the soleplate of the iron from any deposits, if any.
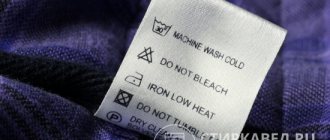
Before you start ironing, carefully study the labels on the clothes, where all the information the housewife needs is always indicated.
If you want to increase the speed of ironing, wrap the surface of the ironing board with foil, place a backing on top; clothes can be ironed on both the back and front sides. This method is best used for working with dense fabrics that will not be damaged by exposure to high temperatures.
We recommend reading the article about choosing an ironing board - this information will be interesting and useful for absolutely all housewives.
You will find all the information about cleaning your iron from carbon deposits and dirt here. This will help you forget about dark spots on your clothes.
Alternatives
For most housewives, ironing is associated exclusively with the iron, which every family has.
However, progress does not stand still, and today in the household appliances market you can find many alternatives to a conventional iron, which can greatly simplify life.
These alternative options include:
- steamers,
- steam generators,
- ironing mannequins.
Steamer
One such alternative is a steamer. A high-quality steamer will cost at least 15 thousand rubles, simpler models can be purchased for 10 thousand rubles. A manual steamer can be purchased for a more modest amount - from 2 thousand rubles.
Its advantages include:
- more gentle effect on fabric;
- high speed ironing;
- can disinfect things with steam;
- It is impossible to burn or damage the item with a steamer.
Disadvantages of the steamer:
- high price;
- the device is quite large in size (if it is not a manual version);
- In any case, you will have to iron the small details of the shirt: collar, cuffs.
Steam generator
Another alternative option for manual ironing is a home steam generator. Their prices vary from 5 to 40 thousand rubles. (depending on the brand and power of the model).
The advantages of a steam generator include:
- You can iron thick fabrics and even folded items quickly and efficiently;
- ironing with such a device is quick and efficient thanks to the large amount of steam;
- fabrics retain their original appearance longer.
Disadvantages of the steam generator:
- you need a place to store it;
- the device is quite noisy;
- steam generators are not cordless.
Dummy
The most expensive alternative to an iron is an ironing dummy.
A household appliance costs at least 70 thousand rubles. , and the price for a professional model reaches 200 rubles.
You can iron a shirt using such a device very quickly, however, due to the high cost and large size of the device, this is not the most popular “replacement” for an iron.
Read about special machines for ironing shirts in this article.
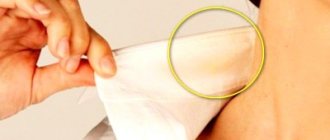
How to iron a shirt collar correctly?
The collar is the most visible part of the shirt and cannot be hidden anywhere. In some cases, it is enough to iron the collar and sleeves so that the product as a whole looks good - this is if you urgently and quickly need to get your clothes in good shape. Let's look at how to iron a shirt collar quickly and without loss of quality.
Instructions:
- place the product face down on the board;
- wet the collar;
- start ironing, trying to cover all the folds, while moving from one edge of the fabric to the other;
- when bends appear, remove them, moving from top to bottom;
- Turn the shirt over and iron the collar on the other side.
Shelves with back
We iron a sleeveless shirt in the same way. Lay out the shelf so that the shoulder is towards the narrow part. First, let's go through the shelf with buttons. Using your nose, gently press the fabric between the buttons without touching them.
Press the seam near the collar and move down. Now let’s tidy up the side seam and back
To make the seams smoother, the fabric can be stretched. The left shelf is smoothed last.
Tips for Ironing Shirt Sleeves
Before ironing, check the condition of the fabric of the product. So, if the material is very dry, which happens after prolonged drying, then ironing will be problematic. It is best to treat the sleeve fabric with water from a spray bottle.
Then we start ironing the sleeves. First, you should run the iron along the inside of the cuffs, then turn the shirt over and iron the cuffs from the outside. Please also note that the fabric in these places has a denser structure, and therefore one ironing may not be enough for you.
To iron the main part of the sleeve you will need a special small ironing board. Place the sleeve on the board first with the front side, iron it, then turn it over with the inside and repeat the work. Thanks to this, you will not wrinkle the already ironed part of the shirt.
But how can you iron your shirt sleeves if you don’t have such a life-saving mini-board at hand? In this case, we use a regular ironing board: lay the sleeve on the surface so that the seam looks up.
Trying not to stretch the material, iron the sleeve - this will protect your shirt from severe deformation when performing work. Then turn the garment over so that the seam is on the side and iron the shirt again.
Important: carefully walk along the upper borders of the sleeves - this way you can make “arrows”.
We buy wrinkle-resistant products
The ideal option for those who absolutely do not want to spend time on ironing is to purchase products that do not require it at all.
Such models are presented in the following brands:
- Marksamp;Spencer,
- Levis,
- Boss,
- other.
Most often, cotton is used to make such shirts, but the model is sewn in such a way that all the wrinkles on the fabric look stylish and appropriate.
You can also purchase a shirt that does not require ironing, made of synthetics (“crumpled” shirts), but such a product is unlikely to be comfortable to wear.
You can find out more about shirts that don't require ironing here.
Creative shirt ironing - some tips for the housewife
How to iron shirt sleeves and any other things if you don’t have an iron at hand or the lights suddenly go out and you need to run errands as quickly as possible? There are several options here.
So, for example, if the fabric hardly wrinkles, then the clothes can simply be washed and hung to dry, making sure to fasten all the buttons. Once dry, these shirts will not need ironing. You can simply dampen the product by hanging the shirt over the bathtub and turning on hot water. The steam from the water will act on the fabric like steam from an iron. Well, of course, you can use a steamer.
You can also prepare one solution, thanks to which all wrinkles on clothes will disappear. To do this you will need:
- fabric softener;
- vinegar;
- clean water (bottled or purified).
Mix all the ingredients in equal proportions, pour into a spray bottle and treat the shirt, hanging it on a hanger in advance. After the solution dries, the shirt will look like it has just been ironed.
We advise you to familiarize yourself with the recommendations for choosing and working with a steamer - an ideal tool for smoothing and refreshing items made from any fabric!
Want to know how to purify water at home? Read all about cleansing methods here.
Cleaning the iron
If you, like me, have hard water at home and mineral deposits constantly accumulate in the iron, then I recommend cleaning it occasionally. To do this, pour a solution into the water tank: 1 part water, 1 part acetic acid. They say you can also use citric acid, but the concentrate will be much more expensive than simple table vinegar (vinegar concentration is about 70%). Pour the solution, heat the iron and place it on the ironing board with the sole of the iron down, so that steam comes out from under it. When all the water runs out, look at how much dirt has accumulated in the iron. Repeat the procedure if necessary. To prevent this from happening, fill with purified water if you have a flow filter or bottled water, if possible.
Knowing how to iron a shirt correctly, you will never be afraid of a mountain of wrinkled shirts. Practice a little by ironing a couple of dozen shirts, and the time spent ironing one shirt will be reduced to an insignificant 3-4 minutes. Simultaneously watching TV or listening to the radio will help to diversify the process of ironing wrinkled shirts. I hope you have the patience to learn this not difficult but necessary skill.
A few recommendations for housewives
We told you how to properly iron shirt sleeves. But if you want everything to go as smoothly as possible, be sure to follow our advice.
First of all, you need to decide on the correct ironing temperature.
So, if the fabric contains polyester, then the ironing temperature should not exceed +120 °C. It is also advisable to wet the fabric so that it can be ironed better.
Viscose is ironed in the same way. Cotton shirts can be ironed at a temperature of +150 °C, and for linen products - a maximum of about + 200 °C. If there are severe wrinkles, turn on the steam.
If you need to iron a wool shirt, it is best to carry out the work by turning the product inside out and using gauze (this will reduce the risk of dark spots on the clothing). It is best not to iron silk items at all, and if such a need arises, choose the minimum power and temperature. If there is lace or embroidery on the shirt, then they are ironed from the wrong side.
Final tips
- iron only clean shirts;
- if you want the collar not to lose its shape, treat it with starch spray;
- To prevent iron marks from appearing on the soles of light-colored clothes, use damp gauze;
- After use, drain the water from the iron container and clean the soleplate, if necessary.
As you can see, there is nothing difficult in ironing the sleeves and collar of a shirt; the main thing is to correctly identify the fabric, set the appropriate mode - and you can get started! We hope our recommendations will help you quickly and easily return freshness and cleanliness to your favorite shirts. We will also welcome your comments and observations, suggestions and advice - join the discussion!
Important nuances
There are a few additional points to consider:
- After washing, the shirts are thoroughly shaken, straightened, and dried on hangers, with the collar in its natural position and the sleeves stretched out without wrinkles.
- If ironing is not possible right away, the shirts are carefully folded so that the collar and cuffs do not wrinkle - they are the most difficult to iron.
- Ironing sleeves is the longest and most difficult. If the shirt is worn only under a jacket, you can leave the arrows. In any case, the cuffs are brought to perfect condition.
- It is better to iron dark shirts from the inside out so that there is no shine or tarnish left.
Embroideries and labels are ironed carefully, through the fabric, from the wrong side. It is better not to touch them with a very hot iron.
