A T-shirt is a universal wardrobe item for adults, teenagers and children. It can be worn at any time of the year, combined with many styles, suitable for a variety of occasions.
However, not only the color and print of the T-shirt are important, but also its attractive, neat appearance. This can be achieved if you know how to iron a T-shirt correctly - there are many nuances to this seemingly simple process.
Preparation
In order not to cause irreparable harm to the T-shirt, first you need to do a number of actions:
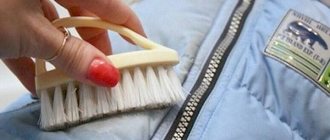
Look at the label of the item, or rather at the information indicated on the tag - there, for example, there is an acceptable temperature for ironing and the type of fabric is written.- Check if the soleplate of the iron is dirty and, if necessary, clean it.
- Try to start ironing before the T-shirt is completely dry - damp fabric makes it easier to smooth out wrinkles. A spray bottle can also help.
- Check to see if there are any stains on the T-shirt that have not been completely washed - if there are, then under the influence of high temperature they will finally be “welded” to the fabric.
- Prepare your workplace - instead of an ironing board, you can use any horizontal surface (for example, a table) covered with a towel or blanket.
It is also worth remembering that white T-shirts are ironed from the front side, and colored T-shirts are ironed from the back.
Step-by-step instruction
A well-ironed shirt is an indicator of a person’s neatness and neatness. However, to iron a polo, you need to take into account some nuances, and, in general, the entire ironing process can be divided into the following steps:
- Turn on the iron and adjust the temperature according to the instructions on the tag.
- Gently straighten the polo shirt on the ironing board and fold the collar as desired.
- Turn the shirt inside out.
- Fold the shirt in half lengthwise.
- Press the T-shirt on both sides, straightening out each wrinkle.
- Turn the shirt over and iron the back.
- Turn the shirt over again and iron the right side.
- Turn the shirt inside out and check the folds.
- Wear a polo shirt or hang it in your closet on a hanger.
Thus, the side seams are ironed first, then the back, and then the sleeves, and the product is turned inside out to be ironed again. The polo collar is ironed last.
When choosing an ironing mode, you need to start from the material from which the product is made. For example, cotton fabrics must be ironed at high temperatures of approximately 150-200 degrees, and synthetic fabrics at minimum temperatures of no more than 100 degrees.
Therefore, when choosing a product, pay attention to the material, since products made from natural fabrics with synthetic admixtures are easier to wash and iron, and in general they wrinkle less.
You need to start ironing your polo before the product is completely dry, that is, it needs to be a little damp. If the item has already dried, then some areas will need to be moistened with water by rubbing with wet hands or spraying water from a spray bottle. The most difficult and painstaking process is the process of ironing the collar, which we will now discuss.
Temperature conditions
Different materials require different approaches, so it is important to know what the item is made of:
Cotton – temperature 200-220 degrees, plus moderate steaming is allowed.- Viscose - temperature 120-150 degrees when carefully moving the iron.
- Polyester - ironing is usually not required, but in extreme cases low temperatures using damp gauze or thick fabric are acceptable.
- Knitwear also requires little ironing and requires low heating.
- Silk – temperature 100-130 degrees.
T-shirts made from mixed fabrics should be ironed according to the directions on the label.
Items made from different types of fabrics
T-shirts are made from various materials that require a special approach.
- Cotton products are quite finicky. Such clothes wrinkle often, as they are made of natural fiber. To iron, you should set high temperatures - from 200 to 220 degrees. The steam function can be used.
- A polyester T-shirt is made from man-made fibers. Therefore, such products crumple extremely rarely, but sometimes creases appear. To iron such materials, use gauze slightly moistened with water. Set low temperatures.
- Clothes made from viscose wrinkle constantly. To straighten T-shirts, set the temperature from 120 to 150 degrees.
- Silk products do not like high temperatures. Although such fabrics also often wrinkle and need to be ironed. Mode for silk – from 100 to 130 degrees.
- Knitwear is not ironed often. It is important to choose the right mode so that the product does not stretch and lose its attractive appearance.
Before ironing any item, you should look at the label that indicates the required temperature.
Ironing process
Standard products without finishing are ironed in a fairly simple sequence:
- iron the pockets, if any, as well as the cuffs and collar area;
- run the iron along the sleeves, making sure that there are no “arrows” on the folds - for this you can use a special stand for the ironing board;
- iron the back and shelf, avoiding the formation of creases.
This video will tell you how to quickly iron a T-shirt:
With print
T-shirts are often decorated with:
- drawings,
- applications,
- rhinestones,
- sequins.
This is done to make things more original, but this design adds complexity during heat treatment - washing and ironing.
Therefore, the algorithm of actions changes slightly:
- turn the T-shirt inside out (regardless of the fabric from which it is made);
- iron without touching the sole of the iron to the areas on which the decorations are applied;
- Use thick paper to iron the rubber base of the stickers.
Separately, it should be said about buttons: if there are any, it is better to avoid areas with them.
Polo (collar and short sleeve)
The polo T-shirt features a stand-up collar and button closure. Ironing this thing is no longer so easy and to do it correctly, you need to follow this order:
Set the iron temperature according to the instructions on the T-shirt tag;- turn the T-shirt inside out and fold it in half lengthwise, straightening the collar;
- iron the item on both sides;
- turn over and smooth the back of the T-shirt;
- turn out and iron the front side;
- Carefully smooth out the collar using the tip of the iron sole;
- hang the polo shirt on hangers.
Since modern clothes are often made from soft materials, a polo collar may not hold its shape and may not look very neat . Therefore, for ironing it is recommended to buy a special starch-based spray.
But, provided that starch can leave marks, it is better to iron the collar from the wrong side, spraying it with a spray.
Sequencing
It is necessary to put men's or children's T-shirts in order in a certain sequence, then the work will be done easily and quickly. You need to proceed as follows.
- First of all, iron small parts: pockets, collar, cuffs, etc.
- Then proceed to the sleeves and make sure that “arrows” do not form on the bend.
- Iron the front and back.
Since stretch fabrics are most often used for sewing T-shirts, it is better not to use the steaming function, as this can lead to stretching of the fibers and deformation of the product.
Alternative methods
Ironing is a process that requires not only certain skills and experience, but also time. And therefore, modern technologies have not been left behind - there are devices that make household work easier .
For example, a steam generator or steamer that is suitable for all fabrics and all types of clothing. This technique treats things with a jet of heated steam, and the nozzle itself does not touch them - that is, it simply cannot harm the fabric.
A steam generator or steamer easily smoothes areas of clothing with decorative details and buttons, and the ironing process itself takes no longer than a couple of minutes.
But besides these devices, there are also special presses - devices consisting of two wide plates . When heated, they smooth out the clothes without deforming them in any way.
Do I need to iron a knitted T-shirt?
A knitted T-shirt is a lightweight and comfortable wardrobe item.
Many people believe that ironing such unpretentious clothes is not at all necessary, especially if they are used for home use. This is not entirely the right approach, since additional care for the item not only improves its aesthetic qualities, but also extends the life of the product. Ironing a lightweight knitted T-shirt does not require much time or effort.
It is enough to fold the product along the shoulder seams and iron it along the front and back sides.
Traditional methods
According to the survey results, two-thirds of people do not like to iron; moreover, there are situations when an iron is simply not at hand, or another ironing device. For these cases, there are life hacks that you can use if the T-shirt definitely needs to be ironed:
Bath with hot water . If you hang a crumpled item over it, then after a few hours under the influence of steam it will become moisturized and smooth out under its own weight. Then it needs to be dried.- Vinegar solution .
To prepare it, you need to mix water and table vinegar with fabric softener in equal proportions. Then you should hang the T-shirt on hangers, spray it evenly with the resulting mixture from a spray bottle and let it dry.
If the wrinkles are small, you can try to smooth them out with steam from the spout of the kettle , but this is a rather risky method, because you can scald your skin in the process. You can also put a not completely dried T-shirt on yourself and wear it for a while.
You can learn more about how to iron a T-shirt without an iron in this article.
Warnings
- Regardless of whether the iron is hot or cold, do not leave it plugged in where it could be easily dropped. If you trip over the cord and the iron falls on your foot, for example, this will be enough to cause injury.
- Do not place aerosols or other flammable items near a hot iron.
- Do not dry clean polo shirts.
- Do not leave a hot iron unattended in the presence of children or pets, even if it is securely placed on the ironing board. Many cases of burns occur as a result of an iron being pulled down from a table or board.
- If you accidentally burn yourself, turn off the iron and remove the plug from the outlet. Immediately start running cold water over the burn area and do this for 20 minutes. Then seek medical attention if the burn is deep, develops a large blister, or develops signs of inflammation (such as oozing, swelling, redness, or pain).
How to fold after?
If the T-shirt is not worn immediately after being ironed, the question arises of how to fold it so that it does not need to be ironed again later.
There are several ways:
- The traditional way is to place the T-shirt with the back up, fold the sleeves with part of the sides towards the center, fold the bottom and fold the T-shirt in half. Just like in a store!
- At home - lay out the T-shirt on a flat surface, fold the sleeves to the center and fold the item first along and then across: you get an even rectangle.
The Kon Mari method is to lay the T-shirt out on a horizontal surface, mentally dividing it into thirds.
Fold one third towards the center and fold the sleeve over it, i.e. he will be on top. Fold the other edge of the T-shirt overlapping the previous one and also roll up the sleeve.Next, you need to fold the bottom part up to about the sleeves, then fold the folded part in half and then fold it with the top part of the T-shirt.
A polo T-shirt folds a little differently because it requires attention to the collar. So, it is best to leave it outside, as they do in stores.
To do this, you need to distribute the item on a flat surface with the collar down (checking that it is not crooked anywhere), and fold the sides of the T-shirt towards each other, bending it in the middle of the shoulder. All that remains is to bend the sleeves, fold the edge twice, turn the item over and put it on the shelf.
4 ways to fold a T-shirt on video:
Steps
Part 2
Ironing a shirt
1
Prepare your iron and ironing board. Make sure the soleplate of the iron is clean. If your shirt is 100% cotton, set your iron to high heat. If the shirt is made of a fabric blend, use a lower temperature. If the shirt is made of cotton or polyester and has already dried, turn on the steam function on the iron or have a spray bottle of water ready to dampen the fabric while ironing. Do not use the steam function on silk fabrics. Test the iron on a small area of fabric on the inside hem of the shirt. If you find that the temperature of the appliance is too high for the fabric, adjust it to a lower level.
2
Iron the collar. Place the shirt on the ironing board. Turn the collar down exactly where it should lie
Make sure it is slightly damp and then iron it gently. Turn the shirt over and iron the other part of the collar
Next, lightly sprinkle the collar with starch and iron again. Then turn the collar over, also sprinkle with starch and iron again. This will prevent it from curling. Iron the ends of the collar and any corners with the tip of the iron.
3
Turn the shirt inside out and iron it with starch. Starch can leave white marks on clothes, which is why the shirt should be ironed from the inside out. Another reason is that some fabrics are quite sensitive to ironing, and this step will protect the front side from scorching or shiny scuffs. Use your hands to straighten the shirt on the ironing board. Also adjust the collar that is inside. It is not necessary to use starch to iron the main fabric of the shirt. However, this can be done to give the polo shirt a thicker texture similar to traditional shirts. Lightly spray both sides of the shirt with starch.
4
Iron the top of the shirt. First, iron the sleeves one at a time, pressing the iron against them and straightening the fabric from the shoulder seams to the cuffs. Do not push the iron beyond the shoulder seam, otherwise wrinkles will appear on the fabric. Then iron the pocket and shoulders. Next, iron the chest area, moving from the pocket to the sides to the shoulders. The iron should constantly slide over the fabric. Don't leave it in one place for a long time. If the shirt has patches or embroidered logos, try not to touch these elements.
5
Iron the middle and bottom. Turn the shirt over. When you first start ironing, the shirt should lie on its back with the front side facing you. After smoothing out wrinkles on the front side of the product, repeat the entire ironing process on the back. Once you've finished ironing the top of your shirt, temporarily place the iron vertically. Move the shirt higher so that the center front of the shirt is in front of you on the ironing board. Start ironing the fabric from the very top and work your way down. Repeat with the bottom of the shirt, ironing it towards the hem.
6
Turn the polo shirt right side out. Make sure there are no jams left anywhere. Then hang the shirt on the hanger until you need it. If you don't have room in your closet to hang a shirt, you can fold it neatly.
Recommendations
The following tips can greatly reduce ironing time and extend the life of T-shirts:
It is better to iron black or very bright T-shirts from the inside out, otherwise shiny iron marks may remain. Movements should be arcuate or circular.- It is necessary to iron in one direction so as not to stretch the fabric.
- It is advisable to hang T-shirts that are still warm from the temperature of the iron on hangers, and fold them after they have cooled completely. Otherwise, creases may remain on the sides.
- If the iron has a “Silk” mode, then you can set it when ironing polyester items. Although for T-shirts made from this fabric, proper drying is sufficient.
- It is better to iron knitwear without moving the iron, but by applying it for a couple of seconds.
Smoothing collar and cuffs
A wrinkled polo shirt looks especially careless. To maintain the shape of the collar of this T-shirt, use starch spray. It is better to apply it and iron it from the wrong side so that no traces of the substance remain on the clothes.
Steam the collar and cuffs carefully with the tip of the iron. A piece of soft fabric - an iron - will prevent the appearance of shine on dark clothes.