A DIY cooler bag is the optimal solution for those who travel a lot. It will come in handy on a trip, when going to the beach or just on a picnic. There is a large selection of bags on the market that are highly functional. The only drawback is the high cost. If you don’t have the money for a new product, then you should think about making it yourself. Simply prepare the necessary materials and follow the instructions exactly. So, how to make a cooler bag with your own hands?
A variety of cooler bags
Bags used for transporting food and medicine are divided into several types. Each of them has certain design features and properties.
Before you make a thermal bag with your own hands, you need to consider all possible options:
- Thermal bag. A universal mobile device that simultaneously plays the role of a thermos and a refrigerator. For several hours it will maintain the set temperature necessary for storing the product. It is suitable not only for cold, but also for warm. It looks like a regular fabric bag with a thermal insulation layer.
- Thermal container. The difference between the previous version is that the container has a more rigid body. The box is made of foam or plastic, which is covered with a thick layer of thermal insulation. To increase shelf life, batteries are used that are charged by heat or cold. This means that the container is used for transporting hot and cold products.
- Car refrigerator. An ideal solution for those who have a vehicle. Powered by a cigarette lighter and does not require batteries. When choosing a device, it is worth considering the volume of transport.
Depending on the purpose, bags are divided into the following types:
- Cooler bag for groceries. Designed exclusively for transporting food and drinks. It is advisable to sort what is being transported to prevent mixed odors. Glass containers are placed so that they do not break.
- Medical bag. Used for medications that need to be stored at low temperatures. A small product suitable for long distance travel. They can carry painkillers, antipyretics and antiseptics.
- Fishing bag. Ideal for storing bait, bait and caught fish. You can also put food for yourself. It is recommended to pack them and place them separately so as not to mix odors.
Before making a refrigerator yourself, you need to decide for what purpose it will be used. The size of the bag and its design features will depend on this. Storage duration plays an important role. The thicker the insulating layer, the longer the container will maintain its temperature. This is affected by batteries and their filling.
How to sew a thermal bag from foil-isolon with your own hands
You can make your own cooler bag using foil-isolon, a soft and flexible material with good thermal insulation and reflective properties. The process of making containers is very simple; it is easy to build even without relevant experience.
For a future thermal bag, you need to purchase foil insulation 0.5-1 cm thick, as well as a piece of polystyrene foam to strengthen the bottom. You will need to prepare wide tape, double-sided or reinforced. A rectangular sports or household bag without internal compartments and pockets, reinforced with wire at the corners, is suitable as a basis for the product. The container must have a high-quality zipper; it is better to choose the color of the fabric white or light gray. In this case, the product will attract less sunlight.
You can make a thermal bag with your own hands to preserve the cold using a simple scheme:
- The container chosen as the basis is carefully measured from the inside in length, width and height. After this, a pattern of a heat-insulating box is made from foil-isolon - on each side it should be 1-2 cm smaller than the bag. The blank is cut out using a stationery knife, the joints are sewn together with thick, harsh threads, and then glued with reinforced tape.
When cutting out the heat-insulating contour, do not leave seam allowances, otherwise the design will not fit into the bag - Place a sheet of polystyrene foam or polystyrene foam on the bottom of a thermal food bag with your own hands. It will increase the rigidity of the structure and improve its insulating qualities. A sewn box made of foil isolon is placed inside the base and properly straightened, making sure that the homemade container fits more tightly to the walls of the bag. If large gaps remain, they are filled with foam rubber. The foil box is secured with tape or metal staples so that it does not bunch up inside the cooler bag.
The foil lid for the cooler bag needs to be made a little larger in size than the box itself - Do-it-yourself thermal bag for baby bottles is inspected for defects. Possible gaps are eliminated using sealant. It is necessary to fasten and unzip the bag several times. This will make sure that the inner foil box is made of really high quality and does not move out during the use of the container.
Making a small cooler bag from foil isolon is convenient for carrying the product in your hands or for traveling by car
A ready-made thermos bag with your own hands at home has a compact size but sufficient capacity. To keep the low temperature for a long time, it is also recommended to put cold accumulators in the container. You can make them yourself. But it is better to give preference to purchased devices in a flat case - unlike plastic bottles, they do not take up extra space.
Attention! A small cooler bag for a car made from foil-isolon turns out to be quite soft. If possible, it is better not to wear it on your shoulder so that the inner box does not wrinkle.
Main components that will be needed
To solve this question of how to make a thermal bag with your own hands, you need to prepare the following materials:
- Bag. When choosing, take into account the dimensions of the future portable refrigerator. Sports and other bags are used as a base. The main thing is that the product is convenient to use and roomy as needed. It's good if it is equipped with a zipper. This will make using the thermal bag more convenient.
- Insulation. To make a refrigerator bag, various insulating materials are used. Foil-coated polyethylene, also called polyisol, isolon or thermal insulation, is very popular. The thickness of the insulation should be 5-10 mm. The material is publicly available at the hardware store. Before purchasing, you need to calculate the required amount of material. To do this, take into account the dimensions of the bag. Craftsmen recommend using heat-insulating material that has a foil coating on both sides. This will increase the insulation of your food and drink storage.
- Foil-coated tape. With its help, all joints are processed. If you don’t have such material at hand, then regular adhesive tape or double-sided tape will do.
- Several factory cold storage batteries. As an analogue, it is permissible to use a medical heating pad or plastic bottles that are filled with saline solution. After this, the containers are cooled. In the process of transporting food or medicine, they will transfer cold.
The selection of materials must be approached very carefully. The quality of the manufactured refrigerator will depend on this. Particular attention should be paid to the bag itself. It should be made of durable material that will ensure a long service life. This also applies to components. It is good if the bag is equipped with handles and a shoulder strap for transportation.
Important! Cold accumulators must contain a sufficient amount of salt solution necessary to maintain cold for a certain time.
What is
An ordinary-looking bag made of two layers of nylon fabric, the inside is lined with a thermal insulator - foamed polyurethane or polyethylene. Pre-frozen products are used as cold accumulators. A simple concept gives the desired effect. Such a portable refrigerator will be useful and not burdensome:
- when working at remote sites where there are no conditions for preparing hot food;
- on long trips by car or train;
- on the beach, picnics, summer cottages, on hikes.
The main advantage of a thermos bag compared to a container is the ability to compactly fold the container after it is empty. Some models of such bags can be additionally equipped with cold or heat accumulators - special plastic containers filled with gel, saline solution or dry ice. Such devices are capable of maintaining the required temperature for up to several days.
How does a cooler bag work?
The operating principle of the thermal bag is quite simple. The main role is played by cold accumulators, which are containers with saline solution. They set the initial temperature inside the storage facility. Thermal insulating material and foil coating help maintain temperature in the interior of the bag.
A portable refrigerator bag with your own hands resembles a thermos. The difference lies in the purpose. If a thermos is designed to keep you warm, then a refrigerator is designed to keep you cold. This is achieved by providing high thermal insulation. This goal is achieved with the help of modern materials, which, despite their thickness, have high insulating properties. As a result, optimal conditions are created in the thermal insulation box for transporting and storing food and medicine, albeit for a short time.
The feature of foil-coated polyethylene has many advantages. The material has a small thickness and weight. This allows you to create a lightweight thermal bag. Despite all the advantages of polyethylene, it can only temporarily protect the internal space. This means that after a few hours, the temperature will begin to slowly rise. This will violate storage conditions. Therefore, it is recommended to use portable refrigerators only for short-term storage.
Important! As the brine solution begins to melt, the temperature in the refrigerator will gradually increase. It is important to constantly monitor this process, especially during hot periods.
What can you make a thermal bag from?
The finished cooler bag looks like a small box made of two layers of nylon fabric with heat-insulating material inside. If you put food in a container and add a couple of cold accumulators to them, then the semi-finished products will remain frozen for a long time - from 3-5 hours to a day.
Although the device is inexpensive, if you wish, you can make it at home. To sew a cooler bag with your own hands step by step, you will need to take:
- strong synthetic fabric with reflective and water-repellent properties - nylon, polyester, polyvinyl chloride;
- folgoizolon - environmentally friendly insulation based on foamed polyethylene coated with aluminum foil;
- penoplex is another thermal insulation material, which is a type of foam plastic, usually used in construction.
In addition to the basic consumables, to make a cooler bag you will need to buy glue and aluminum tape to hold the individual parts together. Self-tapping screws, a stationery knife, a marker and tape measure, a screwdriver or a screwdriver will be useful for this work.
Despite its relatively large dimensions, a homemade cooler bag is lightweight
Stage of work
When all the materials are prepared, you can proceed directly to the task at hand, such as sewing a refrigerator bag.
Regardless of the purpose and size, all work is carried out in the following sequence:
- Cut double-sided foil polyethylene to the shape of the bag. The result should be a solid cross, the sides of which will have dimensions proportional to the future refrigerator. The central part is placed at the bottom of the bag. The sides of the cross will cover the side walls of the bag.
- Carefully tape the sides of the cross with tape. The result should be a box. The joints must be carefully taped. The insulating properties of the product will depend on this.
- Carefully place the box in the bag so as not to damage its integrity. Connect the walls using double-sided tape. The fastening must be reliable. The main thing is that the insulating box is in close contact with the bottom and walls.
- Attach the cover. It is prepared separately in advance. The disadvantage of insulation is that it bends easily, and therefore is not suitable for creating a structural element that would have the required rigidity. Therefore, to create a cover, a more dense material is made, which is eventually sheathed with insulation. After that, it is attached to the refrigerator itself.
- Make a battery. For the refrigerator, ready-made or home-made elements are used to maintain temperature. Ready-made batteries are available in specialized stores. They have a certain volume, which determines the duration of cooling. To create homemade batteries, plastic containers or medical heating pads are used. Filled with saline or alcohol solution.
The process of making a bag will not take much time (no more than an hour). The main thing is to perform all actions correctly. If desired, the refrigerator can be equipped with a temperature sensor. It is used to control the situation inside the container. The sensor is necessary for cases when you need to transport medicines or perishable products. It is installed in bags with reliable and high-quality refrigerant, which provides a low temperature inside the portable refrigerator for up to 10 hours.
Cold accumulators
Cold accumulators can have a liquid or gel base.
To make a liquid-based battery, simply freeze water in an ice cube tray and place the pieces in a Zip-Lock bag. It is convenient to use such batteries: they do not take up much space and “adapt” to the shape of the products being transported. However, ice melts over time and bags are not always airtight, so food may become wet.
The simplest homemade cold accumulator is ice. Fill bags or bags with it and place it in a cooler bag
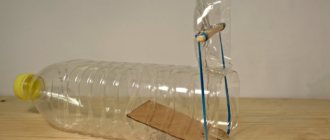
More reliable containers are ordinary plastic bottles in which water is directly frozen. The downside to this DIY battery is that they take up a lot of space.
A plastic bottle is a reliable way to freeze water (and you can choose the right size)
In order for the water to melt more slowly, salt is added to it before freezing in a volume of at least 6 tbsp. l. for 1 liter of water.
Gel-based batteries are more practical: they do not leak and keep cold even longer than salt water. You can make them in two ways:
- from diapers. Pour water into a new diaper, then remove the gel from it and place it in the freezer in a ziplock bag. Once the gel freezes, the battery is ready;
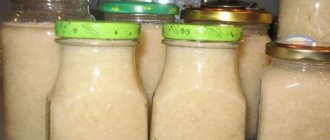
- from gelatin or wallpaper glue. Dissolve gelatin or wallpaper glue in salt water according to the instructions on the package. The resulting gel-like mass is placed in bags or bottles and frozen.
Frozen gel holds the cold better than water
Useful tips for making and using a homemade cooler bag
A DIY thermal bag is an indispensable item for the home. This is especially true for those who love to travel and often go on picnics. The container is also ideal for transporting perishable products during periods of extreme heat. The bag can have different sizes, which significantly expands its functionality.
When making a thermal bag, you should use the following tips:
- To make a bag, not only adhesive tape is used, but also analogues that have the appropriate properties. So, staples are used to seal and secure the box inside the bag. They are practical and reliable to use.
- To increase the insulating properties of the refrigerator, it is recommended to use a double polyethylene coating. To do this, a cardboard box of the required size is covered on both sides with insulating material. There must be foil inside. After this, the processed box is placed in a bag.
- It is recommended to put the cold packs in the bag immediately before transportation. If possible, the products can be frozen first. This will significantly increase the duration of cold retention in the internal space.
- Products must be packaged correctly. They are wrapped in special packaging or in a simple newspaper. After this, they are placed tightly in the refrigerator. Having free space will speed up the heating of the space. Place a towel or paper on top.
- If the bag is used to transport medicines in ampoules, then it is better to equip it with pockets. During transportation, this will reduce their shaking. Such compartments are also well suited for storing drinks in glass containers.
Each time after use, the bag is cleaned of cold accumulators. It is recommended to treat it with a disinfectant before the next transportation. The master class allows you to quickly and easily make a suitable storage unit with your own hands. This does not require serious financial expenditure.
What can it be made from?
To sew the product, a strong synthetic fabric with water-repellent and sun-protective properties is selected. To a greater extent, these qualities are present in nylon, polyvinyl chloride, and polyester. Fabrics based on them are easy to clean from various types of dirt and dry quickly. In addition, the material must be of increased density to eliminate the possibility of mechanical damage during operation.
Foil-isolon is used as insulation. This is an environmentally friendly material with a long service life, excellent thermal insulation properties, high strength characteristics, and low specific gravity. The base is foamed polyethylene. The outer surface is laminated with aluminum foil and polypropylene film. Double protection protects the filler from chemical interaction with organic matter, which makes the material safe for food storage.
Increasing efficiency
Taking into account the recommendations, you can make a cooler bag at home without any problems.
However, few people know how to multiply the efficiency of a portable refrigerator:
- The first tip will be useful for those who travel a lot by car. The blanket will be an excellent helper in maintaining the desired temperature in the bag. Just wrap your portable cooler in it.
- Direct sunlight will reduce the effectiveness of the bag. It should be kept away from sunlight.
- The best place for batteries is the bottom of the bag. If, with this position of the batteries, the food does not fit into the bag, then there is a backup option: you can surround the food with it.
- It’s great if the products are chilled.
- The closer the food is placed to each other, the slower the temperature inside the refrigerator will rise. The empty space in the bag should be filled with any container of water or a folded blanket.
- Before arriving at your holiday destination, it is better not to open your bag often (if this is not possible, then this should be done as rarely as possible).
This is interesting: Is it possible to wash laminate flooring with a vacuum cleaner? Expert answer
Step-by-step instruction
Believe me, it is only at first glance that it seems very difficult to make a cooler bag yourself. In fact, by strictly following the instructions, you will be able to create such a “masterpiece” with your own hands.
First you need to prepare the base bag. All pockets, partitions and other elements are removed from the inside. We leave only the “body”.
Rectangular bags are especially convenient.
Now you need to make a pattern that exactly repeats all sides of the base, but about 0.5 cm smaller (so that nothing puffs up inside). Don't forget the lid. If you decide to make a tab with Velcro, then the lid should be larger in size so that it can be tucked inside. The process of creating a pattern is extremely simple: apply all sides to the paper one by one, and with minor adjustments, trace with a pencil.
In this case, the white part should remain on the outside, the shiny part on the inside.
Using the resulting pattern, parts are cut out of foil polyethylene and glued with tape to create something like a box with a lid. To make gluing more convenient, the parts are first connected using tailor's pins.
It is preferable to fasten the box with a stapler or simply sew the parts together.
The resulting container is inserted into the base and the thermal bag is ready. An important point: if there is space between the base and the “container”, this is not a problem, but it must be filled with foam rubber or cotton wool.
Thus, we received an option that is medium in size and very versatile in its method of application.
The picnic accessory is already ready, all that remains is to “charge” it with heat or cold.
To make a bag for shopping, you will need a base slightly smaller than in the first case (in principle, it can even be a very thick plastic bag) and foil polyethylene, also in a smaller volume. But the manufacturing process remains the same.
You need to put the “batteries” inside, right next to the food. This way they will stay cold (or hot) much longer.
To make a “thermal storage” for transporting food in the trunk of a car, you will have to find a larger base. Often a box made of plywood or thick cardboard is used for this purpose. To enhance the thermal insulation properties, the inside of the box is lined with thin foam plastic, and only then with a layer of foil foam rubber. The latter is secured along the upper perimeter of the box with tape. The same approach is used to make the lid. Well, since it’s extremely inconvenient to just carry the box, a case with handles made of durable fabric is often made separately for such “thermal storage.”
If you have plywood or wood panels, put together a base box.
So, the bag is ready, but it cannot store cold on its own; special batteries are needed. These “devices” can be purchased in stores, or you can make them yourself.
Tags
Refrigerators Refrigerators are solved by the refrigerator. a portable refrigerator will be a refrigerator bag made of polystyrene foam must be cut out; parts must be used beforehand must be removed. It is imperative to provide for the cold must be laid. the bag must be laid first. You need to make it with your own hands; the simplest one with your own hands is ready. with your own hands it will become with your own hands with your own hands; sun-protective properties. must fit freely. Thermal bag with your own hands with your own hands; made with your own hands are losing their relevance
commentratingpackageshomedivvotes
Some nuances
Some tips from personal experience:
- place cold accumulators every 10–15 cm, this will protect the products from heating; wrap frozen drinks or foods in heating pads - this will protect them from defrosting for at least 12 hours;
- wrap each individual product placed in the bag in paper, this will improve thermal insulation;
- fold food tightly so that there is as little free space as possible in the bag;
- cover the already placed products on top with paper and several towels; then close the thermal cover and the lid of the bag itself;
- Don't open the cooler bag unless necessary to keep the cold in.
The bag we made reliably keeps the cold for about a day. First we put some food and drinks. The drinks were cool after 12 hours, and after 20 they began to warm up. Ham, cheese, eggs did not even begin to spoil after 20 hours.
The second time we loaded the bag much more tightly. Heavily chilled foods were mixed with chilled drinks and cold accumulators. Frozen hot water bottles were placed under the lid. The air temperature that day was up to 40 °C. This way the food stayed cool for 30 hours!
In general, the result fully met expectations and even exceeded them.
In a similar way, we recently made a smaller thermal package. We bent a rectangular box from insulation and sealed it on the sides with tape. Use with a frozen heating pad. We bring fruit from the dacha, and after four hours in the heat they don’t even begin to thaw.
Car refrigerators
Not every thermal bag or thermal box can withstand the test of traveling for 2-3 days. Car refrigerators, which are a type of isothermal containers, have proven themselves well in this regard, but they do not operate using cold accumulators, but according to a different principle.
They are rigid boxes made of plywood or plastic, with a thick isothermal layer of foamed plastic. And their inner chamber is foil-lined. For their operation, it is not batteries that are needed, but other devices. There are the following types of auto-refrigerators:
- thermoelectric (works from a standard socket or car socket in the cabin at 12 V);
- absorption (works on liquefied propane or butane);
- compressor (runs on freon).
Modern technologies make a person’s daily life comfortable, regardless of the conditions in which he finds himself. For frequent trips to nature, lasting 1 day, it is enough to purchase a thermal bag or thermal box. The first device is quite possible to carry on yourself, and the second is convenient to carry in a car. The larger the company, the more spacious the product should be. And if the trip takes 10 hours or more, then a car refrigerator would be the best option.
Video: cooler bag - how to use it correctly, where to buy batteries
Cooler bag/How to use it correctly/where to buy batteries
Watch this video on YouTube Watch this video on YouTube
Video: car refrigerators - how to choose and how they differ?
Car refrigerators. How to choose and how do they differ?
Watch this video on YouTube Watch this video on YouTube
Do you want to understand better than others?
How a cooler bag works – For lovers of picnics and long-distance trips, a cooler thermal bag is an indispensable accessory. But not all consumers fully understand what it looks like and how...
Cold accumulator for refrigerator bag. From refilling to making it yourself - Cold accumulator for a thermal bag - cooling components of devices that can maintain low and high temperatures in a special bag or container. These coolers...
How to use LG Smart Thinq - Find LG Smart ThinQ app in Google Play Store & Apple App Store using your smartphone. Follow the instructions to download and install the application
To connect to...
What is a cooler bag and how to use it – When purchasing a cooler bag, also pay attention to the warranty. For most inexpensive products it is 2-3 months, but for some models the duration…
How long does a cooler bag keep cold - We offer you a comparison of several parameters of three types of cooler bags available for sale
Capacity, l Temperature retention time,…