Quality of the paper used Type of toner (mechanical/chemical) and its quality Temperature and humidity in the room Foreign objects (paper clips and other office debris) getting into the middle of the printer
Sometimes the cause of OPC clogging is the refilling of the printer with low-quality mechanical toner, carried out by the hands of the owner of the printing device. To solve this problem, you can order a cartridge refill service from customer service or try cleaning the photo drum yourself.
- Carry out work in a dark place protected from sunlight. Direct rays of the sun contribute to premature wear of the photo layer.
- Do not use flammable products or sprays.
- Do not touch the working surface of the drum, magnetic roller or other parts of the cartridge/printer with your bare hands. Use rubber gloves.
- In case of direct contact with toner, it must be shaken off and washed off with cold water. Toner ink is a complex chemical that can cause an allergic reaction or adversely affect human health.
How to clean a printer cartridge
You can also use cans of compressed air or special isopropyl alcohol-based cleaners, such as Xerox Cleaning Fluid
Expert opinion
Ekaterina Korneva, expert in the field of care, cleanliness and beauty
I will help you understand all the intricacies.
When it comes to how to clean the photo drum, then in 99 cases microfiber or any other lint-free cloth will come in handy. Thus, we provide our customers with the opportunity not only for printing, but also for servicing office equipment. How to clean the printer drum: when to clean it, instructions For any questions, please contact me, I will be happy to answer!
Evaporation
If soaking doesn't work, try hot evaporation. The procedure is similar to that described above, the only difference is that instead of a cleaning agent you will use hot purified water. As it cools down, the water should be changed to hot water several times during the cleaning process. The cartridge should be kept in liquid until the water becomes clear. After this, place the cartridge on a napkin or sheet of paper to “dry”.
The most incredible way to get my hair back!
This is just a DISASTER ! And after all, my hair did not start falling out in one day, but systematically - day after day I watched how the hair left my head: while combing, washing, even while sleeping. (read more…)
After the cartridge is dry, wipe it with a lint-free cloth and insert it into the printer.
Unfortunately, even water vapor does not always help. If this is your case, then repeat the procedure using a solution of hot water and glass cleaner mixed in a 1:1 ratio. Leave the cartridge with the nozzles down in the liquid for several hours (2-3). After soaking, take it out, dry it and print it.
All tips and recommendations described in the article apply to inkjet cartridges. If you encounter problems with laser cartridges, we recommend contacting a service center.
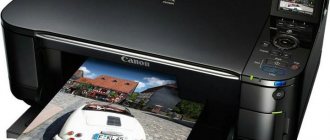
How to clean a Canon printer at home: hardware and manual cleaning
The photodrum is a special shaft on which a selenium coating is applied. The shaft is usually light green or light blue in color.
Expert opinion
Ekaterina Korneva, expert in the field of care, cleanliness and beauty
I will help you understand all the intricacies.
Be aware that if you turn the cartridge over with the drum unit removed, waste toner will spill out. The main part of any laser cartridge is the photoconductor, which is a shiny shaft that has a light blue or light green color, but other colors are also available, depending on the manufacturer of the photocoupler. How to clean an HP printer, printer head at home: methods of cleaning and cleaning the heads. For any questions, please contact me, I will be happy to answer!
How to clean a HP, Canon printer cartridge - cleaning the cartridge
- go to the menu on the printer panel or printer software;
- in the printer software window or menu, select Device Services;
- Find the item Cleaning the cartridge and follow further instructions on the screen;
- Click the Print button and print a test page.
Important! Cleaning the photo roller yourself may cause damage. In this case, you take full responsibility for the performance of the part.
Do you like guys with long hair?
Not really
Features of devices from different companies
The operating principle of a printing device from any company is not significantly different from each other. Minor differences may only be in the form of spare parts and some printer components. Therefore, the instructions described in this article are applicable to any model of all well-known printer manufacturers: Canon, HP, Epson, Samsung, Xerox, Brother, Kyocera and many others.
Cleaning agents can be used without harm, but software cleaning will require a special utility for your printer model. In some cases, different versions of programs may be used for different series or devices released in different years by the same manufacturer. We recommend installing such software from the disk that comes with the device.
Methods for cleaning cartridges
Cold cleaning
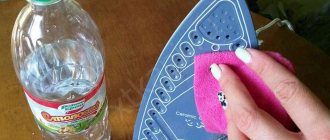
For the cold cleaning method, you will need rubber gloves, a disposable syringe, soft rags, a pipette and water. You will also need a glass cleaner containing isopropyl alcohol or ethylene glycol (for example, Mister Muscle or Glitter).
Remove the cartridge from the Canon printer and place it on a previously prepared cloth (so that the nozzles are positioned upward). Apply the cleaning agent to the nozzles for 10-12 minutes. After this, all nozzles should be blotted with a soft cloth and wiped dry with a soft, lint-free cloth.
If superficial cleaning does not help, more time and cleaning agent will be needed. The container is filled to 3 mm with liquid, then the cartridge nozzles are immersed in it and left for 3-4 hours. After exposure, the cartridge must be removed and wiped dry. If cleaning is successful, a trace of soaked ink will remain on the fabric. They are gradually taken out.
There is another method of dry cleaning, using a rubber plug. Sometimes it is included with the printer. You need to pull back the syringe plunger and fill it with air. After this, put a plug on the needle and squeeze out all the air from the syringe into it. The high pressure releases the dried ink out. After cleaning is completed, the cartridge must be wiped, refilled and a test sheet printed.
Application of the hot method
The algorithm of actions for the hot cleaning method looks like this. Pour some hot water into the container and place the nozzles of the cartridge to be cleaned into it. Change the water without waiting for it to cool down. The water will be constantly colored until all the ink is washed out of the nozzles.
After the first cleaning, the detergent is mixed with water in a 1:1 ratio and poured into a container. The cartridge is kept in the solution for 2 hours, after which it must be rinsed with hot water and wiped dry.
You can make the solution yourself. You will need a little ammonia, distilled water and glycerin. You will also need isopropyl alcohol. Water is thoroughly mixed with all components in a 1:1 ratio and filtered through a strainer.
Types of print heads and methods for cleaning them
Any equipment requires care and knowledge of the basic rules of use. Printer print heads are no exception. But sometimes a blockage occurs even if all the recommendations specified in the instructions for the printing device are followed. The operation of the unit can be restored after cleaning the print head. The algorithm of actions will depend on the name of the MFP and the type of head. To restore normal operation, you need to clean all the printer nozzles.
Matrix printer
The matrix-type device operates using electromagnets and an ink ribbon. It consists of a structure that has a set of special tungsten needles. During operation, the cartridge begins to move under the influence of electromagnets, the needles (matrices) hit the ink ribbon according to a computer-specified pattern, leaving a trace of the specified color on the paper.
Poor printing is possible due to clogged matrices. The ink ribbon accumulates dust over time, and when impacted, the needles pick up fluff, reducing performance.
There are several methods for cleaning a matrix MFP:
- Soaking in oil. The procedure will require machine oil (about 1 cup). The print head must be disconnected from the common unit and placed in a container with oil for 10 hours. Next, remove the head and leave for another 1.5-2 hours to allow excess oil to drain. Before using, attach the head of your printer to the main unit (without the ink ribbon for now) and make several test prints until no oil marks remain on the sheet of paper.
- Cleaning with alcohol. This method is suitable for mild blockages. You will need any alcohol-containing liquid and lint-free wipes. Moisten napkins in alcohol and gently wipe the surface of the head. If necessary, lubricate the dies with machine-type oil.
Attention! The tungsten needles in the matrix MFP are very thin, so when cleaning you need to be extremely careful not to damage the device.
Jet printer
The operation of an inkjet printer is not much different from a dot matrix printer. The principle is the same, only instead of needles a set of nozzles is used. Liquid ink is used as a consumable and is sprayed onto the media. The nozzles become clogged when left idle for a long time.
Ink cartridge recovery options:
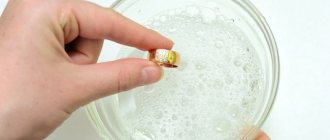
- Maceration. Prepare a vessel with plain water, lower the cartridge with the nozzles down. An important point is that the nozzles should be hidden in the water no more than 1 cm. Clean the dirty printer head. Soaking duration is 72 hours. After the time has passed, refill the cartridge, return it to the printer and print test pages to evaluate the quality of cleaning. You can use washing liquid instead of water.
- Boiling. Pour water into a saucepan and bring to a boil. Turn the cartridge over and grab it with pliers. Hold the product over the steam for several minutes and lower it 1 cm into boiling water for 0.5 minutes. At the end of the procedure, wipe the device, refill and perform a test print. This method only applies to old cartridges. If the product is successfully restored, it is worth remembering that its service life will be short.
- Steaming. To steam, you will need a pan, water and a metal sieve. Pour water into a saucepan and bring to a boil. Place a sieve over the container and place the cartridge with the print device facing down. Steam the device for 10 minutes, then wipe, refill and install in the printer.
- Treatment with a jet of hot water. You can clean your printer head in the shower using a stream of hot water. To do this, you need to open the hot water tap, creating a weak pressure. Place the cassette under the stream with the printing element facing down. When exposed to water, dried paint will become wet.
- Ultrasonic bath. Cleaning is carried out using a special cleaning agent – cleaner and an ultrasonic bath. Pour the cleaner onto the bottom of the bath so that the height of the liquid is 1 cm. Place the cassette on the bottom of the device and turn on the device for 0.5 minutes. Next, remove thick ink from the nozzles and refill the cartridge.
- Cold cleaning. For cold cleaning, Mr. Muscle is suitable. Pour the cleaning liquid into a shallow bowl and lower the head of your inkjet printer 1 cm with the nozzles down. The duration of the procedure depends on the degree of ink stagnation in the device, but does not exceed 3 hours. Next, wipe the cassette, refill it and put it in the printer for a test print. If, after the allotted time, the cartridge cannot be revived, you will have to buy a new device.
None of the methods listed above guarantees complete restoration of the cartridge. After undergoing manipulations, the device will reduce print quality. The duration of work will be reduced.
Laser printer
The structure and operation of a laser printer is significantly different from a matrix and inkjet printer. At the heart of the device is a photosensitive drum and powder toner. Under the influence of an electric charge and high temperature, the drum applies a specified image to the paper.
We clean the inside from dust and toner
- connect the printer to the network;
- remove all paper from the tray at the back;
- A4 sheet is folded in half (widthwise) and straightened;
- place the straightened piece of paper in the back tray (with the open side facing you);
- open the tray to run the test;
- press the “Stop” button;
- hold it until the signal light flashes eight times;
- release the “Stop” button;
- wait until paper comes out of the printer.
To clean the photodrum, you need to arm yourself with a lint-free material, for example, a napkin. With its help, you need to wipe the surface of the drum until not a single particle of toner or greasy stain remains on it. Do not use wet wipes under any circumstances, as after this procedure the photo roll will have to be thrown away.
How to clean a laser printer
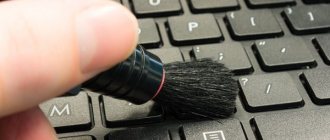
Unlike an inkjet printer, cleaning a laser printer by software is not possible. This is all a consequence of the way these devices are printed. But you can do “good” to your assistant manually. To do this, you need to have dry wipes, cotton swabs, a soft paint brush, a special cleaning liquid, and ideally an old vacuum cleaner. You can also buy disposable gloves so as not to get your hands dirty while working.
We clean the inside from dust and toner
Carry out all actions by protecting your respiratory tract with at least a respirator. If you have a gas mask in the house, you can use it. Protect your hands with rubber disposable gloves. Wear clothes that are not the newest, but rather old ones that you don’t mind throwing away. All this is needed to protect against toxic toner, which is made from petroleum.
- Unplug the printer to avoid electric shock.
- Wipe the printer body with a napkin, in this case it can be damp.
- Open the top cover and remove the cartridge.
- Place it on the table, where you first spread an old newspaper or sheet of paper.
- Using a vacuum cleaner, carefully remove the toner from inside the machine. If there is no vacuum cleaner, then you need to do the procedure with cotton swabs. Do not use a household vacuum cleaner. For the described actions, only an old or special device is suitable.
- Using a previously prepared soft bristle brush, carefully go over all visible components inside the printer.
- Use the vacuum cleaner again.
- You can wipe the inside with a napkin, either dry or slightly wetted with a special liquid, if you previously purchased it.
- The inside is now clean. You can start working on the cartridge.
How I found my ideal hair growth product
Hello dear! I want to share with you my solution to the sensitive problem of hair loss . The problems are very serious, at least for me. I would never have thought that this misfortune would touch me, especially at the age of 29 (read more...)
What you will need
Since laser printers use powdered toner during the printing process, you will need to use several special tools to ensure complete removal of fine particles. Below we have outlined the special tools and equipment needed to effectively clean your laser printer.
Microfiber for collecting toner:
is a kind of disposable cloth that, when activated by stretching the fabric, has a non-oil coating that traps particles for easy removal.
Isopropyl alcohol:
- if not then regular alcohol, isopropyl alcohol is ideal for cleaning mechanical equipment as it evaporates quickly, leaving no liquid on the surface. Use it to ensure that there are no residues left after cleaning.
An air atomizer can be used to help reach hard-to-reach areas and blow out toner particles.
Dust mask:
- If inhaled, although not dangerous, powdered toner can sometimes cause irritation. Before opening the toner cartridge compartment, make sure the room is well ventilated and wear a dust mask to make sure you don't have any problems.
Latex gloves:
— when exposed to skin, the toner may cause irritation; wear latex or rubber gloves to prevent this.
— a toner vacuum cleaner (vacuum) is a powerful, portable device that can gently remove toner from inside a laser printer. It's extremely useful, although toner vacuums are expensive, which is why we've listed it as an additional tool. You can also use a regular vacuum cleaner, but be sure to use a disposable dust bag; this is very important so that it can be disposed of later.
Prevention
- Turn off the printer or MFP by unplugging the power plug from the outlet.
- Open the front cover of the print compartment, where the required part is located.
- Remove the cartridge or drum cartridge from the slots and place it on a flat surface covered with newspaper or oilcloth.
- To get to the OPC installed in the drum cartridge, simply remove the protective shutter. To access the drum, which is part of the cartridge, you must follow these instructions:
- Remove the mounting clips located on the front and rear sides.
- Remove all screws that hold the side covers.
- Using a flathead screwdriver, pry up the sides and remove them.
- Carefully remove the primary charge roller and gear unit.
- Unscrew the 2 bolts securing the squeegee and remove it from its seats.
- Next, grasping the edges of the axle, remove the photodrum.
To clean the toner cartridge, you need to prepare alcohol, microfiber, rubber gloves, a dust mask and a toner vacuum cleaner. Cleaning a laser printer involves the following steps:
What you will need
Since laser printers use powdered toner during the printing process, you will need to use several special tools to ensure complete removal of fine particles. Below we have outlined the special tools and equipment needed to effectively clean your laser printer.
Microfiber for collecting toner:
is a kind of disposable cloth that, when activated by stretching the fabric, has a non-oil coating that traps particles for easy removal.
Isopropyl alcohol:
- if not then regular alcohol, isopropyl alcohol is ideal for cleaning mechanical equipment as it evaporates quickly, leaving no liquid on the surface. Use it to ensure that there are no residues left after cleaning.
An air atomizer can be used to help reach hard-to-reach areas and blow out toner particles.
Dust mask:
- If inhaled, although not dangerous, powdered toner can sometimes cause irritation. Before opening the toner cartridge compartment, make sure the room is well ventilated and wear a dust mask to make sure you don't have any problems.
Latex gloves:
— when exposed to skin, the toner may cause irritation; wear latex or rubber gloves to prevent this.
— a toner vacuum cleaner (vacuum) is a powerful, portable device that can gently remove toner from inside a laser printer. It's extremely useful, although toner vacuums are expensive, which is why we've listed it as an additional tool. You can also use a regular vacuum cleaner, but be sure to use a disposable dust bag; this is very important so that it can be disposed of later.
Prevention
Printing problems can be avoided by following preventative measures. It is recommended to adhere to the following rules:
- Run printing at least 2 times every 7 days. This will prevent the printer from being idle.
- Do not operate the device in unsuitable temperature conditions. In hot climates, the device may overheat; in cold climates, the consistency of lubricating fluids and ink may be disrupted.
- Wipe off dust on the desktop or surface where the printer is located in a timely manner.
- Refill only with high-quality ink. This will prevent clogging of the unit nozzles. Use original ink from the manufacturer.
The listed recommendations allow you to increase the service life of the printing device, reduce costs for consumables, and eliminate the breakdown of expensive cassettes.
Important information
- In the "start" menu, find the "devices and printers" section. If there is no section, then it may be located in the “control panel” section.
- In devices, find your printer and right-click on it and select “printing settings”, then “maintenance”, “cleaning” or “deep cleaning”.
In general, the cleaning procedure will not force you to strain too much and perform a lot of incomprehensible actions. If you notice that there are traces of toner left on printed documents (a kind of “marks” that spoil the entire document and make it unusable), then it is definitely time to clean the laser printer drum.
Software cleaning
Many inkjet machines are equipped with built-in automatic cleaning programs. To carry it out, proceed as follows:
- open the control panel;
- go to the printing equipment settings;
- there select the required section - “Remedies and cartridge cleaning”;
- make a test print of a blank sheet.
The operation can be repeated several times. Built-in tools allow you to get rid of minor dirt.
If the function is missing, you can download the program from disk or the Internet and install it. Then in the print settings, select the “Printer Maintenance” section, then you will need to open the print settings and start cleaning. In this case, you must follow the instructions of the program. Most often, the procedure must be performed repeatedly.
When the software method does not help, then you can get rid of the problem in several other ways. For different models of inkjet technology, the algorithms are the same, only the method of accessing the cartridges differs . To do this, you may need a set of screwdrivers with different bits.
The operation scheme, regardless of the chosen cleaning method, is as follows:
- removing the cartridge;
- soaking;
- washing;
- drying;
- gas station;
- installation in the printer;
- control printout.
You must work carefully so as not to smear surrounding objects or clothes with ink.
Stages of cleaning laser printer cartridges
When cleaning laser products from HP and Canon brands, it is important to follow all recommendations and not skip any of the steps:
- Turn off the power to the device. Disconnecting the power cord from the computer and removing the paper trays. Allow the internal components to cool down. This takes 15–20 minutes.
- The workplace should be protected by covering it with oilcloth or newspaper. This will keep the area clean, because... Removed printer parts may be stained with toner.
- It is imperative to use personal protective equipment (special mask and gloves). The toner should not be inhaled. This is dangerous to your health.
- Next you need to remove the cartridge. How to do this can be found in the instructions for your device model.
- Disassembly. It is necessary to unscrew the screws holding the side covers. Then, using a flat-head screwdriver, the metal clamps (arms) holding the photosensitive drum are pryed up and removed. Many products have different latches, so it’s worth remembering which side each one was installed on.
- Pulling out the drum. Do not touch it with your hands; it is better to use a soft, lint-free cloth, because... even a micro mark or scratch will degrade the print quality. The light-sensitive drum should be immediately removed to a dark place.
- Disassembling the cartridge is a rather difficult process, requiring the separation of the pins holding the two parts of the cartridge together. An awl is used for this.
- Cleaning the components of the product from toner residues and adhering debris. Use a napkin or brush. At the end, everything is carefully wiped with a lint-free cloth.
- Final assembly and installation of all printer parts. Then refueling takes place.
At each stage there is a possibility of damage to parts of the device. Therefore, we recommend contacting an authorized service center, where they will not only clean and refill the cartridge with the correct toner right at home or in the office, professionally, quickly and cheaply.
Cleaning the Image Drum
The image drum is an important element of a laser printer that can be easily damaged. Therefore, you should be extremely careful. After removing the photodrum, you need to move the shutter (located on the cartridge, it performs a protective function).
To clean the photo drum, you can not pull it out of the cartridge, but gradually rotate it as the visible part of the photo drum is cleaned. For cleaning use a dry lint-free cloth. The procedure is carried out in a place with dim light. It is strictly forbidden to use wet wipes or detergents for cleaning.
At an authorized service center, the procedure for cleaning the cartridge from remnants of old toner and other printer parts is already included in the inexpensive cartridge refilling service. Contact us, we do everything professionally and quickly.
When does the photoconductor need to be replaced?
- Carry out work in a dark place protected from sunlight. Direct rays of the sun contribute to premature wear of the photo layer.
- Do not use flammable products or sprays.
- Do not touch the working surface of the drum, magnetic roller or other parts of the cartridge/printer with your bare hands. Use rubber gloves.
- In case of direct contact with toner, it must be shaken off and washed off with cold water. Toner ink is a complex chemical that can cause an allergic reaction or adversely affect human health.
Quality of the paper used Type of toner (mechanical/chemical) and its quality Temperature and humidity in the room Foreign objects (paper clips and other office debris) getting into the middle of the printer