“Don’t you have the same one, but with mother-of-pearl buttons?
- Unfortunately no.- No? Will seek"
(film “The Diamond Arm”)
The clothes or interior items we buy do not always fully satisfy our desires. It seems like something is missing. I would like to change it here or there.
Now you can make something bright and unique yourself. And the easiest way is to decorate with rhinestones. These little decorative pieces are pros at transforming things.
How to properly glue rhinestones to fabric at home? Let's look at this in more detail.
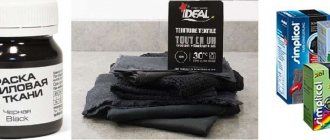
Choosing rhinestones
Mounting methods depend on the type of crystals. Therefore, in order to understand how to glue rhinestones, you need to divide the stones into types according to the principle of fixation on the fabric.
1.Cold fix rhinestones (NO hot fix)
- without glue on the backing. To glue the crystals to the surface, you must use specialized glue. Cold-fix rhinestones are used to decorate wedding and evening dresses, dance and stage costumes, swimsuits for fitness bikinis, rhythmic and artistic gymnastics, and acrobatics; shoes and bags, decorate phones, paintings and even cars.
2.Hot-melt rhinestones (hot fix).
They are used mainly for decorating fabrics. The base of the crystal is covered with a thin layer of glue. In order to fix them, you will need to use an iron, a steam generator or a special soldering iron. The glue melts under high temperature and fixes the rhinestones on the surface of the product.
Which rhinestones are more convenient and practical
Rhinestones are often used in sewing industries. You can also attach these stones to your clothes yourself. This way you can save money and get satisfaction from creativity. Based on the type of fastening to fabric, rhinestones are divided into two types:
- hot fix;
- cold fixation.
Each of these types of crystals has its own advantages and disadvantages. Cold fix rhinestones are attached to the fabric using special glue. They have a flat, smooth back surface. Glue is applied to it, and then the rhinestones are placed on the fabric. After several hours, the rhinestones adhere securely to the fabric. Cold-fix rhinestones are cheaper than hot-fix rhinestones. They can be used with different types of materials, especially thin and mesh ones.
There is already glue on the back of the thermal rhinestone. When heated, the substrate of such a crystal melts, and after cooling it is securely fixed to the material. This saves time if you need to attach a large number of rhinestones to clothing. Also, you will not have problems with applying glue: excess glue will not come out from under the crystals.
Before gluing thermal rhinestones at home, check whether high temperatures can be applied to your material. It is not recommended to attach such crystals to the following surfaces: plastic, vinyl, leather. You should also be careful when working with thin fabric.
Preparatory stage
Three factors play an important role in gluing rhinestones - good mood, inspiration and patience. But you also need to prepare thoroughly:
1. Idea. Think carefully about your future drawing or make a sketch on paper. A life-size sketch can be attached to the surface and adjusted to size.
2.Choose rhinestones that suit the size, color and style.
3. Fabric preparation. Lay out and gently smooth the base fabric. An important point - if the fabric is thin, it is better to place a sheet of paper between the layers of clothing in advance. Otherwise, the adhesive may penetrate too deeply and stick to the clothes.
4.Draw on the fabric with a pencil, tailor’s chalk, or a special disappearing marker the outline of the pattern according to which you are going to glue the rhinestones.
5. Arrange the rhinestones according to this pattern for visual perception.
You are ready? Let's start work.
Gluing with adhesive tape
This method is used if you need to transfer a large pattern, which would be difficult and time-consuming to attach one stone at a time. The process occurs in several steps:
- The rhinestones are laid out on adhesive tape with the adhesive side up;
- The film is transferred to clothing and then ironed;
- The film is removed.
You might be interested in Interesting and simple patterns for sewing boxes
Scotch film helps transfer a large picture
This method saves effort and time, but it has a significant disadvantage: the stones are fixed in a large group, some may not grab and come off.
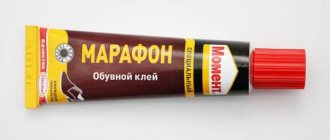
Method one - glue
The glue for fixing rhinestones must be specialized. This will ensure that the crystals are securely attached.
We recommend:
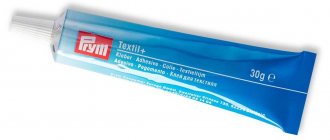
- E6000 adhesive from Eclectic Products.
Ideal for gluing rhinestones to any fabric. Does not destroy the back foil surface of the rhinestones. The fabric retains its elasticity after use. Does not leave marks, does not crumble in the cold. Waterproof – can be used in fresh and salt water once fully cured; Machine washable. The glue dries in 3-4 hours; it is recommended to use the product no earlier than after 24 hours. After gluing, excess glue around the rhinestones can be easily removed. Does not contain ethyl alcohol!
- Crystal Hobby Glue.
White glue, alcohol based. After drying, it becomes transparent, the crystals are firmly fixed to the fabric. Products with this type of glue must not be soaked. Wash at 30C. The tube is equipped with a convenient spout.
To use special glue, craftsmen have different technologies.
1. Glue on the crystal.
It is enough to drop a small amount of glue onto the stone and quickly attach the crystal to the desired place. To set, hold it a little, pressing lightly on it.
2. Glue on the fabric.
Squeeze glue along the design lines. Then, using tweezers or an applicator, place the rhinestones onto the glue and press lightly. The glue dries slowly, so you have time to complete all the work.
When attaching large stones, do not forget to apply glue along their edges. The larger and heavier the stone, the better its edges must be processed.
How to glue rhinestones onto fabric at home?
Buying rhinestones and glue to work with them will not be difficult. In any handicraft store you can purchase artificial stones of various quality and price, which will help you create a unique image. And the decor itself is not a complicated process:
1. On the fabric, preferably washed in advance, the outline of the design is applied with a special pencil. Place hard cardboard or a special mat under the working surface. This will help avoid the glue from soaking other surfaces of the product and gluing the material together. If the fabric is elastic, you should stretch it slightly and secure it, you can use a hoop.
2. A small drop of glue is applied to the outline, so that the adhesive does not extend beyond the rhinestone. A small amount of glue is also bad: the rhinestones will fall off while using the item. Then wait a few seconds for the glue to saturate the fabric.
All fabrics are different in density, so the amount of glue will differ for different textiles.
3. Rhinestones are glued one at a time. It is not recommended to handle them with your hands. For work, it is better to use tweezers or a special wax stick, which will allow you to more accurately place the rhinestone in the center of the glue drop.
4. Then the rhinestone is pressed tightly for a few seconds so that it has time to fix on the fabric.
Experienced needlewomen apply glue to the rhinestone and then glue it to the fabric. This method is not suitable for beginners. The decor will be sloppy and will spoil the item rather than give it exclusivity.
Method two - hot melt
Thermal rhinestones attach best to medium-weight fabrics - cotton, linen, wool. The glue easily penetrates the fibers and binds them to the back of the jewelry.
To fix thermal rhinestones you will need the following tools:
- Soldering iron or hot-melt applicator
It is convenient due to its compactness: you can simply hold the product in your hands during operation. It has a set of attachments that allows you to work with rhinestones of different sizes. Thanks to them, the soldering iron glues the crystal locally, exclusively at the point of contact of the fabric with the stone. Therefore, it is ideal for working in hard-to-reach areas of clothing or shoes.
- Iron. An ordinary household appliance or a small iron for needlework.
There are also several gluing technologies:
1. The stone is placed on the fabric with the thermal base down and the soldering iron is pressed against it. This option is convenient when you decide to first lay out the design with pebbles, and then attach them with a thermal applicator.
2. The rhinestones are laid out with the backing up on the table, heated with a soldering iron and the rhinestone is transferred to the product. It is important to experimentally select the time for gluing. You should start with 4-7 seconds.
3.To glue rhinestones onto fabric with an iron, cover the pattern with a sheet of paper, select the “cotton” temperature setting (160 – 180C) and slowly iron for 20-30 seconds. You need to apply a little pressure on the iron to increase the adhesion of the pattern to the surface of the clothing.
Using any technique or method, allow the glue to dry for 24 hours without moving the item from the surface on which you glued the crystals.
How to glue hot fix rhinestones
In order to attach self-adhesive rhinestones, you will need an iron or a soldering iron for stones. You can also fix them with a heat gun or glue.
To attach such stones with an iron, follow these steps:
- Place your clothes on a flat surface or ironing board.
- On the costume, draw a sketch with a pencil according to which you will glue the stones.
- Place adhesive-backed rhinestones on top of the design.
- Before gluing thermal rhinestones to fabric with an iron, place a sheet of paper or a cotton napkin on them that does not fade.
- Heat the iron and place it on a piece of paper or fabric. First set the minimum temperature. Then it should be increased a little. The iron should be held in this position for 10-12 seconds.
In order to firmly fix hot-melt rhinestones, you must carefully monitor the temperature conditions and the level of pressure on the stones.
Cleaning fabric and rhinestones from glue residues
If suddenly a pebble comes off, you glue it unsuccessfully, or you accidentally stain the fabric with glue, don’t worry! There are ways to remove such glue stains.
Strong-hold adhesive is used to glue rhinestones. To avoid deformation of the fabric, try to first remove the rhinestones along with the layer of glue (except E6000 glue).
1.Saturate the fabric from the inside out with alcohol - this will weaken the adhesion of the glue to the material. After such impregnation, it is enough to pry the stone with something sharp, trying to pick up the layer of glue.
2. Another gentle method is freezing. The freezer compartment of a regular refrigerator is suitable for this. The structure of thermoactive adhesive is destroyed as a result of freezing. To do this, the product must be wrapped in plastic, placed in the freezer and left for 4-5 hours. Then take out and peel off the rhinestones. Usually they come off along with a layer of glue.
3. Chemical action on the glue with acetone or solvent. Apply the product to the inside of the product with a clean cotton pad. At this time, blot the front side with napkins.
4.Wipe the stain with turpentine a few minutes after application. This product can be used on both the back and front sides. Remove the stain carefully, without rubbing the glue over clean areas of the fabric. Residues of glue after the action of the solvent can be easily removed with a regular eraser.
To prevent the product being processed from deteriorating, precautions must be taken. Since many solvents discolor fabrics, all chemicals should be tested on inconspicuous areas of the product.
Decoration with Swarovski crystals
Swarovski crystals are known all over the world because they are of high quality. However, in order not to spoil a thing decorated with such expensive decor, it must be applied correctly. Both clothes and objects are decorated with crystals. For hard surfaces, choose stones that have a flat side.
First, remove the fat layer from the surface on which the crystals are planned to be located. Epoxy glue will securely fix the pebbles. The adhesive composition is applied to the fabric, the crystal is quickly placed on it and fixed with pressure.
Adhesive rhinestones are placed on a dress or other clothing and ironed from the inside out.
Caring for updated things
Products with rhinestones certainly require careful care and delicate handling during washing and ironing:
- Do not soak things;
- Hand wash only at low temperatures;
- Washing with liquid detergents for delicate fabrics, without using conditioner;
- When ironing, avoid direct contact of the hot surface of the iron with decorated areas; iron through gauze or thin cotton.
By gluing rhinestones to fabric, you not only update your favorite piece of clothing, but also enjoy the process.
Adhesive rhinestones VIVA12
Hot-melt rhinestones VIVA12
Adhesive rhinestones MAXIMA
We use thermal rhinestones
This type of decor is best suited if you really don’t want to think about how to glue rhinestones onto clothes. Their lower surface is covered with a special compound, which, when heated, tightly connects the shiny pebbles to the fabric.
- Rhinestones are placed on things in the required sequence.
- Then the product is covered with gauze or other fabric that can withstand heat well.
- On top of it, carefully, trying not to move the rhinestones, apply an iron heated at a suitable temperature.
The connection is quite strong; the glitter can only be torn off with physical force. For this reason, decorated items should not be washed in a machine - there is a high chance of ruining the decor itself and damaging the parts of the washing machine with small elements. Rhinestones on clothes usually survive careful hand washing without any consequences.
Tips for a needlewoman
In the old days they told me to learn to embroider on matting, and then on scoured cloth. A similar recommendation is addressed to novice decorators with rhinestones: by practicing on not the best items in your wardrobe, you can understand the principle of working with decoration and find out which company supplies the best material.
Be sure to take into account the presence of other accessories on clothing : zippers and buttons may interfere with the uniform treatment of the surface with rhinestones by the iron.
Advice! Places with small surfaces that are difficult to reach with an iron can be decorated with a soldering iron, gluing each part separately. Don't know how or are afraid to work with a soldering iron? You can use a candle and tweezers: after heating each rhinestone on the fire, quickly and carefully glue it. The method is also good for fabrics that do not like high temperatures.
Having mastered pasting clothes with thermal rhinestones, you can try decorating shoes - for example, masking scuff marks on your favorite but slightly worn boots. For this:
- A drawing is applied with a gel pen;
- Before gluing the decor, the trace of the handle is carefully wiped off with a cotton swab and alcohol or acetone. Acetone spread over the surface of the skin is fraught with indelible stains !
- Using a soldering iron or a candle, each element of the pattern is glued.
Will the skin suffer from such manipulations? No - a fairly coarse material can survive heating of about 180 degrees. Only the varnished surface raises doubts.
DIY beads from scrap materials
How to make a belt with your own hands from fabric?
Using the applicator
There are fabrics that cannot stand the touch of an iron. For example, velvet. This is where a convenient soldering iron applicator with various attachments will come to the rescue. The attachments vary depending on the size of the rhinestone and allow you to heat the jewelry precisely and evenly.
The device itself is small and easy to use. The applicator will be indispensable for gluing individual hot-melt adhesive rhinestones. The device must be held still to accurately place the crystal on the fabric and ensure excellent results.
We recommend: How to hang a picture on the wall without drilling
There are vacuum models of applicators that are equipped with a special pump; it draws in and holds the rhinestones.
Alternative to glue
You can decorate not only with glue. There are other types of rhinestones for which you do not need to purchase special adhesives.
Thermal rhinestones
They can be glued by heating with an iron or a special applicator resembling a soldering iron. The glue that is applied to the flat surface of the rhinestone melts when heated and becomes viscous, which allows them to be attached to the material.
Sew-on
For some fabrics these embellishments are more suitable. On thin and fleecy materials, rhinestones that are attached with glue do not hold tightly enough. For this type of textile, sew-on rhinestones are indispensable. The advantage is that you can always change the rhinestone to another place without spoiling the material.
The disadvantage is that it is more labor-intensive.
To make something decorated with artificial stones look expensive, you need to choose high-quality rhinestones. They undoubtedly have a higher cost, but they look chic for a long time.
How to sew a belt to trousers
How to sew gloves from knitwear
LiveInternetLiveInternet
Monday, January 20, 2014 18:41 + to quote book Many times I have had the opportunity to explain how a costume for gymnasts and acrobats is sewn. There are ready-made costumes in this diary, but they are so complex that posting a detailed MK on them would only scare people. But you need to start with something simpler. I once sent my daughter to gymnastics and made her first training suit from a simple men’s T-shirt. Since then, a lot of water has passed under the bridge, the experience and complexity of the costumes have increased many times over. I want to share with beginners why step on a rake when you can use the experience of others. We’ll agree right away, I’ll write in detail step by step so that no unnecessary questions arise. HOW TO TAKE MEASUREMENTS: You need to undress your subject for measurement down to their underpants. The less clothes he wears, the greater the likelihood that he will not have to redo and adjust the finished suit. And this is not good. You need to unsolder the rhinestones around the seams, try to match the details of the appliqués when suturing them, the pattern gets lost and all that. Tie an elastic band or cord loosely at your waist. The person being measured must stand straight, do not turn his head after your actions, do not bend, do not bend. Ask her/him to straighten her back slightly, exhale and relax. Girls especially like to suck in their stomachs to appear slimmer. This is of no use. We will make all the allowances and allowances for a good fit of the suit on the figure during the process of creating the pattern, but for now we measure the exact dimensions of the figure in its pure form. I take measurements for a sports swimsuit a little differently than for regular clothes. 1. Shoulder width is measured from the back from the low point of one shoulder to the other. The centimeter tape should lie directly on the shoulders. 2. Shoulder length from the low point to the base of the neck without fanaticism. It’s better to let the shoulder be narrower and the neckline wider, so that it later “strangles” the athlete. 3. We measure the neck circumference not at the base of the neck, but in its middle, where the stand-up collar will end. 4. We measure the width of the back below the shoulders, 6-8 cm between the hands, without running over the hands. 5. We also measure the width of the front 6. Chest circumference around the figure. Make sure that the measuring tape on the back does not sag. 7. Remove the waist circumference directly from the elastic band tied at the waist. 8. Body circumference along the bottom edge of the panties along the side lines. 9. Vertical circumference of the body. Pass a measuring tape between the legs and connect at the high point of the shoulder at the base of the neck. 10. Arm circumference at the armpit. 11. Wrist circumference. 12. Sleeve length. There is no need to bend your arm, let it hang along your body. 13. Front length from the high point of the shoulder to the elastic at the waist. 14. Back length from the high point of the shoulder to the elastic at the waist. If these two measurements differ little (the figure is straight and not slouched), you can take a measurement from the back waist over the shoulder to the front waist and divide the measurement in half. Measurements 13 and 14 will be the same. 15. Width of panties at the back. Mentally divide the distance from the bottom of the panties on the sides to the very bottom line of the panties and measure so that the judges at competitions do not later reduce the mark for “incorrect costume.” The butt should be closed. 16. At the same level, measure the width of the panties in front. 17. Side seam length to waist. Please raise your hand. I place the measuring tape with the 0 point in the armpit, lower my hand, press the tape and measure to the elastic band at the waist line. The armhole of our future suit should fit tightly around the arm, otherwise when moving the suit will be pulled away from the body, and this is unsightly and inconvenient for an athlete to work with. 18. From the elastic at the waist along the side, measure the height of the panties. For babies I take 7-8 cm. For older ones from 150 cm tall and above 9-10 cm. 19. The length of the skirt at the back from the elastic at the waist along the protruding part of the buttock to its bottom, where the leg begins. 20. We measure the length of the front skirt along the middle of the figure from the elastic band to the bottom edge of the panties. To avoid mistakes, ask your child to hold some thick book between his legs and measure to its top edge. 21. Measure the circumference of your hips at the most protruding points of your buttocks. This should be the largest volume below the waist. 22. Chest height from the high point of the shoulder to the protruding point of the chest. 23. Center of the chest - the distance between the protruding points of the breasts. For babies, the last two measurements are taken from the nipples. I always mark these points. as controls, so that when marking the pattern on the suit, you don’t “expose” your breasts. 24. Figure girth 4-5 cm (in adults up to 6-7 cm) below the waist. It is customary for gymnasts to sew their skirts below the waist. 25. Sleeve hem. Insert a book or ruler under your arm tightly and measure the distance from the low point of your shoulder to its upper edge. HOW TO BUILD A PATTERN: Sports suits are sewn from very elastic fabrics (suplex - in common parlance - lycra). Moreover, such fabrics stretch in both directions very well. And stretch mesh too. Therefore, “so that the suit fits,” when creating a pattern, I make allowances from the measurements for width and length. I immediately take two sheets of paper, place them on top of each other and bend them in half lengthwise. The center line of the pattern runs along the fold. Perpendicular to the fold, I set aside the width of the shoulders minus 1 cm divided by 2. From the extreme point to the fold, I set aside the length of the shoulder, marking the high point of the shoulder. From the extreme point downwards I measure 3-5 cm (depending on the size of the suit) and bevel the shoulder line. From the high point of the shoulder to the 3-5 cm mark I draw a segment Shoulder length minus 0.5 cm. From the beginning of the construction along the fold I measure the vertical girth of the body minus 5 cm divided by 2. From the bottom point perpendicular to the fold I put 2.5-2.75 cm for babies, 3 cm for adults. I make the neckline: on the back for little ones 1.5 cm, for adults 2-2.5 cm, in the front 5 cm and for adults no more than 7 cm. I draw the neck lines by eye, smoothly rounding them. From the high point of the shoulder down, I measure 14 - 1 cm and through this point I draw a perpendicular to the fold. I measure on it (measurement 7 - 5 cm): 4. If measurements 13 and 14 are different, then we build a waist line for the front. From the high point of the shoulder down, measure 13 minus 1 cm and draw the front waist line. as in the photo. From the point of the waist up, measure measurement 17, draw a perpendicular through it to the fold length (measurement 6-4 (5) cm): 4. And from the waist to the resulting point, draw a segment measuring 17 in length. The result is the armpit point. Approximately halfway between this point and the low point of the shoulder, draw a perpendicular to the fold. Place half the width of the back and half the width of the front on it. Roundly connect the armhole lines of the back and front. Down from the waist line, take measurement 18. Draw a perpendicular length from it (measurement 8-5 cm): 4. Connect the waist and bottom of the panties along the side line, measure 18. Measure the width of the panties divided by two in front and back, as shown in the photo. Connect the leg girth lines smoothly. Mark the sewing line for the skirt on the pattern below the waist. We cut out the pattern along the lines of the back. We put one piece aside, and on the second we cut out the neckline, armhole and panties along the lines of the front pattern. On the front part we mark the protruding points of the chest using measurements 22 and 23. I build a sleeve for girls that is symmetrical along the middle line. I fold the paper in half and add a sleeve length of +1 cm along the fold. I put it down perpendicular to the fold (measurement 11 - 1.5 cm): 2. From the top point along the fold I measure a measurement of 25 minus 1-1.5 cm and through it I draw a perpendicular with the length of half of the measurement 10. I connect the points of the wrist and the armpit and slightly (no more than 1 cm) deepen the seam line inward in the lower third part of the sleeve. I draw a line for the cuff of the sleeve. In the upper part we bend it outward, towards the armpit, inside the pattern. If you don't trust your eye, connect the dots with a straight line and divide it into 4 segments. From the top dividing point, draw a perpendicular 1.5 cm up, from the bottom - down 1.5 cm. And draw a line through the 1.5 cm points and the middle point of dividing into segments. Skirt. The classic skirt on the swimsuit hugs your figure. We build it as a straight line, and then, closing the darts, we make it wider towards the bottom. The width of the pattern is the circumference of the hips (MEASURE 21) divided in half plus 0.5 cm. From the waist down, measure half the length of the back to the waist and draw a line across the skirt. Using this line, we will build grooves. When everything is built, measure 4-5 cm from the waist down (or the distance you chose) and mark the stitching line for the skirt, cut off the top of the skirt along this line. We cut the pattern along the side line, cut off the side undercut. We cut out recesses on the back part and on the front part. We cut the skirt parts from the corners of the darts along to the bottom line and connect the darts on the parts end-to-end. 1.
This pattern can be modified to suit any style. Nowadays it is fashionable to make two-layer skirts and flared skirts are often used, especially for babies. I will make the “sun” in two layers. The bottom layer is according to measurements 19 and 20, and the top one is 3 cm shorter. We take measurement 24, divide it by 3.14 and get the diameter, to construct the stitching line for the skirt, we complete the bottom line according to measurements 19 and 20. Even now, instead of a skirt, they sew on details like a mold, cut in a spiral, or with petals, or triangles. Stand-up collar (if planned) length - measure 3 +1.5 cm, width at your discretion (I usually make it 3 cm in finished form) Now you need to clearly draw the style of the swimsuit, combine all the shaped lines of the front and back parts and transfer the shaped ones lines on the pattern, indicate the color and fabric of each part. Also, think about the order in which the fabric parts will be connected and on which sides of these parts, when cutting, seam allowances should be made. To ensure that the suit does not lose its shape and elasticity, the parts are overlapped with a seam that allows the fabric to stretch unhindered. We mark the lines on the pattern that will have an allowance with a tick. 3.
4. Cut the patterns into pieces along the shaped lines. If the model is supposed to have a lot of small details or narrow stripes, then first cut a solid base from flesh mesh for the front or back, and then cut the pattern into parts for cutting the fabric. 4.
We choose the fabric and mesh for sewing (actually this is done at the very beginning). 1. 2. 3. I would like to offer you addresses where you can buy materials for swimsuits. Here is an excellent Italian matte supplex and flesh-colored Italian mesh of excellent quality https://blesk-straz.ru/ More stores in Moscow and part-time online stores https://www.estadance.su/tradinghouse/fabrics and also https:/ /www.estadance.ru/dostavka-v-regiony.html I have been buying fabrics and mesh for suits in these stores for many years. I trace the details of the pattern onto the fabric with a gel pen in a color close to the fabric. I check and mark the seam allowances and cut out the cut details. 17. 18. 19. 20.
21. 22.
23. 24. 25. 26. 27. 28. 29.
30.
We also cut a strip of flesh-colored mesh 2 cm wide to process the teardrop cutout on the back. 18. If you do not want to make a stand-up collar, then to process the neckline we cut the same strip of mesh 3 cm wide. We assemble the front and back parts of the swimsuit. We cut off the parts with needles with a ring at the end so that we can immediately sew on the machine without interference. Be sure to check the size and symmetry of the assembled parts; to do this, fold the parts in half lengthwise. On the back we cut out a droplet 12 - 15 cm long. 12.
3. 4. 5. 6.
When both halves of the suit are pinned together, we combine the side lines and check the lengths of the parts of different colors to ensure they match in length, so that when stitching everything matches exactly. We select threads according to the colors of the parts. I sew such suits only with lavsan threads, they are very durable (and this is important for a tracksuit): 45l or 55l. 10. 11. 12. 13. We sew the parts of the costume one by one, each time changing the top threads to the desired color. You can use a flesh thread for all the details, especially since we now use colors that are close to flesh in color for sewing. On the machine we place a zigzag seam with a width of 3.5 - 4 mm, a stitch length of 1.5 - 2 mm. In fact, it’s better to choose the length and width of the seam yourself using scraps, since all machines have their own settings. I use only machine needles special for stretch fabrics. The packaging says TWIN STRETCH, STRETCH or SUPER STRETCH. 12.
13. The parts are assembled in layers one on top of the other. First we sew the first part. Immediately cut off the seam allowances close to the stitching. 14.
15. Then we adjust the second part, cut off the allowance, then the next one, and so on. 19.20.
21.
22. 23.
To make it more convenient to continue sewing, you can iron the parts. Biflex can withstand fairly high heating temperatures. I iron with steam on almost three points. BUT! Be sure to give the iron time to normalize the heating temperature for about 5-10 minutes after plugging it in. And try it on a scrap piece to be sure. When the parts are assembled, I mark the sewing line for the skirt on the front side. 20.
Decorations. You can decorate your suit with appliqués made of fabric in contrasting colors, or shiny fabric with a holographic effect. I use shiny fabrics only based on supplex. The main thing is to check that the fabric does not crawl at the cut, like torn tights. Applications are made flat, and now voluminous. And we will do just that. In addition, you can paint on fabric with fabric paints. I am quite satisfied with the DECOLA contours made in Russia (our St. Petersburg ones), they are inexpensive and adhere perfectly to the supplex. In addition, there are French JAVANA, MARABU and VIVA paints (they have simple contours, contours and paints with glitter and contours for creating pearls) made in Germany, but they are much more expensive. We use them too. They also make draped parts from mesh and guipure - stretch, etc. We cut out flowers and leaves from supplex with a hologram. We pin one part of the flower onto the shoulder and sew it with a zigzag, and stretch the second and melt the edges on the candle so that they become wavy. We sew the second flower along the centers of the petals with straight lines. For applique threads I take the color of the supplex base, here the base is black. 27. 28. 29.
30.
31.
32. 33. 28.
Suppleflex with holographic printing is strictly forbidden to be ironed!!! Therefore, after grinding the parts with appliqués, we do not iron them, no matter what the result is. For now, I’m processing the details separately on the droplet on the back. The method of processing using the “rulik” technique is to sew a strip of mesh on the wrong side. then we fold the free cut, bend it to the front side and stitch it from the front side along the edge. I use the seam under the letter D - triple zigzag stitch length 2 mm. 30. 31.
Finishing the decor. My pattern goes from the flower along the body mesh to the shoulder and then along the back. That's why I sew this shoulder. When connecting meshes I use only a 5mm wide zigzag, the stitch length is about 2mm. 32.
33.
We lay down newspaper and pin it to the base. I usually draw on an ironing board, and I also have a piece of linoleum on my work table, so I simply secure it with needles and rings. I also pin the part for coloring on top so that it does not move out of place. I'm making a drawing. I try not to make the lines too thick. If there is too much paint, blot it with napkins or toilet paper. Then we arrange the droplets - pearls - and break off the fabric part. While we are painting, the paint begins to dry out, so we try to remove the part from the paper faster, otherwise it will take a long time to peel the paper off the already dried parts. That’s why we attach the newspaper to the table, otherwise it will rise along with the fabric and can stain the suit. I hang the patterned pieces suspended on a rope with clothespins to dry. If the parts are large, you may need help. If you do get a part of the costume dirty (this happens), feel free to wash the entire part with soap, dry it and start drawing again. At the same time we draw on the sleeve. 37. 38.
39.
40. 41. While the paint is drying, we will process the bottom of the skirts. Each with its own color in a tight zigzag pattern. When making a seam, we try to stretch the mesh to create a shuttlecock along the edge. If the skirts are cut from two parts, I sew the side seams first. 41. 42.
43.
44. Well, now we’ve come to decorating the suit with rhinestones. There's a lot to talk about here. Rhinestones come in different qualities and manufacturers. They are made in China, Korea, the Czech Republic, and Austria from plastic and glass of different colors. And some are coated with a special compound, causing them to glow with the colors of the rainbow. The highest quality and (alas) expensive Swarovski rhinestones made in Austria. But they are worth it, the quality is excellent. They are made from optical crystal and even cubic zirconia. There are 14 edges on them of different sizes. which gives a very bright shine. Why am I persuading you? Let me just say that I only use Swarovski. There are some that are placed on a special glue, and there are rhinestones with a ready-made glue backing, which are glued with a special applicator; it heats the rhinestones to 170 degrees, the glue melts and the rhinestone sticks to the fabric. All these years I have been confused by the question, why do most craftsmen use rhinestones that need to be glued? They often bring swimsuits made by someone else and ask them to fix them, on which the rhinestones have come off. Washing such suits is a big risk, the rhinestones fall off. After the competition, children crawl on the carpet and collect a “harvest” of fallen rhinestones. The rhinestones themselves become dirty with glue during the gluing process and lose their bright shine. I don't understand!!! But you probably already understood that I only use hot-fix rhinestones (HOTFIX) article 2038 (it used to be 2028). They are a little more expensive, but reliable and bright. A suit with them can be easily washed without damage. I often ask my girls to show me their old swimsuit to check its condition. If the suit was washed carefully in warm water up to 40 degrees, not rubbed too hard and not soaked overnight (as we like to do), then in 3-5 years no more than 10-20 pieces fall off the suit - this is despite the fact that the suit is from 1500 to 4000 pieces. Well, draw your own conclusions. I long ago found an online store that deals only with Swarovski products and delivers them directly from Austria. Their prices are the lowest for these rhinestones and I really like the service, you can pay with a card via the Internet and delivery is not delayed. And there are discounts. And you can order any quantity. And they have glue and applicators and large sew-on rhinestones too. I recommend. https://www.sw-strazy.ru/ For work, I usually order whole packages - 1440 pieces in each gross, but you can also have 20, 50, 100, etc. Yes, please note that when ordering, you need to print not the number of packages, but the number of pieces. Because the first time I got confused, it’s good that they always call back and clarify the order. I bought myself a color card, it’s very convenient, you select colors and sizes, and then order. By the way, they can bring you something to order; they have deliveries often. I mainly use size SS16 - the most convenient, sometimes in order to lay out the second row I use a smaller size - SS12, or a larger size - SS20. I tried 48 and they are big, but I realized that if you want to put large ones, then it’s better to take sewn-on 10 mm ones. And now I don’t take hot fix anymore than SS30. 1.
2. 3. 4.
5.
6. 7.
The applicator has several nozzles for different sizes of rhinestones; there are flat ones for the largest ones, which are best heated from the wrong side. The tips are not labeled, I select them by size myself. I just insert the rhinestone into the recess. it should be flush with the edge of the notch. Before gluing the rhinestones, I place the paper base from the self-adhesive film on the table, glossy side up, the part with the glued rhinestones comes off without a trace. 12.
3. 4. How are rhinestones glued? According to everyone. I like to glue the seams connecting the pieces, sometimes in one row, sometimes in two rows in a checkerboard pattern. It depends on how much the swimsuit is ordered for. You can glue rhinestones scattered if you have colors that match the fabric. Can be glued in groups. as accents to highlight certain elements. 7. 8. 9. The bottom of the sleeves is a cut, I work it in two or even three rows in a checkerboard pattern. This treatment prevents the cut from twisting and stretching unnecessarily, but also does not limit the elasticity of the fabric. 9.
10.
When I glue rhinestones in a row, I leave gaps as wide as the rhinestones themselves to maintain the elasticity of the costume. Stones glued end to end create inconvenience for the athlete; it feels like there are cords attached to the suit that do not stretch and interfere with the performance. I’m sewing a suit for a doll as a sample, so to save money I’ll glue the rhinestones on scattered. The sticking process itself: select the step (the distance between the rhinestones), which also depends on the cost of the costume, the step is no less than 2.5 cm and no more than 5 cm. Lay out the rhinestones in a small area, if you like everything, start gluing. We place the applicator on the rhinestone vertically and count to five, lift the applicator and press the rhinestone to the fabric with something so as not to literally burn your fingers two or three times. I use a ruler. If you have a thimble, you can use it. Experience shows that pressing the rhinestone tightly while heating is not so important; it is more important to press it after, when it cools down, it sticks more firmly. Do not glue rhinestones close to the seam lines, it will be inconvenient to sew the parts together, you will break the needles, and the seam will not turn out smooth. I add rhinestones around the seams, if necessary, on the finished swimsuit. 17. 18. 19. 20.
21. 22.
23.
24. When I sew fabric pieces, I use stitch G on the orange circle. I cut off excess allowances close to the line. Sew the second shoulder, sew the sleeves into the open armhole, sew the side seams and sleeves in one line. If there is alternately fabric or mesh along the seam line, I raise the needle, rearrange the adjusters and continue the seam continuously. This is if you don’t need to change the threads. And if necessary, I change the threads. Then I tie the ends of threads of different colors. so that they do not come out on the front side. 23. 24.
25. 26. 27. 28.
We process the neck. We sew the short edges of the stand and fold it slightly onto the long side by 5-7 mm. I sew it with a straight triple orange A seam. I cut the allowances to 1-2 mm. I turn it right side out. I combine the sections of the stand and neckline on the front side (if you don’t have experience, pin the stand along the neckline) and sew it on a machine. 26.
27. 28.
Be sure to check how the side lines look and how the parts fit together. If necessary, add rhinestones. Glue the rhinestone onto the stand. 30. 31.
32. 33.
We combine the skirts with each other and pin them to the swimsuit with the cut down along the stitching line. Attaching the skirt. I often use a triple zigzag stitch under the letter D, it's easier to unravel if necessary (Or an orange G). 33. 34. 35. 36. 38. 39. I use shirt snaps on swimsuits. 42.
43. 44. 45. Trying on. 45. 46.
47.
Well, it was precisely for this moment that I sewed Varenka. That's it, I'm good to go. And I wish you good luck! If you have any questions, write.
| Categories: | sewing suits for sports Suits for sports (Patterns) |
Tags:
leotard for rhythmic gymnastics
Cited 191 times Liked by: 17 users
Like share
0
Like
- 17
I liked the post - 191
Quoted - 4
Saved
- 191
Add to quote book - 4
Save to links
Liked17
0
Determining the optimal size of rhinestones
The abundance of stones gives stunning shine, and the combination of rhinestones of various sizes further enhances this effect. How to stick rhinestones on a leotard for rhythmic gymnastics, depending on this parameter?
Important! The optimal size of stones depends on the size of the swimsuit. For small ones, ss16 is quite suitable, and for large ones - ss20.
Small stones are best suited for laying out patterns and designs on an athlete's costume. But to accentuate individual parts, it is better to use large rhinestones. For example, flowers or brooches are best made using stones with a diameter of ss30 or sew-on stones.
Important! The use of rhinestones of various sizes will enhance the play of light and shine of a gymnastics leotard, making it look more versatile and sophisticated.