For almost five centuries, humanity has been using such a plumbing invention as the toilet. Since then, they have undergone many changes in shape, design, and design solutions. But one thing has remained the same: the toilet has firmly entered into a person’s everyday life, although it is not customary to talk about it. Statistically, a person spends about 6-7 months over a seventy-year period of life in the toilet. And these wonderful six months of life can be ruined by a dancing and swaying toilet.
These data are given for a reason; they indicate that the toilet plumbing elements: toilet bowl, flush system and flush barrel locking system are actively used every day. When used in this way, the strength of the toilet mountings undergoes significant stress, resulting in a wobbly toilet. Sitting on it is not very comfortable; in addition, the risk of breaking it increases, and the water supply and drainage connections become loose. The result, leaks, flooding.
If it's a concrete floor
How to fix the toilet so that it does not wobble on uneven concrete? In the case of this reason, it will be more difficult to eliminate the problem of a “dancing” toilet. First you need to completely dismantle it. This is done as follows:
- the water supply hose is disconnected;
- the drain barrel is removed;
- the sewer pipe is disconnected;
- fasteners are unscrewed.
The procedure for attaching components to the toilet, connecting to the sewerage system and water supply
The procedure for attaching components to the toilet after installing it on a tiled floor. The process consists of the following steps:
- A corrugated pipe is installed through which the product will be connected to the sewer pipe. This element prevents the spread of stench in the apartment, so it is important to use high-quality corrugation. During installation, the pipe must be supported with both hands, so outside help will be required.
- Using bolts and other parts included in the kit, the drain tank is secured.
- The plumbing is connected to the water supply.
The procedure for connecting to the sewer depends on the design of the toilet, in particular, on the type of outlet:
- models with direct release are most common. Despite the fact that they can only be mounted on a vertical riser at a certain angle, the procedure itself is quite simple. Connection to the sewer system is carried out using a sealing or eccentric collar;
- Stand-up toilets are also quite common. Their main advantage is the ability to install at a minimum distance from the wall and at any angle. Before installing the plumbing, you will need to install a flange with a lock, then you need to connect the sewer pipeline to it and install the toilet on top;
- mounting a model with a side outlet is similar to installing a product with a direct outlet, but it is important to maintain a certain angle. The procedure uses an eccentric or a sealing coupling.
In most cases, a corrugation is used to connect directly to the sewer outlet. It allows you not only to adjust the distance between the toilet and the sewer hole, but also to change the angle of inclination.
Due to the presence of a membrane inside the corrugated pipe, a tight connection is achieved, but silicone sealant is often additionally used for waterproofing.
When installing the corrugation, it is important to prevent it from sagging, otherwise liquid will stagnate in it, and blockages will often form.
Connections to the water supply also vary in type, depending on the design of the toilet:
- if there is an internal water supply system, a flexible hose or a special copper tube is used for connection. As a rule, when sold, such elements come complete with parts for fastening to the floor, but it is advisable to clarify this point with a consultant separately. Sometimes it happens that the tap thread and the thread on the copper tube do not match, then an adapter and sealing elements will be required;
- With an external water supply system, the connection is easiest. Typically, no additional parts are required.
Regardless of the method of connecting to the water supply, all connections should be coated with special sealants for plumbing fixtures to ensure waterproofing and minimize the risk of leakage.
Securing the toilet to a concrete floor
It is much more difficult to fix the problem if the flooring has a concrete base. In old buildings from the USSR, the devices were installed on concrete floors with embedded boards. In this case, to improve fastening, perform the following steps:
- Shut off the water supply to the toilet.
- Dismantle the drain tank.
- Disconnect the sewer drain pipe.
- Remove the bolts securing the plumbing fixtures to the floor.
Important! Further work is carried out carefully so as not to damage the fragile material of the old toilet.
To eliminate the damage, the old backing board is removed and new lumber of considerable thickness is laid in its place. You can simply clear this place and concrete it.
After the concrete has hardened, plumbing installation is carried out in the following order:
- Having placed the toilet in the desired area, mark the points where it will be attached.
- The plumbing fixtures are removed and holes are made in the marked area using a hammer drill.
- The device is secured with bolts.
- Reinstall the drain tank.
- The plumbing is connected to the sewer pipes using a corrugated line.
Root Causes of a Swinging Toilet
There are only three reasons that over time lead to deterioration of stability and unexpected dances of the toilet bowl:
- Irregularities of surfaces when comparing them. (floor, toilet base)
- Loosening of toilet fasteners. (negligent installation).
- Time factor.
Uneven floors and areas under the base of the toilet are typical when plumbing fixtures are installed on a concrete floor, or on a floor covered with linoleum. A difference in height even on such a small plane will lead over time to weakening of the fixing elements. In modern apartments and houses, this reason is offset by the fact that the floor in the toilet is often tiled. Proper installation of which creates a perfectly flat surface.
Loosening of anchor bolts in cases where short fixing bolts are used, loosening of the floor-mounted part of the bolt, or “tearing out” even minimally (a few millimeters) will lead to play in the fasteners.
The last, in fact, the most important reason will be the time factor. A toilet securely fixed to the floor is subject to multidirectional displacement forces. Forward, backward, lateral loads. When a person sits down or gets up from it, he tries to reach something without getting up from the toilet. Even the strongest fastening will weaken over time, the toilet will wobble and “dance”.
If the repair of a wobbly toilet is delayed, the decrease in the reliability of its fastening will increase over time. It is fraught with damage in the form of:
- ceramic cracks;
- leaks in the area where the flush water is supplied;
- leak at the connection with the sewer pipe;
Preparing to install a toilet
Before you start attaching the toilet to the floor on the tiles, you need to empty the room and remove everything unnecessary. The first step is to mark the boundaries where the toilet will be installed, install it and outline the outline of the base. A marker is best for this. Along with the outline, marks for holes for fasteners are indicated.
After making the marks, you need to remove the toilet and apply micro chips to the drilling sites with a center punch. This will allow you to avoid damaging the entire surface of the tile when drilling holes.
You need to cut the tiles in two steps. First, take a drill for working with ceramic tiles. After that, you need to take a drill to work with concrete surfaces. The resulting holes must be treated with sealant to prevent moisture from entering them.
Important! When drilling tiles, care must be taken to ensure that the drill does not overheat. To do this, it needs to be cooled in cold water.
Assembly and installation of the tank
Next we proceed to assembling the tank. For the tank we have a gasket that is inserted here:
Everything needs to be additionally sealed with sealant on both sides to reduce the possibility of leaks.
Here we insert the drain mechanism:
The drainage mechanism, as a rule, is already assembled. You just need to insert it.
Place the tank and tighten the plastic nut:
Now you need to attach this tank to the toilet.
For this, the kit also has its own fasteners, but you need to make no mistake - first there are plastic nuts, then a rubber cone-shaped seal, and before that you need to put this thick rubber seal under the tank:
Also be sure to apply sealant on both sides. After the seal is level, we place the tank on it.
The tank looks like this:
We set everything up evenly, carefully, check the holes and the fasteners that we assembled, and insert them.
Next from the bottom - again, make no mistake - first there is a rubber seal, then a plastic nut and finally a regular nut with which we tighten it all.
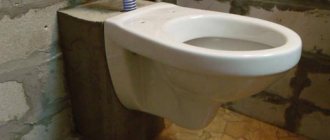
The new toilet is rocking on the floor
Changed the toilet. The old toilet stood directly on the tiles, but the craftsmen who installed it 15 years ago smeared the gap between it and the tiles with cement, so it stood reinforced concrete. Yesterday the installer ripped out that cement and screwed the new toilet directly onto the tile floor. The toilet now wobbles slightly. Will it be enough to just fill the gap under it with sealant, or is it better to unscrew the bolts and put it on cement, as it was before? Or maybe cut out pieces from linoleum and push them in? If you have to unscrew the bolts, what should you use instead of the “original” plastic washers, which were deformed when tightened? Masters online: 101 Orders per week: 1,580 Offers per day: 1,370
Tools and materials
To install on tile floors, you will need the following tools:
- a marker, pencil or chalk to mark the outline of the base on the tile or floor;
- a drill designed for ceramics and a drill for plastic dowels;
- product - sealant to ensure waterproofing;
- standard set of screwdrivers;
- drill or hammer drill;
- core for cleaning the top layer of tiles;
- wrench and adjustable wrench;
- bolts for attaching the toilet to the floor;
- pliers;
- grinding machine with diamond wheel;
- connecting hose;
- tap;
- an adhesive (for example, liquid nails), if you plan to use method No. 3 to attach plumbing fixtures to a heated tiled floor;
- plastic dowels;
- plastic spacers for bolts;
- spatula to remove any remaining sealant or adhesive.
Methods for fixing toilets to the floor
There are at least three methods of attaching the toilet to the floor:
- Using a standard installation kit (recommended for use only when installing on a perfectly flat floor).
- Using adhesives (the plumbing fixture is expected to last for a long time, without the possibility of its quick dismantling).
- By installing the device in cement mortar (the action is similar to glue, but is less durable and ensures easy removal of the product if necessary).
Depending on the chosen fastening method, the master will need a specific tool. It is recommended to always have on hand:
- hammer drill and set of drills;
- drill and drill bits for ceramics;
- push gun;
- a set of screwdrivers, wrenches, hammer and pliers;
- tape measure, spatulas, pencils;
- sandpaper.
Installing a toilet on the floor using standard fasteners involves drilling holes for dowels. Another method of installing a toilet - mounting it on bolts, screws or screws - is practiced more often than others, because most appliances go on sale with just such fasteners.
When installing a toilet on tiles, you should remember about the drilling technology (use a special drill at low rotation speed). Installation on cement also has its own nuances. An important factor in the quality of the connection is the composition of the solution. Here it is recommended to adhere to the ratio of one part cement to two parts quarry sand.
No. Fixation with dowels
The use of dowels and bolts is a fairly popular method of fixing a toilet. The method is simple and practical, but not without its drawbacks. First of all, the tiles will have to be drilled. This must be done carefully and carefully, because the slightest mistake can ruin the flooring. In addition, the use of dowels is designed more for lightweight products, and therefore it is better to use the adhesive method to fix a heavy model.
How to fix a toilet using dowels
To fix it on dowels, you should prepare everything you need:
- roulette;
- ammonia;
- pencil or marker for marking;
- a napkin or rag (preferably microfiber);
- electric drill;
- drill for it (exclusively for concrete).
Toilet fasteners
Less commonly, you may need a small piece of linoleum, sealant with a glue gun. Well, everything you need is at hand, so we can proceed directly to the work process.
Step 1. First, the toilet is tried on and pre-installed where it will stand. The ease of use and the ability to connect to water supply and sewer systems are assessed. You can also shake the bowl - this will help determine the levelness of the floor under the toilet.
Pre-installation of the toilet
On a note! If the product is unsteady, then before fastening it, a piece of linoleum, previously cut to the shape of the support, is placed under it. As an option, you can treat the joint with silicone sealant. Sometimes the problem is not the unevenness of the floor, but the toilet itself. If so, then you need to level the support and clean it with sandpaper.
Step 2. Next, the installation location of the device is determined more precisely, for which you will need a tape measure. Holes for future fasteners are marked.
Future holes in the floor are marked
Step 3. The product is removed, and large cross marks are made at the designated points.
Cross marks are placed
Step 4. Holes are drilled in the tiles using an electric drill. It is important to work extremely carefully so as not to damage the tiles, and also to ensure that the tool operates at low speeds.
The tile is drilled at low speed Photo of the drilling process
The drill needs to be wetted from time to time in cold water.
Step 5. Next, the holes are drilled in the concrete. The speed of the electric drill should be higher or, alternatively, you can use a hammer drill instead (it is better suited for this).
Concrete being drilled
There will be plenty of dirt and dust after drilling
Step 6. The tile is cleaned of dirt and dust (and after drilling this “good” will be enough). Then the surface is degreased with ammonia.
Cleaned tiles
Step 7. Now you need to insert dowels into the holes that were made earlier.
Dowels are inserted into the holes
Step 8. The bolts are checked to see if they fit into the dowels properly. You can replace the fasteners with others if the ones included in the kit are of dubious quality.
The bolts included in the kit should fit properly.
Step 9. The toilet is installed. The holes in the tile must match those in the support.
Step 10. If there are no problems, the bolts are inserted into the dowels, while you should not forget about the washers - made of rubber or plastic. The bolts are tightened, but carefully, otherwise there will be a risk of damaging the bowl. After this, the caps are hidden with special plastic covers. That's it, the toilet is successfully secured to the floor with dowels!
At the end, all that remains is to tighten the bolts
Features of plumbing installation
Plumbing fixtures, and in particular the toilet, are installed based on the installation instructions that are included with purchase. During construction or major renovations, such work is carried out by professional plumbers, but in the future, after moving in, most residents want to make their own adjustments to the arrangement of the sanitary unit, so they replace the original toilet with a new one that they bought themselves.
In order to carry out such work efficiently, it is imperative to know what methods there are for securing the device to the floor covering, as well as how to use them correctly. All features of the installation of a plumbing fixture will be directly related to the configuration of the plumbing fixtures. As a rule, in a household sanitary unit they use only compact models that are installed on the floor, and the mounting of such devices varies.
Why does the toilet become loose?
Before fixing the device to the surface of the floor covering, it is imperative to determine the reason why the plumbing is loose.
There are usually several reasons, but they can be combined into the three most basic and popular:
Uneven floor covering.- The plumbing is installed, but with errors.
- There are irregularities and defects on the bottom surface of the bowl.
The flooring in the sanitary area usually has a concrete base, but there are also options with wood finishing. Due to the loss of tightness of the fastening screw during operation, the fixed toilet on the wooden floor begins to loosen, and sometimes cracks appear in the areas where everything is attached with screws. This is what most often results in loss of stability.
Also, sometimes the surface of the concrete screed is poured, but with some violations, which can lead to deformation and a difference in floor level in height. This causes the toilet to start “walking”. In special cases, the cause of unreliable fastening may be failure to follow the technology for installing a plumbing fixture.
Installation on ceramic tiles
In modern apartments, the floor in the bathroom is usually made of tiles. Then the plumbing has a backlash when the tiles are not level and have differences. This type of defect is the most difficult to eliminate. After all, in order to get rid of the wobbling of the plumbing fixture, you must first eliminate the unevenness of the floor. It is impossible to do this without dismantling the tiles.
Therefore, to begin with, the problem is eliminated by placing a plastic gasket under the base of the plumbing fixture. Such devices are sold in hardware stores and are quite inexpensive. If this option does not bring the desired result and the instability continues, dismantle the tiles and lay the covering again.
Important! Silicone sealant is sometimes used as a gasket. They coat the area of the tiled floor where the device should be located. When the material is completely dry, install it. This method helps to temporarily solve the problem of a wobbly device.
Technical nuances of plumbing installation
Before looking at repair examples, let's start with the basics. A correctly installed and secured new toilet is a guarantee of reliable operation for many years. There are several ways to attach a sink to the floor. And they all depend on the floor covering. The screw method is mainly used. But you can use self-tapping screws.
If drilling is not done carefully, the tile may crack.
If the floors are concrete, you will have to drill holes for the dowels. You will need a hammer drill with concrete attachments. In the case where ceramic tiles are laid on top of a cement coating, a hole in it is first drilled using a drill. And only then do they switch to a hammer drill.
When drilling a hole in a tile, use only a special nozzle. The rotation speed of the electric drill should be the lowest, the force on the device should be minimal.
Step-by-step screw fastening process
Using the set of screws that comes with the toilet, there is the following algorithm for installing and then securing the sink:
- The toilet base is installed on the floor in the right place.
- Through the holes for fasteners, places for recesses for dowels are marked.
- The sink is put aside and grooves are drilled in the marked places to a depth of 70 mm or according to the size of the plastic plug for the screw that will be used.
- If there is a tile on the floor, then an electric drill with a special drill is used to go through it. Only then can you use a concrete drill.
- Plastic dowels are driven into the holes.
- Then the corrugation is placed on the toilet and the mounting holes are aligned with the installed plastic plugs.
- Place plastic or rubber washers under the screws and tighten the anchors until they stop.
- Using a spatula, seal the gaps between the floor and the toilet sole (if any). You can use cement mortar or sealant.
The toilet can be used immediately after completion of the work.
Find out the causes of poor toilet flushing.
How to fix a toilet with side holes
There are sinks in which the mounting holes are not located vertically, but at an angle. This is designed to improve the overall appearance. The delivery set includes special fastenings at an angle of 90 degrees. This does not make the installation any more complicated and proceeds like the previous one.
Installing a toilet on an adhesive base
You can not use the factory fastening, but fix the sink using adhesive (without bolts). But then you need to check that the surface of the floor and the sole of the toilet bowl has no defects, that is, it is smooth.
After installing the toilet, additionally coat all joints with sealant
The process of attaching with glue comes down to:
- designation of the exact installation location;
- surface preparation (cleaning and degreasing);
- applying adhesive composition to the sole and floor;
- installation of the sink in a given place, according to the intended boundaries;
- removing excess glue.
After the work is completed, the structure must be allowed to stand for at least a day. This will allow the adhesive to completely harden.
Helpful information! Review of toilet cleaners.
Installation using taffeta
Taffeta is a lining made of durable wood that the toilet is attached to. The lining itself is used for installing plumbing fixtures on a wooden floor. Its thickness should be 25–30 mm. Having given the taffeta the desired shape (along the sole), the wood is treated with drying oil. This is necessary to protect the part from moisture.
The taffeta is firmly nailed to the floor in the intended place. Then the toilet is installed on it and secured through the holes with self-tapping screws.
To prevent the board from being conspicuous, cover it with tiles
There is a way to attach a sink using taffeta to a concrete floor. In this case, it is necessary to prepare a recess in the floor. The depth of the recess should allow the taffeta to be buried in it flush with the floor surface.
The gasket is first pierced through with nails in a checkerboard pattern. They will serve as reinforcement.
The excavation is filled with liquid cement mortar. Taffeta with nails is sunk into the solution and leveled with the floor. Excess cement mixture is removed. You must allow at least 12 hours of time before installing the sink on the taffeta.
If the work is done by a professional, then you won’t have to strengthen the toilet later. But you should consider the situation when the toilet wobbles not from the moment of installation, but after long-term use.
Safety precautions
In conclusion, some advice from the experts. They will help those who decide to eliminate all defects on their own. Following these recommendations will help you avoid accidents that could result in serious injury.
Experts advise:
- During any plumbing work, turn off the water supply to the apartment. This will save you from flooding in the event of an emergency.
- Use special clothing. Hands must be protected from cuts by wearing work gloves. There are always bacteria in the sewer system, which, if they enter the bloodstream, can cause serious infection. It is better to work in uncomfortable gloves than to lie in the hospital for a long time.
- When working with a hammer drill, use safety glasses, or best of all, a plastic shield that covers the entire face.
- Smoking and using open fire is prohibited. Sewer vapors are very volatile. Ignition can occur at any time.
- It is recommended to plug the drain hole with a rag. This will help avoid poisoning from inhaling its vapors.
Larisa, June 3, 2022.
- My piece of paradise. How to create a landscape design on your personal plot with your own hands?
- How color changes the mood of your home, experts say
Useful tips
Plumbing materials, despite their strength, are very fragile. Therefore, maximum force should not be used when securing with screws or bolts. To reduce pressure, softening pads must be placed under the screw heads.
Important! When using glue, you need to thoroughly degrease the surface. If epoxy resin is used for fastening, the proportions of solvent and base substance are strictly observed. The surface is covered with adhesive evenly, without the formation of bubbles.
Instead of wood, you can use high-quality multi-layer plywood as “taffeta”. It is important to ensure high-quality waterproofing so that the lining does not collapse prematurely.
Recommendations for installing toilets
It should be understood that plumbing fixtures are made from strong, but rather fragile materials, so during its installation you should be careful and calculate the forces, use soft pads for the screws. It’s not enough to know how to fix the toilet so it doesn’t wobble. You need to understand how fragile this plumbing fixture is and how much attention it requires.
When fastening with glue, you should take a responsible approach to cleaning and degreasing the surface, since the strength of the connection directly depends on this. When installing a toilet on taffeta, you need to choose strong wood or multi-layer plywood, but ensure good waterproofing for it. Using these tips, you can figure out how to secure the toilet so it doesn't wobble.
What to do if the toilet becomes loose during use
When a toilet wobbles on a tile or wooden floor, you need to carefully inspect the structure to find the cause of the play.
There are three reasons why a sink sways:
- Uneven floors.
- Defects on the sole.
- Poor quality installation.
Wooden floors can sag over time. Cracks that appear in them will cause backlash. But as for unevenness on the concrete floor or tiles, this already refers to poor quality work when installing the sink. This also applies to sole defects.
If you do not use rubber washers to secure the bolts, the sink will crack and the reliability of the fasteners will be compromised.
Surfaces must be prepared. Floors and tiles are leveled until refacing work is carried out. The toilet seat is worn down.
Poor installation can occur if you use an unreliable fastener. Anchors that are too short will cause the structure to become loose over time.
There are several ways to “fix” a structure.
Healthy! Tablets for the toilet cistern.
On a wooden floor
It is necessary to unscrew the fasteners and move the sink slightly to the side. This will be enough for the screws to hit the undamaged board. New fasteners are carried out according to all rules.
Never try to tighten loose screws. This will damage the integrity of the sink body.
On the concrete floor
If a backing board has been used on a concrete surface and it has become unusable, experts advise removing it. It is necessary to dismantle the equipment by first turning off the water supply and removing the drain tank.
The damaged board is removed from the floor and the hole is concreted. The surface is carefully leveled. The time required for the solution to harden is maintained. Then carry out the work described in the paragraph on fastening with screws.
Find out how to eliminate sewer smell.
On a ceramic floor
When play occurs on a tiled floor, this indicates that the tiles are not laid evenly. Experts advise using various gaskets. The best material is made of plastic, varying in thickness. The correct size is found experimentally.
To avoid re-tiles, concrete the area under the toilet
But if the method does not work, then you will have to reposition all the tiles in the room.
Silicone sealant can help secure the toilet so it doesn't wobble. It is applied to the location of the bowl and left for a day. The plumbing is then reattached.
Reasons for a loose toilet
Over time, even the most expensive and durable plumbing fixtures can fail. Before you begin to fix the problem, you need to determine why he started “walking.” This usually happens for three reasons:
- uneven floor;
- the initial installation was carried out with errors;
- toilet base with defects.
An uneven floor may be causing the toilet to wobble.
Deformation of the floor usually occurs if it is made of wood and does not have a concrete backing. Over time, the wood sags, the fastenings become loose and the equipment begins to sway. Sometimes cracks form where the floorboards and screws meet, causing the toilet to tilt to the sides.
When, during repair work, the floor screed is performed incorrectly, it becomes crooked. The toilet simply cannot stand level on such a surface and begins to “walk”. A similar situation arises when the plumbing itself was initially installed incorrectly, without performing the technology. If you do not observe the ratio of holes and recesses, then problems will certainly arise soon.
Fastening without drilling
For those who do not want to sacrifice the tile surface, there is a method of attaching the toilet without drilling. Often this method is not durable enough, and over time, this procedure must be repeated. And if the fixed toilet is not handled carefully, its stability will fail in the near future. Before using this method of fixing the toilet, do not forget that water may often be present around the toilet. In this case, before installing the toilet, you should remove all remaining water that is on the surface.
The next step is the selection of a fixing agent. Currently, there are many relevant substances, the most popular of which are:
- glue for tiles and ceramics;
- waterproof sealant;
- cement mortar;
Fixing the toilet with glue
This method of fixing the toilet to the tile is the simplest. Glue can be purchased at a hardware store. Before using glue, both surfaces must be completely degreased and clean. This will ensure maximum connection between the toilet and the tile. After the surfaces are cleaned, it is necessary to draw an outline of the location of the toilet. To do this, just circle the toilet with a pencil at the place where it will be located. After that, apply glue to the surface of the tile in the form of the thickness of the connecting part of the toilet. After that, apply glue to the bottom of the toilet and let the glue sit for 3 to 5 minutes. Then connect both surfaces and press firmly.
Fixing the toilet using “sealant”
Sealant has recently appeared on the list of modern building materials. This product has a high coefficient of water resistance and a fairly long service life. It contains glue and silicone, due to which the glued material acquires high strength. The principle of attaching a toilet to a “sealant” is similar to an adhesive connection. After completing the installation of the toilet, do not forget to remove the residues of this product. They could stand out during the pressing process.
Fixing the toilet with cement mortar
This method of installing a toilet on a tiled floor is the highest quality method. To do this, you must have:
To prepare the solution, you need to take one share of cement, three shares of sand and mix thoroughly dry. The next step is preparing the tiled surface. Do not forget that the tiled surface often has a glossy finish, due to which the connection between the toilet and the floor may be poor. To prepare the tiles, you should take sandpaper and clean the contour of the contact between the mortar and the toilet bowl. If you have a professional tool, you can clean the surface mechanically. To make sure the connection is made, you can pre-lay the mounting grid onto the tiles.
When the surface is ready, dilute the mixture with water. It is better to add water to dry cement mortar gradually. The consistency should resemble sour cream. Then apply the composition to the surface of the tile and install the toilet. The composition hardens at room temperature for 24 hours. After which you can freely use the toilet.
All these three methods should always be combined with painstaking preparation of the tiled floor surface. This will ensure maximum adhesion of all particles of glued materials.
Bottom line
Based on the above, it is worth summing up. For any method of attaching a toilet to a tiled floor, you must have minimal skills and understand the principle of operation of a particular substance. Both methods will be of high quality if the users of the toilet handle it with extreme care. This factor significantly extends the service life of not only the toilet, but also any device or equipment.
Dowels
This option is considered one of the most popular. The basis for such fasteners is a floor made of concrete. In addition, the floor surface can be decorated with ceramics.
How to install? Before installation, it is important to make sure that the connecting link located between the sewer pipes and the toilet makes it possible to carry out work in the required place. There will be no problems when using corrugation.
If an elbow of the required size is used, then you need to put it in working condition in advance, and, if necessary, cut off the excess, adjusting the appropriate dimensions. A similar adjustment is carried out for any type of fastening work.
During the purchasing process, make sure that the mounting kit for your toilet includes bolts. Otherwise, you should buy the kit yourself.
For mounting on a tiled floor surface, the toilet is installed in the appropriate position, marking the locations for the holes. After this, the toilet bowl is removed and holes of the required size are drilled into which dowels should be inserted; a toilet bowl is installed on top, which is attached to the floor surface with bolts.
Some professionals recommend using a rubber gasket between the toilet and the tiles. It will become a damper to ensure a reliable fit to the toilet tiles and will veil the gaps. This gasket should be cut based on the size of the mounting surface.
To eliminate gaps, a colorless sealant is also used, as in the photo of the toilet mounting below.
Several ways to secure the toilet so it doesn't wobble
A toilet room is a room that, undoubtedly, exists in almost every house or apartment and is considered one of the traditional attributes of comfortable housing. This article tells you how to secure the toilet so that it does not wobble, and what methods of fixation are preferable to use if there is a need to change the toilet later for one reason or another.
As a rule, the installation of a toilet is carried out by contractors during the construction of housing, but in some cases the apartment owners will have to do this themselves. After reading these recommendations, you will understand how to strengthen the toilet quickly and correctly, without the help of a paid specialist.
Features of plumbing installation
Any toilet must be installed in accordance with the instructions. Installation of the device during the construction stage is usually carried out by experienced workers, but every self-respecting man should know not only how to reinstall this type of plumbing, but also how to secure the toilet so that it does not wobble.
As practice shows, when reconstructing a toilet, owners try to replace the toilet themselves in order to save money, although many do not know the nuances of installation and fastening methods. What to do if the toilet is wobbly? How to strengthen it? Here is an incomplete list of questions that sooner or later almost every owner will ask himself. Features of toilet installation depend on its type. Floor-mounted toilets are mainly used. If you want to understand why the toilet swings and how to strengthen it, then you need to familiarize yourself with the beginning - methods of fastening toilets.
Methods for fixing toilets to the floor
There are at least three methods of attaching the toilet to the floor:
- Using a standard installation kit (recommended for use only when installing on a perfectly flat floor).
- Using adhesives (the plumbing fixture is expected to last for a long time, without the possibility of its quick dismantling).
- By installing the device in cement mortar (the action is similar to glue, but is less durable and ensures easy removal of the product if necessary).
Depending on the chosen fastening method, the master will need a specific tool. It is recommended to always have on hand:
- hammer drill and set of drills;
- drill and drill bits for ceramics;
- push gun;
- a set of screwdrivers, wrenches, hammer and pliers;
- tape measure, spatulas, pencils;
- sandpaper.
Installing a toilet on the floor using standard fasteners involves drilling holes for dowels. Another method of installing a toilet - mounting it on bolts, screws or screws - is practiced more often than others, because most appliances go on sale with just such fasteners.
When installing a toilet on tiles, you should remember about the drilling technology (use a special drill at low rotation speed). Installation on cement also has its own nuances. An important factor in the quality of the connection is the composition of the solution. Here it is recommended to adhere to the ratio of one part cement to two parts quarry sand.
Initial installation with screws. How to strengthen a toilet if it is wobbly
If you chose the first method of fixing the toilet to the floor or want to strengthen a wobbly toilet, then you need to follow these steps:
- Determine the exact place where the so-called sole will be located.
- Mark the mounting holes.
- Use a ceramic tile drill to drill holes no deeper than the thickness of the tile.
- Using a concrete drill, drill holes to approximately 6-7 cm.
- Insert the dowels from the kit.
- Place the plumbing fixtures in place, aligning the holes on the sole with the holes on the floor.
- Connect the toilet pipe with a hose to the sewer.
- Secure the toilet with screws.
Seal the connection points of the pipe to the toilet and sewer, and, if necessary, make cosmetic sealing of the gaps between the “sole” and the floor surface.
How to glue a toilet to the floor
To secure the “sole” of the toilet to the floor with special glue, you must follow these steps:
- Accurately mark the seat.
- Clean, level and degrease the “sole” of the device.
- Apply adhesive mixture to it.
- Install the device according to the markings of the seat.
After installing the toilet, excess glue may appear underneath it, which is removed with a rubber spatula, after which the glue exit points are thoroughly wiped.
Other mounting methods
Another method of attaching a toilet to the floor is called “taffeta mounting.” As a rule, it is used when installing plumbing fixtures on a wooden floor, where taffeta is a board cut along the sole of the toilet. First, the taffeta itself is attached to the floor, and then the toilet is attached to it.
A recess 5-7 cm deep is made in the floor, which is filled with cement mortar. Taffeta is taken, which is randomly punched with nails over the entire area. The side on which the nails came out is laid on cement.
The toilet is attached to the outside of the taffeta with screws. This is one of the easiest ways to secure the toilet so that it does not wobble, since in this case nothing needs to be screwed directly to the floor.
This method is gradually losing its relevance, in contrast to the relatively new one - installing plumbing fixtures on a frame - installation. In this case, the toilet is installed on a special frame - a metal installation disguised in the wall. In this case, we are talking about suspended installation, without much emphasis on the floor surface.
Do-it-yourself high-quality repair of a swinging toilet
There are several options for eliminating a wobbling toilet:
- Emergency, short-term.
- Complete renovation work.
Emergency measures should be resorted to only when a toilet leak is first detected. Temporary placement of fixing wedges formed between the floor and the base of the toilet. Plastic, wooden.
It is strictly forbidden to overtighten the mounting bolts. Since earthenware is very fragile.
This will allow you to eliminate the instability for a short time, and plan for a period of complete repair work. Which step by step looks like this:
Before starting work, you should clear out the toilet room as much as possible, or the space around the toilet in the case of a bathroom combined with a bathroom. Don’t forget to turn off the water supply to the flush tank and be sure to drain the water from it.
We loosen the fastenings of the toilet to the floor. If they are clearly loose, it will be necessary to completely unscrew them, deepen the screw-in point, and then replace the dowel anchor with a longer one, or strengthen the existing plastic plugs in the floor by replacing them or filling them with glue.
Before the next step you will need substitution wedges. The material of manufacture is not of fundamental importance. They should be at least 10 centimeters long, up to one and a half to two centimeters thick, and up to 0.5-1 cm high in their widest part. It will be convenient to make wedges from a block of a suitable size. You will need four pieces in total.
Carefully lifting one edge of the toilet, we place a pre-prepared wedge under its base. We carry out the procedure from four opposite sides of the base.
We carefully place the wedges under the toilet so as not to damage it
Important! Before lifting the toilet, make sure that the sewer drain (often made of corrugated material) and the tap water supply pipe allow this to be done. In other words, there are no additional hard points for fixing the toilet to the floor or wall.
If the work is done correctly, a gap of up to 10 mm should form between the toilet and the floor. And at the same time, the toilet stands stably on the substitution wedges.
This is followed by a thorough cleaning of the area under the sole area of the toilet base. We clean from sand, dirt, and remnants of previously fixed glue.
Cleaning the area under the toilet
If a clear defect is visible - unevenness of the floor, then complete dismantling of the toilet will be necessary to level the floor area under the base using sand-cement compounds. After completing the work, be sure to give the applied solution time to dry completely.
Using a silicone adhesive sealant, we apply a filling layer under the base of the toilet using a construction gun.
We glue with tape the places that do not need to be dirty and coat everything with glue-sealant
Comfortable! To avoid unnecessary contamination of the floor with adhesive. Around the contour of the base of the toilet, retreating 0.5 cm, use construction paper tape to outline the contours. It is advisable to use adhesive tape at least 2-3 centimeters wide.
We carry out subsequent work as carefully and quickly as possible. Having the opportunity to remove excess glue before it is completely cured.
Carefully pull out the wedges sequentially. By tightening the fixing bolts, we ensure that the sealant is sealed under the toilet so that an adhesive layer of up to 2-3 mm is formed between the floor surface and the base of the toilet. thick.
Remove excess squeezed out glue with an elastic rubber spatula. Carefully wipe the ceramic base if it becomes dirty.
Do not rush to remove the tape pasted around the base. Allow the adhesive to set.
Important! Subsequent use of the toilet is limited by the time it takes for the adhesive-sealant to completely dry, depending on the type used and the time specified in the instructions. It is preferable to use silicone adhesive-sealant due to its: high adhesion, ease of use, elastic properties, reliability, moisture-heat resistance. If you use the toilet earlier, it will wobble and “dance” again.
After final drying, you should slightly tighten the bolts securing the toilet to the floor. In this case, we check the horizontalness of the installation using a building level. The tightening force of the fastener must be commensurate with the reliability of the fixation. We remember that ceramics are very fragile and cracks may form.
Before turning on the water supply, you must ensure the integrity of the drainage joint and the tightness of the sealing rubber. If necessary, we treat the joints with a sealing compound.
If a toilet is installed in a bathroom for the first time, the procedure for fixing it to the floor will be similar. This installation option guarantees long-lasting, strong, reliable fixation of the toilet to the floor.
It is worth mentioning once again about compliance with safety regulations when carrying out construction and repair work. Be sure to shut off the tap water supply to the toilet. Drain the water from it. When using power tools, if necessary, follow the rules for safe handling.
As you can see, the volume of work carried out is not large, limited only by the drying time of the adhesive mixtures and the availability of construction equipment. But the value is high. A firmly installed toilet will save the nerves of the residents of the house and will avoid possible flooding.
General preparatory work
List of related works and a set of tools
Before installing a toilet on tiles, it is necessary to carry out a list of the following works:
- create a set of tools necessary to carry out all installation operations;
- organize flexible wiring that ensures water supply to the tank from an existing water outlet;
- assemble the tank and bowl.
The minimum set of tools is as follows:
- an electrical device for drilling holes (drill or hammer drill);
- a set of drills for various purposes;
- level;
- adjustable wrench;
- rubber spatula;
- pencil.
Preparing the water supply system for connecting the drainage system
- ordinary ball valve;
- corner tap.
A pre-selected flexible hose is attached directly to the previously installed faucet. Before installing the flexible tube, it is necessary to check the presence of rubber seals at the mounting points.
The process of connecting assembly elements of a plumbing fixture
The device is often transported in a disassembled state. Responsible manufacturers supply complete assembly units: the drain fittings are installed in the tank during production. Unfortunately, budget options from little-known companies are not supplied in this format. In this case, instructions for assembling the equipment are provided.
The last transition before installing the purchased toilet on the tile is connecting the tank and the bowl of the device. The process includes the following operations:
- install a special gasket on the contact surface of the bowl;
- insert bolts into the holes at the bottom of the tank;
- fit the two parts together and tighten the nuts.
The effectiveness of this technology significantly increases the package of the following recommendations:
- it is necessary to apply a layer of silicone sealant on both sides to the working surfaces of the cuff before installing it;
- the bolted connection must contain rubber or plastic washers that seal the tank and prevent the occurrence of internal stresses;
- the nuts should be tightened one at a time using a small torque (it is better to under-tighten than over-tighten);
- During the tightening process, it is necessary to control the horizontal position of the liquid storage container relative to the bowl by placing a level instead of the tank lid.
Important! Watching how to install a tank on a toilet in a video, you can notice the following nuance: before assembly, the degree of tightening of the base of the shut-off valve, the nut of which is located on the outer end of the tank, is controlled. The purpose of this operation is to eliminate the possibility of internal fluid leaks (from the tank to the bowl) and their subsequent repair
Installation using dowels (bolts)
This method is the most practical and does not require large expenses. It also provides a secure attachment for the toilet, provided that the floor screed is pre-prepared for installation.
Small irregularities do not impair the tightness of the installation, since in this case an elastic gasket can be used.
Fastening the toilet to the floor with bolts is suitable for both conventional structures and light, compact ones, that is, this option can be considered universal.
Installation options overview
How to attach plumbing fixtures to a wooden floor
If the floor in the bathroom is made of wooden planks, then it is quite possible to repair a toilet that wobbles, but it is not reattached to the damaged area. It would be better if you move the device a little to the side and screw it in a new place. At the same time, we recommend that you drill holes for reliable fixation, the location of which will coincide with the holes for fastenings and secure them with screws. You should not try to tighten loose screws further in the old place, especially if the floor is made of planks. The problem is that this can lead to further cracking of the device. To make installation easier, it is better to make the supply line to the sewer system from the toilet flexible.
How to fix a toilet on a concrete floor
In fact, it is much more difficult to fix the problem if the floor covering has a base made of concrete. In old buildings, dating back to the times of the USSR, the devices were installed on a concrete floor, which has embedded boards.
In this case, in order to improve the fastening, you should perform the following steps:
- Shut off the water supply to the plumbing fixture (toilet).
- Remove the drain tank.
- Disconnect the sewer drain pipes.
- Remove the bolts that secure the plumbing fixtures to the floor.
Please note that the rest of the work should be done extremely carefully so that you do not inadvertently damage the fragile material of the old toilet.
To fix the damage, you should remove the old backing board, and in its place lay a layer of new lumber, which will be thicker than the previous one. You can also bore this area and concrete it.
After the concrete has hardened, install the plumbing in this order:
- Place the toilet in the required area, mark the points where it will be attached.
- Remove the plumbing fixture and make holes in the marked area using a hammer drill.
- Secure the toilet to the bolts.
- Reinstall the drain tank.
- Connect plumbing and sewer pipes using corrugated liner.
Now let's talk about the features of installing a toilet on a tiled floor.
Installation on ceramic tiles
In modern apartments located in new buildings, the floor in the sanitary unit is usually made of tiles. In this case, the device will have a backlash if the tiles were not laid out level and also have differences. Eliminating such a defect is the most difficult, since it will be necessary to get rid of the device’s wobble by eliminating uneven floors. It is almost impossible to do this without removing the tile covering.
For this reason, the problem is solved by placing plastic gaskets under the base of the plumbing fixture. Such devices are always on sale in hardware stores or on the market, and they cost pennies. If this option does not give the required result, and the instability remains, you will need to disassemble the tiles and lay out the coating again.
Please note that sometimes silicone sealant is also used as a gasket, which is used to coat the area of the floor covered with tiles and where the device should be placed. When the material is completely dry, install the toilet. This method will only help temporarily, but solve the problem with a wobbly toilet.
How to attach to the floor
If your toilet wobbles, how to fix it?
To perform high-quality work, the master will need to use the following tools:
- A hammer drill for construction work, which has several drills with different diameters.
- A hand drill and a set of drill bits of different diameters to make holes in ceramic tiles.
- Sandpaper with different grits.
- Spatulas made of rubber with different mixtures.
- Mechanical press (manual).
- Locksmith's keys, screwdrivers and other tools.
Additionally, you will need to collect the following materials:
- Metal screws or screws.
- Dowels (plastic) with different diameters.
- Construction adhesive composition.
- Several spacers for screws.
- Sand, cement.
- Boards that are 2.5 cm thick.
- Sheet of rubber with a thickness of 1.5 cm.
Standard toilet mounting will involve drilling holes in the floor to install dowels. In this case, you will need to make 4 holes at once. If the fastening device is oriented to the use of screws, then only 2 holes should be made. You may have difficulty drilling holes when the floor is covered with ceramic tiles. The fact is that even from one awkward movement or the wrong choice of tool, the tile can easily crack.
Important! Drilling ceramics should be done with special drills designed for this purpose, and the rotation speed of the device should be set to low. When working, the pressure on the tool should not be too strong.
When it is decided to attach the toilet to cement mortar, it will be necessary to properly prepare the working mixture to ensure a high-quality connection. To do this, take 1 measure of cement, grade no less than M200, and add 2 measures of sand.
Screw fixing
If the toilet is wobbly, how to strengthen it? To secure it to the floor using the standard method, follow the following steps in sequence:
First, on the surface of the floor in the toilet, determine the exact position of the sole.- Marks should be placed in the center of the hole.
- Using a special drill, make recesses in the tiles, the size of which will correspond to the thickness of the tile.
- Next, arm yourself with a concrete drill and bring the excavations to a depth of 7 cm.
- Place the dowels into the resulting recesses.
- The toilet should be placed in such a way that the mounting plumbing holes are aligned with those made on the floor surface.
- Connect the device to the sewer using a corrugated tube.
- Secure all plumbing fixtures to the floor using the screws provided in the installation kit.
When all the work is completed, you should additionally ensure the tightness of the connection between the corrugated pipe and the sewer inlet, as well as the toilet pipe. You can use absolutely any sealant for this. Next, cosmetically seal the gap between the floor and the toilet sole, if there is one.
Strengthening with adhesive composition
It is not at all necessary to place the toilet on the screws if for some reason it wobbles. There is another high-quality way to strengthen the connection - using a special adhesive composition.
Work should be performed in the following sequence:
- First, place the seat for the plumbing fixture.
- The toilet base must be cleaned, leveled and degreased.
- Apply adhesive composition to the prepared surface.
- Place the device on the floor, and it should be aligned with the boundaries marked in advance.
Please note that after installation of the toilet, due to its heavy weight, excess glue may begin to protrude on the edges of the floor. To remove any remaining adhesive, use a rubber spatula. You can remove traces of tile adhesive using a rag soaked in a soap solution. After this, the toilet can be left for a day so that the glue can completely dry.
Installation on taffeta
This method is suitable if you need to install a plumbing fixture on a wooden floor surface. Taffeta is a kind of padding made of durable wood that will be placed under the device. From a board 3 cm thick, you should cut out a fragment that matches the shape of the sole of the plumbing fixture. To protect against moisture, such a part should be coated with a composition such as drying oil.
To ensure that the taffeta is securely fastened to the floor, drive in several nails in a random order. They must protrude 2 cm beyond the edges of the part. After this, use cement to fill the recess that is prepared for the plumbing, and you can drown the wooden part in the liquid solution, nails down. If you do everything correctly, it will be flush with the floor.
After 12 hours, the cement will completely harden. Afterwards, you can install the device in the prepared place, and use screws for fixation, and place cut washers from a rubber sheet under their heads. They are able to protect the frame from splitting when tightening the screw. To make it easier to unscrew the screws, lubricate them with graphite before fixing the toilet.