Acrylic bathtubs are popular among residents of Russia and beyond. They are lightweight, durable and inexpensive.
However, even with the most careful handling, scratches and chips may form on them, since acrylic has low resistance to mechanical and chemical influences.
Such damage spoils the appearance of the bathtub, leading to corrosion and deformation. Read the article on how to remove a scratch on an acrylic bathtub without ruining it.
How to remove minor damage?
Before you begin removing minor scratches on your bathtub, you need to thoroughly wash and dry it. It should be taken into account that acrylic is a porous material, so it takes at least 7 hours to completely dry it. It is not enough to simply wipe the surface with a dry cloth. It is necessary to give the moisture time for complete evaporation.
Instructions for removing minor scratches:
The first stage of processing is sanding the surface with fine-grained sandpaper.
The skin should be the thinnest, and the grain size should be P2500 units. Only if these conditions are met will it be possible to rub and not scratch the surface.- If after grouting the surface is smooth and no roughness is felt on it, then the work was done efficiently.
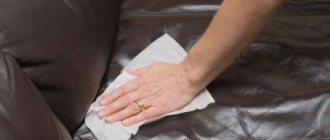
- The second stage is treating the damaged area with an abrasive polish. You can find special repair kits on sale, the average price of which is 600 rubles. The polish is applied to the surface of the bathtub and rubbed with a felt cloth.
- After 2-3 hours, the polish will be absorbed, after which you can begin the third stage of processing. It comes down to applying wax for acrylic baths (this component is also included in the repair kit).
- After an hour, the bath is washed using a liquid product.
If the size of the scratch does not exceed 0.5 mm, then simply rub it vigorously with felt. As a rule, such treatment is enough to remove shallow damage. Video tips will help you remove scratches on an acrylic bathtub:
Options for restoration work
Restoring acrylic is possible in three ways:
- apply two-component enamel;
- use liquid acrylic, a method called “pouring”;
- use of acrylic liner.
Restoration needs to begin with preparatory work. Incorrectly performed procedures for preparing the upper part of the bowl will ruin all restoration work. After a short time, the surface of the acrylic will become cracked again, the shine of the top layer of the sink will fade, and you will need to glue the hole on the surface. The question arises: how to restore an acrylic bathtub.
Restoration with liquid acrylic: pros, cons of the method
One of the main advantages is the long service life of the bathtub. After updating, it can be used for more than 10 years. Acrylic is evenly distributed over the surface of the cast iron product because it is poured rather than applied with a brush. The product fills microscopic cracks, leveling the surface.
Restoration enamel is harmless to health and does not emit a strong odor. It dries quickly, so work is completed in a short time. But this restoration method has a drawback: you have to wait 2 days. We need to close the room. Otherwise, dust particles settled on the drying layer of acrylic will ruin the appearance of the surface.
Most owners prefer white bathtubs, but during the restoration process you can tint them by painting the bowl in any other color.
We present our range of reliable acrylic bathtubs: Acrylic bathtub AM.PM X-Joy W88A-170-070W-A 1700 mm 18890 RUR
Bathtub AM.PM Like W80A-170-070W-A 1700 mm RUR 25,890
Rectangular bathtub Riho Miami 170×70 BB6200500000000 RUB 30,728
Rectangular bathtub Riho Future 180×80 BC3100500000000 RUB 35,972
Using enamel for restoration
Acrylic products can be restored using enamel. This surface repair option will save money. In addition, the work is not difficult.
Enamel consists of substances with a very pungent and unpleasant odor. Therefore, for respiratory safety, you need to work in a respirator. Hands are protected with rubber gloves.
We begin surface repairs
Before application to the surface, the enamel is combined with a hardener, strictly following the recommendations in the instructions. Externally, the mixture will resemble paint.
Using a brush, apply the enamel in the following sequence: the first layer with horizontal strokes, after 15 minutes, without waiting for the applied layer to dry, vertical strokes as the second layer.
The enamel is especially carefully applied to the bottom, which bears the heaviest load, where chipping can most often be seen. A spray bottle can make the job easier. We do not miss a single centimeter of coverage. The restoration is complete.
The enamel will completely harden after a week. It is necessary to keep the area around the sink clean. Make sure that dust particles do not settle on the surface of the new coating.
Restoring the product eliminates large potholes and chips. A big problem will require applying several layers of material.
Using a restoration insert
The acrylic insert itself must be ordered at the factory, where it will be made in the required dimensions. The use of a liner will be relevant if the question arises of what to do when an acrylic bathtub is cracked. In this way you can revive the product or how to remove a through hole.
The work requires full compliance with step-by-step instructions.
- Work begins with the preparatory steps described earlier.
- Place marks on the new bowl for drainage and overflow. There is a simple method when the cup that is being restored is smeared with toothpaste and an insert is placed into it. It must be pressed tightly and pulled out quickly. The drain and overflow holes will be visible on the back of the liner. They are drilled out.
- The surface of the old bowl is completely covered with sealant, construction foam, without missing a single centimeter, including the sides.
- Without wasting time, the liner is inserted inside and pressed with force against the old bowl to glue them together.
- In order for the liner to lie firmly on the bottom, you need to stand with clean feet near the drain hole, you need to walk along the bottom along the entire length of the surface.
- Excess construction foam or adhesive is removed with a rag.
- The drain and overflow elements are put in place.
- To prevent the new bowl from deforming when the glue dries, you need to fill it with water for 24 hours and leave it. Later the water is poured out.
- The liner will extend the life of the product by 10 years. Repair using a liner is the answer to how to repair a hole in an acrylic bathtub and how to remove large cracks.
Installing a bathtub in a bathtub
This option is used for through-and-through damage. In this case, an acrylic liner is attached to the defect site on the other side of the bowl using glue.
How to repair chips?
If a chip has formed on the surface of the bathtub, it will not be possible to rub it with sandpaper; more serious repair work will be required.
To do this, you need to purchase a repair kit, which includes:
- sandpaper;
- polishes;
- reducing agent (putty);
- napkins;
- gloves and applicator.
Instructions for removing chips involve going through the following steps:
First you need to wash and dry the damaged area, then degrease it with white spirit or acetone.- The perimeter of the chip is covered with masking tape. This is done to ensure that the polish does not get on the undamaged area.
- Using 1200 grit sandpaper, sand the surface of the bathtub. This treatment will allow the putty to grip more firmly.
- The dust formed after sanding is removed with a vacuum cleaner. After treatment, use the alcohol wipe included in the kit.
- The putty is prepared according to the instructions for use, which are included with the purchased kit. Sometimes it is included in the kit ready-made.
- Using a spatula, apply the mixture to the chip so that it is completely filled.
- 30 minutes after the manipulations, it is necessary to remove the masking tape.
- After 24 hours, the treated surface is sanded with sandpaper and polished with felt.
You cannot use the bathroom before 5 hours. This is the minimum time that must pass for the liquid acrylic to set.
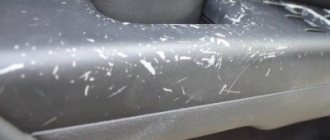
Fighting delamination
Sometimes the acrylic layer comes away from the fiberglass. Because of this, bubbles appear in the bowl, which eventually burst, exposing the inner surface. To eliminate such a defect, you will need a special glue with which the polymer layers are connected.
Work with damage begins with drilling a small hole in the center of the bubble. Through it, the space between acrylic and fiberglass is filled with glue. It can be administered using a regular syringe.
Next, the swollen part must be pressed down so that it comes into contact with the fiberglass. Any adhesive that appears should be removed immediately. The hole made in the acrylic is eliminated according to the scheme described above.
How to cover up cracks?
Getting rid of a crack is much more difficult than getting rid of a scratch, even the deepest one. This defect is end-to-end, so it can lead to water leakage in the bathroom and flooding of neighbors.
Another danger of a crack is its ability to increase in size. It spreads under the influence of weight, when using detergents and even when exposed to water.
Repair is carried out as follows:
- The defective surface is sanded.
- Using a drill, drill 2 holes: on one side and the other side of the crack. Its end should be in the center of the hole. This will create uniform pressure along the edges of the crack. It is necessary to control the force of pressing on the drill. The holes should not be allowed to be deeper than the crack itself.
- Then you need to open the crack and degrease it.
- The final stage of work is the application of the repair composition, its drying and subsequent grinding.
You should begin removing cracks immediately after they are discovered. Otherwise, they will spread out and repair will be impossible.
Surface preparation
To ensure adhesion of the new coating, you need to properly prepare the surface. Preparation is performed in the following sequence:
- thoroughly wash the bathtub with a cleaning agent;
- clean the surface around the defect from rust, traces of paint and other contaminants;
- clean off any remaining rust and unevenness using fine sandpaper;
- degrease the surface;
- dry the bowl with a hair dryer or wait until it dries completely.
When covering a large area, the remaining enamel is cleaned off with a grinding wheel or coarse sandpaper.
How to fix holes?
A hole can form due to a heavy object falling onto an acrylic bathtub. If it has sharp edges, then the likelihood of a through hole increases. Only small holes must be eliminated.
Repair instructions:
the bathtub must be cleaned, dried and degreased on both sides: internal and external;- fiberglass is attached to the reverse side using epoxy glue - its diameter should be 5-6 cm larger than the hole;
- the second fiberglass overlay is attached 2 hours after fixing the first one - its size should be even larger by 5 cm;
- the third segment exceeds the second by another 5 cm, it is also glued after 2 hours;
- after 1.5 hours, the inside of the bathtub is degreased and sanded;
- the damaged area is puttied and leveled;
- when the putty dries, it is sanded again.
If the hole exceeds 5 cm in diameter, then it will not be possible to repair it. The bathtub will have to be replaced.
When filling a hole, cracks may extend from it. To prevent them from spreading, they need to be drilled. Otherwise, they will go further, making the repair ineffective.
Painting
This is the easiest way to fill (not polish!) scratches. To paint an acrylic bathtub, it is best to use enamel or acrylic paint. If the walls are scratched, it is easier to use an aerosol can. If there are scratches on the bottom of the bathtub, you can use liquid paint. The procedure is simple:
- Wash the bathtub with detergent, wipe it dry;
- Apply paint with a brush, roller or spray can;
- Wipe up spills if necessary.
Important
Acrylic paint dries from 30 minutes to 2 hours. Enamel paint can take up to 48 hours to dry. But it has a much longer service life (up to 20 years).
The big disadvantage of this option is the color selection. You can determine the exact shade of a bathtub using a colorimeter (spectrograph), but it is too expensive. Modern technologies will come to the rescue. To determine color, there are color matching apps for iOS and color matching apps for Android.
| Way | Cheapness | Simplicity | Efficiency | Durability |
| Toothpaste | ★★★ | ★★★ | ★★ | ★ |
| Repair kit | ★★ | ★ | ★★★ | ★★★ |
| Polishing | ★★ | ★★ | ★★ | ★ |
| Enamel painting | ★ | ★ | ★★★ | ★★★ |
| Acrylic painting | ★ | ★★ | ★★ | ★★ |
Prevention measures
Preventative measures to prevent scratches and chips on an acrylic bathtub:
- To care for your bathtub, do not use products containing acids or alkalis.
- Do not use abrasive cleaning compounds. Preference should be given to gels.
- Do not pour very hot water into the bath. Manufacturers do not recommend exceeding 60 degrees.
- After each use of the bathtub, it must be rinsed with soapy water and wiped dry.
- For preventive purposes, polishing gel should be applied to the surface 2 times a month. It will not only give it strength, but also refresh its shine.
- The surface of the bathtub should be free of rust and limescale. When they appear, you need to clean them with safe compounds, for example, hydrogen peroxide.
- When carrying out repair work, the bathtub must be removed. If this is not possible, then it should be covered with polystyrene foam and covered with polyethylene. This will avoid scratches and chips if a tool or building material is accidentally dropped.
Following these simple recommendations will extend the life of your bathroom.
Methods for repairing an acrylic bathtub
If your bathtub has fallen into disrepair, chips and cracks are already visible on it - the situation urgently needs to be corrected. If these injuries are left unattended, they will increase in number and become much larger. The product will become completely unusable. There are several ways to solve the problem:
- The simplest, but most expensive is a complete replacement of the bathtub. Of course, if its service life is already on the verge of expiration, then, most likely, this is the method that should be resorted to. In this case, recovery attempts will be ineffective.
- If there are too many defects and they are global in nature, it is better to contact those who deal with such repairs professionally. In the absence of experience, a full repair is impossible; it will cause more harm.
- The cheapest option is to repair it yourself. To do this, you will only need a repair kit, as well as some free time.
What cannot be used for restoration?
To remove scratches in the bathroom , do not use sandpaper with a grit rating below P2500 .
Even the P2000 is no longer suitable for repair work. Such paper will not sand, but scratch the surface.
Pumice stone and metal brushes are not suitable for removing scratches. Abrasive powders should not be used . They won't help solve the problem.
It will not be possible to correct the defect using ordinary putty. You need a professional composition based on acrylic.
Necessary materials
You can repair a damaged surface at home. Depending on the nature of the defect, the following materials can be used for sealing:
- liquid enamel or acrylic;
- porcelain powder, chalk, white;
- epoxy resin;
- aerosol for repairing chips;
- waterproof putty.
To prepare the surface you will need the following materials and tools:
- putty knife;
- sandpaper or sanding machine;
- degreaser (acetone, alcohol, etc.);
- cleaning products in liquid or gel form that do not contain abrasive particles;
- weak acid solutions to remove rust;
- stencil for coating;
- hair dryer;
- protective gloves, polyethylene film.
Spatula for work.
Helpful information
Tips for removing scratches:
- If a scratch has just appeared, it can be treated with a camouflage pencil with a waterproof compound. They are sold in online markets and cost about 170 rubles.
- You should begin removing any defects immediately after they are discovered. This will avoid their increase in size and complex repair work.
- If there are a lot of scratches, restoring the bathtub will be problematic. It is much easier to call specialists who restore bathtubs with liquid acrylic. You can find many similar advertisements on the Internet. The average cost of such services is 2,500 rubles.
All the most important and useful information about cleaning the bathroom is collected in this section of the site.
Grouting tiles
Defects in the bathroom are formed not only on the surface of acrylic. Scratches often appear on tiles. She, like acrylic, does not tolerate mechanical stress well.
It is not possible to answer the question about scratches on tiles and how to remove them. Unlike acrylic, it cannot be completely restored, regardless of the size of the defect. There are two ways to return the wall to its original appearance:
- replace damaged tiles with new ones;
- erase the defect.
The first option is less practical, as it requires complex work, during which you have to remove several tiles from the wall.
The second method involves treating the damaged area with mastic or a special pencil. The material must dry completely, after which it is sanded.
It is relatively easy to remove defects from an acrylic bathtub. Most minor damage can be repaired and does not require professional intervention.
Recommended Posts
How to remove marks from a felt-tip pen, marker, pencil, plasticine...
Wood antiseptic: which one is better to choose
Sliding wardrobe: internal contents + photo
How to correctly write an application for roof repair
How to fight fungus
Golden ratio in construction