The bicycle inner tube is very vulnerable to punctures. If you run over even a small thorn, you can punch a hole. When traveling, far from home, it is necessary to have a repair kit for sealing with you, otherwise cycling can end very quickly. At home, sealing a bicycle inner tube is much easier, since everything you need is at hand.
Required materials and tools
- Wrenches of different sizes for wheel removal.
- Repair kit or made patches.
- Glue for rubber.
- A de-beading tool to remove the tube from under the tire. Two plastic spatulas/hooks are used. As a last resort, you can use screwdrivers or wrenches, but you will have to act very carefully, because they are likely to damage the camera. And the risk of damaging the rim with scratches is also possible.
- A piece of chalk to mark the puncture site.
- Medium grit sandpaper for grouting and, preferably, a degreaser.
- At home - a bath or basin with water to detect a puncture.
- A weight to press the patch, a roller for rolling (this achieves an even better connection).
- Pump.
How to seal a bicycle inner tube
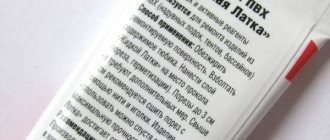
- The simplest is to use camera repair kits. Repair kits differ in composition and include different materials. For example, there may be patches of different sizes and shapes, sandpaper or a metal grater, glue, or chalk. And sometimes there is no sandpaper or chalk. Large bicycle kits, called bicycle first aid kits, are also sold, which include both patches and other materials/tools for repairing and maintaining a bicycle (a set of keys, a pump, screwdrivers, and others). It would be useful to have reinforced patches for tire repair, in case of damage to which a chamber puncture is inevitable, it is only a matter of time.
- Self-adhesive patches. The package contains several round or rectangular rubber patches, one of the sides of which is smeared with an adhesive substance and sandpaper. An ideal option if a tire breaks during a trip and you urgently need to seal it. It is enough to clean the area near the hole, remove all dirt and dust from it, apply a patch, wait 50-10 minutes.
- Homemade patches and the correct glue for them. The patches are made from an old unused camera. Patches are cut to the size of the puncture so that the piece of patch itself is larger and covers the damage with a margin. As for glue, regular rubber glue is suitable. The disadvantage is that you have to spend time making patches and buying glue. Also, the drying time is long, you need to press the camera under a large load. You cannot glue with fast-hardening compounds (superglues), their seams are inelastic and will crack under mechanical loads and bending. The glue should form an elastic seam.
You can buy repair kits for your bicycle at bicycle shops. The sets vary in quantity, quality of components, and price.
To repair the camera it will be enough:
- a wrench for unscrewing the nut from the hub (if the wheel design is without an eccentric);
- tire removal tool;
- sandpaper for sanding the surface;
- patches and glue (or self-adhesive patches);
- pump
Among the repair kits, the Chinese Red Sun is popular ; it includes patches and glue under the same name. Despite the country of production (China), the repair kit is not inferior in quality to more expensive branded analogues, but there is not enough glue to glue all the patches from the kit. When applying a normal layer of glue, you will be able to glue only 10 patches, and the kit comes with 24 or 36 pieces.
It is worth paying attention to the following sets:
- Rema Tip Top TT04 Sport;
- Weldtite;
- Park Tool Super Patch VP1.
Repair kits are listed in descending order of price and quality. So, the Tip top kit costs 400 rubles, for Weldtite you will have to pay about 300 rubles, and the price of the last first aid kit is about 200 rubles.
If you compare sandpaper and a metal float for stripping rubber, there is practically no difference. The only caveat concerns the weather: when it rains, it is much easier to clean even the wet surface of the camera with a float.
Glue from one repair kit may glue patches from another much worse. The adhesive compositions in the kits are developed specifically for your patches.
Regarding self-adhesive patches, you can choose from:
- Topic;
- Park Tool Super Patch GP-2;
- Weldtite Red Devils.
According to reviews, the patches are firmly glued and hold well during use. The kit always includes a certain number of patches (5-6 pieces) and sandpaper. Everything is packed in a small box. The cost of each set is approximately 200 rubles.
What glue to use
The glue must meet a number of requirements:
- after drying, the seam should not change properties during inflation/deflation of the wheel;
- dry as quickly as possible (especially important when a hole occurs during a bike ride).
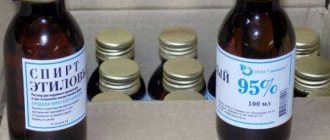
Regarding elasticity, any glue for gluing rubber is suitable, but not based on cyanoacrylate - anything that contains the words “superglue, cyanoacrylate, cosmofen”.
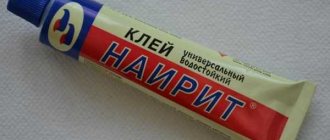
- Moment glue is good for rubber. It’s inexpensive, easy to use, and if it gets on your hands, it’s easy to wash off. Disadvantage: it is not suitable for quick repairs, since the sonnet takes from 30 minutes to two hours.
- Tip-Top patch glue, however, takes a very long time to dry (2-4 hours).
- Quick-drying Red Sun glue, which was mentioned above (from the repair kit of the same name). To dry completely, the glue needs 5-15 minutes. Not sold separately, only available with the set.
Several more representatives are written in the table.
| Name | Complete drying, h |
| Sprut or 88-NT from Novbytkhim | 24 |
| 88-SA from Anles | 24 |
| Moment-1 Classic | 24 |
Camera sealing technology
For beginners, the process may seem complicated. But in practice everything is done very quickly. In addition, the complexity may depend on the bicycle itself, more specifically, on its design. So, for example, the wheel can be tightened with classic nuts or “planted” on an eccentric. In the second case, dismantling is simplified.
In short, the work is as follows:
- remove the wheel;
- get the camera;
- find a puncture;
- seal the damage;
- assemble the wheel, inflate it and put it back.
First, turn the bike over, then place it on the floor so that it rests on the handlebars and saddle (mounting position).
How to remove a wheel from a bicycle
First, unscrew the nuts on the bushing. In modern bicycles, the nut size is 14 mm, and the same key is needed. If the wheel is secured with an eccentric, then simply release it. Next, remove the wheel and proceed to the next step.
If your bike has a rim brake, the pads can get in the way. Then you will have to loosen the brake so that the wheel has enough space to pass. There is no problem with disc brakes.
How to remove a tire and get a tube
- Completely bleed the chamber. Press the spool inside the nipple and push the chamber until the air comes out. Or unscrew the spool completely.
- Using the mounting tool, carefully pry up the tire and move the lever to push the tire out so that it sticks out over the rim. Using the second tool, at a distance of 10-15 cm, protrude the tire in the same way.
When part of the tire is already protruding beyond the rim, you can pry it up a little with your fingers and move along the rim until the entire side of the tire comes out. It is not necessary to remove the other side of the tire. - Remove the nipple from the rim hole, then remove the rubber tube completely.
How to find a puncture
- If the puncture is large, the air escaping from it will be very audible. There may be other minor damage, so be sure to follow the following methods.
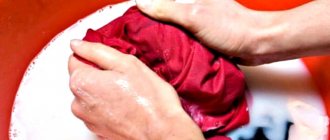
- Inflate the chamber with a pump and lower it into the water, either completely immersing it or gradually scrolling it. Air bubbles will be released where the puncture is. Remove the camera from the water, wipe it with a rag, and mark the damaged area with chalk or a marker.
- Make a soap solution. Bubbles will appear in the punctured area.
On a walk where there is no water, you can heavily inflate the camera and try to find a hole using fine dust. For example, fine dust or sand on the road will be blown to the sides under a strong stream.
When a puncture or cut is located at the junction of the nipple with the camera itself, it is better to completely replace the camera immediately. In this case, the repair will be short-lived.
How to properly tape a camera
- Make sure the camera is completely deflated and dry.
- Sand the punctured area with sandpaper until the surface becomes matte rather than smooth. The stripping area should be approximately 5-10 mm larger than the size of the patch.
- Remove the protective film from the patch and coat it with glue. The method of applying glue depends on the mixture itself and the repair kit. You need to check the glue tube or the instructions on the kit packaging. Sometimes it is necessary to apply glue to both surfaces (camera and patch), and sometimes it is enough to lubricate only the patch.
- Wait the required time after lubrication, if indicated in the instructions.
- Stick the patch on the greased side, squeeze out the air from under it (moving your finger from the center to the edges). Additionally, you can roll it with a plastic roller. Next, press the entire area with a heavy weight for the required time (depending on the glue). For example, place a book on top of the patch and press it down with a coffee table.
- Wait for the gluing time, inflate the chamber and check the strength of the gluing. To ensure the best results, wait longer than what is written in the instructions.
Carefully inspect the tire before reinstalling it. Small needles from thorns may remain in it, which will immediately create holes.
How to put a wheel back together
- We place the deflated camera inside the wheel by hand. First we insert the nipple into the rim, and then we fill the camera with our hands.
- For convenience, slightly inflate the wheel.
- Using the mounting hooks, we reinstall the tire.
- We pump the wheel completely and install it back into the bike. We tighten the nuts well, check that the installation is even, so that the brakes do not rub, and there are not very different gaps between the fork/stays and the wheel. If necessary, we do alignment.
There is a slight difference in the installation of the front and rear wheels. The rear has high-speed gears, and the chainstays have a speed selector through which the chain passes. This means that the wheel must be inserted so that there is a chain on both sides of the “stars”.
Step-by-step instruction
You need to follow a certain sequence. If you have never repaired a camera, just follow the instructions below.
Removing the wheel
To seal a puncture with your own hands, you need to remove the wheel along with the rim and tire. Sequencing:
- Disconnect the rim brakes and remove the fenders if they are in the way. Turn the bike over, placing it on the handlebars.
- Remove the bolts holding the bushing or eccentric.
- Carefully remove the wheel. If we are talking about the rear wheel, hold the chain, move the axle towards the saddle, slightly lift the wheel and pull it out.
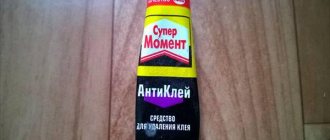
What to do if there is no glue
You can repair the camera without glue. To quickly get home, you can tightly wrap the patch with a material that does not allow air to pass through, but adheres tightly to the rubber. It could be some kind of film, electrical tape, tape.
There will be no strong connection, which means you must adhere to the rules:
- drive constantly so that the wheel and patch are always under load, and the patch does not move inside;
- It’s better to drive on a clean, level road;
- Do not overload the wheel.
Vulcanization is the most durable repair method. The patch is pressed tightly, then heated with high temperature, so both surfaces are fused, forming a single material. Vulcanizes in a tire shop in a couple of minutes.
Alternative repair method
Unfortunately, many cyclists do not always keep a repair kit with them. In case of an unforeseen situation, you will be helped by methods that allow you to seal a bicycle tube without special attributes. Let's talk in more detail about each of them.
No glue required
The most primitive option is to use electrical tape. The main task is to create an optimal pressure level in the chamber that will reliably press the patch and prevent air from escaping. The patch can be made from the same electrical tape or a piece of plastic bag.
Another way to repair a bicycle tube without glue:
- Turn the bike over and place it on the handlebars. Determine the location of the damage.
- At the punctured area, bend the tire away from the rim, remove the tube and tie it with a knot.
- Place the edges of the tire back under the rim and inflate the inner tube as much as possible.
What to do if the camera goes down
Descent after repairs may indicate the following:
- the patch comes off and allows air to pass through (dip it into water to check);
- there were other punctures on the camera that were not sealed;
- the nipple allows air to pass through (you can tighten the spool or completely change the chamber if the result is unsatisfactory);
- A cord (a thin metal wire) has come out of the tire, which is constantly causing new damage. The best thing to do would be to replace the camera with a new one.
Install the tire
Once you have sealed it, you can put the tube back into the wheel. Gradually inflate the wheel, checking whether the tire fits evenly into the rim and whether the tube is deflating. Perhaps the patch did not stick well or you missed another hole, it happens. If everything is fine, the tire is aligned, and the wheel does not flatten anymore, put the wheel back on the bike and go on the road!
Finally, it is worth adding that if you get punctures very often, then perhaps the tread of your tire is very worn out and it is time to replace it. And carry a spare camera with you.
Go to the section with patches and cameras >>>
How to avoid punctures
Basic rules regarding driving:
- do not run over curbs, especially at speed;
- do not drive on glass, beaches and other areas where there are a lot of thorns;
- If your front wheel hits a “dangerous” object (glass, spokes, needles), then try to sharply turn the steering wheel and maneuver it so that the rear wheel passes by.
Requirements also apply to the operation of wheels.
- Maintain correct tire pressure. Tires that are too low are more prone to punctures. Tires must indicate the permitted pressure range. For example, in the image below, the minimum pressure is 2.8 bar, the maximum is 4.5 bar.
There is also a rule - pump more in winter and in the cold season of spring-autumn than in summer. Under the influence of cold in a closed space, the air reduces its pressure. If in summer you pump your tires to 2.8 bar, then in winter you can increase the pressure to 3.8 bar. It is important that the upper limit does not exceed the permissible limit written on the tire.To maintain the required value, purchase a pump with a built-in pressure gauge. The price can start from about 600-700 rubles.
- Monitor the condition of the tire. Any tire has a tread - an additional layer that visually protrudes in relation to the main layer of rubber adjacent to the tube. The tread is a protective layer that helps you be more stable on the road and brake better. If the tread wears down significantly, which happens when braking excessively, the risk of a puncture increases.
Worn tire - There should be rim tape on the inside of the rim.
The modern market offers three tools in case of punctures.
- Anti-puncture tape is a rubberized plastic or Kevlar tape (strip) that is placed inside the wheel between the tire and the tube. Creates an additional protective layer.
- Sealant. It is poured inside the camera and, in case of a puncture, closes the hole, helping to get to your destination.
- Self-sealing cameras. A special resin is pumped inside the cavity. During the puncture, it completely seals the hole.
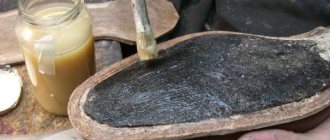
Glue the patch
Then apply the patch, pressing it firmly against the camera. It is best to press it with something heavy for about five minutes until the glue is completely dry. Pay special attention to the edges of the patch; the glue should adhere evenly over the entire surface. If there is a film on top of the patch, it is better to save it - this will help prevent the patch from sticking to the inner surface of the tire.
You should not glue a large patch onto a narrow camera.