It can be a very annoying situation when, after a recently completed renovation, your neighbor drowns you and on the ceiling, even after it has completely dried, yellow spots suddenly appear, increasing in size.
The reason for this unpleasant event is the interfloor slabs that were not completely dry. Even if the plaster on your ceiling has dried, stains may still appear after a while. If the house is old or even new, but the pipes of the engineering systems are touched by rust in the ceilings or the fittings in the monolith are rusting, sooner or later it may also appear on the ceiling, especially if the corrosion process is accelerated by flooding.
The best way to eliminate the consequences of this event is to file a claim with the neighbor above and ask him to eliminate the consequences of the utility accident. However, it happens that you don’t want to spoil relations with your neighbors, and the trouble isn’t that great. In this case, you can try to eliminate the consequences of the flood yourself.
Let's figure out how to remove yellow spots, rust and smudges on the ceiling after flooding and leaks from careless neighbors.
Concrete floor with whitewash
An ordinary concrete floor slab very often acts as the main ceiling in an apartment. The finishing material in this case is whitewash. Repairing the ceiling after a flood under such conditions will be quite problematic, but still possible.
To remove yellow spots on the ceiling after flooding, you can use one of the following methods:
- Mechanical repair of the ceiling;
- Chemical repair;
- Combined method.
The last option is quite relevant - flooding often leads not only to the appearance of stains, but also to other damage, so a complex of operations may be required to restore the ceiling finish. Of course, before removing stains from the ceiling, you need to consider the available methods used in such cases.
Mechanical repair of the ceiling after flooding
Restoring the ceiling after flooding is carried out as follows:
- Before you remove stains on the ceiling after a flood, you need to assess the extent of the damage. If, as a result of flooding, the putty or plaster has crumbled, then this layer of coating must be removed. The resulting bubbles are broken with a hammer, and all flaking elements are removed using a spatula. Stains that have reached entire areas of the coating will also have to be completely scraped off or cut down. The cleaned ceiling must be left to dry completely.
- There may be metal elements in the ceiling that has been leaking. Of course, exposed fittings located next to the rust must be restored and must be separated from the ceiling finish. It is recommended to carefully tap the concrete with the sharp edge of a hammer to find delaminations.
- Metal elements discovered during the inspection must be cleaned with a steel brush or sandpaper to remove rust from the ceiling. Subsequently, the metal is covered with two layers of paint, and it is advisable to select compounds that can neutralize rust. Protecting the ceiling reinforcement will prevent further staining on the ceiling, which can occur due to moisture remaining in the concrete.
- When the paint has hardened, the damaged areas of the ceiling must be treated with a primer. Different compositions are suitable for this - for example, an aqueous latex solution in a ratio of 1:3. If there are no visible metal parts, the repair technology does not change - the ceiling is still primed, since in the future it will be covered with a finishing finish, for which the structure must have good adhesion.
- To eliminate potholes and dips in the ceiling structure, you can use moisture-resistant cement-based leveling compounds. A good option for this composition would be tile adhesive. In any case, the composition is prepared for work in accordance with the instructions attached to it and applied in layers to the ceiling. After applying each layer, you need to give it time to set, but you shouldn’t wait until it hardens completely.
- After preparing the ceiling, all that remains is to carry out the final work by covering the ceiling with a fine finish. As a rule, gypsum putty is used for this. It is applied in several (usually two) layers, leveled and left in this form until it dries. In the future, you will need to sand the coating so that it is as smooth as possible.
- Before painting over the stains on the ceiling, it will need to be treated with a primer again. Of course, to completely eliminate stains and provide uniform coverage, the ceiling will have to be covered with several layers of paint, the number of which directly depends on the saturation of the composition.
As one can conclude, the repair technology is quite complex, and such restoration will require a lot of effort and financial costs. But these shortcomings are compensated by the high quality of such repairs.
Let's look at the first way to remove yellow stains from a leak
This method is mechanical. These are drastic measures that will help you completely get rid of the consequences of flooding in your apartment, but they are labor-intensive.
Before starting repairs using this method, you must have the following construction tools and materials available:
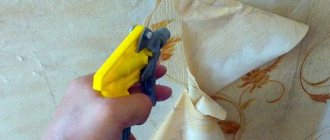
- Putty knife;
- Liquid sprayer;
- Small roller or brush;
- Deep penetration primer;
- Finishing putty;
- Fine sandpaper;
- Paint or whitewash.
Have you collected everything? Get started. You need to use a spatula to clean off old, damaged paint, putty or plaster in the place where the stain has formed. Then moisten the freed area and wait a little until the moistened area dries. After this, using a roller or brush, apply primer to the area to be repaired.
After a while, after the primer has dried, apply the finishing putty to the exposed area with a spatula, level the surface and wait until the putty sets. Using sandpaper, rub in the dried putty and sand any uneven surfaces, thereby preparing the ceiling for painting or other types of finishing work, and prime again.
After the primer has dried, repaint the ceiling with a roller or brush, carefully choosing the tone of the paint. If the shades of the old and new paint are not identical, you will have to repaint the entire ceiling. To avoid stains and stains, paint the ceiling in 2 layers. If you use whitewash, you need to apply it in two layers after preliminary priming.
You can simply whiten the stain, but only if it is small. In this case, the place where the stain formed is washed away, primed with 2 layers of primer and 2 layers of whitewash are applied. When using this method, you will also have to whitewash the entire ceiling.
How to remove stains on the ceiling using a chemical method
If there is high-quality waterproofing of the floor in the apartment above and if the flooding was eliminated as soon as possible, then it will be easier to solve the problem of damage to the ceiling. The thing is that under these conditions the risk of damage to the finish is not so high. That is why it is likely that the only damage will be red spots on the ceiling and characteristic stains.
You need to understand that washing stains from the ceiling is not one operation, but a whole set of measures. The problem is that the characteristic yellow spots that appear on the ceiling after flooding are not uniform damage, so choosing a universal solution to this problem will not work. When deciding how to fix a leak in the ceiling, it is worth considering that the mechanical repair method is more effective, but with the help of chemistry you can achieve the right result.
The technology for removing stains on the ceiling using a chemical method consists of the following steps:
- Before cleaning leaks on the ceiling, you need to remove a layer of paint from the surface of the ceiling. Since the ceiling is already wet, this operation will require minimal effort. There is no point in hoping that wet paint is not damaged - its structure is guaranteed to be destroyed when exposed to water, and in the future the coating will simply peel off, so it will be much safer to completely renew it.
- The dried ceiling must be degreased to remove from the surface various oils that have entered the ceiling along with water. For this operation, you can use any suitable composition - for example, a nitro solvent. Degreasing will make it possible to remove contamination on all layers of the structure, and not just on its surface. A clean piece of cloth is quite suitable as a tool for applying solvent.
- Next, the prepared ceiling needs to be rid of coloring pigments, due to which stains appear on the ceiling. Any household chemical intended for cleaning will do. The main condition is that the substance must contain chlorine. Since chemicals discolor any colors, before work you need to make sure that the floor is not damaged due to the product dripping down. The ceiling is cleaned using a sponge. You should not keep a sponge soaked in bleach on one area for too long - as a result, the putty may begin to crumble, and the ceiling will have to be refinished.
- At some point in the process, the stain will stop losing color. As soon as this happens, you will need to stop the operation and leave the ceiling in a soaked state for about an hour - thanks to this, the chlorine will stop interacting with the stain. This is an important point to consider before whitening yellow stains on the ceiling.
- After an hour, the ceiling can be washed further, but this time you need to use ordinary detergents - for example, laundry soap or washing powder. This operation allows you to solve two problems at once - firstly, to remove all usual contaminants from the ceiling, and secondly, to wash out the chlorine remaining on the ceiling.
- The last stage of work is washing the ceiling with clean water. As a tool, you can use a sponge or a piece of foam rubber. At this stage, it is necessary to completely remove all traces of detergents from the ceiling surface.
Of course, the result of cleaning the ceiling will not be noticeable immediately. It will take a couple of days for the structure to dry completely. In addition, the likelihood of completely removing yellow spots using a chemical method is minimal, at least in one step. However, if you mask the damaged area with paint of the right color, you can put off more radical methods until the next full repair. This is why you need to choose the right paint before painting over a leak on the ceiling - even a temporary solution should be of sufficient quality.
Other things to consider
Stains appear more often when working with glossy and semi-gloss finishes. If you are not confident in your skill, use matte paint. Follow the link to learn how to make matte paint from glossy paint.
Flaws are best shown in white. To protect yourself from possible failure, do not take a snow-white coating or add a little color to it.
Over a large area, there are more defects. The larger the surface to be painted, the more responsible you need to approach the work.
To paint the walls, take the paint that you like best. For the ceiling, take the highest quality one. The ceiling is the most finicky of all planes, especially since you cannot cover the flaws on it with furniture or paintings.
The main components of an excellent result: a well-prepared base, a non-viscous coating and adherence to painting technology. But at the same time, know that the ideal does not exist, which means you shouldn’t squeeze all the juice out of yourself to achieve it.
Plasterboard ceilings and stains after the flood
To equip ceiling structures, moisture-resistant plasterboard sheets are often used, designed for use in conditions of high humidity. However, if we are talking about flooding, then even protected sheets will not be able to remain intact - gypsum tends to absorb water, so the structure will have to be repaired. There is no clear answer to the question of how to remove stains from a plasterboard ceiling after a flood.
If the volume of water was not very large, and the ceiling structure did not interact with it for long, then the repair technology will directly depend on the finishing of the plasterboard ceiling:
- Dye
. The wet layer of paint must be removed before it dries. You need to work carefully - the sharp edge of the spatula may well damage the sheet of drywall if you do not use it carefully. The dried finish is primed with a water-latex solution, and gypsum putty is applied on top of it (after the next hardening). Next, the coating needs to be sanded, treated with a primer and covered with new paint. It is worth remembering that even with the right paint, the damaged area will still be noticeable. - Ceiling wallpaper
. When the ceiling is flooded, the wallpaper glued to it usually peels off and becomes covered with red spots. It will not be possible to restore their original appearance using any methods, ranging from simply trying to remove stains to replacing the damaged area. The simplest solution is to return the dried wallpaper to the repaired plasterboard ceiling and paint it.
Sometimes plasterboard ceilings are used without finishing. Of course, such situations are extremely rare, but you need to be aware of them. In case of flooding, the primary task is to restore the original technical characteristics of drywall, and not its visual data.
When figuring out how to remove rust from a ceiling after a leak, you need to immediately pay attention to the most obvious way to solve the problem - completely replacing the damaged sheet. However, you can also replace a separate piece of drywall, for which you will first have to cut out the damaged area and fix wooden blocks (or metal profiles) to the ceiling, to which you can attach a patch.
The patch is cut so that after installation there is a gap of about 5 mm around the entire perimeter. Having secured this fragment with wedges, you need to align it with the level of the rest of the ceiling structure. A special mixture is used to fill the joints around the perimeter of the patch. After the mixture has completely hardened, the wedges are removed, and all remaining irregularities are filled with putty.
If the vinyl surface is damaged
The easiest way to remove ceiling stains is from vinyl surfaces. What is the reason? It's simple - there are never any unpleasant yellow spots or streaks left on the vinyl. When flooded, this material acts as a large basin, collecting all the water. The only thing you need to do is carefully remove all moisture. To perform this task, it is optimal to call specialists from the company that did the installation.
However, there are situations when there is no time to wait for specialists to arrive - the bag hanging from the ceiling has reached alarming proportions. This problem should be resolved as quickly as possible. During installation, all vinyl sheets are equipped with decorative inserts with a connecting seam. It is best to look for them in corners. Before removing the inserts, the room must be heated to a temperature of +40°C.
A container of sufficient volume is placed under the area with the inserts and all collected liquid is carefully drained. Before returning the insert to its place, you should thoroughly dry the space between the canvas and the ceiling.
Which is better: heated floors or radiators?
Warm floorBatteries
Repair of PVC tiles
PVC tiles themselves have good resistance to water, so flooding of the ceiling will not affect the performance characteristics. This statement does not apply to the visual side of the issue - stains appear on tiles in the same way as on other materials. It will not be possible to wash the tiles, since contaminants are absorbed into them due to the low density of the material.
However, you can get rid of the problem even in this case - all you need to do is perform the following series of operations:
- First you need to thoroughly wash the tiles using foam rubber and detergents (compositions with chlorine can also be used);
- Then the tile is primed with a latex compound, due to which a protective film layer is formed on the material;
- When the primer has dried, the tiles can be coated with water-based paint of a suitable color.
The technology is quite simple and almost completely copies the algorithm for conventional painting of ceiling tiles. To understand the details, it is worth studying the article on this topic.
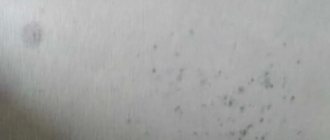
Removing rust stains
In some older homes, the pipes that run through the floors between floors have not been repaired or replaced for many years. Therefore, it is very easy to flood the apartment below, leaving unattractive yellow spots with rust on the surface.
How to get rid of rusty yellow stains? For work you will need the following materials:
- copper sulfate,
- laundry soap,
- bone glue,
- drying oil,
- gloves,
- roller
The work begins with preparing a special composition that will help get rid of yellow spots on the ceiling. It includes 250 g of the first three components. Drying oil will require no more than 40 g. The damaged surface is cleaned of paint and plaster to the maximum permissible depth. The mixture must be poured into a special tray and, dipping the roller, treat the entire damaged area with it.
You can simplify stain removal by treating with copper sulfate. After this, the area is carefully primed, covered with putty and painted over with oil-based paint. Due to the fact that this paint and varnish material forms a film, streaks and stains will not show through. If the ceiling was previously painted with water-based paint, you should also apply it over oil paint.
If you had to resort to creating a film with paint, over time the stain will appear again. Therefore, the best solution would be to immediately replace the finishing material or cover the ceiling with a new one.
Repair of suspended ceilings
It also happens that the suspended ceiling is flooded by neighbors, and something needs to be done about it. Stretch ceilings, although considered one of the most leak-resistant, are still susceptible to water. Even if the volume of water was not very large, and all the consequences of flooding have long been eliminated, yellow spots on the stretch ceiling may still appear. The fact is that water marks do not appear immediately, but gradually appear on the canvas.
The most common conditions look like this: a special elastic film is used as a canvas, and the cause of the appearance of red spots is water entering from above the apartment. The simplest option for eliminating damage would be a suitable means for cleaning a stretch ceiling. Such products are available in a variety of formats - gels, sprays, various solutions, etc. The cleaning product must be used strictly in accordance with the instructions.
If there is no opportunity to use such means, then you will need to think about how to bleach the ceiling using improvised means. For example, you can make a tampon from gauze and cotton wool. Such a swab is moistened in a 10% solution of ammonia, after which they need to wipe the stain, going into clean areas. To complete the work, you will need to wash the entire ceiling with ordinary detergents - then the ceiling surface will look uniform.
Another good option is soda ash. It is diluted with water to a 5% solution, after which the resulting composition is applied to the contaminated areas of the ceiling. The dried solution is washed off from the ceiling surface with warm, clean water. However, if we are talking about using a film ceiling for cleaning, then most suitable products will do - unless you use aggressive compounds. It's all about the smooth surface of the stretch ceiling, which is quite easy to clean.
If fabric was used to decorate the ceiling, the process of removing stains may take longer. The list of acceptable products is the same as in the case of film materials - but they can only be applied and washed off with soft bristled tampons. Detergents must be designed for delicate work. To get rid of very strong stains, it would be better to replace the canvas or contact a specialist.
Preparing for work
Before getting rid of stains and stains after flooding on the ceiling, its surface should be cleaned of the old coating. You need to start stripping from the corners and move towards the center.
To remove whitewash, prepare an adhesive composition of 3 tbsp. l. flour and 6 liters of boiling water with continuous stirring. Cool and spread onto the surface with a brush or roller. After 15 minutes, when the mass has dried, clean it with a spatula, and the whitewash will not crumble into fine dust, but will be removed in even layers.
Another option to remove limescale is to mix 2 tbsp in a bucket of warm water. l. any planed soap without fragrances and 5 tbsp. l. soda
Water with soda and salt in a ratio of 3 tbsp will do a great job of cleaning whitewash. l. soda, 3 tbsp. l. salt and 5 liters of water.
Any of the solutions should be left on the surface for 10–15 minutes, and then cleaned with a brush, sponge or spatula. When working in the area of lighting fixtures, turn off the power supply to avoid electric shock.