Have you finally finished renovating your apartment and are you already planning who to invite to your housewarming party? True, there is one more push left - cleaning. Renovated premises must be thoroughly cleaned of construction debris, dust, dirt and stains of building materials. Doing this on your own is difficult, but possible. Find out how to properly clean an apartment after renovation with your own hands and how you can safely remove construction dirt from different surfaces. With our advice, the work will go much easier and faster.
What is needed for cleaning after renovation?
Before you start work, prepare everything you need. First of all, find a good vacuum cleaner. As a last resort, it could be your old home unit, if it has enough power and you don't really feel sorry for it. The fact is that household vacuum cleaners are not designed for the smallest construction dust, and soon after such cleaning they break down.
How can we better solve this problem? Rent a professional construction vacuum cleaner (a variety of professional cleaning equipment can be easily found in advertisements). It will cost money, but cleanup will be faster and easier.
Next, select your inventory:
- One or two buckets (more can be done if you have a lot of helpers).
- Lots of microfiber cloths and soft rags.
- Brush and/or mop for cleaning the floor.
- A mop with soft bristles for wiping the ceiling (if the ceiling can be wiped). You can also use regular napkins when standing on a stepladder. Choose what is more convenient for you.
- A pair of brushes for manual cleaning (with soft and hard bristles).
- Spatula for mechanical cleaning of surfaces from dry building materials (plastic or wood).
Be prepared for the fact that all brushes and rags will have to be thrown away after cleaning. They will collect so much dust that they will then leave white streaks on any surface. Also buy a pack of durable plastic and polypropylene trash bags.
What to clean with? In our work, we use professional products to treat various surfaces and remove various contaminants. But purchasing such an arsenal for one single cleaning is too expensive. Therefore, at home, more affordable options are usually used. Here is a sample list of cleaning products for an apartment after renovation:
- All-purpose detergent (designed for washing dishes, floors and other surfaces in the house). You can even replace regular liquid soap, but not washing powder.
- Means for washing and cleaning plumbing fixtures. Depends on the condition of the sinks, toilet and bathtub. If they are new, you only need to remove construction dust; you can get by with regular detergent. If there are rust stains or limescale deposits, take a special “chemistry” that will dissolve the dirt and disinfect the ceramics (usually it is based on acids or chlorine).
- Window cleaning liquid - useful for double-glazed windows, glazing of doors, mirrors, as well as for glazed tiles.
- Furniture polish, parquet wax, laminate and porcelain tile care products – as needed.
- To remove stains from available “chemicals”, denatured alcohol, white spirit and acetone are most often used. If there is a lot of excess grout on freshly laid tiles, you will have to buy a special foam to dissolve and wash it off. Other chemicals for removing specific stains should be purchased only if these stains are definitely present.
Also, take care of your protection. Choose old but comfortable clothes. After cleaning, you will most likely have to throw it away too. Dust and building materials are very difficult to wash off, and even settle in the drum and filters of the washing machine. Be sure to buy several pairs of durable housekeeping gloves and pick up safety glasses. If there is a lot of dust and the vacuum cleaner is not a professional one, you should use a respirator to protect your respiratory system.
Proper execution of repair work
Work associated with the formation of large amounts of dust is carried out with open windows only in the warm season and in calm weather. In this case, a noticeable part of the dust will leave the room without flying around it under gusts of wind. You must wear a respirator to work, since construction dust is harmful to the respiratory system.
Dust work includes removing plaster, cleaning plastered or puttied surfaces, and drilling. When drilling, it is recommended to use a construction vacuum cleaner to immediately collect the dust that spills from under the drill.
Special dust collection attachments are also suitable for this purpose - a small plastic container is attached to the drill nozzle. You can also use a regular scoop, placing it just below the hole to be drilled. If you don’t have an assistant, glue a “pocket” made of thick paper to the wall with masking tape.
When removing old coatings, the surface is sprayed with water so that as little dust as possible gets into the air. This applies to the removal of whitewash and plaster, old wallpaper.
After performing dusty work, use a spray bottle - water sprayed into the air will kill the dust, preventing it from scattering throughout the house. Spraying water clears the air of suspended and non-settling dust.
Procedure: step-by-step plan
How to clean an apartment after renovation, where to start and where to go? All this needs to be thought through before starting work, so as not to complicate an already difficult task. First, decide who can help you and how. Of course, you shouldn’t assemble a “crew” of a dozen friends, but you also can’t do such a voluminous job alone.
Also expect that a thorough cleaning of the entire apartment may take two to three days. Decide how it is more convenient for you to do it - one room a day or in stages (today we remove dust, tomorrow we wash, etc.). If you choose the first option, keep in mind that dust from uncleaned rooms can get into cleaned ones. Doors must be tightly closed and covered to maintain cleanliness.
The main rule of any cleaning: do all work from top to bottom. That is, first clean the ceiling, then the walls and windows, doors, furniture, and at the very end - the floors. This way you won’t have to clean the same surface several times.
We clean each room in the following sequence:
- We collect and remove tools, leftover building materials, and construction waste.
- We carefully remove dust (this is perhaps the most important stage for successful post-repair cleaning).
- We wipe, wash and clean all surfaces from stains, general dirt, and adhering dust.
- We remove stains that remain after general washing.
- We rub glass, lacquered and glazed surfaces until they shine.
Important! Do not attempt to clean anything until all construction dust has been removed. By wetting a dusty surface, you will create an additional problem - white stains that remain even after several washes.
To finish cleaning your apartment after renovation, you should clean upholstered furniture and carpets (with your own hands or at a dry cleaner), wash curtains and other textiles. If after all the smell of building materials and solvents remains, you need to take additional care to remove it.
Shelf life of construction waste
The legislation states that storage of generated construction waste is permitted for a period of no more than eleven months. Then they are processed, neutralized or completely disposed of.
Storage facilities for such waste mean constructed structures that are equipped in strict accordance with the requirements of the sphere of ensuring environmental protection and sanitary and epidemiological well-being of the living population. Such structures are used for long-term storage of generated waste.
Garbage collection and dust removal
How and where to start cleaning after renovation?
- First of all, collect all the things that interfere with vacuuming and washing.
- Don't put them in a pile in another room or on a landing. Sort immediately.
- Shake off any remaining building materials that may still be useful and put them in the pantry. Assess their necessity; perhaps it is better to give the remaining few rolls of wallpaper or a can of paint to someone than to store them at home, taking up useful space.
- Wipe off dust from tools and electrical equipment (drill, screwdriver) and also put them back in place.
- If possible, pack large construction waste in large polypropylene bags. If these are very large pieces (plasterboard, plywood, fiberboard), stack them. All this garbage will need to be taken to a landfill; it cannot be thrown into household waste containers. There is a fine for this.
- Smaller trash can be collected in regular trash bags and thrown away. Be careful with residues of hazardous materials - paints, solvents, glass wool.
When the rooms are cleared of all unnecessary things, you can start cleaning up the dust. This is very important work. The result of all cleaning and the comfort of living in the apartment depend on how carefully you do it. Leave at least a little dust in the corners or behind the baseboards, and it will continue to appear from there for several months. And hence the constant stains on the floor and stale air with a dusty taste.
How to effectively remove dust after renovation in an apartment? There are no special secrets here. Just run the vacuum cleaner over all surfaces from ceiling to floor. The main thing is to do this carefully, without missing a centimeter. If there is a lot of dust and the vacuum cleaner is a household one, vacuum the room once, then change the dust container and vacuum again.
Be careful not to damage the surface being cleaned. The vacuum cleaner brush should be soft. When cleaning delicate materials, such as suspended ceilings or wallpaper, you can attach a thin cloth (gauze) to the brush, which allows air and dust to pass through well.
Important! We are accustomed to thinking that dust settles on horizontal surfaces, but this is not true. You need to vacuum the walls, the sides of the cabinets, and all the parts of the lamps, as well as windows, doors and even sockets. Blow well the baseboards and grooves in the window frames (the windows should be vacuumed first closed and then open).
After finishing the ceilings and walls, be sure to remove dust from the furniture. If it is in covers, vacuum them. If the sofa and armchairs are simply covered with something on top, remove and remove these protective materials from the room. Then clean the upholstery itself.
After successfully removing dust, you can proceed to washing the surfaces. Use our tips for wet cleaning in an apartment after renovation. We will look at each room separately.
Preparing the premises
Cleaning an apartment with your own hands is a dusty task. To work, you will need to wear old clothes, which will end up in the trash.
You should also buy gloves, a respirator and goggles. It wouldn't hurt to cover your head with a scarf.
Material and tools
Where to begin? All construction materials and tools used in the process should be placed in their places.
Their place is in the pantry or garage. However, first, take a cloth and a bucket of water, add some dishwashing detergent, and wipe down all the tools. During the renovation, a lot of dust must have accumulated on them.
If the remaining materials are no longer needed, take them too to the garage or storage room. They may come in handy in the future.
Another option for recycling building materials is to offer it to family, friends or neighbors, or place it next to the trash can. Perhaps someone will need them.
Construction garbage
Then clear the room of debris. Buy bags for it at a hardware store, just don’t take plastic ones, you can’t put much in them - they’ll tear quickly. But polypropylene ones can be reused, for example, storing firewood in them.
Entrust this work to the male half of the family. After all, you still have to wash the entire room, and possibly the apartment, from dust and dirt.
Large construction waste must not be disposed of in waste containers. You need to call a car that removes construction waste or take it to the landfill yourself.
Then start cleaning up small particles. This can be done using a vacuum cleaner, but not an ordinary one, but a construction one. You don’t have to buy such a vacuum cleaner; many cleaning companies rent it out.
What and how to wash in the living room, bedroom, nursery?
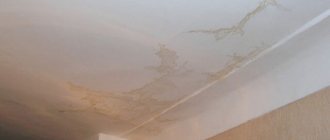
Start from the ceiling:
- Painted and fabric stretch ceilings just need to be vacuumed. They do not require additional wet cleaning. The exception is visible dirt and stains. They need to be carefully wiped with a damp cloth; if necessary, use a detergent solution.
- Wooden trim can be wiped with a damp, well-wrung-out cloth.
- Vinyl stretch ceilings are easy to clean. They can be wiped with a cloth soaked in clean water if there is no visible dirt. Stains are washed with soapy water. Just be careful - do not use abrasives or sharp tools to avoid damaging the film.
At the same time, start cleaning the chandelier and ceiling lights. Remove removable lampshades, wash and wipe dry. Carefully wipe metal elements and non-removable parts with a well-wrung cloth to prevent moisture from getting into the electrical wires. Be careful: before any manipulations with lighting fixtures, turn off the electricity in the room. Do not rub plastic, glass and metal elements of lamps and chandeliers with hard brushes, scrapers, or abrasive powders. There is a risk of damaging the surface.
After the ceiling, move on to the walls, windows and doors:
- Walls usually do not need to be washed or wiped if they have been thoroughly vacuumed. The exception is finishing made of wooden lining, natural stone, plastic and mirror decorative panels. They are wiped with a damp and then dry cloth or napkins.
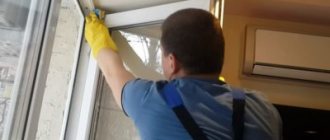
- Windows must first be washed from dust and dirt with water and detergent. Change the water and rinse the wipes frequently. Pay special attention to the corners and grooves in frames and fittings. Glass and curtain rods also need to be washed. After the soap solution, rinse all elements of the window unit with clean water and wipe dry. Treat double-glazed windows with glass washing liquid and rub until shiny, avoiding streaks. Do not use abrasive tools or powders to clean plastic frames, glass, or varnished wood. If there are stuck pieces of plaster, glue, or polyurethane foam, remove them with a wooden spatula. Carefully treat primers, paints, thin spots of glue and foam with acetone - it will dissolve them. And tape and glue from stickers can be easily removed with white spirit.
- Interior doors are washed, in general, like windows. But pay attention to what material they are made of. Solvents should not be used on varnished wooden door panels to avoid damaging the coating.
After the walls comes the turn of furniture, mirrors and, in general, everything that remains unwashed in the room (appliances, decorative elements, stationary screens). What should be done:
- Wipe cabinet furniture (cabinets, cabinets, chests of drawers) with a damp cloth inside and out. Give it a chance to dry thoroughly - leave all the doors open and the drawers pulled out. Dried facades can be rubbed with polish, which will repel dust from the polished surfaces.
- Upholstered furniture (sofas, armchairs, beds) should be freed from covers and vacuumed very thoroughly. Ideally, after repair, send them to the dry cleaner (or call a dry cleaner to your home). If you are not going to seriously clean the upholstery, carefully go over it with a damp brush or microfiber cloth. Do not moisten or rub too much to avoid damaging the fabric. Your task now is only to remove the remaining dust. If you wet the upholstery excessively, unsightly stains will appear on it.
- If possible, mirrors should be washed with clean water to remove dust and dirt. Then use window cleaner and dry them with a microfiber cloth.
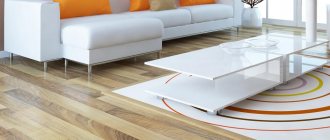
When everything in the room is already clean, all that remains is to wash the floor. Depending on the degree of contamination, this can be done with clean water or a detergent solution. Do not wet the floors too much - neither solid wood boards, nor parquet, nor laminate like excessive moisture. It is better to rinse the rag or mop more often and treat a small area of the coating at a time. Parquet and parquet boards are washed only in extreme cases. After wet cleaning, they should be allowed to dry thoroughly and then treated with protective wax.
Removing stubborn stains
Residues of building compounds or materials can be difficult to wash off with plain water and a cloth.
- Remove paint drops with white spirit or kerosene.
- Traces of polyurethane foam and construction tape can be wiped off with a rag soaked in vegetable oil.
- If whitewash or putty gets on polished furniture, wash it off with gasoline or a homemade compound. To do this, take equal parts of vegetable oil and “Extra” salt, mix and apply to the contaminated area. Wipe gently with a soft cloth.
- Glue residues from linoleum can be easily removed with any alcohol-containing liquid.
- Do not use abrasive powders to clean laminate or parquet floors. Do not use acid or alkali on porcelain tiles.
Do not think that this is the end of the general cleaning: within 2-3 days, construction dust may again appear on the furniture and floor, so you will need to wash all surfaces again with clean water, and thoroughly vacuum upholstered furniture and carpeting.
If you understand that you cannot cope with such cleaning on your own, then I recommend that you order this service, I advise you to look at the website https://sts-uborka.ru/.
How do you like the article?
How to clean and wash the kitchen after renovation?
- As in living rooms, here we start from the ceiling. Often in kitchens, ceilings made of washable materials (plastic, wooden paneling, stretch PVC) are specially installed. Such a surface must be wiped with a damp cloth and, if necessary, wiped dry. Also, do not forget about the lamps and ventilation grille.
- After the ceiling we move on to the walls, windows, doors. The same work is repeated here as in the living room or bedroom. The kitchen apron will require special attention. If it is decorated with plastic panels, it is enough to use a napkin and a soap solution. The apron made of facing tiles must be cleaned of any remaining grout for the seams, and also thoroughly washed from stains of tile adhesive and putty.
- Wash the kitchen set thoroughly outside and inside and allow it to dry. If the facades are glossy, they need to be polished. You should also polish all chrome, mirror and glass elements. Wash the sink with a special powder or cream product.
- Often, appliances remain in the kitchen during renovations - a refrigerator, stove, microwave, etc. All this must first be very thoroughly dust-free. Dust can damage devices and lead to premature failure. Next, the equipment should be washed thoroughly, but be careful with electrical components and components so as not to damage them with water.
- The kitchen floor is washed last. If it is linoleum, it can be easily washed with acidified water (5-6 tablespoons of vinegar per 8-10 liters of water). Tiles, especially freshly laid ones, require more attention. It, like the wall one, needs to be cleaned of any remaining building mixtures, as well as dirt. A good brush and floor cleaner will do the job. Do not add chlorine or acids to the water for washing porcelain tiles - they can damage the coating.
If furniture gets dirty during renovation
It’s so nice when, after renovation, you can bring brand new furniture into the room, still wrapped in film. In this case, we simply install pieces of furniture in the desired places and enjoy the work done.
And if the furniture remained in place during the renovation, then even covered with a protective film, it could still get dirty.
A vacuum cleaner is indispensable when cleaning furniture: everything is thoroughly vacuumed using the attachments designed for this purpose.
Old furniture does not always look good after renovation. Somewhere you will need to remove a stain, or even replace the upholstery.
Purchase products for cleaning textile, leather and wooden surfaces
Grease stains are removed with compounds containing alkali, or, conversely, with acids (for example, citric). Regular milk will help with many stains: it will push dirt from the deep layers of the material out.
In addition to upholstered furniture, all cabinets and shelving are vacuumed and washed: inside and out.
Cleaning after renovation in the bathroom and toilet
First, wash and dry the washable ceiling, paying special attention to light fixtures, exhaust grilles and ceiling skirting boards. The painted ceiling and painted areas of the walls do not need to be washed or wiped. The most difficult task in the bathroom is cleaning ceramic tiles. As a rule, it takes up a lot of space here, and washing takes a lot of effort.
Assess the total area and degree of contamination of the coating. You may be better off investing in special foam to clean freshly laid ceramic tiles rather than scrubbing everything by hand. This foam dissolves excess grout and helps remove stains from glue and putty.
Have you decided to fight dirt with improvised means?
- First, remove large stains of building materials using a spatula or a stiff (not metal) brush.
- Then, little by little, scrub away dirt from each tile using a sponge or napkin. To wash glazed tiles, the water can be acidified (up to 0.5 liters of vinegar per bucket of water), this makes it easier to remove stains. In any case, the water should be changed as often as possible.
- If you come across stains of paint and primer, dissolve them with acetone.
- Wipe the washed tiles dry. If it is large and glossy, you can finish it off by using window cleaning liquid to add shine.
Also wash and dry the window, door, mirrors, cabinets, and pencil cases.
Next, take care of the plumbing. If it is new, wash with soap and then clean water and wipe with a dry cloth. The toilet, sink, or bathtub that was used before or during the renovation must be cleaned and disinfected with special means. Please note that some preparations are used for ceramic products, while others are used for acrylic bathtubs and trays. Acrylic is afraid of chlorine and strong acids, do not damage it.
After the plumbing, move on to the floor tiles. It also needs to be rid of any remaining building materials, and then washed from dirt with water and detergent. Even though the bathroom is a wet place, do not leave the floor too wet. Collect all the water and wipe with a dry cloth if possible. Open the window and turn on the hood to thoroughly dry the washed room.
Protecting surfaces from construction dust
How to keep surfaces new and not damage anything?
The correct answer is using covering materials.
How to protect surfaces before repair:
► Floors – place rags on clean surfaces and hardboard sheets on top of them. Tape the joints with masking or regular tape.
► Cover window sills with rags and cover with sheets of cardboard. Connect the joints with tape.
► Furniture – wrap on all sides in 2-3 layers of plastic film. Place the cardboard on the corners over the film.
► windows with cling film or stretch packaging film.
► plumbing items (toilets, sinks, bathtubs) with thick film, sealing the joints with tape.
► Doors – attach the film to the door leaves, frames and fittings with tape.
Only walls and doors should be protected with a thin film. It is useless to lay such polyethylene on the floor and window sills: it will certainly tear and let through many abrasive particles, which act on many materials (especially varnished ones) like sandpaper.
Important: when carrying out repairs and subsequent cleaning, try to move heavy objects and stepladders with extreme care. If there is an opportunity to lift and rearrange something, do not move it, but lift it and rearrange it.
By the way: periodically clean the legs of the stepladder, which can become “overgrown” with abrasive construction contaminants.
Return to contents
A few more tips
- Do not rush to wash and wipe all surfaces in the apartment. After all, many of them do not tolerate such “care”, besides, now they are still completely new. There is a risk of damage to the finish immediately after repair.
- Do not wash painted walls or new wallpaper. You can try to wipe them off only locally, if there is contamination.
- When using detergents, and even more so solvents, test them first on inconspicuous areas of the finish. This way you will avoid extensive damage.
- In each room, thoroughly wipe down the sockets and switches. Do this with a well-wrung out napkin, after turning off the electricity.
- When mopping floors, move from the far corners to the exit from the room. But always wipe down the baseboards first.
- When cleaning is complete, ventilate all rooms well. If the smell of paint or other building materials remains, use available sorbents - ground coffee, salt, soda. Pour them into several saucers and place them around the room. Throw it away on the second day.
Now you know how you can clean your apartment yourself after renovation. You just need to prepare everything you need, tune in and get to work. Or you can entrust everything to the professionals of Eco-Dry Cleaning. Our specialists will ideally clean an entire apartment in one day, leaving no stains or dust.
What to remember
To get rid of dirt and dust and effectively clean your floors, remember:
- Cover surfaces. To make cleaning the house easier after renovation, cover surfaces as much as possible with plastic film.
- Humidify the room. Before cleaning, dampen the room with a spray bottle. Dust will not rise up, which will simplify cleaning.
- Cover cracks and openings with wet rags. A damp barrier will protect you from dust more reliably than regular doors. During repairs, protect openings with damp towels and curtains. In this case, concrete dust will not spread throughout the house.
- Use cleaning products. To make work easier and remove dust quickly, use special detergents. They are able to eliminate dust in the house and wash the floor after renovation.
- Be sure to read the instructions. Before using a cleaning product, be sure to read the instructions and follow the recommended proportions on how best to clean the room.
The author of the video offers his own way to clean the floor after renovation
How to vacuum a carpet
Carpets made from natural materials are cleaned with a nozzle with long bristles, and synthetic carpets with short bristles. Moreover, it is recommended to vacuum woolen carpets only after six months of use, and before this point they should be swept. For carpets with long pile, only a nozzle without bristles is suitable.
Collect debris and dust only along the pile, and not across it. You can mentally divide your carpet into strips and go over them one by one with the nozzle - this way you won’t miss a single section.
Synthetic rugs can become electrified, making it difficult to collect debris and dust. Therefore, before cleaning, spray them with an antistatic agent. And don’t forget that any carpet needs to be vacuumed not only from the front side, but also from the backside.
Tools and cleaning products
Before each cleaning, you need to stock up on tools and detergents.
Before you start cleaning after renovation, you should take care of everything you will need for this event. First of all, you need to prepare:
Garbage bags - they should be large and dense.
Garbage bags should not only be spacious, but also strong
Solvents - white spirit, acetone, etc., to easily remove dirt from various surfaces. A powerful vacuum cleaner - an industrial model is best suited. The filters of household vacuum cleaners quickly become clogged, and dust can get into the engine. You can always rent a construction vacuum cleaner. A set of cleaning products - for floors, plumbing, glass, and the treatment of wooden and plastic surfaces. Professional cleaning products do an excellent job of removing stains. Their price is slightly higher than usual, but the result is worth it. Rags, sponges - microfiber products are best suited, as they absorb well and do not leave streaks. Rags should be prepared in large quantities and in different sizes, since they will be used for the floor, furniture, window sills, and mirrors.
Rags and sponges should be in large quantities and of different types
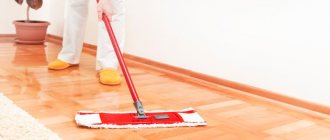
Floor cleaning kit - mop, bucket, dustpan with brush or broom.
Cleaning should be carried out using rubber gloves; if possible, it is worth purchasing special clothing and protective equipment for the face (goggles, respirator).
When cleaning, do not forget to use personal protective equipment.
Advice! A stepladder will greatly facilitate cleaning; it is more practical and safer when working at heights than chairs or stools.
The final stage of cleaning
After completing the main part of the cleaning, it is necessary to clean other items: chandeliers, radiators, lamps, etc. After repair work, they are usually dusty, so you need to completely rinse and dry them. The result of high-quality cleaning and treatment of all surfaces will be a clean, well-kept apartment.
General cleaning after completion of construction work is a complex process in which it is not always possible to get by with only household solvents and detergents. In some cases, it is difficult to handle on your own, so you need to call specialists from a cleaning company. Remember that all stages of cleaning must be thought through before it begins, and before using any chemicals, you must read the instructions, not forgetting about the necessary protective equipment.
Window cleaning. Accuracy and patience
No matter how hard the homeowner tries, there may still be a coating of whitewash or construction dust on the glass. For cleaning, use soft, lint-free cloths. The latter often remain on the glass and are difficult to wash off later. Newspapers and microfiber cloths may also come in handy. Paper napkins will also come in handy.
How to wash windows after renovation? There is a simple rule: first you need to wash the outside of the window, and only then the inside. Only after this do they wipe the frames, fittings and window sills. It is better to wash windows in cloudy weather, as there will be fewer streaks. This is due to the fact that any product dries quickly in the sun, so it is very difficult to avoid streaks.
Also, do not use powders or sharp spatulas. If there is a need to pick something off, you can wrap the spatula in a soft cloth. You can wrap a knife in the same way. This will reduce the risk of damage to the plastic.
How to put your things in order?
14 rules of order in the house: Legko.com guards cleanliness
- Throw away clothes you haven't worn in over a year...
- Don't put things on the floor - put them where they belong! ...
- Keep your car clean...
- Make your bed every day...
- Don't keep gadgets at home that you no longer use...
- Use the 5 minute rule...
- Get rid of waste paper!
Interesting materials:
How to distribute Internet from a phone to a Lenovo laptop? How to distribute the Internet from a phone to a laptop MTS Tariffishche? How to distribute Wi-Fi from a computer to a laptop? How to distribute Wi-Fi from a laptop if the Internet is wireless? How to distribute Wi-Fi from a phone to a laptop? How to distribute Internet from a laptop to a phone? How to partition a disk on a laptop? How to allow access to the camera on a laptop with Kaspersky? How to maximize the screen on a laptop? How to maximize an image on a laptop screen?
Hazardous waste disposal
After completing the repair work, you need to remove hazardous waste from the apartment: you should get rid of the remains of glass wool, glass wallpaper, and chemicals. It is advisable to dispose of such materials immediately upon completion of work, but this is not always possible. In this case, they must be placed in plastic bags along with packaging for acid- and alkali-containing products until cleaning, and then taken out along with the rest of the construction waste.
Glass wool is a popular thermal insulation material used for interior decoration. But it has a significant disadvantage - its fibers easily cling to skin and clothing. After working with glass wool, the apartment must be thoroughly vacuumed or a comprehensive wet cleaning done. Do not touch glass wool with unprotected hands to avoid getting the fibers on your skin. If this does happen, remember the following:
- Don’t scratch your skin – it will only make things worse;
- if fibers get into your hair, immediately wash your hair carefully to avoid getting dangerous particles into your eyes;
- you need to take a shower without a washcloth and detergents;
- If glass wool gets into your eyes, rinse them with clean water and immediately consult an ophthalmologist;
- Clothing with glass wool left on it will have to be thrown away.
USEFUL INFORMATION: Painting walls: choosing a color scheme
Top Tips: How to Vacuum Clean Your Home Properly
No matter what surface you're cleaning or what model of vacuum cleaner you're using, here are six tips to always keep in mind:
- Take your time Fast is not always effective - it’s better to do it well once than to do it poorly several times, because dust continues to accumulate.
- Vacuum often Clean hard floors at least once a week and carpets twice a week. Regular cleaning will save you time in the long run.
- Work from top to bottom Dust falls from high surfaces when you vacuum them, so it's best to leave the floor for last. The same principle applies to stairs - start at the top and end at the bottom.
- Use an empty and fully charged vacuum cleaner Most vacuum cleaners work best when the dust container is empty, and if the vacuum cleaner is cordless, when the battery is fully charged.
- Use the right tool for the job Accessories may seem like a gimmick, but most of them actually serve their purpose.
- Caring for a vacuum cleaner is necessary If you want your vacuum cleaner to work for a long time and properly, you need to take care of it.
We also recommend:
- Robot vacuum cleaner and its features
- A Thomas vacuum cleaner can clean the apartment of an allergy sufferer
- Solid wood furniture
- Techniques for dry cleaning carpets at home
- Selecting photo wallpaper
- Rules for choosing tiles
How to use vacuum cleaner attachments
Most new vacuum cleaners, especially cordless models, come with a lot of extras and accessories.
Using the right attachments can help you clean more efficiently. But with so many attachments, it can be difficult to understand what each of them does.
Some brands, such as Dyson and Shark, have unique names for their attachments, but essentially they are one of the following:
Crevice nozzle Long, thin nozzle for cleaning tight spaces. Dust removal brush Brush with soft bristles for delicate cleaning. Extension wand Like a traditional vacuum cleaner hose, it allows you to reach further and higher. Mini Motorized Nozzle Also known as a “turbo nozzle” or “power nozzle,” this is a smaller version of a regular floor nozzle—great for cleaning tight spaces like stairs or your car, or for removing stubborn pet hair. In models aimed at pet owners, mini turbo attachments are often packaged as pet attachments. Mop attachment Allows you to turn the vacuum cleaner into a mop. Multi-Purpose/Combi Floor Nozzle A floor nozzle that works on all surfaces - most models come with one. Floor nozzle with soft roller For use on hard floors. Turbo floor nozzle For use on carpets. Upholstery nozzle Wide nozzle for cleaning upholstery furniture. In the box you can often find adapters and clips for attachments (for carrying attachments while cleaning).
Thinking about buying a new vacuum cleaner? Check out our cordless vacuum cleaner buying guide for tips and tricks.
Removing unpleasant repair odors
Does the renovation smell? Oh, it smells so good! But this smell cannot be called one that you want to inhale again and again. To quickly forget about the difficult repair days, you need to remove all the accompanying aromas.
We definitely open the windows, but it’s still impossible to completely remove the smell of chemicals.
Spraying with aromatic sprays is useless: although the smell from the renovation will be masked, all the harmful substances will remain hovering around the apartment.
To make the odors go away faster, you need to create a draft, leaving it to reign in the house for several hours.
We carefully tighten all loosely closed jars of paints and solvents and hide those that will no longer be useful in the near future. If the jar cannot be tightly closed, it must be thrown away - health is disproportionately more valuable.
In winter, you can’t open the windows for a long time, and those who have an air conditioner should use it, but only if it has a filter.
A good idea to combat renovation odors is to buy a humidifier. This thing will remove unnecessary aromas, and make the air much healthier and more pleasant to breathe. During its operation, particles of construction odors will stick to the sprayed moisture. All this will quickly settle on surfaces, but you know and know how to wash them.
Important! Doors and windows are closed while the humidifier is operating.
Wet cleaning effectively eliminates the settling smell of repairs, therefore, after its completion, such work is carried out as often as possible.
Do not neglect the work of odor neutralizers: onions, lemon, vinegar, scented candles, wet sheets.
Choosing the right power settings
Most cordless vacuum cleaners have one power setting, although you can often change the suction level.
Cordless vacuum cleaners, on the other hand, have multiple power settings—most have at least two (minimum and maximum), while some have three or four.
The written instructions included with the vacuum cleaner should state the manufacturer's recommended settings, but as a general guide:
Low power (sometimes known as eco power) uses less battery power. It is best suited for hard floors that do not require much effort to clean. Maximum power (also called "turbo" or "boost") uses more battery life. It is best suited for carpets and dirty areas where strong suction is required. Automatic power (or auto) can mean two things: 1. somewhere between maximum and minimum power, or 2. the vacuum cleaner automatically switches between minimum and maximum power - this may be due to the presence of sensors that determine the type of floor being cleaned or how dirty it is. .
Cleaning glass and mirrors
General cleaning after renovation also includes window cleaning. PVC structures are much easier to clean than wooden ones. In the first case, for cleaning you need to use a kitchen sponge and a standard household glass cleaner. And in order to wash wooden frames, you will have to use dishwashing detergent, which is diluted with water.
Doors and mirrors should also be treated: remove dust and clean dirt with special products.
Attention! Washing windows from the outside on upper floors is unsafe. Therefore, in this case it is worth resorting to the help of specialists. Many cleaning companies provide this service.
How to vacuum furniture
Vacuum cleaners aren't just for cleaning floors; they can also add shine to furniture.
Many models come with upholstery attachments designed for cleaning upholstered furniture. However, mini motorized tools are often more effective at removing pet hair and stubborn dirt.
Instead of lightly vacuuming your furniture after mopping the floors, it's better to vacuum it first—vacuuming can cause a small amount of dust and fiber to end up on the floor underneath the furniture, which can be very unpleasant if you've just cleaned it.
Extension rods or handheld vacuums can help you remove dust from hard-to-reach places like shelves and light fixtures, while an upholstery tool can come in handy if you need to tackle a dirty mattress.
For more information, check out our guides on how to clean a mattress and how to clean a sofa.
How to use a robot vacuum cleaner
Robot vacuum cleaners are designed to take the hassle out of cleaning. And, for the most part, they do.
But to get the most out of your robot vacuum, you need to set a cleaning schedule.
This is usually done in an app where you can control how often you clean and, depending on the model, where you clean. You can also choose whether the robot will do one lap or two.
More advanced apps, like the iRobot app, have a feature where the robot starts vacuuming as soon as you leave the house - just be sure to take your cell phone with you, otherwise the robot won't know anything.
Be sure to remove cords, curtains, and tassels to prevent your vacuum cleaner from getting stuck while cleaning. And if you move the chairs away from the kitchen table, it will be easier for the vacuum cleaner to reach the debris underneath.
See our reviews of robot vacuum cleaners.