In any room, sooner or later it is necessary to carry out repair work. However, after putting the apartment in order, a thick layer of dust settles on all surfaces, and it seems that it is simply impossible to get rid of it. In fact, cleaning up construction dust after renovation is a completely solvable task. Next we will look at what needs to be done to restore order.
Step one: collection and removal of construction waste
It is impossible to carry out high-quality cleaning without removing all the debris that interferes with the process. To collect everything, you first need to arm yourself with thick gloves, preferably rubber, and strong bags. Those who care about their health should take care of safety glasses and a respirator. By the way, swimming goggles are also suitable.
Bulky trash is removed first
Bulky waste includes remains of tiles, concrete, drywall, pieces of boards and linoleum, wallpaper scraps, and cuttings from polyurethane foam. Everything is loaded into bags and taken outside the home. Bags should be packed compactly, but calculate their weight: each bag can be quite heavy.
You can take out the bags one at a time, but always at once: they make it very difficult to move around and block your view.
It is important not to spoil relations with neighbors and not harm the environment: everything is taken out to strictly designated areas for garbage.
Next step: removing dust from the ceiling and walls
The garbage has been removed, and you can begin removing construction dust. It is better to choose the dirtiest area or room, thereby reducing air pollution in your home.
You need to start with the walls and ceiling, gradually lowering the cleaning process to the floor.
Dust settles everywhere and is not always clearly visible.
If this is not removed in time, then the air in the room simply cannot be clean. And gradually settling dust will accumulate in the lungs.
First of all, the remaining foam and cement are cut off. They are removed with a spatula; sometimes an abrasive sponge soaked in water is required.
Dust can be easily removed using a construction vacuum cleaner. If you can’t get one, then you can take a regular unit with convenient attachments: it’s better to vacuum in every corner. It is good to use a telescopic tube.
After cleaning the dust, you need to walk over the surfaces with a damp cloth.
Advice! Dust disappears perfectly where you wipe it with a microfiber cloth soaked in a solution of vinegar and salt.
A vinegar solution can remove dust from surfaces such as laminate, MDF, glass, plastic, porcelain tiles and stone. The same composition will help remove limescale.
Necessary tools and cleaning products
Before starting general cleaning, you need to prepare what to use to remove dust after renovation in the apartment - cleaning products and tools. It is better to prepare everything you need with a reserve. After all, it is advisable not to leave the room while cleaning so that dust particles do not fly away. Necessary:
- In order to collect and remove construction waste, you will need gloves, a respirator and many large bags.
- It is better to first put curtains, carpets and other items in bags or boxes and cover them with film. Place those items that have already been wiped with a damp towel separately from dusty curtains, carpets and other textiles.
- To spray dusty surfaces, you will need a spray bottle with a fine spray.
- Of course, the king of cleaning is the vacuum cleaner. To remove construction dust after renovations, you need an option with high suction power.
You cannot vacuum construction dust with a regular vacuum cleaner. Also, in addition to power, it is important that the waste collection container is made of plastic or paper. Fabric will not work. A construction vacuum cleaner will do the job perfectly. You don't have to buy it - it's quite expensive. Can be rented. If this is not possible, you can vacuum up construction dust with a powerful home vacuum cleaner.
For wet cleaning you will need:
- Water containers.
- Rags, sponges, pieces of cloth (cotton). Rags made from so-called “smart” material are also perfect. The dust particles seem to stick to it and do not scatter throughout the room.
- Detergents for floors, windows (alcohol-based) and walls.
If there is wallpaper or paint on the walls, the product must be appropriate. For tiles, the same as for windows is suitable. The most important thing here is that you can never have too many rags and water. It is necessary to change and wash as often as possible.
The dust has been removed, and then we will clean the surfaces from stains.
Repair without stains is impossible. They may remain from repair work. But not all stains give up easily; they are completely removed at the general cleaning stage.
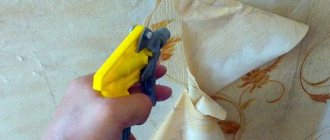
Paint and putty
Any solvent remains effective against paint. But it is not suitable for all surfaces. Paint stains from MDF should be removed with a blade, after soaking them with alcohol.
If you need to remove paint from frosted glass by sandblasting, then a solvent is also used, and stains are removed from smooth glass with a scraper. Do not rub frosted glass with abrasives!
The water-based emulsion is simply washed away with warm water and comes off without a trace.
The plaster will also have to be washed. With MDF it is scraped off with a spatula, slightly diluting the dirt with water. Then they begin to work with the abrasive side of the sponge or sandpaper.
It is already more difficult to remove traces of polymer putty, since mechanical labor is required.
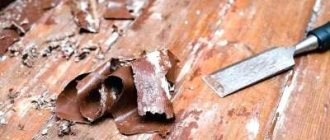
Construction foam and cement
Believe me, it is better to remove splashes from the polyurethane foam before it hardens. But since the question of removing the foam arose, it means that the moment is hopelessly lost. This is another “gift”!
The building materials market offers special foam cleaners: this will be the simplest and fastest solution. And whoever wants to put more work into cleaning after repairs can cut off the foam with a sharp object. Then you will have to use dimexide (remember about protective gloves).
Dimexide is bought at a regular pharmacy
Foam stains are removed from linoleum by first soaking them with water: a wet rag is placed on the splashes for a while.
Once hardened, cement is also difficult to remove. There are ready-made special products: they are applied to the stain and covered with film. After a couple of hours, the dirt is washed off. Not every product is suitable for tiles, artificial stone or aluminum elements.
Other stains
Limescale stains are washed off with water and vinegar. And greasy stains from the floor will come off if you sprinkle talc on them. And they will leave the parquet after exposure to denatured alcohol.
Often, after repairs, traces of adhesive tape remain. Regular sunflower oil or nail polish remover will deal with them.
From some surfaces, greasy stains are wiped off with turpentine.
How to remove construction dust
Cleaning your apartment from construction dust is a matter of not only putting things in order, but also the health of the whole family. After all, small dust particles can cause serious harm to the human body. Getting on the mucous membranes of the eyes and respiratory tract, they can lead to disruption of the functioning of these organs. In addition, if you stay in a dusty room for a long time, small particles can penetrate into the lungs, making it difficult to breathe and causing a cough. Also, some people may experience an allergy to construction dust in the form of redness and itching of the skin.
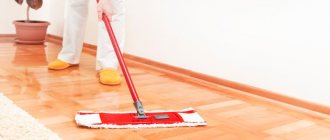
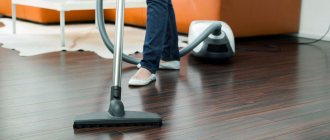
Cleaning the floor from dust
Most construction dust accumulates on the floor. Therefore, cleaning the room begins with it. Before you start cleaning your apartment, you will need to protect yourself from fine dust, which can significantly complicate breathing and cause allergic reactions. Skin can be protected using special rubber gloves for cleaning. You will need a respirator or dust mask for your face. Removing dust deposits from the floor after renovation includes the following steps:
- Fill a spray bottle with clean water and actively spray the room so that small dust particles become heavier and settle on the floor covering.
- After an hour, you will need to collect construction dust with a vacuum cleaner. It is permissible to use a regular household appliance. But cleaning will be much better if you use a construction vacuum cleaner. At the same time, you should not bring it into the room, so as not to carry dirt, just extend the hose into the room.
- If necessary, vacuum the floor several times until it becomes washable.
- At the end of the hygiene procedure, you will need to thoroughly wash the floor. To prevent whitish stains from remaining on it, it is recommended to change the water many times. The best way to clean the floor from construction dust is to change the water every time you rinse the cloth.
Final cleaning of various types of surfaces
Ideally, all surfaces should be cleaned twice. But you can do everything wisely once, if you take into account the type of surface being cleaned.
Floor coverings
The type of floor covering dictates its cleaning conditions. If you do not take into account the floor material, you can ruin it, or the product used will simply be useless.
Laminate and parquet
Parquet is not considered an easy-to-maintain surface. There are a number of oil- or wax-based care products. They must be applied to the floor after basic cleaning. A trace of varnish will come off from parquet or laminate if you treat the contamination with denatured alcohol.
Light stains of dirt can be removed with regular alcohol. For laminate use 30% alcohol
Linoleum and carpeting
After repair, the linoleum is washed with warm water using a mop with the addition of vinegar. Paint stains can be removed using any available method.
Carpets are first cleaned with a vacuum cleaner and then wet. You will need a brush and soap solution
But it is more effective to treat the carpet with special dry mixtures for such coatings.
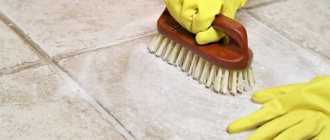
Ceramic tile
Ceramics are cleaned with Schumanite: this active agent will remove various traces after repair. It is sprayed and then washed off with a damp sponge.
Scrapers, spatulas, and screwdrivers will help in cleaning the tiles after repair: it would be convenient to work
If the primer has been absorbed into the tiles, you will need a fresh portion of it or acetone, which is then cleaned off along with the hardened one.
Cement grout, lime and plaster are washed off with warm water, but epoxy grout is removed with a special solvent for this material.
Silicone sealant and traces of paint are removed mechanically and then removed with a solvent (acetone or white spirit).
Wood coverings
Wooden coverings are restored to order after repair using water, soda, and, if the surface is unpainted, sand. Everything is rubbed and thereby polished.
The doors need to be treated with polish, and the baseboards just need to be washed with soapy water.
Plastic frames
PFC profiles are cleaned with various detergents based on ammonia and acids. The product is applied to a damp sponge and the frames are treated.
All stickers from window profiles must be removed by washing the frames with a soapy solution containing alcohol.
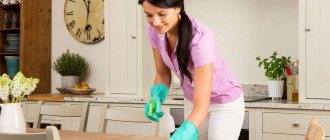
Wash and clean
If you have dealt with the dust remaining after the renovation yourself, then wet cleaning of the apartment will no longer be a problem. Here it is important to correctly assess the condition of the surfaces and decide which of them really need serious cleaning. Not all finishing materials can even be wiped, much less washed. Cleanliness must be ensured so as not to damage them.
Like dust removal, wet cleaning should start from the top, from the ceiling, and gradually move down. Frequently change the water or cleaning solution in which you rinse your wipes and brushes - this will help avoid streaks. If you are not sure whether a detergent is suitable for a particular surface, try it on a small area in an inconspicuous place. And only after making sure that there is no harm, wash the entire area. Further separately about the different surfaces in the apartment.
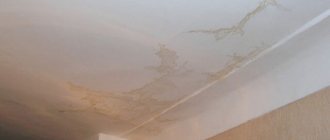
Ceilings
- A painted ceiling, if it is well cleaned with a vacuum cleaner, does not require additional cleaning. The same applies to fabric tension structures.
- Plastic seamless ceilings, coatings made of laminated polystyrene foam or polyurethane foam should be wiped very carefully with a damp cloth. If the coating is glossy, with a mirror effect, immediately wipe it dry to avoid leaving streaks from moisture.
- PVC stretch ceiling structures can also be wiped with a soft, damp cloth. Do not use detergents if there are no stains on the film. Heavy dirt can be washed off with soapy water; the main thing is not to scrub the ceiling with a hard brush.
Chandeliers, lamps, switches, sockets
Lighting fixtures are wiped with a very well wrung out damp cloth and then wiped dry. Be careful - be sure to turn off the electricity before working on electrical appliances. Moisture should also not get inside. If possible, it is better to remove the lampshades and wash them separately. Wipe glass and chrome elements immediately dry; if necessary, you can use a window cleaning spray. Carefully wipe sockets and switches with a clean damp (not wet!) cloth.
Walls
Painted walls, decorative plasters, liquid, vinyl and paper wallpapers cannot be washed. They can only be gently wiped in areas of heavy dirt or stains. In other cases, vacuuming well is sufficient.
Glossy surfaces (wooden panels, lining, mirror and plastic coatings) need to be wiped. Use a well-wrung out damp cloth to remove any remaining dust. Then wipe the coating dry.
Ceramic tile
There are two problems here: grout residues and dust stains, which appear even after the second or third wash. How to effectively wash tiles and remove all dirt remaining after renovation?
- Before washing, the tiles must be cleaned of dust with a vacuum cleaner. Then you should also wipe it with a dry cloth - this will make it easier to clean. Throw away any rags used for dry cleaning immediately.
- Carefully remove large pieces of putty, cement, grout, tile adhesive with a spatula (preferably wooden or plastic, not steel). Be careful, although the glaze on the tile is strong, even it can be scratched by metal and sand.
- If there are stains of primer on the glazed surface, treat them with acetone. But first, be sure to try its effect on the tiles in an inconspicuous place.
- Small remnants of grout can be carefully removed with a spatula or try to wipe off with a napkin. If there is a lot of grout and the cladding area is large, there is no need to waste energy. Buy special foam for tiles. It can be found in construction stores and among professional cleaning chemicals.
- Wash the tiles with acidified water (2 cups of vinegar per 10 liters). Rinse the napkin frequently and change the water when it gets dirty. Clean tiles are wiped dry. If it is very glossy and large-format, you can use glass cleaning liquid after washing. This will make it easier to avoid divorces.
With floor tiles the situation is more complicated, since they are usually more dirty. Instead of acidified water, use a solution of detergent (all-purpose or for washing ceramic coatings). Do not use acidic or chlorine-containing products on porcelain tiles! Wash the floors with a brush several times, and collect the dirty cleaning solution with a rag. Then rinse the coating again with clean water and wipe with a dry cloth.
Furniture and plumbing
- Remove covers, protective films, and covering materials from furniture.
- Thoroughly vacuum sofas, armchairs, upholstered parts of chairs, cabinets and cabinets inside and out. Just be sure to wash and dry the vacuum cleaner's brush after dealing with construction dust before using it on furniture upholstery.
- Wipe wooden and steel elements with a damp and then dry cloth. Leave cabinets and bedside tables open to dry thoroughly.
- For upholstered furniture, it is advisable to organize dry cleaning. But it is more convenient to do this after the cleaning is completed. Now the main task is to clean it from dust and traces of building materials, if any. Rub leather upholstery with protective wax.
Advice! The facades of cabinet furniture should be immediately treated with polish. It will not only give a more well-groomed appearance, but will also protect surfaces from dust, as it has an antistatic effect.
Clean the plumbing fixtures with any suitable product. If there are residues of building materials on ceramic surfaces, remove them with a spatula and/or solvent. Clean acrylic bathtubs and trays very carefully - they scratch easily. Also, do not use aggressive “chemistry” on acrylic - it does not withstand concentrated acids, alkalis and solvents.
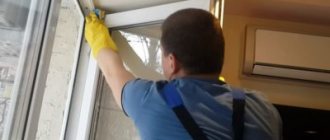
Windows, doors and mirrors
If the only problem with your windows is dust and dirt, it is enough to wash them with a solution of any all-purpose detergent, and then with clean water. Clean frames are wiped dry. Double-glazed windows are treated with glass washing liquid and dried so that there are no streaks (with a microfiber cloth or rubber squeegee). There are no special tricks here. The main thing is to thoroughly wash all the grooves and corners, because that’s where all the dirt accumulates.
It’s worse if there are traces of cement, tape, and polyurethane foam on the frames, window sills and glass. They must be removed very carefully so as not to scratch the plastic and glass. Do not use harsh chemicals or abrasive tools. First, remove large stains with a wooden or plastic spatula. Remaining traces of building materials from the PVC profile can be removed with acetone, and glue from stickers can be removed with alcohol. Do this very carefully.
Advice! Rub glass when the sun is not shining on it. Under its rays, the glass cleaner dries quickly, and streaks cannot be avoided.
In the same way, interior doors and mirrors, all mirror, glass and plastic decorative elements are washed. Cleaning exterior windows is difficult and you may want to leave the job to the professionals. But be sure to open them when cleaning from the inside to remove all dirt and dust from the grooves of the window frames.
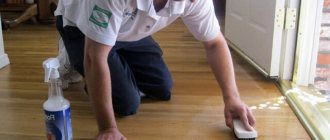
Floors
- The painted wooden floor is washed with water and ammonia (1–2 tbsp per bucket of water). If there is heavy contamination, you will have to wash it several times, changing the water each time.
- Parquet and parquet boards should be cleaned only with special products (according to the instructions).
- Laminate flooring is washed with soapy water and then with clean water. Just don’t over-wet the floor, it will harm it. Use a well-wrung out cloth or mop.
- Wash the linoleum with acidified water (a few tablespoons of vinegar per bucket of water).
Advice! In each room, start mopping the floor from the far corner and move towards the door. Be sure to wipe down the baseboards.
Plumbing treatment
Plumbing fixtures that are dirty during repairs are cleaned using rubber gloves. Fresh dirt can easily be washed off with plain warm water, but during repairs, rarely does anyone undertake to immediately wash something dirty.
If the surface of the plumbing fixtures is metallized and chrome-plated, you need to overcome the temptation to use acid-containing products: leave them on ceramics, and various unsightly stains will appear on the metal from such cleaning.
If stains of paint and glue have hardened on an enamel bathtub, you will have to replace the enamel layer. They can no longer be removed without leaving a trace.
An acrylic bathtub cannot be washed with abrasive agents. It is better to study in advance the list of compounds suitable for cleaning it.
Wet broom
It is recommended to use this method in cases where the dust layer is not very large. You need to fill a deep basin with water, moisten the broom generously and start cleaning.
Dust will stick to a wet product rather than rise into the air. After each movement on the floor, the broom should be immersed in the basin again. Periodically, the water needs to be drained and the container refilled with clean liquid.
If furniture gets dirty during renovation
It’s so nice when, after renovation, you can bring brand new furniture into the room, still wrapped in film. In this case, we simply install pieces of furniture in the desired places and enjoy the work done.
And if the furniture remained in place during the renovation, then even covered with a protective film, it could still get dirty.
A vacuum cleaner is indispensable when cleaning furniture: everything is thoroughly vacuumed using the attachments designed for this purpose.
Old furniture does not always look good after renovation. Somewhere you will need to remove a stain, or even replace the upholstery.
Purchase products for cleaning textile, leather and wooden surfaces
Grease stains are removed with compounds containing alkali, or, conversely, with acids (for example, citric). Regular milk will help with many stains: it will push dirt from the deep layers of the material out.
In addition to upholstered furniture, all cabinets and shelving are vacuumed and washed: inside and out.
Preparatory work
You should not start renovations without first preparing the room, then during cleaning the question of how to remove construction dust will not arise unexpectedly.
Required:
- take down the curtains
- take out indoor flowers,
- Small items should be packed in boxes and stored away from the work area.
The fewer things left in the room, the easier it will be to clean up after the renovation.
- It is better to take out small household appliances, but large ones must be packed.
Static electricity attracts dust well, which can easily penetrate into unprotected equipment.
Removing unpleasant repair odors
Does the renovation smell? Oh, it smells so good! But this smell cannot be called one that you want to inhale again and again. To quickly forget about the difficult repair days, you need to remove all the accompanying aromas.
We definitely open the windows, but it’s still impossible to completely remove the smell of chemicals.
Spraying with aromatic sprays is useless: although the smell from the renovation will be masked, all the harmful substances will remain hovering around the apartment.
To make the odors go away faster, you need to create a draft, leaving it to reign in the house for several hours.
We carefully tighten all loosely closed jars of paints and solvents and hide those that will no longer be useful in the near future. If the jar cannot be tightly closed, it must be thrown away - health is disproportionately more valuable.
In winter, you can’t open the windows for a long time, and those who have an air conditioner should use it, but only if it has a filter.
A good idea to combat renovation odors is to buy a humidifier. This thing will remove unnecessary aromas, and make the air much healthier and more pleasant to breathe. During its operation, particles of construction odors will stick to the sprayed moisture. All this will quickly settle on surfaces, but you know and know how to wash them.
Important! Doors and windows are closed while the humidifier is operating.
Wet cleaning effectively eliminates the settling smell of repairs, therefore, after its completion, such work is carried out as often as possible.
Do not neglect the work of odor neutralizers: onions, lemon, vinegar, scented candles, wet sheets.
Recommendations for protecting your apartment from dust before renovation
To reduce the amount of work required to clean the premises after finishing work, a number of preparatory steps should be taken to isolate adjacent rooms and interior items:
- before starting work, all objects are removed from the room to free up space;
- To prevent construction dust from penetrating into the next room, the doorway should be covered with thick fabric or plastic film. The material must be selected in size so as not to leave gaps and cracks through which dust can penetrate;
- It is advisable to wet the fabric covering the doorway. Wet material will better protect the adjacent room, and will also accumulate small dust particles settling on it. As soon as the fabric dries, it is thoroughly rinsed and hung in place again;
- if polyethylene film is used to protect the doorway, it provides the possibility of passage, for which you can sew in a zipper, or make a barrier from two sheets of film with an overlap of 250-300 mm. This design will allow you to easily pass from the work area to the living rooms without spreading dust traces;
- Windows should also be covered with plastic film, otherwise you will have to spend a lot of effort to bring the frames and glass to their original form. The film is cut to the size of the window opening and secured around the perimeter with tape. The protection will protect the smooth surface of the glass from the adhesion of fine dust, which is very difficult to remove;
- if there is not enough material to completely block the doorway with fabric or film, you can build fabric rollers that are placed at the bottom of the opening to close the gap. The rollers should be wet;
- If the renovation plans do not include replacement of the floor covering, care should be taken to preserve the existing one. A plastic film with a thickness of at least 100 microns is laid on the floor, overlapping. The joints are taped;
- If it is impossible to remove all pieces of furniture and interior from the room in which renovations are being done, you need to take care of their safety. The furniture is covered with plastic film, which must be secured with tape.
Waste disposal: an important part of the work after renovation
According to the requirements of SanPiN 42-128-4690-88, waste that remains after repair and construction must be removed to designated areas. All rules for waste removal are regulated by Federal Law No. 89-FZ.
For residents of apartment buildings and private buildings in cities, there are licensed companies involved in the removal of solid waste. If your management company has entered into an agreement with such a company, you can order special transport or a container for removing construction waste at a certain time.
Such services are paid according to a separate price list
Another option: you can throw construction waste into the nearest developer's container. Much leftover from construction and renovation is even sold on online sites like Avito.
You need to find out if there is a “Dump” project in your city: you can take unnecessary furniture and other things there.
If you throw away repair waste in an unauthorized place, you can run into a fine of 2,000 rubles (for civilians) and an order to remove everything within a certain period of time in a special place designated for this type of waste.
Don't be intimidated by the large amount of work. The main thing is that the repairs are already behind us! And if you have neither the strength nor the desire to do the cleaning yourself, then the work of cleaning companies is at your service, which will clean everything at a professional level quickly and efficiently.
A few more tips
- Do not rush to wash and wipe all surfaces in the apartment. After all, many of them do not tolerate such “care”, besides, now they are still completely new. There is a risk of damage to the finish immediately after repair.
- Do not wash painted walls or new wallpaper. You can try to wipe them off only locally, if there is contamination.
- When using detergents, and even more so solvents, test them first on inconspicuous areas of the finish. This way you will avoid extensive damage.
- In each room, thoroughly wipe down the sockets and switches. Do this with a well-wrung out napkin, after turning off the electricity.
- When mopping floors, move from the far corners to the exit from the room. But always wipe down the baseboards first.
- When cleaning is complete, ventilate all rooms well. If the smell of paint or other building materials remains, use available sorbents - ground coffee, salt, soda. Pour them into several saucers and place them around the room. Throw it away on the second day.
Now you know how you can clean your apartment yourself after renovation. You just need to prepare everything you need, tune in and get to work. Or you can entrust everything to the professionals of Eco-Dry Cleaning. Our specialists will ideally clean an entire apartment in one day, leaving no stains or dust.