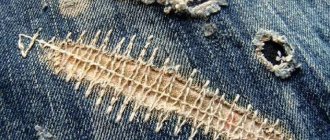
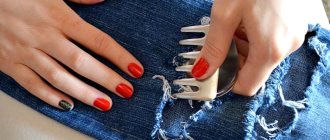
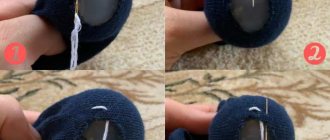
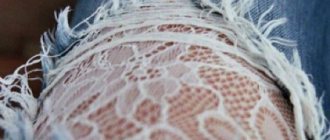
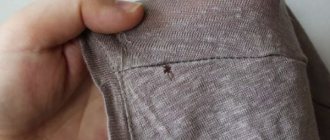
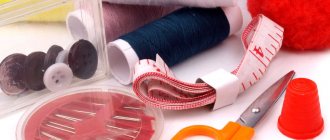
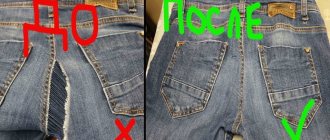
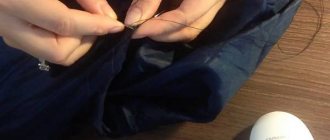
A patch is a piece of material that is fixed to the product to hide tears in a separate section of it. The term comes from the verb “patching” - that is, “sew up”, “darn”. A patch of base fabric or a more durable material covers damage that cannot be repaired by simple darning.
bluemaize.net
Features of working with different types of trousers
Repair of strict classic trousers is usually carried out very carefully, without the use of different overlays or prints. In a business suit, the place of wear must be carefully examined to understand whether it can be repaired. Small holes and tears are mended with the edges pressed together so as not to attract attention. Most often, repairing dress pants requires:
- Repairing small holes and tears in inconspicuous areas. They can be sealed by cutting a piece of non-woven fabric larger than the hole and basting it from the inside. After this, the item will need to be ironed.
- Repairs to the bottom of trousers with braid, hems, shortening. The braid is replaced with a new one, placing the thickened edge 1–2 mm below the trouser leg. Sew on both edges with a hemming stitch. The trouser cuffs are shortened by tearing off the folded edge, cleaning it and stitching it. After ironing, the fabric is folded a few millimeters above the unworn edge.
- Joining the gap along the seam. In the inverted state, you will need to stitch up the tear areas closer to the damage, finishing after a few centimeters. Difficult areas must be processed manually 2-3 times.
If the tears are large, visible or deformed, the trousers cannot be repaired.
Basic methods
There are several ways to sew up a hole (lifehacks and original ideas will help make this place completely invisible). This depends on the size and complexity of the injury, as well as the thickness and texture of the torn tissue.
Hand darning
Careful hand sewing is the best way to make darning stitches. It is necessary to use the thinnest needle - only in this case the result will be perfect. In addition, it is advisable to pull the sewing thread from the item being repaired (longitudinal fibers from an inconspicuous area). If this is not possible, you should choose nylon or silk thread for thin fabrics, and cotton thread for thick ones.
Basic rules for hand darning:
- Do not choose a tightly twisted thread that will stand out on the fabric.
- Darning stitches are made from the inside out.
- Sutures are placed over a larger area than from edge to edge of the hole.
- When sewing, do not use dense stitches, especially towards the end of the row (with subsequent washes, the thread will shrink and the seams will begin to stand out in noticeable folds).
- First, seams are made in the direction of the longitudinal fibers.
- It is necessary to constantly make small and even stitches.
The manual darning process is carried out as follows:
- It is necessary to trim the uneven edges of the hole in straight lines and place them as close as possible to each other.
- After forming the smallest possible hole, you need to make a mark around it at a distance of 1-1.5 cm from the edges, and secure the fabric in this position, tightening the loops in a circle.
- Next, starting from the top corner, you should make continuous stitches parallel to each other. It is important to remember to go through the same number of fibers in the fabric each time (for example, 1 or 2).
- By passing the thread through the hole, you obviously won't be able to make any running stitches, so you just need to make them straight, connecting the edges.
- The rows of darning should be spaced at the same distance from each other and pass through the same number of fabric fibers throughout.
- When the seams reach the beginning and end of each row, it is necessary to wrap small loops of thread - this will help prevent further shrinkage of the thread and avoid the appearance of wrinkles.
- Having finished covering the stitches lengthwise, you should begin to sew them in the transverse direction, using the weaving technique. To do this, you need to alternately wrap and leave the transverse fibers intact, and repeat the same over the hole. This process essentially braids the fabric back to its original state.
Once completed, the darned area will look completely seamless—as visually natural as the original fabric.
There are different types of darning, each of which allows you to make clothing repairs invisible.
| Type of darning | Peculiarities | How to do it |
| Straight | Connects tissue tears in a straight line without gaps between the edges of the damage. | 1. A straight tear may have loose threads and uneven edges - you just need to fold them carefully so that the seam looks smooth. 2. Attach a piece of stabilizing tissue to the folded tear. This ensures that there is no empty space left when you sew the edges together. 3. Then perform the same darning stitches as described in the basic instructions over the straight tear. |
| Diagonal | Repairs severe and large irregularly shaped tears. | The first longitudinal stitches are made as described in the main instructions, but the transverse weaving is done diagonally. This provides a more flexible darning, but is not as discreet and seam-disguising as regular darning. |
| Visible | If the darning cannot be made invisible, sometimes it is made with a thread of contrasting color to make it a decorative element. | Darning should be done according to the basic instructions, but the stitches should be done with a contrasting colored and thick thread instead of an inconspicuous and thin one. The result will be very noticeable and eye-catching - this allows you to disguise traces of clothing repair as a decorative element if you cannot make it hidden. |
| Machine | Recommended for dense and heavy fabrics that are difficult to repair manually. | Place a removable stabilizer or fine mesh under the hole and sew darning or zigzag stitches (depending on the type of sewing foot connected) very close to each other, covering the damaged area and replacing the lost fibers with thread. |
Patch
You can sew up a hole (lifehacks allow you to turn traces of complex repairs into a decorative element) even if a piece of fabric is missing. To do this, you will need two new fabric flaps - to replace the missing fragment and an external patch.
The process of repairing a thing is carried out like this:
- It is necessary to estimate the size of the missing piece of tissue. The most difficult type of holes to mend are worn or torn areas, as well as frays at the knees of trousers or the elbows of a jacket. You should not try to sew up such damage without an internal patch - this will only wrinkle the fabric, change the shape of the garment and create an unkempt appearance.
- If the hole is worn down to the seam line or anywhere in the middle of the garment, that area will need to be reinforced. To do this, you need to cut a small piece of fabric of the same quality and color as the item being repaired to the required size, and place it under the edges of the hole, right side up.
- Then you need to move the edges of the hole as close to each other as possible without wrinkling the fabric.
- Using a small zigzag stitch on your sewing machine, stitch along the edges of the damage, catching as much fabric (added and repaired) as possible so that the patch holds well.
- Sew a new piece of fabric over the repair area, carefully selected in size (using machine stitches or by hand). If the clothing is casual, it is recommended to use additional pieces of fabric in a contrasting color or pattern to form and sew patches in several places, and not just over the stitched damage. This will allow traces of repair of the item to become a design element.
Neat patch on elbows
You can restore damaged areas or old items with the help of a neat patch. This way the product will acquire an original appearance.
You can sew a neat patch on the elbows in the following way:
- you need to prepare everything you need;
- mark on the product where the patch will be applied;
- cut out the patches and sew them on.
Important! Once all the work is completed, the product needs to be steamed using an iron.
Neat patch on elbows
How to quickly close torn areas if there is no time
The process of darning jeans or sewing on a patch takes a long time or requires the use of a sewing machine. If you don’t have the time and the necessary equipment, you can decorate the damaged area on your knee with a sticker made of Swarovski crystals.
There are ready-made drawings on sale; they are the easiest to work with. It is enough to choose a drawing of a suitable theme and size. You can buy rhinestones coated with adhesive and make a design out of them yourself.
All work takes place in several steps:
- The damaged area is cut out. A patch of similar fabric is placed underneath.
- The edges of the lower part are glued with adhesive web or sewn around the perimeter.
- A pattern of rhinestones is laid out on the area to be covered. Cover with a piece of fabric and fix the temperature of the iron.
- The trousers are turned inside out and the area to be treated is carefully ironed from the wrong side.
Thermal patches are a kind of lifesaver when you don’t have enough time for lengthy repairs. The procedure for working with them is the same as with a pattern made of rhinestones. The quality of the repair depends on the mode of the iron and the time of its exposure. You can check the quality of gluing after the area being ironed has completely cooled.
What material to use for the patch
A patch on jeans (fabric most often tears on the knee) not only hides the defect, it can be used as a finishing element. Denim trousers go well with different colors and textures. Depending on the model and purpose of the pair, a patch option is selected.
Fabric from jeans
Classic denim trousers can be combined with items of different shades and styles. To prevent the patch from standing out, it is cut out from the fabric of the trousers. It’s good if the fabric is preserved after shortening the pair.
The second option for a patch made from native fabric is the area under the back pocket. Any other fabric of similar density is sewn in place of the cut fabric.
Adhesive fabric
Minor damage and abrasions are fixed with adhesive material. Thick cotton adhesive with a dotted coating of adhesive is suitable.
For duplication, a part is prepared that is wider and longer than the damaged area. If you carefully make a patch from adhesive fabric, the work will be unnoticeable. It is not always necessary to hide traces of repairs.
Thermal patches
A patch on jeans on the knee or other part of the trousers, made in the form of embroidery, plays the role of finishing.
Embroidered pictures on fabric impregnated with textile glue on the reverse side are available in different colors and themes. On sale there are pictures from popular children's cartoons, army symbols, flowers, animals, birds.
The size of the thermal patch should be a couple of centimeters larger than the tear site. The damage is fixed with light stitches without tension. The trim is glued using a hot iron with steam for a few minutes.
Lace, colored, leather options
Depending on what type of clothing trousers are most often worn with, patches made from a material other than denim are selected.
| Pants model and denim color | Patch material and color | Top of the set |
| Blonde boyfriends; White jeans | White thick lace, white coarse mesh | White shirt or tank top |
| Black | Black lace, black leather | Biker jacket, white shirt |
| Blue Boyfriends; cropped jeans | Colored cell; black fabric | Biker jacket, white shirt |
| Blue slim mom cropped jeans | Floral fabric | Plain colored T-shirt; floral blouse |
| Blue; black | Fabric with sequins | Silk blouse, T-shirt with sequin appliqué |
The fabric with a pattern selected for the patch should not repeat the top of the set. It is enough for one color or shade to be common.
Machine embroidery, stripes
The proliferation of embroidery machines allows anyone to order embroidery on jeans according to their taste. After its completion, there will be no trace left of the damage that caused the transformation.
Machine embroidery is done with silk threads; the color and design can be chosen from those offered in the atelier. An alternative to machine embroidery can be a patch made from embroidery made on a different fabric.
Plastering – restoration of fabric structure
In case of careless tears, a patch on jeans between the legs may not always fit, or will look unnatural, so it is necessary to resort to a decorative method in which the treatment of the item at the site of damage will not be noticeable.
The most common type of artistic darning is darning. To perform it, it is advisable to have sewing skills, since it is produced by machine.
- Turn your pants inside out. Align the edges of the hole, cutting off any excess thread.
- Glue the dublerin along the slit, the size of which should be slightly larger than the slit. If the jeans are tight, then you need to baste a piece of thicker fabric.
- Turn the product back onto your face. Set the minimum stitch length to 1 or 1.5 mm. Start laying stitches through the glued gap, perpendicular to it, and very close to each other, back and forth.
- When the entire length of the joint has been completed, the thread must be secured and cut.
Advice : to prevent the fabric from becoming too stiff after plastering, the stitching should be thicker in places of damage, and less often where they are not really needed.
Curly darning – squares, flowers
Masking defects on fabric using embroidery is a very extensive part of needlework. Dreaming craftswomen have come up with and use many options for such figured darning. The simplest of them are geometric figures and plant motifs, which can be completed in a few minutes.
To create a square at the tear site, we make cross stitches. With each new step, making a puncture next to the previous one, we will “move”, closing the hole and interweaving the threads.
The patch can not just be sewn on, but secured with stitches in the shape of a flower. We fasten a piece of fabric with running stitches and begin sewing. We make a puncture with a needle in the center of the patch, bring the needle outside it and wrap the tip with thread, pulling the needle out. We get a curly loop stitch that imitates a flower petal. We repeat the actions in a circle. We secure the middle with yellow threads. The charming daisy patch is ready.
On leather that doesn't fray like regular fabric, making a flower is even easier. We place petal stitches around the hole, fill the center using the Japanese technique of darning - we make a “frame” of threads, then intertwine them with transverse stitches, bringing the needle either from above or from below.
More details in the video tutorial:
Don't rush to throw away things that have small holes or scuffs. Take advantage of the experience of experienced craftswomen and turn old T-shirts, jackets, jeans into designer items.
How to sew a lining
Many jackets use inexpensive material as lining - artificial silk, polyester, satin, satin, and less often viscose. When clothes are worn regularly, holes appear in the seam area, which over time turn into large holes.
How to repair a jacket lining:
- turn the jacket inside out;
- select the desired thread color;
- thread the needle;
- cut off the frayed part of the fabric along the edge of the hole;
- Sew the lining by hand using a stucco stitch.
Sealing leather products
Despite the high quality of such outerwear, it is also subject to some damage that can be disguised at home. Most often in this case, universal glue “Moment” is used.
If the damaged area is on the sleeve, then you need to turn the jacket inside out and tear off the lining a little. The jacket should be straightened in order to correctly cut a small piece of fabric, the diameter of which will correspond to the existing hole. Fixing glue must be applied both to the patch itself and to the defect site. The adhesive composition should be fixed (this procedure takes no more than 30 minutes).
How to beautifully make a patch on jeans on the knee?
photo of jeans with a hole in the knee and the inscription on the picture
Since this area is the most noticeable on jeans, the best option for repairing it would be a large rectangular patch.
- You can use both denim and leather in a contrasting color as a material to hide holes.
- Sew the decorative patch symmetrically onto the second knee too. Then the overall appearance of the jeans after repair will change. And you will be happy to continue wearing them.
- Cut the patches in width equal to the legs, and in length - slightly larger than the hole.
The sewing technique is as follows:
- fold the edges of the patch and fix them manually
- iron the seams around the perimeter with a hot iron
- put it on your knee
- draw a symmetrical location of the second patch on the other leg
- hand sew a piece of fabric to the main fabric with a hidden seam around the perimeter
- repeat the steps of cutting and sewing the patch on the second knee
- wash your jeans and let them dry naturally
- check the repaired areas for deformation
- if they are, rip up the work and start all over again
Patches in the groin area
Any instruction on how to make a patch for jeans usually begins with a recommendation to first make the hole look more slender, and only then begin the tailoring work.
The sequence of actions in this case will be as follows:
- All threads protruding from the fabric are cut off from the edges of the hole, after which the edges are swept away to prevent further spreading of the hole in width. This operation is carried out manually, it is advisable to make the stitches both frequent and wide;
- Then a patch of the chosen shape and appropriate size is cut out. Naturally, the patch should be slightly wider than the hole in the jeans. If you do not want to advertise the presence of a patch, you can sew it on the inside of the jeans, and not on the outside;
- It is advisable to secure the patch to the working area of the fabric with pins for greater accuracy. This will significantly increase the likelihood that when jerking and moving clothes on the sewing table, the patch will not move and thereby spoil the compositional design;
- At the end of the sewing process, the thread is secured with a knot and cut.
How to install an invisible patch
For an inconspicuous patch, select a fabric similar to the material of the trousers. The damage site is cut out in the shape of an oval or square. The patch follows the shape of the cut out part, but is larger by the amount of allowance. The direction of the warp thread on the trouser leg and the patch must match, so the result of the repair will be barely noticeable.
The blank is placed under the trouser part and adjusted with a straight stitch. The allowance is cut off by 0.3 cm and secured with a small zigzag. The closer the threads of the last line are in color to the material of the trousers, the more invisible the work will be.
Jeans are easy to repair
For example, denim clothing torn during a walk in the forest or as a result of the pranks of pets can be safely mended or patched. Such basic repairs will save a lot of money for your personal budget and prevent your closet from becoming overcrowded with many identical items.
You can be convinced that modern technical means and materials make it possible to install simply magnificent patches on trousers of any style by quickly studying the numerous photos of patches for jeans published on the World Wide Web.
How to glue a patch to jeans with an iron?
girl glues a patch to jeans using an iron
- Cut the patch so that it is slightly larger than the torn area.
- Non-woven fabric or similar adhesive fabric are ideal options for this method of repairing jeans.
- Turn the latter inside out and smooth out the area for the patch well.
- Place the sticky side on the fabric and smooth it with a hot iron.
- On the front side, for security, apply a decorative stitch around the perimeter of the hole. This will extend the life of the non-woven fabric; it will remain in place even after several washes.
How to darn with a hidden seam
A blind seam is used if it is necessary to sew up a hole in a product so that it becomes invisible. To do everything correctly, you should follow the recommendations:
- thread a needle and make a small knot;
- turn the product inside out;
- pass the needle inside out through the hole so that the knot remains there;
- sew up the hole;
- finish the seam.
After the hole is sewn up, you need to pull the thread until it goes into the seam and becomes completely invisible from the front side.
Blind seam
DIY patch on jeans using a sewing machine
Most people have a good sewing machine in their home; having one allows you to independently repair your favorite pair of denim trousers. The more special operations the machine performs, the more interesting the result will be.
In addition to the sewing machine, for work you need to prepare:
- repair material;
- ruler and centimeter;
- threads of a color similar to the fabric of the trousers;
- sharp scissors for small jobs;
- cutting scissors;
- ripper;
- tailor's pins;
- adhesive fabric.
All preparation work is carried out on a table, in good lighting.
A thing doesn't age within a season
In other words, from television screens the idea is persistently introduced into the consciousness of the broad masses of the population that after a couple of years after purchase, every thing becomes unfashionable.
However, if some wealthy socialite can agree with this, then a practical woman in the street is not at all obliged, under the pressure of such dubious arguments, to refuse clothes that are still suitable for use.
All that is needed to return it to decent form is to eliminate the rupture or persistent contamination with your own hands.
True, modern women are so absorbed in working at the computer in the office and then at home that they have completely forgotten all those simple sewing techniques that their mothers and grandmothers regularly used.
Lifehacks to help prevent scuff marks
- When buying, choose the right size, you can take a looser one.
- Give preference to pants with a medium or high waist; they are less likely to wear out quickly.
- Fidget less in your chair.
- Wash your jeans properly: hand wash or delicate wash will do. They need to be turned inside out, fastened with a zipper and buttons, and not washed too often.
- At the first sign of scuffing, take it to a workshop or, if possible, fix the problem yourself.
- Buy several pairs of pants and wear them alternately, this way you will increase the service life.
- Try purchasing quality custom made jeans.
Ideas for the most beautiful and stylish patches
Depending on the purpose of the denim trousers, the embroidery pattern and the type of patch material are selected.
For boys and girls
Children's clothing is bright; patches made from multi-colored pieces of durable fabric can be used to decorate it. All seams must be strong, there should be no protruding threads, fringes or buttons for decoration.
Patches on jeans for girls Patches on jeans for boys
A child will be delighted with an applique with embroidery in the form of a favorite cartoon character; it can be easily ordered from a studio or picked up a thermal sticker. Patches can also be designed in the shape of a heart, apple or animal.
For women
The modern fashion for ripped jeans leaves room for creativity when decorating trousers:
- iron-on embroidery stickers and rhinestone designs;
- patches made of lace and fabric with a pattern;
- drawing with acrylic paint using a stencil;
- applique made of colored fabric and leather.
The design style can also be varied, from a vamp woman to a romantic girl.
For men
The stronger half prefers stripes made of genuine leather. Damage to the knee can be covered with a genuine leather patch sewn into the side seams. The holes can be enlarged, the edges can be loosened, and the processing of many ready-made fashionable trousers can be repeated.
Decorated jeans have become a fashion trend in recent years. By sewing finishing fabric as a patch on the knee or hips, there is a chance not only to save your favorite pair, but also to improve their appearance. If the style should remain the same, an inconspicuous piece of work is done on the damaged area. Most defects in denim can be repaired and the pants can continue to be worn.
Article design: Natalie Podolskaya
Hole on genuine leather
Leather is a durable fabric, but it can also be torn. Small holes can be glued from under the bottom with elastic material. Manually suturing such incisions is difficult and the seam will be too rough.
If you need to sew up leather, it is better to do it on a machine with a special foot. For such work they make beautiful decorative patches.
To do this, take 2 blanks:
- made of fabric, shaped slightly larger than the diameter of the tear. It is placed on the inside as a securing lining;
- leather, matching the size of the hole.
They need to be ground down carefully, without moving them relative to the product.
How to seal a hole
If your jacket is torn and you don’t want to bother with sewing, you can seal it. To repair a burnt hole or cut you will need:
- glue (KP-1 or Moment);
- cotton pads;
- wooden spatula;
- iron;
- degreaser (acetone, alcohol, gasoline);
- patch.
How to seal a bologna jacket:
- the jacket is turned inside out;
- the lining is ripped open;
- degrease the cut or hole;
- glue is applied to the patch;
- gauze is placed on the inside;
- a patch is applied to the front part;
- cover with unnecessary cloth;
- A cold iron or any other weight is placed on top.
If a hole appears on a sports jacket, glue on a themed patch or chevron.
Repairs are carried out in a quiet environment in a ventilated room. The glue is applied in a thin layer so that it does not subsequently leak out from under the edges of the patch.
How to repair ripped jeans by hand
There are several ways to repair torn tissue. In case of minor damage, the places where the tears are made are reinforced with pads; if the holes are significant, a denim patch is applied.
Tip: Jeans lovers should not throw away old worn-out items - they will come in handy for repairs.
General sewing tips
If the problem of holes and abrasions in jeans between the legs is constant, then it is recommended to strengthen this area of the pants immediately after purchasing the product and washing it for the first time.
Also, you should not wait until the abrasion turns into a hole or a small hole becomes a big one. Taking preventive measures will increase the service life of jeans.
You should carefully consider the choice of fabric for the lining. For example, thick material or thick denim can subsequently chafe the body, especially if the jeans model is narrow. To make the repair of trousers less noticeable to others, you should take the time to find sewing threads that match the color of the fabric.
What you need for work
For hand sewing you need the following materials and tools:
- patch fabric;
- threads;
- needles.
Seamstresses advise working with household needles, which are sold in a set. To sew up a hole without a sewing machine, use numbers 11 and 14. The threads are also chosen thicker.
Cotton threads from 50 to 80 numbers or from 50 to 60 numbers (synthetics) are suitable. You can also use a sewing machine to repair a hole in your pants.
How to properly make patches on jeans by hand: instructions, tips
a patch fixed with pins on jeans before sewing on by hand.
Patches vary in appearance and functionality:
- decorative - inserted in place of a torn place, looking like a flap on the main canvas,
- double - have different sizes and the same shape. They are applied to the damaged area from the front and back sides, followed by sewing each to the jeans fabric,
- invoices are the most short-lived, since they are sewn on top of the hole on the front side of the product.
Before putting a patch on jeans:
- wash them and those scraps of fabric that you will use as patches
- Dry the jeans completely, iron them and especially those seams closest to where the damage is located.
- cut patches from scraps of fabric in the required quantity and shape
- mark the repair areas with chalk, especially if you need to place patches on both legs
- remember and practice a hidden seam on a piece of fabric, if necessary
- plan seam allowances around the perimeter of the patch
- if necessary, pre-process the edges of the patch with a zig-zag stitch or similar
- After sewing, be sure to wash the jeans
- First, choose a fabric for it of the same material, color and texture. An acceptable option is also from old jeans of a slightly darker shade.
- Cut the patch so that it completely covers the hole and has gaps for the seams.
- Place it on the front side of the main fabric. Pay attention to the fabric pattern of the patch and the main fabric. They must match.
- Attach with pins around the perimeter.
- To be safe, baste the patch in the corners.
- Using narrow, small stitches, carefully move along the edges of the patch.
- Remove the pins and spread the auxiliary thread.
- Turn the jeans inside out.
- Sew the same stitches around the hole. This will secure it. It will not be able to disperse and destroy the tissue further.
Sew patches while slightly damp to avoid fabric deformation and wrinkles.
To ensure that your patches on jeans look neat after hand sewing, consider a number of points:
How to carefully sew a patch on jeans between the legs by hand?
neatly hand-sewn patches between the legs of jeans
Let's look at the sequence of work:
- Jeans and patch fabric are washed and ironed (except for adhesive materials).
- Turn the product inside out and determine the size of the required patch. The size of the prepared piece should be larger than the total area with holes of 0.5-0.7 centimeters around the entire perimeter.
- Sew the cut piece from the inside out with a basting stitch, make sure there are no folds, bubbles, and all holes are carefully covered with a patch.
- Depending on the type of patch material, iron it with an iron (adhesive) or make multiple seams using the plastering method.
It is not difficult to install such patches, but these methods are used to repair minor damage and slightly worn areas. Therefore, restoration work begins immediately after minor abrasions appear.
Patches
The matter will stop unraveling if you put a patch on the wrong side. Craftswomen cut a piece of fabric of the same shade (the material of any old denim item will be useful). A couple of horizontal cuts are made on it, which will be identical in size to the hole.
Afterwards, the seamstress carefully pulls out the longitudinal threads. When the holes match, step back a centimeter from each side and cut out a patch. Then the workpiece is placed under the abrasion and sewn with small stitches. In this case, the color of the thread is selected to match the denim.
Replacing the damaged area
To sew up jeans discreetly by hand, craftsmen completely replace the torn part of the item, maintaining symmetry. To work, you will need 2 shades of thread: to match the color of the fabric and threads whose color matches the factory ones.
How to sew clothes correctly:
- To begin with, the back and side seams of the pants are partially ripped out.
- Then cut out the rubbed part.
- Then the fabric for replacement is cut out. However, its shape must be identical.
- The cut out part is applied to the prepared scraps and identical blanks are cut out.
- Next, all the flaps are basted and sewn in so that the patch on the pants looks neat.
In order for the item to retain its appearance for a long time, the sections for the inserts are cut out in such a way that the guide threads are located diagonally. This way the material will stretch well.
Seamstresses use not only denim or stretch fabrics, but thick corduroy or leather inserts. They will look more harmonious if there is a patch on the legs, and not just in the crotch area. It is cut from the same material.
Japanese technique "Boro"
The technique originated in the Middle Ages in the Land of the Rising Sun. Boro art consists of numerous parallel stitches of equal length, hand-crafted. They resemble darning with coarse threads. For ease of use, needlewomen advise using long needles.
- To repair damage to jeans, choose thin denim, cotton or linen fabric.
- To work, choose a flap of any shape. The seam allowance should be 3-4 cm.
- Finish the outline of the cut or hole with forward stitches using a needle. In this case, the damage will not stretch further.
- Parallel to the outline of the hole, use a washable felt-tip pen to draw parallel lines for future embroidery. The distance between them can be 0.6-0.8 cm.
- From the wrong side, baste the prepared patch.
- Apply smooth stitches along the marked lines, which should be longer on the front side than on the back side.
- You need to turn the stitch onto the next row from the wrong side. Continue embroidering in the opposite direction.
- Make several rows of stitches on the bottom and top of the patch of different lengths, as well as on the sides.
The cuts on the flap can be slightly frayed if the flap is sewn on the front side of the product. To add style to the patch, you need to choose different stitch lengths and thread colors.
Blind stitch patch by hand
If the hole has formed on the knee, and it is large enough, during the repair process you should follow the step-by-step instructions below:
- Trim the threads sticking out around the perimeter without going into the fabric.
- Turn the jeans inside out and circle the hole, making an indentation from the edge of about 2-3 cm. If possible, it is better to process the edges of the hole not with your hands, but with an overlocker. But in this case the patch will be more noticeable.
- Prepare the self-adhesive tape by cutting it to the desired size. Do the same with a piece of fabric for sealing your pants. Ideally, you should cut it diagonally in the direction of the weave of the thread. Thanks to this, the fabric will not unravel or fray.
- Glue the web and denim patch using a heated iron. Steam the patch a little, especially around the edges.
- Sew around the perimeter of the pants patch using blind stitches.
- Turn the jeans right side out and make the correct horizontal stitches. The most suitable stitch for this would be a zigzag stitch.
- Cut off the excess threads and the repair is complete.
Repair without patches
How to sew up a hole in jeans beautifully? There are several ways for which you do not need to make patches. They are simple to perform, and if you learn how to do it, you can quickly and easily restore worn-out material.
Darning by hand
How to mend a hole in jeans? With this method of repairing things, frayed threads are replaced with new ones. To do this, darn along the worn area.
If there are factory threads left on the fabric, then pass the needle first under and then over them.
When the row ends, a needle is threaded from the end through several threads on a whole piece of material. At the same time, the gaps from the edges of the torn material should remain minimal, but should fix the fabric well. This way, the darned area will be less noticeable, and the denim will stop unraveling.
Usually craftsmen do a continuous stitch: this way the darning will be dense and more durable. Then they continue to mend the hole, but not along, but across. First, the needle is passed under the thread, which is located perpendicularly, then over all the following ones. The seamstresses make sure that the stitching is tight and there are no gaps. If this condition is met, and the color is matched tone to tone, then the repair will be barely noticeable.
How to mend jeans between the legs by hand instead of using a machine? To accurately repair jeans, each thread must be suitable in density, texture and shade. It is best to take them from the bottom of the trouser legs that need to be sealed. This method is suitable for restoring worn-out, sometimes see-through clothing. Often such areas appear if denim wears out over time. Craftswomen easily mend small holes with torn edges.
Plastering
This method is used if jeans need to be closed by hand unnoticed. Seamstresses use it when sewing the edges of fabric. This is usually used to repair clothing that has been cut or torn by a sharp object.
Craftsmen know how to sew up a hole without a sewing machine. Such a hole can be round in shape. The plastering method is used most often.
There are several ways to repair various types of damage:
Blind seam
Jeans can be hand-stitched discreetly. Craftswomen advise using a hidden seam for this. This method is suitable in cases where the trouser legs are torn at the stitching site.
For example, they can disperse from behind or from the side. It happens that some parts have come off: patch pockets or a belt loop.
If apart from this there are no other defects, and the trouser legs remain intact and not frayed, then two or three hidden seams on the fabric completely eliminate the damage and remain invisible. This technique is also used if you need to hem the trouser legs at the bottom. Such repairs may be necessary when restoring worn edges, fixing the hem from the inside, or stitching the bottom part.
Types of patches
The main types of patches can be divided by the method of connection with the product and by purpose.
- Invoices. The part is applied to the front side of the damage and fastened to the product by hand or using a machine stitch. The main fabric can be sealed with additional inner fabric or adhesive material.
- Internal. In this case, the fabric is placed under the gap on the wrong side of the main fabric. The damage is carefully hemmed along the contour or, conversely, stitched on the front side with a strong zigzag stitch
- Functional. Their task is to beautifully strengthen certain areas of clothing. Such a patch is created on a obviously new product in order to accentuate the knees, elbows, and add texture or color.
- Decorative. In sports, trendy, and children's models, decorative patches are made of bright, eye-catching fabrics, which are applied to the front side of the clothing in a variety of, not always functional, places. The “grunge” fashion has brought its own adjustments, and now shabby clothes, with breaks and deliberately placed patches, are a sign of a certain style and serve to attract attention.
honestlywtf.com
lystit.com
Depending on the type of product and its purpose, various materials are used for patches.
- The main material of the product or as similar as possible.
- Wear-resistant natural and artificial leather.
- Textured materials such as suede or velvet.
- Ready-made stripes with ornaments and designs.
- Decorative thermal applications.
honestlywtf.com
Plastering - mending a hole in the trousers
Plastering is used in cases where it is difficult to sew up the fabric with a straight seam, and it is too early to apply a patch (for example, if the threads of the fabric are preserved in at least one direction and the fabric has not torn, but only become thinner). A skillfully made contraption is durable and almost invisible. When starting to repair small damage, you need to select a soft thread and color (floss, darning), or even better, pull the thread out of the fabric of the product in a hidden place, in the shared seams, etc.
The piece effectively sews up holes in denim trousers
- Having stretched the fabric with the front side on a solid object, they lay even stitches along the grain thread, leading the rows so that they pass through still strong places.
- You have to sew forwards and backwards.
- When moving from line to line, you need to make a loop at the end of the row so that the threads do not pull the fabric together.
- When the shared threads cover all the worn-out places, the same mesh is applied in the transverse direction so that they intertwine with the shared threads, as in the usual darning of stockings.
- If the threads of the fabric being repaired are located diagonally, then the piece is done at an oblique angle.
- If the damage is significant, and there are almost no threads of the main fabric left, you can select another suitable fabric, hem it from the inside under the repaired area, and then, using a thread of the appropriate color, sew the piece on the front side.
Ironing after plastering is of great importance. If the piece is made of dark and thick material, then the repaired part of the product should be placed on the ironing board with the wrong side facing the iron, thoroughly moistened and ironed with the toe of the iron at medium heat. Then turn the product over, place a damp thin cloth on it and iron it with the entire surface of the hot iron.
After plastering, light and thin materials must be ironed from the face and back through a damp cloth.
Why do abrasions appear?
Clothes wear out quickly for a number of reasons. Abrasion, a hole between the legs are the most common defects that appear on comfortable things that we wear every day. As a rule, such shortcomings arise due to the fact that:
- The trousers were bought in the wrong size - they fit too close, or, conversely, the item is too loose. In both cases, excessive friction occurs, which will then lead to damage to the fabric and inevitable repair of the product.
- Between the legs, abrasions most often occur in low-waist jeans.
- Improper washing or ironing of clothes. Before putting items into the washing machine drum, read the information on the label to find out at what temperature it is allowed to clean stains, and what spin task is recommended to be turned on.
- Hot water leads to premature wear of the fabric, and as a result, to the rapid appearance of abrasions on the material.
- Jeans cannot be dried in a washing machine. The best option is in the fresh air. This way, the pants will last longer and the fabric will deform less often.
Pants can tear at any time and in any place, so it is advisable to know in advance how to repair jeans that are frayed between the legs and how to carefully apply patches to clothing. The correct way to get rid of a defect that has arisen, making it invisible, is to use patches or stripes. Try to give your favorite clothes a second chance - make things original, exclusive, and continue to wear them with pleasure.
Japanese technique "Boro"
The technique originated in the Middle Ages in the Land of the Rising Sun. Boro art consists of numerous parallel stitches of equal length, hand-crafted. They resemble darning with coarse threads. For ease of use, needlewomen advise using long needles.
- To repair damage to jeans, choose thin denim, cotton or linen fabric.
- To work, choose a flap of any shape. The seam allowance should be 3-4 cm.
- Finish the outline of the cut or hole with forward stitches using a needle. In this case, the damage will not stretch further.
- Parallel to the outline of the hole, use a washable felt-tip pen to draw parallel lines for future embroidery. The distance between them can be 0.6-0.8 cm.
- From the wrong side, baste the prepared patch.
- Apply smooth stitches along the marked lines, which should be longer on the front side than on the back side.
- You need to turn the stitch onto the next row from the wrong side. Continue embroidering in the opposite direction.
- Make several rows of stitches on the bottom and top of the patch of different lengths, as well as on the sides.
The cuts on the flap can be slightly frayed if the flap is sewn on the front side of the product. To add style to the patch, you need to choose different stitch lengths and thread colors.
Video about Boro technique
Darning by hand
More skill and patience will be required for manual repairs.
For a hole in the shape of a rectangle, hand darning is used:
- A thread of a suitable color must be threaded into the needle twice.
- Having secured the thread on one side of the rectangular hole, you need to stretch it to the opposite side and secure it with one stitch.
- The thread is fixed again on the first side and so on until the entire “window” of the hand patch is filled.
- In the second direction, a needle and thread alternately interweaves threads in the opposite direction. The result is a dense mesh. It hides the defect and serves as finishing.
Socks were previously darned this way. The patches looked beautiful and spoke of the woman's skill.
Beautiful patch
One of the easiest methods that helps not only patch, but also decorate clothes. However, it is only suitable for items made of thick fabrics, such as denim.
Patches can be found in sewing stores or ordered online. They come in two types - with and without a hot-melt adhesive base.
With the first ones everything is simple.
You will need:
Instructions:
- Place the patch on the front side of the garment, closing the hole.
- Cover the top with gauze.
- Run the hot iron for 30-50 seconds.
With patches without an adhesive base it will be a little more difficult. To do this, you will have to pick up the needle again.
You will need:
- stripe,
- needle,
- pins,
- threads of a suitable color.
Instructions:
- Place the patch on the fabric and secure with pins.
- Sew the patch along the contour, making sure that it does not move out.
As you can see, sewing up a hole in your favorite clothes with your own hands is not at all difficult, and you only need anything for this. In addition, you can create a unique item by decorating it with embroidery not only at the tear site, but also in other places, creating an interesting composition. It all depends only on your imagination!
Features of the material
Bologna is a synthetic fabric that consists of a dense weave of polymer threads. It is smooth to the touch, thin and airtight. Often used to produce waterproof clothing.
Bologna jackets are popular because the material has the following properties:
- lasting;
- easy;
- does not wrinkle;
- practical;
- does not get wet;
- resistant to acids, alkalis, mold;
- it's easy to take care of.
Such jackets protect from wind and rain, but are very fragile. Any sharp object can leave cuts on the surface; holes also appear from exposure to high temperature. Therefore, the problem of how to seal a Bologna jacket is familiar to many. There are several simple ways to do this without being noticed.
