If the apartment is constantly kept clean, then the owner rarely gets around to cleaning the ceiling. Still, this is not the floor or walls, where much more dust and dirt collects than on the ceiling. But, nevertheless, at least once a year you have to do this difficult work, especially in kitchen areas. And then the housewife is faced with the question of how to wash a ceiling painted with water-based paint.
Safety precautions
When carrying out cleaning procedures, it is recommended to place the ladder as securely as possible.
You should not install all kinds of pads under the legs if the floor is uneven. You cannot stretch while standing on a ladder in an attempt to cover the maximum area of the ceiling. In such a situation, it is recommended to get off and move the stepladder. Otherwise, there is a high risk of falling and serious injury. When wet cleaning the ceiling, water will fall onto the floor. On such a surface, the housewife may slip or the stepladder may move out of place.
The container for the soap solution must be of such size and shape that it is securely fixed on the landing of the stairs. It is recommended to wear an apron over your clothing. It should have roomy pockets. You can put a rag or sponge in them at each stage of cleansing. It often becomes necessary to wipe the ceiling with a dry cloth after cleaning with a damp sponge. In this case, the sponge can be placed in the apron pocket. Moreover, most likely, there is no place on the stairs for it. In addition, the sponge may fall, which means that you will have to go down to get it.
How to protect yourself
Don't forget to be careful:
- You need to wash it piece by piece, without rushing.
- It is better to move the stepladder behind you, moving in small steps.
Often people lean back, trying to cover as much territory as possible with the rag, and as a result they fall. This may result in a little trouble and a few bruises if you have wood floors or carpet, but if you have tile, you could end up with serious injury.
Remember that general cleaning is a procedure that does not require such sacrifices, and take your time.
Preparing a painted ceiling to renew the decorative layer
If the surface cannot be cleaned with simple means or the time has come to refresh the ceilings, the base should be prepared for restoration. Let's figure out how to wash a painted ceiling before renovating it.
The work algorithm is as follows:
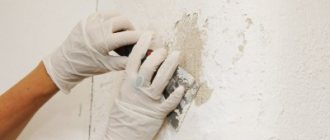
Use a long-handled brush to remove dust. Pay special attention to the areas where panels meet and corners. The electricity should be turned off and the lamps removed. It is permissible to vacuum the surface with a short-haired brush, but without pressing the tool against the surface, so as not to leave scratches. After dust removal, wrap a damp cloth on the mop and wash the ceilings. Wash contaminated areas thoroughly using soap and soda mixtures. Inspect the ceiling, if there are stains of mold or mildew, clean them with a brush. Be sure to clean down to the base, completely washing away the paint.
The movements are gentle, it is important to thoroughly clean the affected area, washing off even layers of plaster if mold has penetrated into them. After cleaning, treat the areas with a solution of copper sulfate and lime (1:30)
Let dry, then rinse with clean water to remove the bluish tint. Dry again and saturate the areas with primer in 2-3 layers, drying each layer before applying the next.
- After drying the surface, you should inspect the ceilings and if there are stains left, rinse again with clean water.
When figuring out how to wash a painted ceiling, you should take into account that after each stage of cleaning the surface should be dried - this will take time, but this way the surface will be better prepared for subsequent work
It is important to leave the base to dry naturally without using a hairdryer, otherwise the edges of the washout will remain visible.
Paint the prepared dry base with water-based emulsion in several layers, and the ceiling renovation is complete. And knowing how to wash a painted ceiling, you can always refresh the coating without any special financial costs. By the way, the same renovation methods are suitable for whitewashed ceiling surfaces. And the mold elimination option is useful for any ceilings.
Preparing for cleaning
With systematic general cleaning, cleaning the ceiling is not very difficult. This is especially true for residential premises. You can remove dust and cobwebs using a vacuum cleaner. Soft brushes or a broom, which should be wrapped in a clean cloth, are also suitable for this. After such preparation, the need to wash the ceiling often disappears.
See also
Step-by-step instructions for repairing an electric kettle with your own hands
Types of water-based paint
Water-based paint is a water-based emulsion that contains polymer particles undissolved in water. The composition also includes pigments and various additives that change the characteristics of the final product. After applying the paint, active evaporation of water occurs and a thin polymer film remains on the surface.
Painting the ceiling with water-based paint begins with choosing the composition. They use four types of polymers:
- Acrylic. An aqueous emulsion based on acrylic resins allows you to obtain a smooth surface, has good hiding power, and hides small surface defects, even cracks up to 1 mm wide. Its disadvantage is its high price, but it is easier to work with. In their pure form, acrylic compositions are hygroscopic and can only be used in dry rooms, but they do not interfere with the passage of steam. To create a waterproof film, latex is added to the acrylic water-based emulsion. The same additive increases the elasticity of the dried film. Such compositions can be used in damp areas.
- Silicates. This type of water-based paint is based on liquid glass. The coating is resistant to precipitation and does not interfere with the release of vapors, has a long service life (10 years or more), and can be used for outdoor work.
- Minerals - lime or cement. Mineral water-based emulsions have good adhesion to any surface, but are quickly washed off. As a result, they are gradually losing popularity.
- Silicone. Silicone-based water emulsions are the latest achievement in the industry. These compositions are good because they “tighten” cracks up to 2 mm thick. As a result, the surface painted with them, even without excellent preparation, turns out to be even and smooth. The film turns out dense, but vapor-permeable. Silicone water-based emulsion can be used to paint ceilings in bathrooms and other wet areas. The disadvantage of this type of paint is its high price.
Latex can be added to any of the compositions. Latex water-based paint is water-repellent. It is not afraid of moisture and can be used in damp rooms.
Based on the main characteristics of these compositions, you can choose the best type of water-based paint for yourself. Each case requires its own properties and the “best water emulsion” is different each time.
When emulsion and emulsion are different
For the production of water-based paints, several polymers with different properties are used. The most popular among them are:
- Silicate - forms a coating that allows the walls to “breathe”, but is not moisture-proof. Only wiping with a well-wrung out sponge or cloth is allowed.
- Latex has excellent steam permeability while retaining water. It can be washed without fear of disturbing the structure of the paint.
- Acrylic has better properties than silicate, but is in many ways inferior to latex. If exposure to moisture is short, it is quite capable of withstanding washing.
- Silicone is the best polymer today, which is not at all afraid of contact with water and is suitable for frequent washing.
Selection of materials and tools
This stage is considered the most important. The quality and service life of the future surface depend on the correct selection of tools and consumables.
It is important to make purchases in large chain hypermarkets or branded stores; there are a lot of fakes sold in the markets
Necessary tool
- The main painting tool used for working with water-based emulsion is a roller. To finish the ceiling, it is better to choose a product with a medium-wool coat - this way the paint will not splatter on the sides, but at the same time, the color of the base will overlap without spots or streaks. The height of the cylinder for faster operation should be 18–25 cm.
- Then you need to pick up one or two brushes for painting corners or hard-to-reach places, for example, behind ventilation ducts or pipes.
A brush no wider than 8 cm is best. You can also use an angled roller. You should buy a container for paint; it may be called a paint tray or tray, or a cuvette. The flat part of the bottom of the container should be corrugated so that it is convenient to squeeze out excess paint from the tool. Painting the ceiling with water-based paint does not require many tools. - In addition, you need to purchase fine-grain sandpaper, masking tape (ordinary tape will do) and plastic wrap. It is recommended to take care in advance of the availability of protective clothing, gloves, headgear and glasses. So that when painting the ceiling with water-based paint with your own hands you can control the quality of the surface, you need to prepare a powerful lamp and a pole to raise it to the ceiling.
- If you have a stepladder at hand, you can use it, but you should not purchase it specifically.
You can buy a telescopic tube for a roller or use tables, cabinets and other furniture as a stand. All small interior items should be removed from the room, and floors and bulky furniture should be covered with film. When painting the ceiling, it is more convenient to use trestles, as they are wider and more stable than a stepladder.
How to choose paint
To paint ceilings with water-based paint yourself, you can use the following types of material:
- Polyvinyl acetate compounds. The cheapest type of coatings. Surfaces coated with this paint should not be wetted with water.
- Latex. They are considered one of the highest quality. With their help you can obtain strong and durable coatings. The price of materials is also quite high.
- Acrylic. The most common type. They have a good combination of price and quality.
- Silicate. Compositions with the addition of liquid glass are most often used for painting stone or plastered surfaces. Can be used both indoors and outdoors.
- Silicone. They have good hiding power, vapor permeability and a long service life, but their high cost makes them less popular than acrylic paints.
Acrylic compositions are considered the most durable, PVA is the cheapest, for new buildings you need to take latex, universal acrylate ones are suitable everywhere, but they are expensive.
When choosing a material for painting, you need to listen to the advice of the seller, but it is also recommended to carefully read the label. The manufacturer indicates the following information on it:
- Type of work. This can be internal or external work on bases made of various materials.
- Paint consumption. Based on this indicator, you can approximately calculate the total amount of material, but it is better to add 10%.
- Covering power. The number of layers required to completely cover the old color depends on this indicator.
- Resistant to abrasion or moisture. The material may only be suitable for dry operating conditions in the absence of mechanical stress. A little more expensive are paints that can withstand mechanical stress. They are followed by materials that, after drying, do not dissolve with water, and the most expensive are dirt-repellent paints.
All water-based paints are white, color is added later, but the entire volume must be tinted, otherwise there will be stains
It is also important to consider the type of finished coating:
- Matte. They are difficult to clean, but visually increase the height of ceilings and mask minor defects.
- Glossy. More resistant to abrasion and easy to clean, but does not hide defects.
- Semi-matte. A compromise between the two above types.
We also suggest watching this video:
How to paint a ceiling with water-based emulsion with your own hands
Each of the water-based paints has instructions for use on the can. The operating procedure is described there. Some compositions just need to be stirred well before use: undissolved polymers may settle at the bottom of the jar. Some formulations require dilution. The amount of water added is also specified in the instructions and depends on the application method. For spray guns, the dilution is stronger; when using a roller, thicker formulations are required.
Paint tray makes the job easier
When diluting the emulsion with water, add it in small portions. Stir thoroughly and try on a surface area. If the paint goes on evenly and almost completely covers the base, you can paint.
It is more convenient to pour the paint into a special container with a tray and a ribbed platform. You can use a regular basin and a clean piece of oilcloth spread nearby. It's not as convenient, but less expensive.
Which roller to choose
A roller for painting the ceiling with water-based emulsion is needed with dense short pile. You need to examine him carefully. The pile should “sit” firmly and under no circumstances should it “climb out”, even if you pull on it. Then inspect how the seam is made. Under no circumstances should he stand out. It must be difficult to find. It is best if it is made obliquely.
Rollers for painting the ceiling with water-based emulsion
Pay maximum attention to choosing a roller: the quality of painting - the absence of stripes on the ceiling - largely depends on how good a tool you have chosen. It is more convenient to whiten the ceiling with water-based emulsion not from a stepladder, but from the floor. To do this, the roller is placed on a long handle and secured well.
How to paint without streaks
To avoid streaks on the ceiling, painting the ceiling with water-based paint should be completed no later than in 20 minutes. Immediately after application, water begins to actively absorb/evaporate and stripes appear at the junction of the dried and “fresh” paint. Therefore, it is advisable to prepare the room. It is necessary to turn off (wrap up) the heating radiators and prevent a draft. It is also advisable to wash the floor immediately before whitewashing; even if you work during the day, turn on the lighting, this will allow you to better control the quality of the paint. Afterwards you can start working.
Ready-to-use water-based paint is poured into a container, a roller is dipped into it, then rolled well over the site, achieving uniform distribution over the entire surface. When the roller has a uniform color, they begin to paint.
The corners are painted first with a brush. After applying a little paint, take a small roller and roll it out well. Then they begin to paint the main surface. The first layer is applied parallel to the window, the second - perpendicular.
You need to stand so that you look at the area to be painted at an angle. This will give you a good look at how evenly the paint has spread, as well as where you have already painted and where you haven't. Move systematically, without jumping from one piece to another.
It is more convenient to paint from the floor, and to do this, the roller must be attached to a long but light handle
The width of the strip painted at a time is slightly larger than the width of the roller. After wetting the roller, place it approximately in the middle of the strip. Quickly roll the paint in both directions from one wall to the other. Don't waste a lot of time: you don't have much of it. On average, the water emulsion dries in 10-20 seconds. If you didn’t have time to apply the strip next to it before, the border will be clearly visible, which you won’t get rid of. Having distributed the paint more or less evenly over the strip, dip the roller into the paint and roll it out again from the middle of the ceiling. At the same time, go beyond the already painted strip by about 10 cm. All this at a good pace without stops and smoke breaks. The edges of the painted strip should not dry out. In general, these are all the rules.
After applying the first coat of paint, some areas may not be painted as well. You need to wait for it to dry completely and paint it a second time. This should already be enough to obtain a flat surface. If even after the third layer of water-based paint you still have streaks and stains on the ceiling, you will have to redo it again. It is necessary to level the surface with sandpaper, prime it again and paint again.
What color
The easiest way to achieve perfect evenness is to use “snow-white” paint. All pigments clearly highlight even small irregularities, so the process of puttying the ceiling should be given maximum attention or use an acrylic or silicone-based water-based emulsion.
Rules for washing walls and ceilings coated with water-based emulsion
To preserve the decorative qualities of the paint, it is important to clean it correctly:
- During the washing process, only soap solution can be used. In undiluted form, detergents destroy the polymer layer.
- It is forbidden to rub the painted surface with force, otherwise a bald spot will form there.
- Frequently washing certain areas of the wall or ceiling leads to fading of the paint and the appearance of an unsightly light stain.
Washing walls or ceilings painted with water-based paint is not so difficult if the purpose of cleaning is to remove dust. But it is better to prevent the appearance of persistent stains.
If the apartment is constantly kept clean, then the owner rarely gets around to cleaning the ceiling. Still, this is not the floor or walls, where much more dust and dirt collects than on the ceiling. But, nevertheless, at least once a year you have to do this difficult work, especially in kitchen areas. And then the housewife is faced with the question of how to wash a ceiling painted with water-based paint.
p, blockquote 2,0,0,0,0 —>
Removing stains
Most often, stains form on the walls - next to the switches. The fat that is on every person’s fingers dries to the paint layer by layer, forming an unsightly, greasy “edge.” It is extremely difficult to get rid of this pollution. If the surface is white and matte, professional cleaners recommend lightly rubbing it with a light-colored eraser. In all other cases, it is better to wash off the old paint and apply a fresh layer of emulsion.
You can remove children's drawings from the walls if they are made with a simple pencil and occupy a small area. Here again the eraser will come to the rescue. But traces from an alcohol felt-tip pen will disappear only after repairs are carried out.
Grease that gets on kitchen walls and ceilings is first softened. To do this, apply a solution to the contaminated area with a sponge, which consists of 4 tablespoons of soda or table salt and a liter of water. This method is effective for fresh stains; old ones cannot be removed.
Working with walls
Walls coated with water-based emulsion are much easier to clean, but you have to do it more often, especially in apartments where there are children. They often play nearby, get dirty with their hands, leave marks, even draw on the walls. One day you have to wash all this art.
If a child's “rock painting” is made with alcohol-based markers, it will be very difficult to get rid of them. Trying to wash away marker marks can easily damage the paint layer. Easier to repaint.
Where do spots appear most often?
The most popular places for stains on walls are around switches and sockets. All family members touch these items, and it is not surprising that they get dirty faster than others.
A regular white eraser will help get rid of plaque next to them.
If you don’t want to wash the area around switches and sockets, try erasing the stains with an eraser. Under no circumstances should you lean on the eraser or rub too zealously - there is a risk of “wiping” the water-based paint, and then everything will have to be repainted to achieve an even coating again.
But you shouldn’t experiment if you notice that the eraser leaves white spots: it’s so easy to ruin everything and have to paint it again.
Peculiarities
Ceilings seem to be relatively clean and less dirty surfaces, because no one stands on them, no objects are hung here, no one walks on them, no scattering or spilling liquids, and touching with hands occurs very rarely. But the problem is that emerging stains are extremely difficult to hide, and against a light background they are too noticeable even to the naked eye.
The traditional finishing method - whitewashing - allows you to eliminate accumulated dirt by simply applying a new layer. But modern materials and designs, with all their advantages, do not leave such an opportunity for people. Therefore, the question of how to wash away soot and other contaminants is extremely relevant.
How to clean soot from a painted ceiling
Icer December 1, 2016Specialization: master in the construction of plasterboard structures, finishing work and laying floor coverings.
Installation of door and window units, finishing of facades, installation of electrical, plumbing and heating - I can give detailed advice on all types of work. In the photo: keeping the ceiling clean requires some effort
The article is addressed to those whose kitchen ceiling has turned yellow and stained. In it I will tell you how to wash the ceiling from soot and grease with minimal time and effort. You need to follow a few simple recommendations that have been tested by experience and proven to be effective.
If there are 2 types of ceiling coverings in the room, then the work becomes more complicated
Main types of paint
There are a number of dyes, each of which has certain advantages and disadvantages. Experts advise choosing formulations that can easily withstand washing. Thanks to this, it will be possible to maintain the cleanliness of the coatings and avoid constant repairs.
Silicate
This type of coating is considered the most resistant to moisture. In addition to the silicate base, the substances contain pigments and liquid glass. However, you should not use such compositions for painting bedrooms. An excellent solution for using silicate paint would be a bathroom. It is also allowed to apply it in other utility rooms and carry out external treatment.
Latex
These compositions fit perfectly on all types of bases and are easy to clean. The only disadvantage is the high cost, since this is an elite market segment.
Acrylic
This is one of the most popular coating options. This dye contains resins. They have a binding effect and make the paint more elastic. Some substances are characterized by resistance to moisture because they include a latex component.
Acrylic dyes are easily distributed over the surface and are durable. They usually have a pastel color scheme. To obtain a more saturated shade, special additives are added to the composition. Tinting is done in a store or at home.
Silicone
These coatings are based on silicone resins. They also include acrylic copolymers. The products protect surfaces from fungal microorganisms and mold. The compositions are characterized by vapor-proof properties.
Before renovation
Preparing the surface for painting always begins with cleaning. The ceiling is washed very conscientiously so that neither soot, grease, nor dust interfere with the reliable adhesion of fresh paint to the base. In this case, it is possible to use more radical methods:
- high concentration of detergent in water;
- brush with stiff bristles;
- a large amount of water when rinsing.
A very important point: allow the surface to dry completely before applying primer and paint.
There are not many options on how to wash the ceiling or walls painted with water-based paint in the kitchen. Typically, these surfaces are washed using delicate products so as not to damage the protective film of the coating. During the cleaning process, do not forget to wear gloves, glasses and a hat to protect yourself from getting the solution into your eyes and skin. If the described cleaning methods do not help you achieve an ideal condition, perhaps it’s time to refresh the paint job, especially since you’ve already washed the ceiling and part of the work is done!
Tools and devices
In a room with a normal ceiling height, it makes sense not to use a stepladder or table, but to take a telescopic mop. The advantage of such a tool is the ability to clean tiles in corners, ceiling skirting boards and other hard-to-reach areas.
To clean the ceiling, use:
- soap solutions;
- dishwashing detergents;
- ammonia.
Plastic panels
Light laundry soap is most often used to care for them.
, which is mixed with hot water to create foam. The same applies to working with detergents. Ammonia is diluted in accordance with the standard proportions found in cleaning recipes.
Washable glossy
This ceiling must be washed without using abrasives; It is unacceptable to scrape off dirt with a knife or other sharp object
. Also, do not use a mop wrapped in a rag, as this may cause dents.
With drawings
To clean ceilings decorated with drawings, it is better not to use alcohol-containing substances or acetic acid. Bleach helps to deal with yellowed areas - any factory product is diluted in the appropriate proportion: 60-90 g per 10 kg of liquid. It is easier to avoid streaks and stains if you wash the ceiling surface in one direction.
Melamine sponge is widely used when washing ceilings, but you need to check the reaction of the finishing material in advance to avoid any deformation.
Slat ceiling
This kind of construction is very widely in demand, but you should not assume that aluminum blocks can be washed with abrasive agents - the chrome surface is easily damaged and loses its decorative qualities. Minor and relatively weak dirt can be removed with soap suds, and when there is a lot of dirt (the ceiling is all black from burning or soot), you will have to use an aqueous solution with dishwashing detergent. The mirrored slatted ceiling is washed in the same way as a window.
The following materials are used:
- mop with retractable handle;
- sponges, not covered with lint;
- factory-made window glass cleaners.
You cannot use washing powder, as it quickly penetrates into the paintwork material or fabric, retaining a characteristic aroma that disturbs almost all apartment residents.
When consistent vacuuming with dry sponges and soapy water does not produce results, a different approach must be taken:
- dilute soda in warm water (90-120 g per 10 l);
- the ceiling is wetted with this solution;
- after 10 minutes it is washed off.
remove dirt from paper wallpaper, even if it involves soot, with a vacuum cleaner - wet cleaning and washing are not allowed
. Only in the dirtiest places is it possible to do a little work with slightly damp napkins made from natural materials.
Traditionally, cobwebs are removed with brooms or brooms, but this can lead to deformation of the coating. It is much more correct to use a vacuum cleaner equipped with a long-bristle brush. The textile ceiling must be vacuumed regularly
; Responsible owners remove any stain immediately, without putting it off for later.
You can prevent streaks and stains by limiting the use of liquids.
, since the fabric does not tolerate waterlogging well. It is unacceptable to remove stains containing chlorine using mixtures, and if they are very deeply ingrained, then it is advisable to dilute the cleaning powder in water and use it. Finish the work on the fabric ceiling by wiping it dry with a paper towel.
The ceiling does not need regular cleaning, due to the characteristics of the material from which its finishing is made. However, after some time, dust may settle on the floor or dirty stains from grease may form in the kitchen. Therefore, the ceiling has to be washed periodically. But to do it correctly, it is worth familiarizing yourself with some of the features of the process.
Further information: Cleaning up after a fire
Cleaning such a ceiling is not an easy task.
I want to tell you about how to clean the ceiling after a fire. In such cases, the surface is covered with a thick layer of soot, and if you just start washing it or scrubbing it with a brush, it will clog into the pores so that you are unlikely to remove it. To achieve the best result, you need to follow the surface cleaning technology.
First, let's figure out what you need to get started:
- First of all, purchase protective equipment: a respirator, goggles and gloves. There should be a hat on the head, and clothes should be such that they can be thrown away after work - it is impossible to wash soot off things;
You shouldn’t work without protective equipment
- Vacuum cleaner with powerful dust suction;
- Brush with hard bristles;
- Sponges for soot (several pieces);
For work, you can use sponges for fireplace glass, they are excellent for collecting soot
- A basin for the detergent composition and detergent (you can also use “Fairy”). Gather more rags, you will need them.
The work is done in this order:
- The floor is covered with a covering film to prevent soot from falling on it;
- Take a vacuum cleaner and use the most powerful suction mode to remove everything that is possible. Do not touch the pipe or brush to the ceiling, move along the surface;
An industrial vacuum cleaner removes soot from surfaces very well
- Next, you need to take a stiff brush and sweep away the soot from the ceiling with sharp movements. Try to scrape off soot rather than rub it into the surface. It is better to move in one direction, so the cleansing occurs better;
- A special sponge allows you to remove even more soot; it also needs to work with jerky movements in one direction. As the sponges become dirty, they are thrown away and new ones are taken. ;
- A cleaning solution is prepared, after which the surface is wiped several times using rags using the same sweeping movements. As the rags become dirty, they are thrown away and the detergent is replaced with a fresh one;
- The finished base is primed several times with a penetrating compound, after which it can be puttied and painted.
After priming and painting there will be no traces of soot left
What to remember when starting to wash
No matter how long you have to put off spring cleaning, this day will come. Not a single housewife likes to do this kind of work, because it is difficult, takes a lot of time and effort, and requires scrupulous work. You cannot miss a single area, leave at least some speck, because it will immediately become noticeable, you just have to turn on the chandelier.
It is important to follow some rules:
- Use only a mild soap solution (or mild detergent) to remove stains.
- Movements should be light and leisurely.
- It is better to use a stepladder to be able to wash the entire ceiling.
- To protect your hands from the influence of detergents, wear gloves.
- It is advisable to wear glasses to prevent dust particles from getting into your eyes.
- It is better to wash the water-based coating with a cloth, without using mops or hard brushes.
Due to the fact that ceilings coated with water-based paint are quite “delicate”, these precautions must be observed. Under no circumstances should you:
Under no circumstances should you:
- Wash the water-based coating using hard brushes, rollers or unwrung rags - stains will remain.
- Use toxic detergents. The coating is easily damaged, it will definitely have to be changed, and the powder itself will become embedded, and the smell will be very difficult to get rid of.
Rules of care
To ensure that the need to wash a painted ceiling occurs less frequently, it should be provided with high-quality care. To do this, it is recommended to systematically collect dust, cobwebs and other contaminants using a vacuum cleaner. The brush head should be wrapped in a soft, dry cloth. Particular care should be taken to remove gray carbon deposits that accumulate above the windows and stove. Getting rid of greasy stains is of no small importance. Only after this should you begin wet cleaning of the surface.
Old stains should be rubbed with great care. Otherwise, there is a risk of damage to the dye layer. If the coating was made using regular water-based paint, it will be difficult to clean.
It is recommended to get rid of old stains carefully so as not to erase the paint layer. If you can’t cope with them, you should paint the ceiling again. Cleaning a ceiling that has been painted with water-based paint has a number of features. To do this, it is permissible to use a soap solution. To remove stubborn stains, use a soda or saline solution.
Share link:
Which tool to choose
When painting, use a brush or roller. So that you can do the work yourself, standing directly on the floor and not having to climb on a stepladder, you can use a telescopic tube. In order for the roller to absorb the paint uniformly, you need to take a special tray. In addition, the bath will prevent excess dirt from spreading.
You should not choose a large brush. After all, as a rule, a brush is used only for layering corners. The best option for this is a thin flute brush with a width of five to ten centimeters. The roller should be chosen more carefully. A medium-pile roller is best suited for this purpose. Its width should be from 18 to 25 centimeters. You should not buy a roller with a foam attachment; it will fail very soon.
Technology of painting the ceiling with water-based paint
The procedure for applying water-based emulsion to the ceiling surface is practically no different from working with other types of paints. However, before painting, you will need to do a preliminary test of the coverability of the material on a small piece of concrete or plywood somewhere in the utility room.
It is best to whiten the ceiling with a thread roller; there should be at least two of them in stock, one with a nozzle width of at least 20 cm, the second, 5-7 cm, is used for tinting corner areas.
How to properly apply water-based paint to whiten a ceiling
The painting procedure involves laying at least two layers of material. In this case, the direction of movement of the working tool when moving to a new layer should change to perpendicular to the previous one.
Traditionally, the first layer of water-based emulsion is laid with movements parallel to the plane of the window opening in the room. The second layer of painting is accordingly performed perpendicular to the window. In this case, the flow of light falling through the window onto the ceiling will be directed parallel to the lines of application of the water-based mixture. Even if there are risks from the roller somewhere, they will be invisible in natural light.
How to whitewash a ceiling with water-based paint without streaks
In order to obtain high quality painting of the ceiling surface without marks, marks and streaks, you must follow several basic rules:
- Before applying paint to a roller or brush, it is necessary to remove lumps of mixed dust and water-based emulsion;
- The water-based paint applied to the working surface of the tool must be rolled in a tray so that it is evenly absorbed throughout the entire nozzle;
- When painting, the roller is pressed against the ceiling surface with approximately the same force. There is no need to rush or try to squeeze the water emulsion out of the nozzle;
- Rolling out the paint and varnish material is done in strips with slight overlap at the joints. In this case, the ends of the soft roller attachment must be rounded; this is the only way to avoid the appearance of splashes and marks on the ceiling.
After painting, the layer must be thoroughly dried before repainting. Painting over a damp or insufficiently dried layer is not allowed.
Advice! Experts also recommend installing an additional light source in the room, a lantern or spotlight aimed at the ceiling. This illumination allows you to see painting defects even at the stage of applying water-based paint.
In corners and areas adjacent to walls, the water-based emulsion must be applied with a small roller, and in some cases it is necessary to use a brush to touch up or level the layer. The process of painting ceilings with water-based paint with your own hands is described in more detail in the video.
How to properly paint a ceiling with water-based paint to avoid stains
In order to avoid the appearance of stains or stains during the painting process, it is necessary to carefully prepare the ceiling surface. Even if the surface has been primed and thoroughly dried, immediately before painting the ceiling, the surface must be thoroughly wiped with a slightly damp sponge and allowed to dry for 10-15 minutes.
Use a thread version of the nozzle with bevels
The second problem is related to the incorrect use of the paint itself. Stains and stains appear on the ceiling due to uneven application of the material. After applying a fresh portion of water-based emulsion, the roller, as a rule, is pressed against the surface with great force; accordingly, at the beginning of the movement, a larger amount of paint is squeezed out. As you move away from the starting point, the amount decreases, the paint layer becomes thinner and more transparent. Therefore, it is better to roll several times with little force than to make a stain.
How to quickly whitewash a ceiling with water-based paint
There is only one way to quickly and efficiently paint a ceiling with water-based paint - using a pneumatic spray gun. It will take about an hour and a half to cover the walls and furniture in the room with plastic wrap. The same amount will be required to paint the ceiling in two layers.
The sprayer is convenient for applying water-based composition to complex surfaces.
With the traditional method using a roller or brush, the process of painting the ceiling surface takes 2-2.5 times longer.
Painting
Finally, let us give you a few recommendations for painting the ceiling.
As with any business, even a simple one, there are some subtleties.
- Paint at least two coats. The direction of painting each layer is perpendicular to the previous one.
- To ensure that the paint applies evenly, use a long-haired roller rather than a brush. Preferably new.
- Layers of paint should be of minimum thickness. By rubbing the paint, you will achieve the most uniform color of the ceiling.
- Be sure to roll out the roller, not on the ceiling, but in a paint tray or on a sheet of cardboard, hardboard or linoleum. It should be saturated with paint evenly.
- Apply each layer in one go. If you pause, areas of dried and fresh paint will stand out in stripes.
The uniformity of color can be easily assessed by looking at the ceiling at an angle
For modern water emulsions
Today, the market for paints and varnishes offers a very wide selection of coloring agents, but the good old water-based emulsion still remains in demand. Both walls and ceilings are painted with it, and they choose exactly the type of composition that is optimally suited for decorating a particular room, taking into account all its conditions.
For kitchen walls and ceilings, a material is usually used that provides the coating with water-repellent properties and abrasion resistance.
If the surfaces are painted with a modern material adapted to treatment with cleaning compounds, then they can be washed as follows:
- dissolve a little gentle household detergent in warm water;
- Moisten the ceiling surface with a soft, finely porous sponge, avoiding the formation of excessive drips;
- Rinse off the solution with a sponge or soft cloth slightly moistened with clean water.
In the same way, you can wash walls and other surfaces that are painted with water-based emulsion and do not have strong or old dirt. It is permissible to clean them only with the softest brushes, using aqueous solutions of low concentration detergents.
How to wash a whitewashed ceiling?
First of all, it is necessary to determine what composition the ceiling is painted with. What and how to wash? The simplest method is ordinary warm water with detergent, which, using a soft sponge or an old clean rag, can easily clean the surface of dirt and dust.
Interesting materials:
What can you eat after a run in the morning? What can you eat after training? What can I use instead of stain? What can girls eat while drying their bodies? What can you apply to a sprain? What can you pump up with dumbbells? What can you pour? What can tourists wear in Dubai? What can be treated with a Steam Cleaner? What can you carry in luggage on an airplane?
Procedure for cleaning old water-based coating
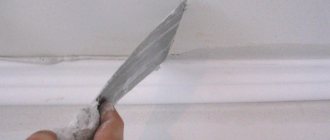
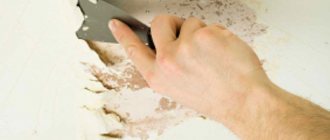
To remove the old layer of water-based paint, you need to generously moisten the surface of the ceiling with water twice, thirty minutes apart, and then create drafts in the room. The old paint should swell into bubbles that can be easily removed with a metal spatula.
Then you need to start removing stains and rust. They are wiped several times with a sponge using any of the following products:
- hydrochloric acid of two or three percent concentration;
- a mixture of crushed lime and drying oil;
- a thick mixture of lime, water and denatured alcohol;
- “Belizna” cleaning agent, which is made on the basis of sodium hypochlorite.
You can remove lime from the ceiling surface using a paste containing flour and water. To dilute the paste you will need two tablespoons of flour or starch. The bulk product is diluted with a small amount of cold water. The resulting mass is poured into a liter of boiling water and mixed thoroughly. Allow to cool slightly and apply to the ceiling over its entire area. After drying, the paste layer is cleaned off along with the whitewash with a metal spatula.
There is a faster way - to remove the whitewash with a grinding tool. There will be a lot of dust, so you should remove all furniture from the room, close the doors to another room and wear eye and respiratory protection.
Fat and soot
In order to wash areas covered with a layer of soot (usually these are located above the kitchen stove), you can use the old method: dilute three tablespoons of baking soda in a bucket of warm water and wipe the stain or the entire ceiling with this composition. After a quarter of an hour, you can carefully wash it off along with the removed dirt.
Another method involves using table salt instead of soda; you need to act in the same way.
Most often, ceilings and walls are washed with ordinary soapy water using soft rags.