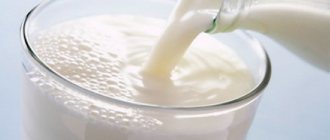
Making healthy milk safe for health. The editors will tell you about the rules for boiling the product.
Milk is one of the healthiest products, both doctors and traditional healers say so. However, we must remember that it is a favorite environment for harmful bacteria and microorganisms. This is why experts recommend boiling milk. This is especially true for fresh products, “only from under the cow.”
Dangerous microorganisms can get into “your” milk at any stage. From the hands of a milkmaid, due to poor conditions of keeping a cow, goat or poorly processed containers. This is all clear. It is not necessary to boil “store-bought” milk if it is not a perishable product. Pasteurized and ultra-pasteurized milk undergoes the necessary processing in production and does not require additional heat treatment.
However, there are exceptions to this rule. So, doctors recommend boiling any milk for people suffering from diseases of the gastrointestinal tract. The product also needs to be thermally treated for patients who have undergone surgery or have weak immune systems. It is recommended to give boiled milk to children.
Why do this?
By raising a cow yourself and properly caring for it, you don’t have to worry about drinking fresh milk. But when buying from other farmers, you need to play it safe and take into account the boiling procedure.
The reasons why you should definitely boil your homemade product are as follows.
- Possibility of transmitting diseases to animals. As a result of this fact, dangerous microorganisms can also get into milk. Improper cow care leads to the same result.
- The product may contain antibiotics. There is a possibility that they were fed to the animal to prevent disease.
- Due to the content of lactic acid bacteria, fresh milk can turn sour immediately on the day of milking.
- The person who milked the animal may not have adhered to the established rules for the procedure.
- The storage and transportation of goods may have been carried out without observing sanitary standards.
When boiling, the following elements disappear:
- pathogenic bacteria from the skin of a cow, a milkman or from the air (the boiling process helps kill brucellosis, for example);
- lactic acid bacteria, which are necessary for fermentation (but thanks to this fact, the product is stored longer);
- enzymes that allow young children to digest formula (adults can get them from fermented milk products);
- vitamin C and some others, which are not very resistant to heat treatment (but there are very few such components in the initial product);
- immunoglobulins needed only by calves.
But at the same time, the product retains:
- calcium is the most important and useful component;
- a significant proportion of vitamins and microelements;
- fats and milk protein.
Despite all these facts, even a glass of boiled milk or regular store milk contains a small amount of antibiotics that are resistant to high temperatures, which are added to animal feed in industrial production.
Suitable cookware
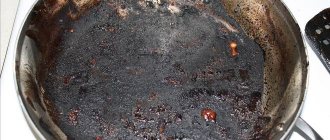
Milk tends to burn. In order to avoid this fact, you need to choose the right dishes.
It is recommended to boil the product:
- in an aluminum pan;
- in glass containers;
- in a stainless steel container.
It is not recommended to carry out the process with a boiler, as this will form a large layer of scale, and the milk around the device will burn. It is also better to take dishes with a thick bottom. It is strictly forbidden to heat milk in enamel containers.
How to boil milk
Download PDF
Download PDF
Boiling fresh milk kills all germs and makes it fit for consumption. Pasteurized milk can be drunk cold, but boiling it will extend its shelf life. You can pasteurize milk quickly and easily, whether you need to heat it up for cooking or simply enjoy a warm mug of drink.
Boil the milk on the stove
- 1
Check whether the milk needs to be boiled. Sometimes milk can be drunk without boiling first. Follow our recommendations to decide whether to boil it:
- Fresh milk should always be brought to a boil.
Pasteurized milk that has been stored at room temperature should also be boiled. This may not be necessary if it was in the refrigerator or cool room.
- Milk from a sealed tetra bag, the label of which contains the mark “SVT”, is suitable for consumption, even if stored at room temperature. SHT stands for “super high temperature.” This type of treatment kills all pathogenic microbes.
- 2
Pour the milk into a large, clean saucepan. Choose a pot with taller sides than usual to give it plenty of room. As the milk boils, it foams and escapes through the top of the pan.
- Clean the pan thoroughly, otherwise food residue may cause the milk to curdle. Or set aside a separate saucepan for these purposes.
Copper, aluminum, and stainless steel pans heat up much faster than cookware made of cast iron or other heavy metals. This will save time, but you will have to pay close attention so that the milk does not burn or run away.
- 3
Heat the milk until it begins to boil. It needs to be heated over medium heat, paying all your attention to the process. A layer of glossy foam forms on the surface of the heated milk. Over time, small bubbles will begin to rise from under the foam along the inner edge of the pan. Reduce heat to low as soon as this happens.
- To speed up the process, put the milk on high heat, but watch it constantly so that you can reduce the flame in time. Over high heat, the first bubbles of milk will quickly turn into a rising layer of foam.
- 4
Stir the milk periodically. If the pan does not heat evenly, the milk will burn in some places. Stir it from time to time with a wooden spoon, carefully moving it along the bottom of the pan.
- 5
Knock off any foam that forms. During the boiling process, cream accumulates on the surface of the milk, which prevents steam from passing through. This steam whips the cream into a foam that quickly rises, causing the milk to escape from the pan. To prevent this from happening, a quick response is necessary:
- Reduce the heat so that the milk simmers at a constant intensity.
Stir it continuously to avoid foam formation.
- Place a spoon into the pan (optional). It breaks the foam layer, creating a hole for steam to escape.[1] But make sure that this cutlery will not melt under high temperature.
- 6
Boil the milk for two to three minutes, stirring it constantly. This time is enough for the milk to become suitable for consumption. Further boiling will only destroy all nutrients.[2]
- 7
Pour in the milk immediately. Take a closed container and pour milk into it. Place it in the refrigerator or the coldest place in the house. Milk hidden in the refrigerator does not need to be boiled again. However, milk that is stored at room temperature will have to be boiled before each use.
- Repeated boiling will kill all the beneficial substances in milk. If you don't have a refrigerator, buy as much milk as you can use at a time.
Boil milk in the microwave
- 1
This method will not make fresh milk drinkable. A microwave can boil milk in a short period of time, preventing it from escaping. This will kill some germs, but not enough to drink fresh milk or milk that has been stored at room temperature. It is better to boil raw milk on the stove.
- 2
Pour the milk into a clean mug. Do not place metal utensils in the microwave.
- 3
Place a wooden spoon in the mug. Place a wooden stick or spoon into the mug. The device must be long enough so as not to drown in milk. This will allow the steam to escape through the hole rather than pool, thereby preventing the foam from exploding quickly.
- 4
Heat the milk for 20 seconds at a time. Remove the milk and stir every 5-10 seconds between each batch. Such precaution will prevent the milk from escaping.
Pasteurize the milk
- 1
Pasteurize milk for use in recipes. Pasteurization is the process of heating milk to a temperature below boiling. It modifies the properties of milk for use in bread recipes.[3] Some people choose to reheat the milk as an additional antimicrobial precaution, but this is not necessary if it has been in the refrigerator.
- Boil the milk if it is unpasteurized or stored at room temperature.
- 2
Pour the milk into a clean saucepan. A thick-bottomed pan heats evenly, thereby reducing the risk of burning.
- The pan must be absolutely clean, as dirt will spoil the milk.
- 3
Heat the milk over medium heat. Never put it on high heat, otherwise it will burn or run off onto the stove.
- 4
Stir the milk from time to time. Keep an eye on the milk, stirring it every minute. A wide spatula is best for this, as it can be used to scrape the bottom of the pan if the milk starts to stick to it.[4]
- 5
Watch for light boiling and steaming. Milk is considered “pasteurized” when a thin layer of foam forms on its surface. Small bubbles will begin to appear along the inside edge of the pan and the surface will barely simmer.[5]
- If you have an infrared thermometer, you will be able to determine that the milk has reached the required 82ºC.
- 6
Continue heating for another fifteen seconds. Stir constantly so that the milk does not escape.
- 7
Store the remaining milk. If you still have milk left after drinking, pour it into a sealed bag and put it in the refrigerator. In the absence of the latter, store the container in a cool room. Bacteria multiply at room temperature, so milk can be stored for no more than four hours.[6]
The process of boiling milk on the stove
nomnoms.
The most important condition for boiling milk is attention. The process is very simple, but insidious. Milk can “run away” at any moment. Therefore, experienced housewives know that during boiling they need to put things aside and monitor the product for two minutes.
How to boil “homemade” milk
Take a clean pan. Ideally, you need a separate container for boiling milk. Remember that the product easily absorbs all odors. Therefore, milk boiled in a soup pot will taste like bay leaves and pepper. If it is not possible to separate a separate pan for milk, thoroughly clean the container before use.
- Rinse the pan with cold water and grease the edges with butter. Thanks to it, the milk will not burn, which, by the way, can also spoil the taste of the product.
- Pour cold milk into the pan. Remember not to add liquid to the brim. When heated, milk noticeably increases in volume, so experienced housewives recommend pouring only a liter of milk into a 1.5-liter pan.
- Place the milk on low heat and wait until it boils. There is no need to “customize” the process. Due to high heat, milk will burn even in the most proper container. This includes glass and stainless steel.
- When the milk boils, rises and foam forms on the surface, the fire needs to be made even quieter. If the boil is too strong, then briefly remove the milk from the stove altogether. At this time, skim the foam from the milk. Now let the milk simmer on low heat for two minutes.
- During this time, stir the product constantly. Do not skim off the foam that forms during boiling. It contains macro- and microelements and vitamins that are beneficial to human health.
- After two minutes have passed, remove the pan from the heat. Cool the milk naturally before use.
How to boil “store-bought” milk
This procedure may be necessary, for example, if you are preparing a dish that requires boiled milk. For example, for making yogurt or puree. In this case, our task is not to kill all harmful microorganisms, but simply to boil the product. Therefore, a shortened process can be used.
- Clean the pan.
- Pour cold milk into it.
- Bring to a boil over low heat.
- Remove from the stove and leave to cool.
Adviсe
- If you want to add sugar or seasonings to the milk, do so after removing it from the heat after boiling.
- You can purchase a metal flame spreader and install it between the stove and the pan. This will allow the pan to heat more evenly, preventing burning. However, using it will take you much longer than boiling in a regular saucepan.
- You can skim the cream off the surface of the milk as it simmers over low heat. Add them to pasta sauce or curry.
How to boil milk in a microwave and slow cooker
pexels.com
The microwave and slow cooker are modern and easier ways to boil milk. However, each has its pros and cons.
So, you can boil only a small amount of milk in the microwave. The volume is limited to a glass or cup. However, the entire process will take significantly less time.
- The mug or glass must be washed thoroughly. Do not forget that milk absorbs the slightest odors, so it is better not to use a coffee mug. Also remember that not every mug can be used to heat food in the microwave. Use special dishes.
- Pour milk into a container. The same rule applies here - the product will increase in volume, so fill the dishes only two-thirds full.
- In a microwave, you cannot constantly stir milk. To prevent it from “running away,” you need to put a wooden object in the mug. This could be a skewer, a long toothpick or a spoon - the main thing is that they look out of the mug and do not drown in the milk.
- You need to boil milk in the microwave in three stages of 20 seconds each. The microwave must be set to full power. After every 20 seconds, remove the mug, quickly stir the milk and put it back in for 20 seconds.
The procedure is even easier in a slow cooker. Many modern appliances have a separate boiling mode. They can process both breast milk and vegetable milk (for example, coconut milk), and prepare steamed or baked milk for a child.
do-slez.com
You just need to pour the milk into the multicooker ladle, set the mode and wait. Of course, not everything is as perfect as it seems. The fact is that it is impossible to purchase a separate ladle for preparing milk. Whereas in the standard we prepare both soups and main courses, generously sprinkled with spices. Therefore, you need to wash the multicooker pan before boiling milk especially carefully.
Also, in a multicooker, although the risk of milk “running away” is reduced, the product still cannot be left unattended.
Main photo: 1000sovetov.ru
