Freshly laid ceramic tiles always look neat and pleasing to the eye. Ceramics are a popular, durable and time-tested solution for tiling kitchens, bathrooms and toilets. But over time, the seams lose their presentable appearance and become covered with dirt. And here the housewives are faced with the question: how to clean the seams between the tiles easily and quickly?
There are quite a lot of ways - from folk recipes to professional chemistry and even complete removal of stitches.
The choice of a specific method depends on the condition of the space between the tiles: if it’s just dirt, you can get by with traditional methods, and if there’s mold, it’s better to use household chemicals.
Causes of pollution
Of course, floor tiles get dirty most often and quickly for obvious reasons. But even the seemingly obvious reasons are worth understanding in order to prevent the loss of the presentable appearance of the seams in the future.
Common causes of grout contamination:
- ingress of dust and particles of finishing materials during repairs;
- poor rinsing of seams during cleaning - detergents or simply dirty water may remain;
- ingress of water, which creates an excellent environment for fungal growth;
- natural settling of dust in the toilet or grease in the kitchen;
- irregular cleaning of the premises.
It is worth noting that grout can darken on its own, even if it is cleaned regularly. This happens from old age, for example, if the tiles have not been changed for more than 10 years. In this case, rather than cleaning, it is better to renew the grout.
A radical solution to the problem, or if the mold has penetrated too deeply
Once mold penetrates the structure of a material, it is difficult to completely remove. In these cases, chemical-based products become ineffective. It is recommended to use a more radical mechanical method:
- prepare the scraper;
- to facilitate the process, treat the seams with a vinegar solution;
- the joint space is freed from grout, but the tile adhesive does not need to be touched;
- remove dust and debris from the surface, which will increase adhesion;
- the seams are treated with antifungal agents, and it is important to follow the instructions, otherwise the quality of adhesion of materials will decrease;
- new grout is applied.
What are the dangers of pollution?
Ordinary compressed dust practically cannot harm a person, unless it causes an allergic reaction, cough, or simply an unjustified feeling of beauty.
The real danger is mold, which likes to settle in damp places, which include the bathroom and kitchen.
Mold can cause:
- poisoning of the body;
- diseases of the respiratory system - asthma, pharyngitis, bronchitis, rhinitis;
- dermatitis;
- diseases of the circulatory and nervous system;
- suppression of immune mechanisms.
When mold is first discovered, you must immediately begin to fight it, since its spores may already be on your toothbrush, towel or washcloth.
Cleaners
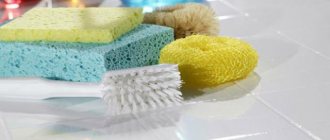
Even folk recipes can remove dirt and incipient fungus, but professional ones are also often used. The choice of a specific product is influenced by the nature, degree and duration of contamination. May require:
- several rags or sponges;
- a hard old toothbrush;
- pure water;
- detergents;
- Remedies.
But the choice of detergents is quite large.
Household chemicals
Household chemicals have long saved housewives time and effort, making it easier to clean the house. Various manufacturers have come up with a variety of solutions for contaminating the space between tiles. You can find sprays and even special markers.
It is worth taking a closer look at the following brands:
- Melleurd;
- Litonet;
- Unicum;
- Pemolux;
- Silit;
- Cif;
- Amway;
- Domestos.
These are the most effective, but tile-friendly products.
You can also treat dirt in tile joints using the now popular melamine sponge: it works like a pencil eraser, but you must wear gloves, since the product is aggressive and can cause irritation.
But you should be wary of serious substances containing chlorine, especially if the grout is colored and not just white. Chlorine is an aggressive component that can bleach the seam where it is applied.
Typically, household chemicals are used after traditional recipes have been tried, but the desired result has not been achieved, that is, when there is severe contamination.
If it is important to quickly get an instant result, then you can use a special marker that will paint over dirty tile seams, but will not get rid of the dirt.
This solution is suitable for a temporary option when you need to portray the illusion of beauty and purity. Sometimes markers have anti-fungal protective impregnation, which will still benefit the grout a little. This grout care product has several more advantages:
- safe for humans, as it does not contain harmful substances;
- the seams acquire shine and a beautiful appearance;
- the composition of the marker has waterproof properties, that is, mold cannot appear there (but it can spread).
It is also easy to use, but the effect does not last long: a maximum of one year.
Folk recipes
Experienced housewives love to resort to folk recipes because they:
- not so aggressive
- their components are often at hand at home;
- are cheaper.
There are several proven and effective ways to clean the joints between tiles.
Recipe 1. Take one and a half liters of clean warm water and add there:
- one glass of baking soda;
- ¼ cup vinegar 9%;
- 1/3 cup lemon juice;
- 1/3 cup of ammonia.
Mix the resulting solution well, soak a sponge in it and apply to the seams. Rub if necessary.
Recipe 2. The sequence of actions is as follows:
- Take a liter of water and add 100 grams of bleach, mix thoroughly.
- Apply to stains and leave for 10 minutes.
- Afterwards, rinse thoroughly with water and wipe with a dry cloth.
The mixture is quite aggressive, so it is better to work with it in well-ventilated areas.
Recipe 3. Add equal parts to water:
- baking soda;
- mustard;
- citric acid;
- dentifrice;
- ammonia.
Apply the resulting mixture to the tile joints, leave for half an hour, and then rinse off.
Recipe 4. Sometimes it seems that Coca-Cola can replace all household chemicals in the house. Yes, it will also help with problematic seams between tiles. The convenience of this recipe is that you only need one ingredient - actually, Coca-Cola or Pepsi-Cola itself. Soak a rag or sponge in soda and apply it to the seams, leave for 30 minutes, then rinse and dry.
You can use the remaining soda to clean the toilet or descale the kettle - anything is better than drinking it.
Any of the above recipes requires working with gloves, as a chemical burn or allergic reaction may occur. If the mixture does get on the skin, the area must be thoroughly rinsed with running water.
Preventive measures
To ensure that dirt accumulates in the tile joints as little as possible, follow these recommendations:
- The grout is applied according to the instructions. Pay special attention to preparation: degreasing and priming.
- It is better to give preference to grout with an epoxy base. It prevents the formation of mold and repels dirt.
- After cleaning, it is recommended to apply impregnation to the tiles and seams, which closes the micropores. This will prevent further penetration of the fungus deep into the grout.
- The seams should be cleaned regularly - at least 2 times a month.
- Remove moisture from all surfaces by wiping with a dry towel.
- Constantly ventilate the room.
- Carry out wet cleaning and cleaning with vinegar and ammonia.
- Do not use granular cleaners or abrasive brushes, as they will make the surface of the seams rough and dirt will collect faster.
Preparation for procedures
Preparation for cleaning is a very important stage that cannot be skipped, since the result depends on it, among other things. The essence of preparation is to remove unnecessary items from the room and acquire the necessary tools.
- Remove all unnecessary items that may interfere with cleaning - for example, hooks, shelves, bottles of shampoo and other personal care products.
- Remove all textiles, as they can absorb unpleasant odors from cleaning products.
- Assess the need to remove the sink or toilet. Do this if necessary.
- Prepare gloves, safety glasses, a respirator and the grout cleaner itself.
- Wash the tiles themselves and the seams from greasy stains and clean easily removable dirt.
This small instruction will help you check whether everything is done correctly and whether you can begin cleaning activities.
Using a Steam Cleaner
You can clean the most difficult stains in tile joints with a steam cleaner. This device helps remove any dirt and disinfect. Prolonged exposure to hot steam helps remove deeply ingrained fungus. The steam generator will require a special nozzle with a thin spout. The number of treatments depends on the degree of contamination of the seam. Experts recommend carrying out at least 5 such cleanings. This will help completely remove putrefactive fungus even from the deepest layers of grout.
Methods for cleaning seams
How to clean them depends on the room where the seams are dirty. For example:
- in the bathroom - there is often high humidity, so mold and mildew form. Their spores are capable of penetrating into the deepest layers, which only professional deep penetration tools can handle. It is imperative to pay attention to the presence of antifungal components in the composition. Folk recipes, and especially ordinary soap, are powerless here;
- in the toilet - the seams in such rooms most often suffer only from particles of dust and dirt, so removing them is quite easy. You can cope with ordinary soap and folk recipes, or resort to household chemicals. In the latter option, it is worth making sure that the composition contains antibacterial components;
- in the kitchen - here, too, high humidity is often maintained, but the main problem is still grease. Splashes from cooking or washing dishes quickly pollute the space between tiles and are quite difficult to clean. Both folk recipes and professional products with a large amount of surfactants that can break down fats are suitable for the kitchen.
Regardless of the room, it is worth remembering to protect your hands and respiratory tract.
Steam cleaning
A household steam cleaner will help restore the walls to their original cleanliness. This is a special device that releases hot steam under pressure. Steam easily removes old stains, kills pathogenic bacteria and even destroys spores of moldy fungi that have penetrated the grout.
For high-quality cleaning, you should give preference only to those devices that can heat up to a temperature of at least +175 degrees.
It’s worth paying attention to the equipment – the brush attachment will come in very handy: the steam will become more concentrated, so the efficiency will increase.
After steam treatment, the seams should be rinsed with ordinary water at room temperature and additionally treated with special antifungal agents. The treatment itself is quite easy: you just need to bring the switched on steam generator closer to the seams between the tiles and move it slowly. If stains remain, they are removed with a rag or an old toothbrush.
Mechanical cleaning methods
Mechanical methods are used if the joints between the tiles have turned black for a long time. Chemicals cannot remove old stains. In some cases, the grout must be removed.
Sandpaper
This tool helps remove fine deposits from seams. Contaminated areas are treated with bent sandpaper. After this, wipe the tiles with a clean cloth. The treatment is carried out carefully, trying not to damage the tile. After cleaning, the grout can be painted.
Sandpaper for cleaning tile joints.
Steam cleaner
A steam cleaner is a device that supplies a jet of steam under pressure. Using this equipment helps you quickly clean tile joints at home and remove mold and bacteria. To remove any remaining dirt after treatment, wipe the surface with a wet cloth.
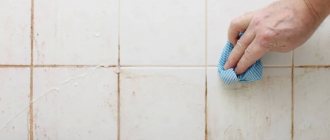
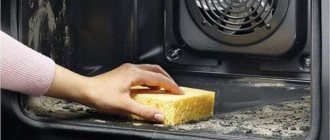
Hard sponge
Using this tool is an effective and inexpensive method of removing black plaque. Clean the seams with a hard sponge, then wipe the tiles with a clean cloth.
This method does not provide disinfection, so it is used in combination with chemical compounds.
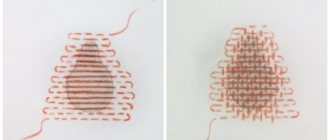
Melamine sponge
Melamine sponge removes dirt of any origin. It functions on the principle of a simple eraser. The tool copes well with lime deposits, rust, and mold. To eliminate pathogenic microorganisms, the sponge is used in combination with chemicals.
Melamine sponge for cleaning joints.
Destroy mold and mildew
Removing mold is a complex process that even professional means cannot always cope with. It is important to catch the onset of fungus at the very beginning - then the chance of defeating it is high, but in other cases it may be necessary to completely remove the grout. This is a rather labor-intensive process, for which they usually hire a specialist - with his experienced hands he will do everything correctly, quickly and accurately.
After the grout is removed, it is necessary to carefully treat all seams, gaps and joints with a special antifungal agent. After the space between the tiles has dried, the procedure is repeated. Then apply new grout.
There are several rules that will allow you to do everything right.
- Carefully read the instructions for the cleaning product - sometimes the soaking time on the seams is different and not all products require reapplication.
- The rag with which the surface was treated is burned or thrown away.
- If you have a hair dryer, it is better to use it to dry the seams. Can be replaced with a regular household option. At the time of processing, the room should not be humid.
There are also folk recipes for getting rid of mold in tile joints.
Recipe 1. You will need one liter of water and 10 grams of copper sulfate. The ingredients are mixed and applied to the surface to be treated. It is better to get into the seams with a hard brush or an old toothbrush. If there are a lot of black mold spots, you can repeat the treatment 2-3 times. After drying, the surface is washed with water, dried, and the room is ventilated.
Recipe 2: Requires chlorine bleach. Working with it is much faster than in the previous version, since the exposure time is reduced to several minutes. For such simplicity you will have to pay with a strong odor, so after treatment the room must be ventilated.
There are also industrial products that can help fight mold. There are a great variety of them on the market; you can focus on the following manufacturers:
- Cilit;
- Unicum;
- Savo;
- San Klin;
- Neomid;
- Bugs;
- Ceserit.
All these products contain special substances that have a detrimental effect on fungal and mold spores.
Why wash tile grout?
The air in the bathroom is more humidified than in other areas of the home. Against the background of regular temperature changes, condensation occurs on walls and pipes. In addition, the moisture contained in hot steam settles on surfaces. These factors contribute to the proliferation of harmful microorganisms: fungal spores, bacteria.
As the area of mold damage to walls increases, the risk of deterioration in health also increases: respiratory tract diseases and other complications (allergies, skin pathologies) may develop.
If dirt appears in the space between the tiles, it immediately attracts attention, because in most cases the bathtub is decorated in light colors. The presence of dark spots worsens the interior and contributes to discomfort when visiting such a room.
It is important to keep the bathroom clean not only for aesthetic reasons, but also to ensure hygiene.
Remove other contaminants
There are other contaminants that can be classified.
| Nicotine | If there is a lot of smoking in the room, then over time a yellowish or brownish coating appears on the seams. This problem can be easily solved with the help of acetone, gasoline, white spirit and other organic solvents. If the situation is not advanced, you can get by with vinegar and lemon juice. |
| Rust | Rust on the grout only appears if there are pipes nearby. The best option to get rid of such a scourge would be ordinary household chemicals marked “For rust,” for example, Sanox. Alternatively, you can use a melamine sponge. |
| Old stains | It is best to immediately get rid of old yellowed or cracked grout and make new one. But you can try to revive it with folk or industrial means, or simply paint it over with a special marker. But the result of such cleaning by a renovator will last for a maximum of a year, then you will have to repeat the procedure. But a pencil like this is a great way to briefly refresh and update the appearance of your seams. |
If you regularly clean the joints, the grout will not deteriorate, even if there is a lot of smoking in the room, there is a chimney nearby, or it is simply 10 years old. The main rule in caring for seams is regularity.
It would seem that white seams are the most difficult to clean. This is actually not the case, as any bleach will do the job. But colored grouts cannot afford such a product, as they will significantly lose their brightness. That is why there are usually no difficulties with how to bleach seams. The main thing is to be careful and not step on the tiles.
Types of contamination in tile joints
Contamination of the joints between tiles most often results from:
- carrying out repair work, after which traces of solutions and mixtures used remain;
- accumulations of dirt, dust and residues of detergents that were used during cleaning;
- the appearance of fungal growths and mold as a result of high humidity and lack of ventilation in the room.
How to remove grout?
If even professional products helped only for a short time, this means that mold and mildew spores have penetrated deeply. To get rid of them, you will have to remove the grout completely. If you don’t want to hire a specialist for this, you can do it mechanically with your own hands. But there is one secret that will make this grout renewal process easier.
If you mix vinegar with water in a 1:1 ratio and apply the resulting solution to the seams, the composition will soften and the grout will be easier to remove.
This is done with the abrasive side of a regular dishwashing sponge. If the tile has a textured surface, then it is better to use the soft side of the sponge so as not to damage the tile.
You can also use cruder tools:
- spatula;
- screwdriver;
- with a knife;
- folded sandpaper;
- chisel.
But they must be used very carefully so as not to damage the tile with the sharp end.
Household chemicals
You can clean the seams between the tiles using household chemicals. It is easy to use, effectively cleans and disinfects the surface.
Chlorine-containing products
To clean seams, use products containing chlorine: Sif, Comet, Domestos, Sodasan, “Mr. Muscle”, etc. They are presented in the form of powders, gels or liquids. To clean tile joints, use thick compounds that, due to their consistency, do not run off, but penetrate deep into the grout, effectively dealing with mold and dirt.
Special household chemicals will help you clean tile joints quickly and without much effort. Before use, read the instructions and take the necessary safety precautions
Step-by-step cleaning instructions:
- Read the instructions for use.
- Moisten the tiles and grout a little with water.
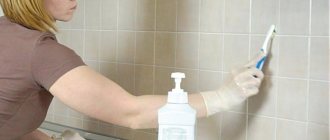
- Apply your chosen cleanser using a toothbrush.
- Leave for 20 minutes so that the active substances fight fungus and dirt.
- Wipe all seams with a brush and then rinse with clean water.
Household chemicals containing chlorine are only suitable for white finishes.
Special pencil
An innovative solution for cleaning tile joints is a special pencil. It is easy to use, safe, effectively removes dirt and destroys germs. This method is applicable for cleaning joints in the bathroom, kitchen, hallway and other rooms where there are tiles.
To clean, use a pencil to apply any stains. Thanks to its water base, it quickly penetrates into the grout without leaving any traces or odor. After just a couple of seconds, the surface becomes clean and beautiful.
A special grout marker will help you whiten tile joints in the bathroom.
Oxygen bleach
Oxygen bleach will help restore whiteness to seams and get rid of germs and mold. Before use, mix it with water in equal proportions. Using a sponge, apply the solution to the dirty areas and leave for 2 hours. Then remove any remaining dirt with a brush and rinse the tiles with water.
Prevention
Prevention is much easier than correction. That is why it is worth knowing the measures that will help avoid mold on the seams between the tiles.
The main cause of fungus is high humidity, so all measures are aimed at maintaining a normal atmosphere in the room:
- monitor the serviceability of pipes and immediately correct leaks;
- eliminate condensation and find out the reasons for its occurrence;
- dry clothes not in the bathroom, but on the balcony;
- maintain good ventilation;
- if necessary, use a fan with an exhaust function;
- keep the washing machine clean and dry;
- If there is a shower stall, open the doors after use;
- carry out regular cleaning;
- periodically inspect the premises for early detection of mold;
- frequent ventilation.
These steps will help maintain a healthy indoor atmosphere, which will minimize the possibility of mold growth.
General recommendations
Maintaining humidity at the proper level is very important, but there are other steps that will help prevent rapid contamination of tile joints:
- timely care of tiles and cleaning of dirt;
- treatment with special means that prevent mold spores from penetrating into the deep layers of the seams;
- treating tile joints with a special impregnation immediately after applying the grout;
- At the renovation stage, you can abandon small tiles - this will reduce the number of seams that need to be cleaned.
Here a new difficulty may arise with which impregnation is best to choose. There is no need to be original in this matter, but it is best to choose an impregnation of the same brand as the grout: in this case, the products will work in synergy.
Why does grout darken over time?
Ceramic tiles are almost ideal because they are very easy to clean. However, grouting is more “capricious”: sooner or later, it becomes the cause of headaches for most owners of finishing with snow-white seams. Therefore, they have to correct the situation; more often they do this work themselves. But not everyone knows which means guarantee results.
Before wondering what and how to clean the seams between the tiles, you need to find out why it changed its color. It is the reason that can give a hint on how to act in a particular case. Pollution can be caused by several factors:
- ventilation system, the operation of which cannot be considered effective;
- constant high humidity, temperature changes in the room;
- seams that were forgotten to be properly treated before grouting;
- irregular or complete lack of tile maintenance;
- the kitchen hood does not work well;
- purchasing grout of questionable quality;
- violation of technology during work.
All issues can be resolved, since cleaning the seams between the tiles is a very real task. There are several ways to fix the problem. The simplest is the use of one or another product for bleaching, cleaning, and antiseptic treatment. But this is not the only way out. In some cases, when the dirt has ingrained itself very deeply, only one, drastic method of combating it helps - completely replacing the grout. It is better to mentally prepare for both options at once.
Tile features
If every tile could be cleaned with the same grout cleaner, it would be too easy. There are a number of restrictions for each type.
| Glossy and glazed surface | Do not use acids as this will cause tarnishing of the tiles. |
| Matte tiles | It is important to wash it thoroughly after the procedure and then cover it with a special protective mastic. |
| Mosaic and glass tiles | They are quite stable, but do not tolerate highly concentrated agents (both alkaline and acidic) |
And it is forbidden to use highly abrasive materials on any tile, as this will cause microcracks and scratches on the surface, in which bacteria will thrive.
How to clean the seams between tiles on the floor - additional recommendations
Finally, we would like to clarify some points:
- acids can easily ruin glazed tiles and their surface will noticeably fade;
- in order to maintain the quality of unglazed matte tiles, after all work is completed, they are washed and covered with mastic;
- You should not clean the space between glass tiles or mosaics with alkali or acids;
- abrasives that get on any tile can ruin it;
- For floor joints, an epoxy base mixture is preferred.
Knowing how to clean tile joints, it is still better to prevent them from becoming excessively dirty.
We wish you success in bringing back the fresh look of your bathroom!