The stitching of a blanket is an artistic connection of all its layers. This process is often very difficult for craftswomen, but once you get the hang of it, you can create a real masterpiece.
Stitching requires patience, meticulousness, even courage. A high-quality result depends a lot on experience and constant careful monitoring of the situation. Even experienced seamstresses can rarely quilt a blanket correctly.
You can apply a stitch pattern using a needle and thread, special adhesive tape or chalk.
However, you should not be afraid to take on such work. By following the instructions and your inner feeling, you will definitely achieve the desired result.
They usually quilt either a patchwork bedspread (patchwork technique) or a whole cotton blanket. Let's look at each option in more detail.
Stages of making a blanket using the patchwork technique
Quilt stitch
Scheme of the order of quilting squares
Before you start stitching, you need to make all the necessary preparations.
Preparing for Hand Stitching
First of all, decide how to apply the stitches: by hand or with a sewing machine. Having chosen the first option, it is important to immediately acquire tools; the standard set consists of the following tools.
- Large hoop. The larger the diameter, the better. Make sure that the hoop is comfortable to hold in your hands.
Large wooden hoop for hand quilting blankets
Thimbles for hand sewing
Thin small sewing needle
Multi-colored sewing threads of medium thickness
The first step of the actual work is a basting stitch, which will connect the lining, interfacing and the front side of the bedspread together. Typically, a patchwork fabric does not require marking the pattern: simply stitch the joints of the pieces of fabric.
Basting stitch for patchwork sewing
At this stage, the preparations are completed, you can start stitching the pattern.
Operating technique
Lay out the blanket fabrics in the correct order.
The seams themselves are made with ordinary stitches used for any similar product.
Mark the stitch pattern on the top fabric and pin it together
More important here is to consider the essence of the first quilted seam.
- To begin, position the hoop so that you work towards you.
- Take a fairly long thread, a needle, then make a knot at the end of the thread.
The needle must be held at right angles to the top layer, piercing all 3 layers, pulling the thread down
Baste along the pinned lines, remove the pins as you baste
We wrap the excess lining on the upper surface, bend the edge inward by 10 mm, pin and baste through three layers, sew the lining with a hidden seam
When the thread runs out, you need to hide its tail under the previous stitch, and start the next one, according to the first.
Hand stitching gives the product extra softness, but is very time consuming
How to quilt a blanket on a machine?
Machine foot, especially for patchwork with side guide
Presser foot suitable for quilting, darning, embroidery
This method is objectively easier than the manual one. You just need to prepare a special darning foot and a strong needle.
Bring the bottom thread up and make the first two to three point securing stitches
The placement of the needle at the bottom when working with the presser foot down will not allow the fabric to move from place
The main rule of working technique is uniformity: make sure to maintain the same sewing speed during the process.
Straight stitching a blanket on a sewing machine
Using a machine, quilted blankets are most often quilted with artistic stitching.
Curved stitch - curved lines are quilted on a machine using the free-motion technique.
To do this, prepare a full-size drawing diagram. It is better to apply a drawing with chalk or pencil on top of the fabric, and then stitch the contours.
Dotted stitch is suitable for making patterns of any shape
Technology
Trimming flaps
This is a preparatory, but very labor-intensive and responsible operation; The allowance must be at least 7.5 mm, otherwise the seams of the tire will unravel later. To cut flaps to size and shape, stores (sewing shops, For Creativity, Skillful Hands) sell cutters and boards with a self-tightening coating; a coordinate grid is applied to their front side. The coating is rough, the fabric adheres to it.
The cutter can also be replaced with safety razor blades (3-5 per quilt), but if you are sewing a quilt in the chaos style or from chaotically assembled blocks, then it is difficult to find a replacement for the “self-healing” board. Only experienced cutters can accurately use scissors, and plywood and cardboard are quickly cut off by a cutter until they are completely unusable.
Scheme of a 7-color patchwork quilt in the flic-flac style and a template for cutting flaps for it
If you work using the patchwork technique, when one thing requires quite a few identical fragments, the matter is simpler. This is the time to hide your beloved, unless he is stuck tightly to beer and football: templates for cutting need to be cut out of plywood in the form of 2 completely identical halves with wings for an allowance. The blank flap is inserted between them (on the left in the figure), and the halves are combined. This is not difficult, because the edges of the template halves can be easily felt through the fabric. The template is then compressed with your fingers or a small carpenter's clamp.
A special cutter (not cheap, by the way) is not needed for such a template: even very thin and “stretchy” fabric can be precisely cut with a razor blade. For example, just one such composite template is enough to cut flaps for a very impressive blanket in the flik-flyak style (on the right in the figure).
Sewing and edging
Sewing the flaps together and sewing the cover of a blanket from blocks, as well as its edging, do not differ significantly from other sewing works. The amount of allowance and the minimum allowable size of the workpiece are indicated above; The simplest method of edging is bias tape. We offer a selection of videos about everything else for beginners:
How to sew flaps:
Master class on sewing a patchwork quilt with your own hands:
Blanket edging using patchwork technique:
Quilting
Quilting a warm blanket with a non-replaceable insert is an operation even more important and labor-intensive than preparing fragments. It’s better for beginners not to think about the figured stitch (wave, leaves, scales, etc.). Figured stitching of blankets is done by weight: the pie blank is unrolled horizontally in the frame, and along the seams marked in advance on the cover, all 3 layers of materials are secured with pins. Simple straight pins are best. Pieces of cork are pricked onto their points; they hold the pie firmly and protect against punctures.
Once upon a time, figured stitching was done by hand, but now special sewing machines without a table and with long consoles movable in 2 directions are used for it. This unit occupies a large room. We would prefer to make do with a regular sewing machine. Better, of course, is a machine with a walking foot, but it’s so expensive. It will be much cheaper to buy or make yourself (him, not you) a special foot for quilting for a regular sewing machine, see for example. track. video clip:
In any case, the working techniques for quilting a blanket are as follows:
- By marking the seams, the cake is secured against displacement of the layers with safety pins.
- With the spread fingers of the right hand, spread the cake over its entire thickness directly in front of the foot. If the liner is synthetic padding, this requires considerable skill.
- With the folded fingers of the left hand, they pull up the material behind the foot. Here, too, you need experience and a sense of the material in order to pull exactly in time with the feed of the fabric with the grab (teeth). If you didn’t make it, the puff wrinkled and/or the seam came off; overtightened - the thread got tangled, the needle got stuck or broke.
Note: for quilting a blanket, you need to use smooth and strong polyester thread No. 40 or No. 50.
A patchwork quilt is usually quilted with the so-called. free stitch, see e.g. video tutorial:
In general, for slippery liners made of synthetic padding polyester and holofiber using a conventional sewing machine, a linear-diagonal stitch pattern is recommended (on the left in the figure below):
- From the center to the short edges, stitch across.
- Then do the same - from the center to the long edges.
- Also from the center - diagonally to the corners.
- From the middle, parallel to any of the diagonals, alternately on one side and the other - to the opposite corners.
- The same, from the other diagonal to the remaining 2 corners.
Blanket quilting patterns
A linear-diagonal stitch does not eliminate the flaws that are inevitable when stitching on a conventional machine, but it drives them to the edges and corners where the cake can be trimmed. Therefore, if a blanket is quilted in this way, its edging and bordering are done last. If the blanket has a fleece liner, then the matter is again greatly simplified: then the blanket can be quilted with an envelope (on the right in the figure); the step of expanding the rectangles is from 10 to 25 cm (for fleece).
High-quality edge sealing
Machine finishing the edge of a quilt
There are many ways to create a beautiful edging, the most common is “cheesecake”.
First of all, leave a few centimeters free at the back of the bedspread; if you skipped this step, use a separate wide fabric tape. The backdrop (or tape) needs to be folded over to the front side and a seam made around the perimeter of the product, trying to get closer to the edge of the folded area.
Finishing a blanket with bias tape
We pin the corner of the edging with pins
We attach the binding, checking how the needle catches the lower half of the binding on the wrong side
Video: Patchwork Ether 37. How to quilt a patchwork quilt?
Share on social media networks:
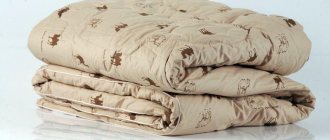
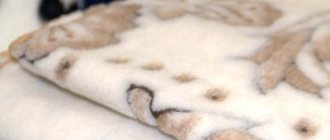
In the cold season, you really want to warm up under a warm blanket, and it’s great if it’s made of sheep’s wool. Unfortunately, there are many bedding items on sale that are stuffed with cotton wool, which is not as practical as fleece. Cotton wool very easily absorbs moisture and various odors, cakes, and blankets made from it are short-lived and heavy. Whether it's a quilted wool blanket or a felt blanket. It is light, elastic, airy and will last for more than one generation. Anyone who has covered himself with such a blanket at least once would not exchange it for anything. Today we will try to remember the traditions of our ancestors, who knew exactly how to make a sheep wool blanket at home. After all, for a long time, our ancestors not only knitted socks and mittens from fleece, but also felted felt boots.
How to choose a filler
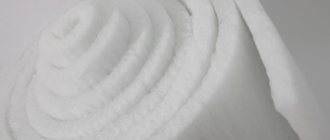
Synthetic fiber materials are used for insulation:
- holofiber;
- padding polyester;
- synthetic fluff;
- sheet synthetic winterizer, holofiber.
A synthetic winterizer blanket is lighter than the same thing made from holofiber, but tends to cake and lose its shape. These fillers quickly become damp, but are light, warm and harmless. They need to be quilted so that a blanket made of padding polyester or holofiber will last longer.
A fleece liner will make the product heavier and increase the price, but the item will be durable and warm. Fleece transmits moisture unevenly - more on the pile side than on the smooth side. The fleece fabric does not stretch or crawl.
How to sew a blanket from sheep or camel wool?
Is it possible to restore the blanket? Even if the house is thoroughly prepared for winter, it still won’t be cozy without pleasant and practical little things that will help cope with the cold. A warm quilted blanket made of wool, pleasant to the touch and warming with its warmth, can provide us with just such protection from chilly days.
Important! A long time ago, when there were no warm blankets in stores, our grandmothers themselves made simple and beautiful blankets. Any multi-colored scraps left over from sewing were used. They were selected by color and carefully sewn together. The end result was a beautiful patchwork quilt that looked like a meadow with flowers and herbs. The top and bottom sheets of such products had the same dimensions as standard blankets. Mostly animal hair was placed inside the canvases. The miracle blanket served for many years, warming in winter and cooling in summer, thanks to the properties of fur.
Pattern of different types of blankets
Immediately before sewing a blanket, you need to select or develop a suitable pattern.
When developing children's options, you can consider the option below:
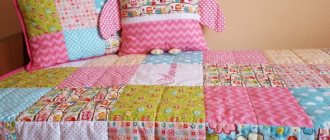
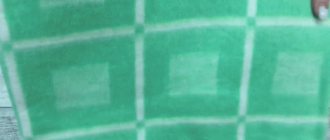
So-called patchwork quilts, made up of small pieces of fabric, are widely popular. With the help of flaps you can create almost any design, guaranteeing the individuality of the product. Below are examples of quilt patterns.
When developing your own patchwork pattern, it is better to use checkered paper with known cell dimensions. In this case, the numbers will indicate the numbers of fabric colors in accordance with the selected samples.
There are a huge number of different patterns on the Internet, which most often are simplified drawings and pattern samples. Based on them, the user can develop his own pattern that suits his preferences and needs.
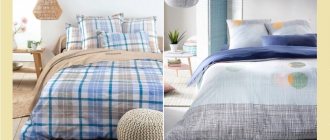
Below are typical quilt designs.
The final pattern for the work is created on tartan paper using full size blocks. Then the blocks are laid out and the desired visual effect is obtained. The color schemes applied to each block separately are also indicated. In the end, a complete drawing of the product is drawn on a sheet of paper, which indicates the dimensions and designations of the blocks.
The last point is often neglected even by experienced seamstresses, hoping for accuracy in drawing up a pattern in real size. However, if problems arise, localizing the error in this case will be very difficult.
DIY sheep wool quilt - master class
Sewing a blanket from sheep wool is not so difficult; the main thing in this matter is to stretch it well for further work on it. You can make a simple device that allows you to easily stretch the fabric, something like a hoop. Or you can use an assistant for this process. Well, now let’s learn more about the process of making a sheep blanket.
Choosing a size
First of all, decide on the size of the blanket. All products are divided into 2 main groups:
- One and a half bedding. The size of a one-and-a-half blanket is 145x205 cm. Recently, products measuring 150x205 cm have become very popular on the market.
- Double. Size of a double product: 175x205 cm. Currently, the most widespread blanket size is 200x220 cm, the so-called “European standard”.
Stages of work
The process of making a wool blanket can be divided into several stages:
- Preparing the fleece.
- Interruption of material.
- Making a cover for the trust.
- Placing the fleece in a case.
- Quilting a blanket.
Let's look at all the stages in more detail.
Wool preparation
One blanket for an adult will require 2.5 kg of washed sheep fleece. Unwashed wool will need 2 times more. If possible, then immediately purchase washed fleece, although it is much more expensive.
Important! The best wool is that which is sheared from sheep in May.
If you purchased unwashed hair, it must be thoroughly cleaned. This is done like this:
- Soak wool fibers in warm, slightly soapy water.
- Place the fleece on the mesh and rinse under running water.
- Let the water drain.
- Spread the fibers evenly on a horizontal surface to dry. Turn the fleece over from time to time, like hay when drying.
Important! A couple more useful tips will help you do everything faster and easier, and most importantly - without damaging the material:
- Do not use bristle soak powder as this will cause the fibers to become unpleasant to the touch. It is best to simply soak the fleece in warm water and constantly drain the water as it becomes dirty. You can wet your hair for about 2 days. During this time, all the dirt will disappear and the coat will become good and clean.
- Dry the fleece hanging on sticks or spread the fur on a net. It is best to dry the material outside or in a dry, warm and well-ventilated area.
Intercutting material
To make a blanket from sheep's wool at home, clean and dried wool must be sorted, as for spinning.
Important! Some recommend combing out the fibers using brushes and graters so that the fur is loose and fluffy. But combed wool is not suitable for making a blanket, because when combed, the fibers break and turn into dust. Such fleece fibers quickly form clumps, acquire the properties of cotton wool and quickly “fail.”
To properly remove hair, proceed as follows:
- Spread plastic film or any sheet measuring 2x2 m on the floor.
- Place the dried fleece in a heap on the prepared film.
- Spray the wool fibers evenly with warm water to “open” them and become elastic. During treatment with water, turn the fur over and toss it.
- Leave the material for 10-15 minutes.
- Prepare a flexible and smooth rod for cutting wool.
Important! You can make a rod from hazel or other similar shrubs. The length of the rod should be 1.2 m, and the diameter at the narrowed end should be 8-10 mm. Round the ends of the tool and sand them smoothly.
- Put a mitten on your right hand and a damp gauze bandage on your face.
- Take the rod in your right hand and hit the wool fibers with sharp movements from top to bottom.
- As you lift the rod for the next blow, remove pieces of hair from it with your left hand. To do this, pull the rod through the slightly clenched palm of your left hand.
- Restore the wool that has fallen apart during the beating process and move the lower layers to the top.
- Pulse the fleece until it becomes fluffy and has at least doubled in volume.
- Carefully transfer the broken wool to another clean cloth. Make sure that the resulting wool dust remains on the first bedding and does not subsequently fall into the blanket.
Important! The work of beating wool is very dusty and hard, so entrust this process to a man. Carry out cutting in the summer - preferably in the yard or in a dry, warm and well-ventilated shed. Cover your face with a damp gauze bandage to prevent dust from entering your respiratory system.
So, the sheep's hair is broken, and by this time the cover should already be ready.
Design
Sewing a blanket is simple at first glance, and this applies not only to its quilting, which will be discussed later. Have you tried washing a sweaty blanket? Say, after having the flu? If yes, then you know that it does not always fit into the machine and how difficult it is to wash it by hand. And what your work, which may have required several months of busy evenings, can turn into after it. So let's see how best to sew a blanket so that later there will be less hassle and less hassle.
A blanket, as you know, consists of a lining (underside), an insulating liner and a cover. To prevent the insulation from creeping or bunching up, the entire cake is either quilted, or the lining and the tire form a duvet cover into which the liner is placed. The last option, due to the efforts of advertisers pushing expensive products, has not been particularly popular lately, but for a homemade blanket from scraps it is advisable to consider it first, because in this case, most of the problems with washing the blanket and replacing the liner disappear. The liner always wears out faster than the tire, and washing a tire with underwear without it is equivalent to washing 2 sheets. If a window for the liner in the middle of the tire is undesirable for design reasons, then in the legs you can make a wide armhole from the lining fabric with an internal pocket-turn, like in a pillowcase. This, by the way, completely removes the problem of the reverse seam; any seamstress will immediately understand how much easier sewing is.
There is only one “but” in a blanket with a replaceable insert: if the bed does not have a footboard, then the insert will push out the pocket and the lining fabric will be visible. You can avoid this, without resorting to visible and hard fasteners of any kind, by using a wide border and/or choosing the appropriate lining material (see below). And once again, by the way, a blanket with an insert can be uninsulated for the summer. But we again ran into materials.
Preliminary work
Dimensions
First you need to decide on the dimensions of the finished product so that the blanket fits into standard duvet covers without any problems.
- The size of a single blanket is 160x205 cm;
- one and a half - 145x205 cm;
- double - 175x205 cm;
- European standard - 200x220 cm.
Wool consumption
- A small children's product requires approximately 1.5–2 kg of natural sheep wool;
- one and a half - 2–2.5 kg;
- double and euro - 3–3.5 kg.
Based on the figures given, you need to buy fabric for the cover of the required size + 10 cm for seams, as well as wool, from a sewing store.
Materials and tools for work
To avoid distractions while working, prepare the following in advance.
- Natural combed wool (sheep or camel).
- Thin fabric for the cover.
- Sewing machine.
- Scissors.
- Centimeter.
- Needle.
- Threads to match the fabric.
- Pencil, marker or chalk.
- pins.
Dimensions
Since it is understandably difficult to make a bed for a blanket or to fit it to it, the blanket is sewn to the size of the bed. If your bed(s) are factory purchased, then blankets of one of the following sizes will fit it/them:
- Euro – 210x200 or 200x200 cm.
- Double, depending on the height and build of the couple - 210x180 (small skinny ones), 215x175 (plump short ones), 200x200 (average height and build), 220x240 (large ones).
- Single beds - 215x155 or 205x150.
- Single – 200x150.
- Children's - 150x120 (predominantly for boys) or 140x110 (more girlish).
- For newborns - the size of the changing table plus 12-15 cm in each direction. Typical size 120x120 cm.
The dimensions of the blanket for the existing bed are selected so that its edges (fringe, lace, frill, ruffle) on a made bed without lying down do not reach the floor by 12-15 cm, otherwise the edge of the blanket will get dirty. Also, the blanket on a free bed should not bunch up at the feet or heads, otherwise the insulation will creep. The size of the blanket determines the amount of materials needed for sewing.
How to prepare wool
You can buy six already prepared for work. But if you have untreated fleece, then you need to soak it in a bathtub in warm water for several hours . When dirty, drain the water and add new water.
IMPORTANT! Do not use synthetic detergents for soaking; they can weigh down your hair.
After 1-2 days you need to wash and dry well. The fleece should be hung vertically on ropes. The best time to wash wool is on sunny summer days, so that the wool can dry naturally outside. If this is not possible, then place it in a dry and well-ventilated area.
After this, the fleece must be thoroughly beaten so that it does not lie in lumps . This is very hard and dusty work, so it is better to ask a man for help.
REFERENCE! After washing, the finished material will lose approximately half its weight.
LiveInternetLiveInternet
—Quote book
A small explanation to the post from Tanya, walking. A small explanation to the post from Tanya, walking.
Frame “Here comes summer.”
Caramel honey cake with raspberries, caramel cakes, protein cream, the sweetness of such etc.
Cartoon "Trouble in the Himalayas" online Last weekend I finally found time for...
Watch the light, funny, ironic film “Blame it on Rio.” It turned out to be a wonderful comedy.
—Photo album
—Tags
—Categories
- (0)
- iClone (1)
- Animation Shop (3)
- Catherine Deneuve (8)
- Corel (8)
- GIMP (31)
- Paint (16)
- ProShow Producer (5)
- Roberto Perry (8)
- the motions of my soul (20)
- Word - Excel (1)
- avatars (14)
- actors (45)
- alphabet (37)
- English (38)
- animations (10)
- audiobooks (55)
- famous aphorisms (1)
- banner (13)
- libraries (1)
- sparkles - blings (2)
- action games (49)
- jam (10)
- jams and compotes (6)
- video (84)
- embroidery (16)
- knitting (544)
- fortune telling (10)
- Defne gallery (86)
- gallery from Crys_tal (4)
- generators (137)
- hyphae (5)
- glitters (3)
- horoscope (4)
- Georgian cuisine (26)
- desserts (75)
- design (89)
- motorhome (1)
- animals (90)
- life of wonderful people (1)
- live healthy (9)
- blanks (9)
- snacks (193)
- curtains (4)
- toys (45)
- games (23)
- dough products (80)
- interesting sites (56)
- Art (336)
- border (1)
- Calendars (2)
- pictures (4)
- housing problem (6)
- Ceramic floristry (2)
- cinema (361)
- FS brushes (3)
- clipart (50)
- cliparts (385)
- buttons (18)
- rugs (38)
- collages (28)
- Christmas Collection (1)
- necklace, bracelets (42)
- comments in pictures (1)
- catmatrix (8)
- beauty and health (384)
- creams (12)
- dolls (23)
- chandeliers (1)
- makeup (7)
- manicure (3)
- massage (6)
- Masha and the Bear (2)
- fashion (49)
- my garden (10)
- music (105)
- drinks (71)
- nailart (4)
- wallpaper (8)
- decoration (2)
- Pates (1)
- translators (4)
- baked (425)
- booties (12)
- plugins (15)
- plaid (11)
- players (14)
- gifts (1)
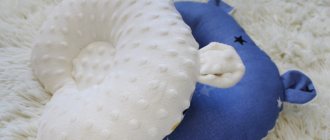
- pillows (13)
- congratulations (1)
- useful for blogs (193)
- useful for computer (218)
- useful tips (22)
- parables (10)
- hairstyles (40)
- programs (430)
- weather forecast (1)
- Works and lessons from Mademoiselle (18)
- dividers (27)
- Frames (212)
- Frames from Falconet (3)
- stories (1)
- Recipes (588)
- Russian (9)
- from the diary Dreaming_Irina (3)
- gardener (14)
- salads (50)
- napkins (68)
- tutorials (1)
- series - Wolf Messing (0)
- tablecloth (31)
- download from the Internet (2)
- dictionaries (2)
- emoticons (3)
- Tips (4)
- sauces (30)
- links (97)
- FS styles (7)
- poems (45)
- bags (6)
- soups (34)
- circuits (236)
- my diagrams (4)
- Cheeses (12)
- slippers (1)
- creativity (505)
- television (22)
- dough (3)
- tests (4)
- stencils (7)
- corners (7)
- horror (2)
- patterns (7)
- decorate the table (0)
- lessons from Tatunechka (7)
- drawing lessons (142)
- cake decorating lessons (2)
- care. (1)
- porcelain (9)
- filters (13)
- Backgrounds (138)
- diary formulas (3)
- photo (86)
- FS (1226)
- flowers (23)
- quotes (6)
- famous quotes (1)
- watch (29)
- drawing templates (5)
- shawls (4)
- sewing (39)
- hats (24)
- fonts (15)
- this is interesting (186)
- this is interesting (120)
- humor (81)
—Applications
- Postcards
Reborn catalog of postcards for all occasions - Online game "Big Farm"
Uncle George left you his farm, but, unfortunately, it is not in very good condition. But thanks to your business acumen and the help of neighbors, friends and family, you are able to turn around a failing business. - I am a photographer
Plugin for publishing photos in the user's diary. Minimum system requirements: Internet Explorer 6, Fire Fox 1.5, Opera 9.5, Safari 3.1.1 with JavaScript enabled. Maybe it will work - TorrNADO - torrent tracker for blogs
TorrNADO - torrent tracker for blogs - always no analogues at hand
^_^ Allows you to insert a panel with an arbitrary Html code into your profile. You can place banners, counters, etc. there
—Links
-Music
—Search by diary
—Subscription by e-mail
—Interests
-Friends
— Regular readers
—Communities
-Statistics
How to make a blanket
When the cover for our product has already been sewn and the wool is ready, you can proceed directly to sewing. To begin, choose a surface to work on . This could be a clean floor without carpet in a large and spacious room. Or you can move several wide tables together. The main thing is that the blanket fits entirely on the surface and there are no hanging edges.
Filling the case
- Turn the cover inside out and lay it out on the work surface.
- Let's start laying out the wool. Start from the edges, slowly spiraling towards the center .
ADVICE! Distribute the fur evenly so that there are no empty or overcrowded spaces.
- Next we start turning the blanket out. This process requires extreme accuracy, so it is better to resort to the help of a few more pairs of free hands.
- Start rolling the blanket together with the laid out wool into a roll. Work your way from the solid edge towards where you left the hole . The roll should not be too tight. In the process, straighten the displaced wool, tuck in the material sticking out at the edges .
- As soon as the roll is rolled, you need to simultaneously place the ends of the cover over the roll and unwind it, as if putting it on wool . Take your time so that there are no lumps inside and the blanket is evenly filled.
- Lay out the future blanket evenly, without wrinkles or kinks . Carefully hand stitch the opening closed using an inside seam.
- Once again , carefully check the uniform distribution of the wool inside . Correct if necessary. And proceed to the next stage.
Quilting the product
- Place some weights in the center and along the edges of the blanket so that the blanket does not move around inside while working.
- Having retreated 10 centimeters from the edge, begin to sew the seam forward with the needle . Do not lift the product too much above the surface to avoid displacing the contents.
- Lay the seam in a spiral, retreating 10 cm from the edge and the previous seam . Work from the edges to the center. If the thread runs out, tie the next one to it with a double knot. Don't interrupt the stitch.
- Continue quilting to the center of the quilt. Tie a strong knot at the end to prevent the seam from unraveling.
Your handmade wool blanket is ready! You can give it as a gift or tuck it into a beautiful duvet cover and use it yourself.
Which fabric is better to choose for sewing a blanket?
The first stage of designing a future blanket includes the selection of material. Almost all products of this type consist of three main parts:
- face - the surface of the blanket, most often directed outward;
- lining - the lining part directed towards the bed;
- filler is a kind of insulating material that gives the blanket volume and ensures heat retention.
The selection of each part must be approached with great care, taking into account the conditions of use of the item, its design and the funds that are planned to be invested in its manufacture.
The front side can be made from almost any fabric without any restrictions. Both natural materials and synthetics are suitable. When choosing a base material, you need to consider the following factors:
- Where to use the blanket. For a children's room, you need to select the safest and hypoallergenic options possible, while for use as part of outdoor activities, the primary condition will be strength.
- Compatible with filler. Synthetics will not be able to retain down or six, which act as insulation. So the front side of such a blanket needs to be made from natural cotton fabrics. If the filler is synthetic, then no problems with retention will arise even when using the cheapest polyester.
- Appearance. Ideally, the top of the blanket should harmonize with and complement the bedroom decor.
A variety of materials are also suitable for lining a blanket. But here you need to provide in advance the necessary density so that the filler does not cause discomfort. Also, complete hypoallergenicity and good breathability are important for this fabric.
The most common options for the lining are calico, chintz, satin and twill. Expensive solutions may use silk or bamboo fabric.
Note! Silk and satin are extremely slippery materials that can slide off a person sleeping in equally slippery pajamas.