How to clean tiles after grout repair?
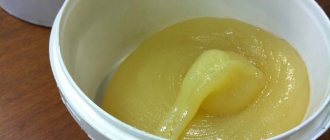
To avoid problems with cleaning grout from the surface of ceramic tiles, you should remember that such contaminants are most easily and quickly removed during the repair process, before the building mixture has had time to harden.
After tiling a small area, you should check how well the mortar has set and begin removing dirty drops and marks on the ceramic surface. To check the condition of the grout:
- Lightly dampen the seam with a damp cloth.
- Observe the behavior of the material.
Important! Evaluate the result based on the following criteria:
- If the grout begins to swell and extend beyond the boundaries of the seam, then this behavior of the building material indicates insufficient hardening and a low degree of adhesion.
- If you don’t notice any changes after soaking, then everything is fine and you can start cleaning the surface from any remaining building material.
Grout removal technologies
You can clean the tiles from grout after repair in two stages:
- Dry cleaning. This procedure is carried out after laying a small section of tile by wiping the surfaces using a special grater. The tool is held at right angles to the coating.
Important! It is recommended to carry out cleaning movements diagonally to the surface of the seams. This direction will help you avoid damage to grout that has not hardened completely.
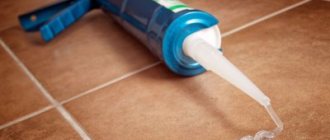
- Washing the surface. Wet cleaning of the tile surface should begin after the grout has partially hardened. For this procedure, it is recommended to use a piece of foam rubber, which is generously moistened with water.
Important! Remove any remaining dirt from the glossy surface with a hard cloth, felt or burlap. This procedure will avoid streaks on the smooth surface of the tiles.
Prohibitions when deleting
When removing grout, it is important to remember a number of prohibitions:
- You cannot use purchased solvents that are not intended for removing grout from tiles, as ignoring this point can lead to damage to the surface.
- You cannot begin general cleaning of the surface until the grout has completely dried and the main contaminants have been removed. Violating this rule may result in damage to the compound between the tiles.
- You should not use solvents, even homemade ones, with your bare hands. Rubber gloves are a necessary means of protection.
- Do not use a metal scraper or knife to clean directly on the tiles. Such a tool can leave damage not only on a glossy surface, but also on a matte and embossed one.
Available means
Let's figure out how to clean the tiles from grout. It is easiest to complete the work if cement-based grouts were used during the repair process. To remove them, you can use the following methods:
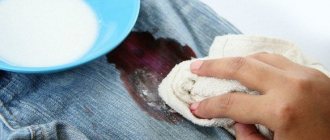
Take 100 ml for 2 liters of warm water. regular table vinegar (9%). Prepare the solution. Wipe the tiles with a soft cloth or sponge. We often rinse the rag or sponge in the solution and wring it out well; it should be damp, not wet. If traces of grout have dried and cannot be washed off, you just need to apply a rag soaked in the solution to them for a few minutes, then scrape off the composition with a spatula, and wipe off the residue using a rough layer of a dish sponge.
- If the most stubborn traces of grout remain in some areas of the ceramic coating, then it is worth applying soda slurry to them. To do this, mix soda with water until you obtain a mass similar in consistency to toothpaste. Apply the paste to the stained areas, and after 20-30 minutes wash off with vinegar water. This product is suitable for cleaning floor coverings, since soda slurry will not stick to walls.
- To soften traces of old grout on tiles, it is recommended to use diluted glycerin. It is mixed with water in a ratio of one to three and applied to the stained areas. After 15 minutes, the softened grout is carefully removed with a spatula, and the surfaces are washed with water. Similarly, you can use a soap solution prepared from 10 g. grated laundry soap, and 0.5 liters of water.
- To wash away traces of cement grout on tiles, use a solution of ammonia. It is prepared from a liter of water and a tablespoon of ammonia. The walls or floor are washed with the prepared solution.
Homemade ways to clean up epoxy grout residue
To deal with epoxy resin, you can try the following techniques:
- Heating dried grout. A hairdryer is used for these purposes. The stain is heated and then carefully removed with a spatula or sharp knife. The remaining small particles are washed off with acetone or solvent.
- Freezing. Some craftsmen who tell how to clean epoxy grout from tiles consider this method to be one of the most effective. You need to purchase refrigerant in the form of an aerosol at the store and spray it on the stain. Freezing will cause the epoxy to become brittle, making it easy to remove with a knife.
- Treatment with hydrochloric acid. With its help you can quickly get rid of small stains of dried epoxy, but when using the product you must remember that it is aggressive, so it is not suitable for all types of tiles.
Available means
For minor fresh stains, you can use proven folk recipes that are always available at home.
Laundry soap
Laundry soap removes yellowness and whitens tiles well. It is enough to rub a brush or sponge with a bar of soap and treat the surface. The product gives a thick foam and stays on the surface for a long time. Leave the applied soap for 30-40 minutes, rinse with water and wipe the tiles dry.
Vinegar
Acetic acid is successfully used to clean limescale from cladding. Vinegar is applied from a spray bottle or sponge. As a rule, the surface must be rubbed. If the plaque is relatively fresh, vinegar will remove it.
In combination with salt, vinegar is effective against rusty plaque.
A napkin or rag is well moistened with vinegar, dipped in fine salt and carefully wiped off the rusty stains. An aqueous solution of vinegar is suitable for everyday tile care: the ingredients are mixed in equal parts and poured into a container with a spray bottle.
The product can be sprayed on wall tiles and tile joints daily.
Baking or soda ash
Baking soda can remove grease, fresh rust, mold, dirt and water stone. Before treatment, the surface of the tile is moistened with water. Pour soda onto a wet sponge and rub the stained areas. The product is left for 15 – 30 minutes. During this time, the plaque usually softens and is easily wiped off with the hard side of a dish sponge or brush.
Hydrogen peroxide
Pharmacy 3% peroxide whitens yellowed seams, colored stains or traces of hair dye. On porous tiles, stains will have to be treated several times. The peroxide is gradually absorbed into the pores and after 3–4 applications, the stains usually noticeably lighten or disappear.
Ammonia
Ammonia is often included in liquids for washing glass, mirrors and other glossy surfaces. By itself, it does not remove stains well, but it is added to prevent streaks after washing. An aqueous solution of ammonia (2 tablespoons per 1 liter of water) is suitable for finishing the tiles after basic cleaning.
Lemon acid
Lemon or citric acid softens limescale and gives a slight whitening effect. Sprinkle the powder onto a sponge and wipe the tiles. In this way, you can wash the tiles from fresh deposits in 2-3 minutes.
Tea tree oil
Tea tree essential oil is known for its antibacterial and antifungal properties. It can be used pure or added to household and industrial cleaning products. Regular use of tea tree oil is a good prevention of mold.
Cleaning methods
To grout the joints between tiles, various materials are used, which can be wiped off with certain substances. When cleaning after renovation, you should know what type of grout was used for finishing work.
For cement grout
Cement paste is most often used for finishing tile joints. Fresh cement can be cleaned from tiles by treating with warm water and wiping the surface with a sponge. When the mass has time to harden, it is necessary to apply more radical methods.
Acidic solutions
After contact with the surface, highly active acid-containing solutions begin to soften the cement grout. Among such solutions you can use:
- A liquid concentrate that is suitable for any type of tile and fills uneven surfaces, simplifying the work process.
- Powder product to be diluted. This option is not applicable to porous and marble surfaces.
Highly concentrated acid-containing solutions must be used according to the attached instructions. To be on the safe side, it is recommended to test the product on a small area to first ensure a safe result and no negative consequences.
Liquid for eliminating whitewash
This substance is intended to effectively remove plaque, traces of cement and other building materials. The liquid is diluted with water and applied to the tile joints using a brush, roller or spray.
After waiting a few minutes, wipe the surface with a sponge with a not too hard surface or a rag.
Special removal of cement deposits
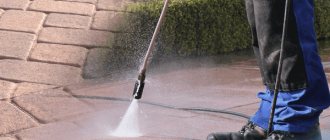
A specially developed cement paste remover is widely used after finishing and repair work in residential buildings and in production. The composition not only helps to remove grout, but also concrete splashes, tile adhesive and other types of contaminants. The solution can be used indoors and outdoors. The action of the wash is 2-3 minutes; a sponge or spray bottle is used for application.
Methods for cleaning ceramics from various contaminants
We will present for review an effective method for cleaning tiles from the most common types of contaminants, using both special products and cleaning methods with improvised materials and substances.
Due to the fact that the cladding of the bathroom walls occurs after the installation of ceramics on the floor, there is a danger that the primer compositions used to prepare the wall surface for finishing will come into contact with fragments of the floor covering. Wipe off stains from dried primer is a serious test of endurance and patience, so you should not allow it to get on the ceramic surface, and if this happens, then you need to remove the spills immediately using ordinary water.
Since tile is a material that is resistant to various types of adverse effects, many products are suitable for washing it
The following methods are used to clean dried primer:
- stains are dissolved with a special remover;
- the primer is washed off with acetone;
- the contamination is treated with a liquid primer;
- use of vinegar essence.
To make the dried primer easier to remove, the contaminated areas are covered with a wet rag, and some time is given to soften the dried stains.
Particularly difficult areas can be cleaned mechanically, namely using a special scraper. It is a device consisting of a handle and interchangeable blades. Pre-soaked stains are carefully removed with a scraper so as not to damage the tile; the tool must be held at an angle of 30 degrees to the surface of the tile.
Cement mortar that has not set is easily washed off with a wet sponge or rag and clean water. But you will have to tinker with the frozen solution:
- Cleaning with special removers.
- Toilet bowl cleaner works well on dried cement mortar.
- Mechanical cleaning method. Traces of the solution are removed with a metal spatula or a metal mesh for washing dishes.
We remind you that when using the mechanical method, the dried solution must first be soaked and when cleaning with metal objects, do not damage the surface of the finishing material.
After repairs, the cement should be removed from the tiles immediately before it has time to harden.
Tile adhesive
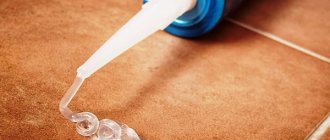
- Traditionally, the easiest way to promptly remove glue residues during the installation process is with a wet sponge.
- The frozen glue is soaked in a solution of water and vinegar or ammonia.
- Chemical treatment of contaminated areas with potent substances.
- Mechanical cleaning. Traces of glue are removed using a metal spatula, scraper, metal mesh or fine sandpaper.
Key moment. In “hopeless” cases of strongly set glue stains, it is advisable to use chemical and mechanical methods in combination.
To facilitate the process of cleaning grout from the surface of tiles in the bathroom, you must strictly follow the technology of finishing joints with fugue, do not apply too much grout to the surface to be treated and remove its excess in a timely manner.
First of all, we need to remove traces of glue as soon as possible, especially if we are dealing with ceramic tiles
There are two removal methods:
- Chemical. The method is based on the use of potent, acid-containing substances. Using this method, you need to take into account the properties of the ceramic used and its resistance to acids. We should not forget about safety measures when working with active substances, be sure to use personal protective equipment.
- Mechanical. The method is used to clean heavily dried grout or grout that is resistant to chemicals. The following tools and devices are used:
- metal spatula, brush or scraper;
- various cutting devices with a sharp blade;
- sandpaper or metal abrasive mesh.
Construction dust
The most common and “obligatory” type of pollution after construction and repair work is the presence of construction dust. Removing it is a simple process and does not require the use of any special or potent substances.
It is necessary to remove dust as soon as possible so that dust and dirt do not become embedded.
First, dust is removed from the surface with a dry cloth or using a vacuum cleaner, after which wet processing of the cladding begins, for which the following means are used:
- warm soapy water;
- water with lemon or citric acid added;
- vinegar solution;
- compositions for cleaning glass.
Ceramic tiles should be washed from top to bottom.
How to clean seams?
The seams between the tiles, even with high-quality cladding, lose their presentability over time. Dust, grease and dirt accumulate here, and mold also multiplies in damp rooms. There are two effective methods for cleaning seams - chemical and mechanical.
Chemical method
Any household chemicals designed for cleaning ceramic coatings will do. They remove dirt, mineral deposits, fungus and bacteria, and also effectively combat unpleasant odors.
The above-mentioned folk remedies will also come to the rescue - solutions with vinegar, soda, citric acid and glycerin.
Mechanical methods
Sandpaper is a proven way to combat inter-tile dirt. The abrasive should be as thin as possible, and the work should be done carefully so as not to touch the tile coating. To be on the safe side, roll the paper into a thin tube equal to the width of the seam. Pasted strips of masking tape will also help protect the edges of the tiles.
After sanding the seams, the surface is washed with water and wiped dry.
A melamine foam sponge works great on seams.
It is a soft yet durable material that easily penetrates into any pores, leaving them clean without chemicals.
Hard-to-reach areas can be treated with a toothbrush with washing or cleaning powder.
Rules for working with cleaning products
Most grease removers - both homemade and store-bought - can cause an allergic reaction, poisoning, or, if actively inhaled, a burn to the lungs.
To work with household and folk chemicals, you must strictly follow the safety rules:
- Cover your clothes with a long, thick apron;
- be sure to wear rubber gloves;
- do not lower your head low to the surface to be cleaned so that the acid vapors do not burn your throat and lungs;
- read the instructions for the purchased product;
- remove all food products from the table and kitchen counter;
- Make sure that children and pets do not have access to the kitchen.
After cleaning, wash your hands, face and neck very thoroughly, it is even better to take a shower with shampoo and soap. Rinse the gloves thoroughly, wash the apron in the machine. After cleaning the kitchen, it is better to immediately throw all clothes into the washing machine.
Before work, it also makes sense to make sure that the window in the kitchen is open, and if possible, you should also turn on the hood. You should not inhale fumes from household chemicals or vinegar - they can cause a real burn to the larynx and mucous membranes.
After washing the tiles, the window should be left open for at least 30 minutes in winter, and for two hours in summer, so that all the toxic fumes are blown outside.
Using ready-made cleaning products
Ready-made household chemicals vary in effectiveness and, in relation to the task of how to clean the seams between tiles on the floor, are divided into two groups:
- The tile joints have just begun to change color. To clean light yellow grout, compositions with surfactants (surfactants) are suitable. These are the well-known Cilit, Pemolux, Fairy, Cif, Komet.
- In difficult cases, specialized compounds will be required to remove contaminants. They are intended for tile joints and have a higher concentration. The label indicates that this is a product for deep cleaning of tiles (options for tiles or porcelain tiles are possible). Compositions HG, Rayen, Mellerud, KiiltoClean are more expensive, but they act more radically and are used sparingly.
Commercial formulations are available in liquid or cream form Source wixstatic.com
How to clean fresh grout from tiles
It is best to remove the grout directly during the process of filling the joints, alternating grouting with cleaning. After completing a small amount of work, you need to check whether the solution has set and begin cleaning up dirty marks. To check the condition of the grout, lightly moisten the seam with a damp cloth and observe what happens next. If the grout swells and begins to come out of the seam, it means it has not set enough. If there are no changes, the remains can be deleted.
When the volume of cladding is small, you can begin cleaning after all the grouting has been completed.
The process looks like this:
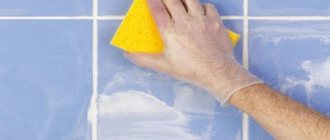
- Moisten the sponge with water and wipe the surface;
- Remove solid grout residues with an abrasive that does not scratch the surface;
- Rinse the sponge until clean and wipe the tiles again.
During cleaning, it is important to monitor the moisture of the sponge and remove excess water, which can wash away the fresh grout. Glossy tiles can be cleaned the next day after grouting
Glossy tiles can be cleaned the next day after grouting.
How to remove dried grout from tiles
To remove mortar that has hardened in the pores of porcelain tiles or from a glazed surface, there is an acidic cleaner to remove cement residues. Its composition is capable of reacting and dissolving traces of glue, grout and cement that have fallen on the tiles. The product is applied to the surface for 5 minutes, then washed off repeatedly with water.
Features of removing epoxy-based grout
Cleaning tiles from grout containing epoxy resin should be done as soon as possible after processing the joints. There is an epoxy cleaner for this. The agent that dissolves epoxy resin consists of several acids and is quite expensive. But still cheaper than re-purchasing material and new facing work.
If more than 24 hours pass and the grout has completely hardened, the tiles can only be cleaned mechanically.
Handy tools for cleaning tiles
In addition to ready-made products specially produced for removing dirt from tiles, there are common household cleaning products:
- Detergents containing acid - you can find out about their composition from the label;
- Limescale removers are a proven method of cleaning tile grout;
- You can add 1 spoon of white alcohol or kerosene to the water;
- A mixture of water and glycerin (3/1) – eliminates cement stains on tiles;
- Rubbing the tiles with baby soap before grouting the joints protects its surface from contamination. After finishing the work and drying the joints, the tiles must be washed.
It should be noted that it is better to start experiments with removing dirt from a separate tile left over from the renovation. If a satisfactory result is obtained, the proven product can be applied directly to the cladding.
Cleaning different types of grout
Grout mixtures include different components that give the solution certain beneficial properties.
Therefore, it is necessary to take into account the basic composition of the product and its drying speed.
Fresh grout
Grout is considered fresh if it has not yet had time to set and dry. As a rule, it is easily removed within the first 24 hours after facing work. If the tile is matte and embossed, the mixture should be removed immediately - with a soft spatula and a dry cloth.
With glossy tiles everything is different - it can only be washed the next day, otherwise scratches will remain on the surface.
Fresh putty can be removed with a damp sponge. It is moistened in water and wrung out thoroughly - a poorly wrung out sponge will blur the seams and delay their drying.
Wash the tiles with a sponge until all stains are eliminated.
Cement grout
Since sand is included in the cement grout, the remaining mixture is easily washed off with plain water.
After half an hour, when the initial setting of the cement occurs, excess and stains can be removed with a damp sponge in several approaches. You need to rinse the washcloth as thoroughly as possible - under running water or in a large basin.
The sponge should not be too wet so as not to wash out the space between the tiles.
If the grout layer has already dried, and there are traces of putty and glue on the tile, acids – sulfuric, hydrochloric or acetic – will come to the rescue.
Advice! Regular food vinegar, a concentrated solution of citric acid, or a water-glycerin mixture will work well with cement mortars.
“Epoxy”
Grouting materials based on epoxy resin are considered to be of the highest quality. They lie smoothly, harden quickly and have a wide palette of colors. But due to the high setting speed, it is possible to clean the surface of epoxy resins only in the first day. Already on the second day, only the mechanical method will help.
On the first day, special solvents and acid reagents will come to the rescue - such as MAPEI, Litokol, Sopro, Keranet, Clean Kiilto, etc.
Their active components interact with resins, allowing the substance to be washed away from the surface without damaging the base.
Cleaning the cladding immediately after repair
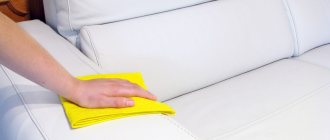
General cleaning of the lining in the bathroom or kitchen can be carried out when the main contamination of the coating has been eliminated and the seams have lightened. Some owners prefer to simply carry out wet cleaning, wiping the entire area of the tile with a wet rag.
Missed areas where the hardened solution remains can be rubbed with a piece of felt, and then treated with vinegar diluted in half with water.
Regular dish soap will help make glossy tiles shine. You can prepare a soap solution or drop a little onto a sponge.
After treatment, the product is allowed to dry for 10 minutes, and then the tiles are wiped dry with a soft cloth.
How to clean grout from relief tiles?
You can try cleaning embossed tiles with dry citric acid powder:
- Moisten a work sponge with water and wring it out.
- Pour a small amount of lemon onto a washcloth.
- Wipe the surface without touching the tile seams.
It is advisable to wait until the crystals melt on the surface of the sponge, or clean with crystals, but without pressing on the lining.
The embossed surface can be treated with a homemade paste made from vinegar and soda. The acid will make the grout more flexible, and the soda will act as a soft abrasive. It’s easy to prepare the paste - mix soda and vinegar in a ratio of 3 to 2. Apply the product to the dirt and after 10 minutes, brush over it.
A solution of white spirit will help restore the cleanliness of porcelain tiles. For half a liter of water you need to take 2 tablespoons of white spirit and mix thoroughly.
Use a cloth to carefully remove any remaining grout, and then completely clean the surface of the alcohol solution.
Cleaning porous tiles
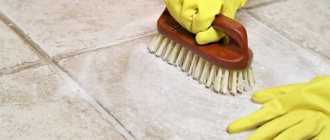
Porous tiles are the most difficult to clean, because they literally absorb all dirt. The most effective method of cleaning will be a mechanical cleaning method using a brush or hard cloth. You can also use a scraper designed for washing pots and pans.
If the grout is still fresh, you can remove it from the pores with a felt glove dipped in vegetable oil.
You can take note of this popular recipe:
- Mix baking soda, natural lemon juice and vinegar - a few tablespoons of each component.
- Dilute the resulting mixture with water to one and a half to two liters.
- Soak a soft cloth in the solution and wipe the tiles, carefully treating all pores.
Sometimes you have to resort to more aggressive methods using chemicals - acid removers and solvents. They penetrate deep into the pores and lift all contaminants, including grout, to the surface.
Reference! Special washes not only effectively deal with all kinds of dirt, but also give the seams a uniform color.
How to clean grout - modern methods
The young and advanced generation of tilers does not welcome traditional methods and focuses their work on the recommendations of ceramic manufacturers. But in their principled approach they also forget that all modern means of cleaning ceramic coatings are based on folk recipes.
The cleaning liquid must be applied to the tiles and then removed with a sponge after a certain time.
The acid-base component predominates in the composition of detergents and cleaning products in the current chemical industry. Here are some groups of such funds:
- protective: applied a few hours before the grouting process and after completion of work, removed by washing off along with the remains of the grout;
- cleaning: applied to the uncured grout mixture by applying it to the wall with a sponge;
- removing: used to remove already hardened fugue by applying and leaving for a certain time to soften the areas of contamination.
When working both with recipes of folk craftsmen and with modern cleaning products, you must adhere to certain rules.
- Before you start using any product, test its effect on a sample of the tile you are going to work with. This will save the entire cladding from possible damage and undesirable cleaning results.
- Use personal protective equipment, at least special gloves and a respirator when working with acid-containing solutions.
- When working, use not improvised means, but those tools that are intended for a particular operation.
- Follow the sequence of operations and technology for using cleaning products. This is especially true for factory production.
With proper care of ceramic cladding, it can last for more than one generation, as it is one of the most resistant finishing materials to external factors.
How to remove epoxy resin
Epoxy resin dries completely within a day and is invulnerable to the effects of acid-base compounds. It is possible to remove traces of epoxy resin only with the help of highly active reagents. When using cleaners, you must follow a number of rules and properly prepare for the work. Read more here.
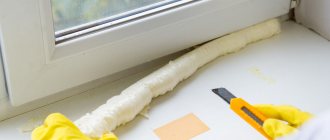
Preparation
The first preparatory step is to select and purchase a special softener that can remove epoxy resin residues. To complete the work, you also need to prepare a metal brush for processing the ribbed surface, protective gloves and a respirator.
Seam sealing
To prevent the cleaner from destroying the tile seams, it is necessary to close them while the stains are being washed off. Applying a thick layer of masking tape creates an obstacle for the solvent to pass to the seams. If the solution gets on the seam, you must immediately wipe it off with a rag or sponge.
Solvent
If the epoxy resin has dried, you need to treat it with a solvent and wait 10 minutes for it to soften. Then traces of grout are removed with a metal brush or scraper. When performing work, it is important to be careful and control the degree of pressure so as not to destroy the tiles or leave scratches on the surface.
Recommended cleaning times
Removal of the grout layer is carried out in several stages - from the initial removal of excess to dry and wet cleaning. It is better to carry out the first stage when the material has not yet hardened, but has already hardened sufficiently. In this case, the risks of damaging the surface of the tile and disrupting the hardening process of the putty are minimized.
It’s easy to check the condition of the seams - just moisten them with a damp cloth and evaluate the reaction.
If, after interacting with the liquid, the grout mass begins to increase in size and extend beyond the seam, it is too early to begin cosmetic work. If the layer remains unchanged and does not react to water in any way, then the moment for cleaning is most suitable.
Reference! The average initial setting time for tile grout is about 30 minutes.
We assess the condition of the composition and coating
It must be understood that removing hardened mortar from joints can damage the ceramics. Therefore, this should only be done if the material is completely damaged. To make sure of this, you must first thoroughly wash the space between the tiles and inspect it carefully.
It is necessary to remove grout if:
- There are multiple cracks, crumbling and voids.
- Mold or mildew has appeared and is spreading under the cladding.
- The space between the tiles is deformed.
In other cases, sanding with sandpaper and updating the grout mixture will be sufficient.
Epoxy grout Starlike Evo, absolutely white, 2 kg
2 184
Buy
- Decoration Materials
How to fix a burn on linoleum: 3 effective ways
Cleaning products
To care for a tiled surface, the easiest way is to use ready-made special products that are sold in household chemical stores. They are ready for use and do not need to be diluted or mixed with other substances. However, there are no universal ones among them, so before purchasing you should carefully study their purpose.
A good product must meet the following requirements:
- Be gel-like or liquid. It is better to avoid the use of powders and abrasive pastes, because they spoil the glaze layer, and over time the tile will lose its shine, the gloss layer will be erased irrevocably.
- It is desirable that it contains chlorine. This component makes the product almost universal, because... not only helps to cope with various contaminants, but also destroys bacteria and unpleasant odors.
- Does not contain chalk. Many housewives have long abandoned the use of chalk to clean tiles, because to wipe off the white coating on the tiles will require additional time and effort.
- Does not contain acids. Their impact destroys the layer of putty and grout in the seams.
Other contaminants during repairs and methods for cleaning them
The process of covering walls or floors is always associated with the appearance of construction dust, debris and dirt. At the end of the work, stains and traces of paint or primer often remain on the tiles. All this requires timely removal, otherwise over time these substances will be much more difficult to remove.
Traces of paint
There are several ways to remove paint residues:
- Gently scrape off with a sharp knife or blade.
- Remove any remaining paint with a cloth soaked in acetone.
- When the stains are large, it is better to soak a piece of cloth in a solvent and leave it on the contaminated surface for 15-20 minutes. After this, rinse with water.
When using one or the other method, care must be taken, especially in cases with glossy surfaces. They can be easily scratched with a sharp object or the texture can be damaged by a product containing acid.
Remaining primer
After drying, the primer leaves unsightly white spots that often cannot be washed off with plain water.
The primer leaves white marks on the tiles.
To get rid of its traces, you can use the following cleaning options:
- Try to carefully scrape off the stain with a scraper.
- Add 1 tbsp to 5 liters of water. granulated sugar, boil. With the mixture cooled down but still hot, rinse the stained surface.
- Leave a cloth soaked in solvent on the stain for 10 minutes, then rinse with warm water.
- Apply fresh primer to the old stain and leave for 5-10 minutes. It will soften the hardened product, after which it can be easily washed off with hot water.
- Use a special primer remover, which is sold in hardware stores.
Construction dust
Of all the contaminants, construction dust is the most harmless, although cleaning will still take time.
What to do after the repair is complete:
- Using a rag or soft brush, sweep all debris from the walls and floor into one place and carefully collect it.
- After this, remove smaller particles with a vacuum cleaner.
- Remove remaining grout or adhesive stains using a suitable method for the particular case.
- Wash the tiles with warm water.
- To consolidate the effect, use household chemicals to care for ceramics.
- Wipe the tiles with a dry cloth or microfiber cloth. This will remove any remaining stains and give the tiles a shine.
It's good if you have a steam generator at home. Steam treatment of the facing surface will remove all dust not only from the tile itself, but also from the freshly jointed surface, as well as from hard-to-reach places that are difficult to clean with a rag or sponge. At the end of the process, you need to wipe all surfaces with a dry cloth.
How to care for tiles
In order for the coating to last for a long time, you need to know how to properly care for tiles.
For glossy structures, strong acid-based detergents should not be used. This may damage the gaps and seams between the products.
It is best to purchase special products for tiles, ceramic tiles and porcelain tiles.
Do not use metal brushes or abrasive powders because they will severely scratch the surface of the coating. This is especially noticeable on glossy ceramic tiles.
The Best Tile Cleaners
To ensure that the tiles retain their attractive appearance for a long time and do not fade, it is better to use specialized mild detergents:
- Mister Muscle. Eliminates plaque, rust, removes stains from the surface of tiles and gives it shine. It is necessary to apply the liquid to the dirt, wait 3-5 minutes and walk again with a damp sponge. It copes well with old, stubborn stains and does not run off vertical surfaces. In this case, there is no need to scrape and rub the plaque with a washcloth. The detergent perfectly removes even formed mold from the grout.
- Frosch. Suitable for most types of tiles. Effectively removes dirt, grease, stains and plaque from ceramic tiles. Frosch is harmless to the body. The product neutralizes unpleasant odors and kills germs. To clean the tiles from dirt, dilute 2 caps of detergent in 5 liters of water and clean the surface. Not intended for use in its pure form.
- Cif Anti-plaque. Removes accumulated dirt thanks to a unique water- and dirt-repellent formula. In a matter of seconds it will remove limescale and soap stains from the surface of the tile. SIF should be applied evenly to the dirt, wait 5 minutes and rinse with clean water.
- Domestos. Effectively eliminates fungus, whitens grout joints between tiles and disinfects. Directions for use: Dilute 2 caps of gel in a five-liter bucket of water and remove dirt with a sponge or soft-bristled brush. Then rinse the surface with water and wipe dry.
- San-klin (Santik). Liquid for removing limescale, rust and other contaminants from tiles. It must be applied to the surface for 5-10 minutes and then remove any remaining dirt.
You can also use the following aids to clean tiles:
- Bleaching powder. Dilute the powder with clean water. Pour the solution into a spray bottle and spray it onto the desired surface. Then leave for five minutes and rinse with plenty of clean water. Let the ceramics dry or wipe the surface with a dry cloth. Chlorine solution kills germs and gets rid of mold.
- Melamine sponge. Easily wipes off minor stains, removes limescale and does not spoil the appearance of the cladding. You just need to wet the sponge and rub away the dirt.
- Steam cleaner. A gentle alternative to aggressive cleaning liquids. Steam cleans the tile surface no worse than chemicals. And at the same time it does not have any mechanical effect. Steam supplied under high pressure dilutes grease stains on the tiles and disinfects the surface being cleaned, killing germs. The steam cleaner is excellent at removing mold and limescale in the bathroom. It easily removes even greasy stains in the kitchen.
To prevent ceramics from fading and scratches appearing on it during use, you need to treat it with a special varnish. A durable protective coating is created, the color does not change for many years, and caring for the tile surface is greatly simplified because almost no dirt accumulates on the varnish coating.
With proper cleaning and good timely care, ceramic tiles will last for many years.
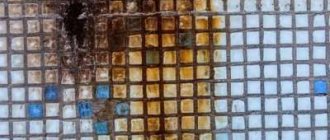
Grout restoration
Grout joints sooner or later need updating. Restoration allows you to improve not only the appearance of the coating, but also its performance properties.
Restoration with special means
Ready-made chemicals for the restoration of tile joints are sold in ready-made liquid form in bottles. They contain components that renew color, eliminate dirt, lime, mold, darkening, grease and oil stains.
Advice! For light grout, choose products containing bleaching components; for colored grout, choose products that do not affect the shade of the grout.
You can use special products in concentrated form or diluted with water, depending on the level of contamination. 5-7 minutes after applying the drug, the tiles can be cleaned with a stiff brush.
Restoration using household chemicals
The available tools in any housewife's arsenal also do a good job of updating seams.
- Washing powder. Prepare a liquid paste from the powder and a small portion of water. Dip a toothbrush into the mixture and scrub the dirty areas, then rinse off the foam with water.
- Washing gel. Once finished, apply the gel mixture to the seams and wait a couple of minutes. You can clean dirt with a sponge, brush or any other abrasive.
- Spray. The spray cleaner may contain additives that dissolve grease, destroy lime and mildew. It is sprayed directly onto the joints between the tiles and left for a while for a chemical reaction.
Then wipe the seams with a brush or hard sponge and polish with a dry cloth until shiny.
Partial removal of the top layer of grout
If the dirt has become too deep and even mechanical methods do not help, there is nothing left but to partially remove the grout.
There is no need to completely remove all the grouting material - just clean off a layer 2-3 mm thick. The work is carried out with a scraper or extender with preliminary wetting of the grout.
Cement and latex mixtures are well softened with ordinary water, but for epoxy products only a special solvent is used.
After removing the grout material, the edges of the tiles are sanded with sandpaper. The cleaned surface is primed for better adhesion to the new layer. Next, prepare a portion of grout and compact it tightly between the tiles with a rubber spatula.
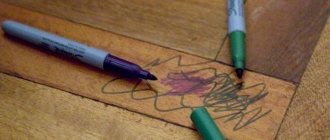
Restoration with marker
A waterproof seam marker can be purchased from a specialty store. It masks unsightly areas on the seams well, but does not fundamentally solve the problem of cleaning. The achieved cosmetic effect will become invisible in a few weeks.
Restoring with a marker is easy - just go along the seams with a working rod. The work area must first be prepared - wash everything with soap and water, remove mold and putty on cracked areas.
Removing simple stains
If there are severe stains and those that are not even spots, but lumps, a spatula will do. It is necessary to remove the sagging by carefully prying each one up. The main thing is not to rush and perform all movements at a smooth pace, otherwise you may not calculate your efforts and leave scratches on the tile, which will be very unpleasant. This technique is suitable for removing solutions mixed with water.
The situation is different with polyurethane compounds. Cleaning also involves gently prying, but then slightly tugging and removing from the surface. No cleaner will cope with the task at this stage, since it makes no sense to dissolve heavy deposits.
But the grout may not appear as clumps on the tiled surface, but only as drops or spots. They can also be cleaned mechanically.
Before you clean the grout from the tiles, you need to prepare:
- container with warm water;
- clean rags;
- gloves;
- putty knife.
Using a spatula, they try to crush the integral structure of the stains. After that, they soak a piece of cloth and, rubbing the stains in a circular motion, begin to fight simple stains on the tiles. In addition, to clean small stains, you can apply cloths soaked in the product.
Typically, cleaning tiles with a relief surface involves the use of special solvents and acids. However, the inconvenience is that the composition gets clogged between the porous tile structure. You can go over the matte surface with a brush or sponge. But it is not recommended to do this with glaze.
There is a special grout remover available in stores. Moreover, the range of such products is quite wide. These are potent solutions for different types of textures and surfaces, based on alkali or acid (or both). Each such product has an action interval strictly defined by the manufacturer, which cannot be either underestimated or exceeded when applying the drug to a tiled layer of dirt.
Basically, chemical industry products are used when it is not possible to remove the grout from tiles with a grooved side using mechanical methods. To apply the composition use a sponge or brush. The product is applied pointwise. If there is a large area of contamination, work is carried out on an accessible area, limiting the treatment to two square meters. Gradually covering other zones. It is easier to work with small areas, if only because the rubbed area of dirt will not have time to dry at the very beginning while working with stains throughout the entire area. After applying the product to the traces of the grout mixture, there is no need to wait longer than the time specified by the manufacturer of the product. Because otherwise it will be problematic to wash the tiles after repairs.
Removing grout from seams
Finishing is carried out on all tile surfaces and joints to ensure the same level of finish.
If the technique is violated, the seams must be aligned separately using the following means:
- Sponges and professional solvents - for epoxy composition and smooth tiles;
- Zero-grit sandpaper - for wide cement joints and embossed tiles;
- Light grit sandpaper or an old toothbrush for dry polyurethane.
When processing joints, it is necessary to avoid contact of solvents and abrasives directly with the tiles. Pre-wetting the seams with water also greatly simplifies the process.
Cleaning fresh grout
Modern grout hardens within 24 hours, so it is easiest to clean it immediately after filling the tile joints. But first, after processing, it is necessary to check the seams for stability. Lightly moisten them and observe the reaction. If no changes appear, you can begin to wash away the dirt.
To do this, lightly wet a soft sponge in water and carefully wipe the tile joints to remove dirt. When removing excess mortar from facing tiles, do not wet the sponge excessively - this can lead to distortion of the seams
If you missed the moment, the cleaned joint has dried out slightly, and white marks appear on the tiles, it is recommended to resort to the following cleaning measures:
- White stains can be washed off well with special felt graters using regular dishwashing detergent or vinegar solution (add 100 grams of vinegar per 2 liters of water).
- Baking soda will help remove grout marks. Apply a little soda to the slightly moistened surface of the tile and begin the scrubbing process in a circular motion.
- A felt grater soaked in vegetable oil will help in the fight against dirt on embossed tiles.
Quick questions and answers
- Will construction tape help? Yes, protect the surface with construction tape before grouting.
- Will vegetable oil help? Yes, to do this you need to lubricate the surface with vegetable oil before applying the grout.
- How to clean embossed tiles in the bathroom? It is enough to rub it with laundry soap before grouting.
- How to clean tiles after repair within half an hour ? You need to carry out the work carefully and immediately remove all traces of grout.
Recommendations on how to clean tiles after grout repair:
- Dirt from the tile can be removed from bottom to top , and the surface is wiped with a clean napkin from top to bottom. With this approach there will be no streaks on the surface.
- When working with chemicals and aggressive agents, use protective equipment: rubber gloves, respirators, goggles.
- Do not use abrasives or rough brushes to clean the glossy surface to avoid leaving scratches on the tiles.
- If you dry the surface of the tile well and then rub it with a microfiber cloth, then there will be no trace left of stains.
- Before using a cleaning agent , test its effect on an inconspicuous area; if the tiles do not lose their external qualities and there is no reaction with the grout mixture, you can start working.
- After cleaning, ventilate the room and carry out wet cleaning with clean water.
Relief tiles and porcelain tiles
How to clean embossed tiles from stubborn grout? Of course, smooth surfaces are easiest to clean. But how to remove grout from the terrain? It is best to remove the mixture before it begins to dry.
The best option is the wet cleaning method.
You can also use special mixtures and compositions for complex surfaces. Epoxy grout cleaner is applied to the surface with foam rubber, and then the dirt is removed with a brush in a circular motion.
Prevention
As a rule, old tiles are held in place only by a porous grout, so for the purpose of prevention, you can not remove, but renew the grout between the tiles. Acids, reagents and folk remedies are suitable for this. Periodic renewal of the grout allows you to securely hold the tiles and maintain the proper appearance of the space between the tiles.
The most common facing materials are ceramic tiles and stone. To prevent dirt and moisture from getting into the joints, the seams are rubbed down. But the grout is quite difficult to clean. How to clean grout from tiles and what product is best to use?