Carry out a general cleaning of the kitchen at least once every six months (and preferably more often). With such frequency, you won’t have to admire the brownish greasy coating and “stick” your palms to the surfaces.
In this article we will describe the entire technical process so that when drawing up a general cleaning plan you will save time and not miss anything important. We'll tell you how and in what order to clean the kitchen from greasy deposits. We will recommend effective cleaning products that will speed up the process and provide high-quality results.
What you will need for general cleaning of the kitchen: products, tools and equipment
To combat grease, you will need a basic set of cleaning products and equipment, which can be supplemented with auxiliary equipment - a steam generator, a vacuum cleaner and a windshield wiper. You don't have to use the technique, but it will greatly simplify your task.
Minimum required for general cleaning in the kitchen:
► Strongly alkaline product for removing old fat deposits with a pH of 12-13. With its help, you will clean the oven from burnt substances and free the hood grate from a layer of fat.
► Slightly alkaline product for general cleaning with a pH of 9-10. You will use its solution to wipe lightly soiled surfaces - matte facades of wall and floor cabinets, window sills, radiators, stoves, household appliances.
► Neutral cleaner for sensitive surfaces with pH 7-8. Use for cleaning glossy facades.
► Glass polishing agent . Use when wiping glass and mirror surfaces, as well as when polishing chrome handles and faucets.
► Sponges . The double-sided dishwasher is useful for quickly applying cleaning solution to moisture-resistant surfaces and wiping off light stains. An abrasive sponge for cleaning Teflon cookware will come to the rescue if grease or carbon deposits do not yield to gentle mechanical action.
► Cleaning wipes . Abrasive ones will be needed to remove stubborn dirt, microfiber ones - for general and final wiping, smooth ones made of suede or microfiber - for polishing glass and glossy surfaces.
► Ironing brush and scraper for glass/tiles . Useful for removing hard and sticky substances that are not amenable to abrasive wipes/sponges.
► Flounder mop with microfiber mop . Needed for cleaning the floor.
► Water distiller . It will help remove liquid from glass quickly and without streaks.
► Basin or other plastic container . Needed to dilute the cleaning solution.
► Household gloves made of latex, vinyl or nitrile. Protect your hands from the negative effects of chemicals. Read the blog - “Detailed guide: how to choose the ideal cleaning gloves.”
Please note: when carrying out general cleaning of the kitchen, we use professional alkaline and neutral products from the brands Buzil, PitKhim and Dr. Schnell. They can be replaced with less expensive mass market products. For example, stubborn grease deposits can be cleaned with Schumanite from Bagi or Azelite from Grass , and light stains can be cleaned with gentle grease removers Amway for the kitchen or Frosh Grapefruit. Read the article “How to Choose Cleaning Products for Kitchen Grease Removal” where we recommend different brands of effective cleaners.
Order general kitchen cleaning in St. Petersburg and the Leningrad region
Maintaining consistency
Cleaning of any room is usually carried out from top to bottom , each time moving clockwise. The kitchen is no exception.
The first stage is preparation. Remove textiles (curtains, tablecloths, towels) and put them in the washing machine. Then empty all cabinets, drawers and shelves. Next, you should check the availability of rags, sponges, napkins, and household chemicals for various materials and purposes.
Emptying kitchen furniture and returning the contents to their place takes a lot of time, but allows you to quickly and effectively clean surfaces.
Each housewife has her own secrets for general cleaning, but there is a certain sequence that most people adhere to:
Ventilation grilles, window.- Lamps and cornices.
- Fronts, shelves and drawers of cabinets.
- Sockets and switches.
- Window sill and battery.
- Tile on the kitchen apron.
- Hood and stove surface.
- Countertop, sink and faucet.
- Appliances.
- Chair legs.
- Interior doors.
- Floor.
After cleaning, the kitchen area needs an influx of fresh air, so the process should be completed by ventilation.
Check spices and herbs for freshness
My mother could never understand why people would buy something in small quantities when buying a lot is more profitable. Dried spices and herbs have a shelf life of six months to a year. Do a smell test! Set a timer for eight minutes and smell each container of spices and herbs in turn to check their freshness. Write down the names of the ones you want to replace. If you need to buy several types of spices in bulk, purchase several glass spice jars from the same store. Here's a little tip to help you find the spices you need in no time: store them in alphabetical order.
Get rid of mysterious and unnecessary tools
In addition to the mystery-shrouded meat lying in the freezer, every average kitchen contains many mysterious tools - objects whose purpose you will never understand in your life. These things are brought to us as gifts, we buy them ourselves out of the blue. In addition, our kitchens contain space-consuming collections of identical items. How many garlic presses, potato peelers and bottle openers do you have?
I don't know how many drawers you have in your kitchen or what's in them, so it's up to you to decide whether you can complete this task in eight minutes or whether you can devote eight minutes to each drawer.
Make a quick decision as you open each drawer. In case of multiple copies of the same instrument, keep the best one. Then throw the extra copies in the trash or put them in a charity bag (as long as you donate them as soon as possible). Or, if you can think of a legitimate place for one of those extra tools, like a picnic basket or cooler bag, put it there. For mystery items, give them to someone or throw them away, but be sure to clear some space.
Cooking area
Cleaning the stove
Kitchen cleaning begins with the most contaminated areas - the stove, hood and oven. Remove the burners from the gas burner and wash them with warm water and soap. Electric stove burners are wiped with a damp sponge. Having freed the surface of the slab, a suitable product is applied to it using a sponge.
At the next stage, we move on to the handles - the removable ones can be easily washed with dishwashing detergent. If the elements are not removed, a toothbrush will help clean them - dip it in ammonia diluted in equal parts with water, and carefully clean the handles.
Removing grease and dust from the hood
To wash the hood, use a warm soapy solution. Wipe the outer part of the ventilation with a rag soaked in it, remove the foam with a wet, clean rag, and wipe the surfaces dry. Remove the filters and immerse them in a container with a soap solution. They are put back in after thoroughly washing and drying completely.
Cleaning the oven
Fill a suitable container with warm water and add a mild detergent. The removed oven grates are soaked in the prepared solution to make it easier to remove pieces of food stuck to them.
The oven needs to be washed with special products, or you can prepare an effective composition yourself: mix a quarter glass of salt with ¾ glass of soda, add a quarter glass of water. The paste is applied to the walls of the oven, avoiding holes.
For best results, the product should be left for several hours. You need to remove it with a plastic spatula. After this, all internal surfaces are wiped with a damp cloth. It is easier to remove dirt from an electric stove - you need to turn on the cleaning mode. After the end of the cycle, the remaining stains are washed off with a damp cloth.
Separate baking tools
Store cooking tools separately from baking tools. Also, choose cooking tools that you will store in a drawer next to your pots and pans. Likewise, use a drawer for baking tools next to where you store baking sheets, mixing bowls, and the like. When you need a garlic press, you don't want to have to push cookie cutters and a rolling pin to get to it. If you want your kitchen to be organized like a pro, line up your drawers and use drawer storage systems.
Plumbing area
Cleaning the sink
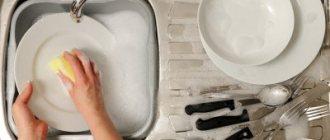
To clean the sink, it is better to use a special product - gel or milk. It is applied to a damp sponge and evenly distributed over the entire surface of the sink. Such products easily remove dirt and are washed off with warm water without leaving streaks.
Mineral deposits on plumbing fixtures are removed by a solution of water and vinegar in equal proportions - a toothbrush will help you reach hard-to-reach areas of the faucet.
Pipe cleaning
A method for removing mild blockages and unpleasant odors from a drain: 250 g of soda poured into the pipe, pour in the same amount of vinegar, and then rinse with plenty of water. You can also use ready-made products - alkaline ones are suitable for the kitchen; they cope better with fat deposits.
Fewer fake diamonds
I can already hear some of you saying, “Well! I won’t have to do this task since I don’t have any of those things in my kitchen.” But do you have disposable containers like the ones you put salad in at the store? Or maybe you keep every glass dessert jar you've ever had in your house? These varied collections take up a lot of space and are rarely used. They fall into a category I call “fake wealth.”
Cleaning Features
The kitchen is not only the favorite room of the household, but also the place where food is prepared. Specific contaminants on the surface of furniture and appliances are not always removed in a timely manner and become a serious problem. The task is complicated by various materials and the proximity of food products, which are not recommended to come into contact with aggressive components of cleaning products and detergents.
Appliances
The most problematic places in the kitchen are household appliances that are involved in cooking and storing food. In addition to standard dust and dirt, here the housewife is faced with greasy stains, traces of spilled liquids and carbon deposits. Some simple tips will help you cope with this problem:
Oven
The contents must be removed from it. Soak racks, baking sheets, molds in a detergent solution.
Treat the internal and external surfaces with a special agent to combat carbon deposits and fat deposits, let the active components work, remove the residue with a clean damp cloth and wipe dry.
You can find out how to remove carbon deposits in the oven here.
Plate
If its surface is covered with enamel, it is necessary to apply detergent and leave for 20 minutes so that the grease and carbon deposits soften.
Then treat with a sponge, pay special attention to problem areas around the burners, rinse thoroughly with a clean cloth and dry.
It is not recommended to use products with abrasive particles or hard scourers to avoid scratches.
Steel coating is more resistant to mechanical stress , but stains may remain on it. The processing algorithm for it will be the same, but you should avoid circular movements during cleaning, wipe dry and polish at the end of the process with a cotton cloth. For glass ceramics, only special sponges, scrapers and industrial products are used.
You can find out how to clean the grate of a gas stove from carbon deposits here.
Hood
The surfaces of the device can be easily washed with soapy water. The main problem – deposits on a grease filter made of aluminum or steel – may not be dealt with by the product if it has not been washed for several months.
It should be removed and soaked in soap and soda (15 ml of detergent and 50 g of soda), vinegar or ammonia (100 ml per 3.5 liters of water) solution, left for 20-30 minutes, brushed, rinsed with clean water and dried. After all manipulations, the filter is returned to its original place .
Fridge
The first step is to remove the content and revise it. Before cleaning, the appliance must be defrosted; it is better to do this in advance, otherwise the process of general cleaning of the kitchen will be delayed.
The next stage is shelves and containers. All parts must be removed, washed under warm water with a sponge or brush using detergent and dried. Proceed to cleaning the back wall of the device (condenser), here it is advisable to use a vacuum cleaner or a narrow brush with a long handle.
You can wash the internal surfaces with a gentle product that will not damage the structure of the plastic.
Moving from top to bottom, do not miss corners and recesses. Clean the drain hole and rubber seal, wipe everything with a dry cloth and leave the doors open until completely dry. Don’t forget about the outer surface; a weak soap solution will quickly remove all dirt from it.
Before cleaning household appliances, they must be disconnected from the power supply. Read how to clean your refrigerator here.
Furniture and countertop
Cleaning and disinfecting kitchen floor and wall cabinets, tables and chairs is an important stage of general cleaning. Step-by-step instructions for housewives:
Cleaning the interior surfaces of cabinets.
Empty shelves and drawers must be wiped with a microfiber cloth, preferably using a disinfectant spray. The contents are sorted, the excess is sent to the trash and arranged and put into place.- Treatment of external facades. You will need a soap solution and a sponge. If the furniture is made of wood, it is better to use special household chemicals for this material so as not to damage the structure.
- Washing accessories. Furniture handles absorb most of the dirt; they should be thoroughly treated with a detergent solution. If the parts are removable, it is better to remove them, clean them and return them to their original place. Metal and wood components must be polished using a special spray.
- Cleaning the countertop. The choice of product for these purposes depends on the material from which the table surface is made. For laminated chipboard and MDF, a solution of dishwashing liquid is suitable; for glass, an alcohol-based spray is suitable. To clean a wooden surface, use a minimal amount of liquid, dry thoroughly and polish with a beeswax-based product.
Chairs and stools are wiped last; special attention should be paid to furniture legs.
Floors
The final stage of kitchen cleaning is washing the floor . For these purposes, it is better to choose household chemicals that cope with various types of contaminants and have antibacterial properties. A product that contains chlorine is fundamentally unsuitable for kitchen floors.
Some housewives use folk recipes. For example, a soap-soda solution with the addition of a few drops of essential oil, water-alcohol in a ratio of 5:1 or vinegar (15 ml per 5 liters of water).
Once the equipment and detergent have been selected, the following steps must be completed:
- clear the floor of carpets and unnecessary objects (chairs, floor pots);
- sweep and collect small debris, crumbs and food debris;
- treat corners, baseboards, hard-to-reach places with a cloth soaked in detergent;
- wash the entire surface, moving from the window to the exit.
The floor must be treated twice. The second time, the rag must be wrung out well to prevent excess moisture from forming. When working with aggressive and volatile components, it is necessary to use personal protective equipment (gloves, respirators, aprons) and ensure air circulation in the room.
How to clean plumbing fixtures until they shine?
The basis of hygiene in the kitchen is a perfectly clean sink. Step-by-step instructions for cleaning it:
Remove dirty dishes and cutlery.- Clean the containers and soap dishes that are placed on it.
- Rinse the walls and bottom of the product with running water to remove any remaining food.
- Apply an industrial or homemade solution to the entire surface.
- Treat with a sponge until completely clean, rinse off any remaining detergent with water.
- Wipe the sink with a dry cloth to avoid streaks.
The sink cleaner should be selected based on the material from which it is made and the manufacturer’s recommendations. The product drain is capable of accumulating fatty deposits and particles of food debris, so it often becomes a source of unpleasant odor and has an unaesthetic appearance.
An industrial cleaner or baking soda with vinegar (15 g per 50 ml) will help remove obsessive odors and dirt. The liquid must be poured into the hole, left for half an hour, then filled with hot water.
Before using an industrial product, you must study the instructions on the label and make sure it is compatible with the material from which the sink and components are made.
Don't forget about the mixer. The chrome product must be cleaned of limescale, rinsed and polished. To prevent deposits from forming, it is necessary to wipe the sink and its parts with a dry cloth after each use.
This article will tell you how to eliminate smell from your kitchen sink.
Other kitchen objects
The window in the kitchen is a source of light and its amount directly depends on the cleanliness of the glass. Wash windows in any room in the same sequence , starting from the inside:
- Use a damp cloth to remove any accumulation of dirt and dust from the glass;
- clean the plastic parts of the structure in the same way, carefully wiping the corners and joints;
- if the contamination is significant, you can prepare a weak soap solution;
- treat the structure with a clean damp cloth and wipe dry;
- Using a spray bottle, apply ammonia-based product to the glass;
- Use a dry lint-free cloth to polish the surface so that there are no streaks left.
You can clean the outside of the window in the same sequence. If access to it is difficult, you can use equipment with a telescopic handle.
Lamps in the kitchen are an additional source of light. If it is impossible to remove the lighting fixture, you should use the proven instructions:
- Apply detergent to the chandelier using a spray bottle.
- Wait 10-15 minutes.
- A swab with a small amount of alcohol will help to clean the components and get rid of stains.
- Wipe the product with a dry cloth.
It is not recommended to turn on the device until it is completely dry.
Steel, aluminum or cast iron batteries also require careful care . It is not enough to wipe the external surfaces; the bulk of the dust is concentrated in hard-to-reach places, that is, inside the structure. A vacuum cleaner with a long narrow nozzle, a brush dipped in soapy water, household cloth gloves, sponges and special brushes will help.
Cleaning the refrigerator
Before cleaning the refrigerator, it is disconnected from the power supply. The main tasks are disinfection of surfaces and elimination of unpleasant odors. You can make an effective remedy yourself: dissolve a couple of teaspoons of soda in ¼ glass of water. A sponge soaked in this mixture is used to treat the shelves and walls of the refrigerator. After this, the surfaces are wiped with a damp cloth and wiped dry.
This home remedy cleans the freezer well: add a teaspoon of vinegar and dishwashing liquid to a glass of water. It is convenient to spray the resulting composition with a spray bottle. If it is not there, the solution can be applied with a sponge. Afterwards, wash the walls with a damp cloth and dry with paper towels.
Unpleasant odors
Avoid unpleasant odors in the kitchen . Their source can be a trash can, refrigerator, sewer, stove with burnt food residue, dirty dishes and sponges, spoiled food and cooking food, especially fish.
If a smell appears from the sink, you need to unscrew the siphon and remove any remaining food, clean the pipes and rinse all the rubber gaskets in the drain hole. Then pour baking soda into the drain hole and fill it with vinegar in a ratio of 1:2. Rinse the drain hole at least once a week with hot water and washing powder, soda, salt and other products.
When frying fish, add a few pieces of raw potatoes to the frying pan; the smell will definitely be reduced by at least 50%. After fish, rinse the frying pan and dishes with salt water, and wipe the cutting board with a slice of lemon. Soda or salt sprinkled on the surface of the stove absorbs the smell when cooking food.
After eliminating the causes of unpleasant odors, burnt dried orange or lemon peel, 4-5 teaspoons of coffee grounds and a little water, fried in a hot frying pan, and essential oils will quickly help fill the kitchen with a pleasant aroma
Tips on how to organize the inside of your closets
The fact mentioned above is that first you need to free them. Sorting content at the same time can save time. You need to prepare three boxes: the first for unnecessary things that can be thrown away, the second for items that can be given to someone, the third for things that will go back to the closets.
After cleaning the shelves and drawers, they need to be filled. To maintain order longer, you can use the tips of professionals:
- place items where they are most often used;
- do not store food and utensils in one place;
- divide content into categories so you know exactly where to find what you need;
- allocate a shelf for things that are used every day.
It is recommended to store in the upper sections:
- plates and cups;
- groceries;
- storage containers;
- cookbooks.
In the lower ones:
- utensils for cooking;
- household appliances;
- bowls, cups, cutting boards;
- household chemicals.
Cleaning up your kitchen cabinets is only half the battle; in the future, it is important to be careful and always return the contents of the cabinets to their place.
The system is the best solution
The main reason why great plans to clean an entire room in one day fail is the fear of a large amount of work.
You start cleaning the stove, tidying up the floor, looking at the closet... And you give up! Don’t reproach yourself—such burnout is considered an absolute norm.
It is much easier to put a neglected kitchen in order using a certain cleaning system - for example, a fly lady.
The name of the American technique is simply translated as “fluttering woman.” Its essence is to put the apartment in order not in one jerk, but gradually. This way you won’t get tired, and you will be able to achieve stable maintenance of order. Let's take a closer look?
- 1. The first rule will please lazy people and those who are constantly busy at the same time - do not spend more than fifteen minutes on cleaning. To do this, you should set a timer that will stop you with its signal. There is a certain logic in this - it is impossible to get tired in such a period of time, and you will have time to do quite a lot if you are not distracted.
An important point: of course, you can break this rule and add more time to cleaning. However, we still recommend using fifteen-minute intervals, since this time is considered optimal - a person can concentrate extremely and not react to distractions. Don’t forget to take breaks between sets if you want to change the fly lady system to suit you.
- 2. Cleaning is carried out in stages, so the second rule is to clean only one zone at a time.
Professional Services
Cleaning companies cope with general cleaning of kitchen premises quickly, and the result, thanks to professional equipment and household chemicals, is always perfect.
The standard set of services includes:
- Removing cobwebs, dust, dirt, including fatty deposits from external surfaces.
- Washing dishes.
- Plumbing cleaning.
- Furniture, including upholstered furniture.
- Taking out the trash.
For a fee, clients can order window cleaning, organizing cabinets, and cleaning the insides of household appliances.
Average price for services:
- washing dishes – 350;
- oven cleaning – 500;
- microwave oven – 350;
- refrigerator – 500;
- cleaning the inside of cabinets – 500;
- kitchen hood – 300 rubles.
Some companies charge hourly rates. You can find professionals to clean your kitchen through the recommendations of friends, by searching on the Internet, or on specialized contractor search resources.
In order to avoid encountering scammers, you need to carefully study the company’s website and customer reviews, check the relevance of your contacts and remember that professionals do not require payment for services before work.
Cozy atmosphere
The cleaning is finished. Now you need to look around the entire kitchen, not missing a single detail:
- Are the doors, external surfaces, surfaces behind the kitchen unit, and wall shelves cleaned well?
- Have you wiped down all the wood elements thoroughly? For example, a wooden cutting board. It must not only be wiped daily, but also cleaned of old stains. This can be done with a paste of soda and salt: mix them in equal parts, dilute with water, and clean the board.
- Have you paid attention to the tiles, and especially to their joints and seams? If you see dirt there, an old toothbrush will come to the rescue, which has already helped you during cleaning: soften the dirt with soda or vinegar, and then clean it with a brush and a cleaning agent.
So, everything shines and shines with purity. The most pleasant part remains - making it cozy and beautiful. Lay out fresh, clean tablecloths, napkins and towels. Hang curtains on sparkling clean windows. Throw away old sponges and cloths and replace them with new ones.
Place new napkins on the dining table. Decorate the table with a vase of flowers or fruit. A clean, shining space will become truly homely and cozy!
