The condition of the furniture deteriorates over time. Regardless of operating conditions, the finishing coating loses its strength, becomes covered with a network of small cracks, and becomes dull or cloudy.
Scratches and abrasions appear, which spoil the appearance of the furniture and make it unsuitable for use in the interior of residential or public premises. However, in most cases the condition of the surfaces can be restored, and sometimes it is possible to make the furniture more attractive than it was before.
Polishing furniture: choosing the right folk remedy
Often, homemade polish is made with a fatty base (olive oil, petroleum jelly, turpentine or wax) or with the addition of vinegar, lemon and ammonia. It is recommended to mix the main ingredients immediately before use. Only then will they be effective
To understand how to polish furniture in a particular case, it is important to know some of the features of these substances.
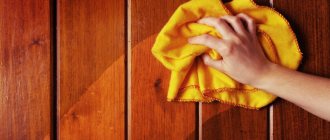
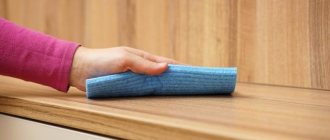
Scraps of cotton or flannel fabric are used as cleaning accessories. The ideal option for this procedure is suede, soft leather and cotton pads.
"Fragrant" ammonia
A mixture of ammonia and water is suitable for cleaning kitchen units or bar counters. The suspension does not leave streaks on glass surfaces, as well as fittings made of metal.
To prepare such a solution, you will need:
- heat 1 liter of water;
- add 2 tsp. ammonia;
- stir the suspension thoroughly;
- pour it into a spray bottle;
- After applying the mixture to the countertop, rub the stains with a cloth (preferably lint-free).
This composition is perfect for all painted and varnished items. Moreover, it is stored for several years.
"Powerful" vinegar essence
Vinegar-based compositions (70%) are used to degrease objects and also clean them. Since an acidic environment neutralizes alkaline compounds, it is used to remove limescale that remains on tables after mugs. To obtain such a disinfectant for polishing furniture, you need to dilute 2 tsp. essences in a liter of warm water.
Original tandem - lemon and vegetable oil
Lemon juice and olive oil cannot be used for polishing furniture varnish, since the top layer of the surface will not be able to completely absorb the greasy emulsion. In addition, after it, antiques with fine finishes are often covered with a “haze.”
All other products can be treated with a simple product made from:
- 250 ml of any vegetable oil;
- ¼ cup lemon juice;
- The liquid is stirred until it becomes homogeneous.
Before polishing wood with oil, you need to check how it “reacts” to the resulting mixture. As an experiment, the composition is applied to a small area of the table and left for some time. If nothing happens, then cover all parts of the trellis with polish.
Wax and its “competitors”
Furniture polishing paste with wax removes all cracks and chips. Essential oils of tea tree, eucalyptus, lavender or juniper are added to the mixture as a disinfectant ingredient. The resulting composition is applied to objects, wait until they dry and only then polish them.
There is another simple way to make furniture shiny:
- pour 1 glass of beer into the pan;
- wax/paraffin is immersed in liquid;
- bring the mass to a boil;
- leave it for a while to cool down.
You should not touch cabinets polished in this way, because all fingerprints will appear on them. Among other things, some housewives rub the set with regular talcum powder or baby powder, others use denatured alcohol, shellac or turpentine.
In addition, you need to know what else to polish furniture with if you don’t have polish. Many people liked the tea leaves. It not only cleans the products, but also gives the wood a richer and deeper shade, refreshing it. To do this, you will need to squeeze out the tea leaves thoroughly, transfer the mixture into a piece of thick material and roll it into a bag. Use the resulting ball to wipe the entire set, and then polish it until shiny with flannel.
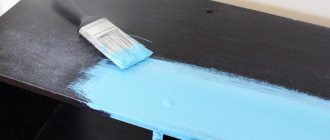
Compositions for varnished wood products
Such furniture polishes belong to a separate group. The fact is that if interior items have a varnish layer, they cannot be coated with universal compounds that dry out the surface. In this case, the polishing liquid is required to create additional protection - a durable film over the varnish layer. Then direct varnishing becomes unnecessary.
Industrial
The most famous furniture polishes:
- Pronto - the product removes stains from furniture well and also masks scratches on its surface;
- Chirton is a wax-based product that effectively removes dust and dirt from the surface of wood and improves its structure;
- Emsal - quickly copes with dust, as well as water and grease stains. Due to the presence of natural oils in the polish, it refreshes the color of wood, giving it a natural shine;
- Luxus – cleans the surface of wooden furniture, giving it a neat, well-groomed appearance;
- Mebelux - designed to care for wooden surfaces, extending their service life.
These and other types of polish can be purchased at a hardware store or market.
Mebelux
Pronto
Luxus
Emsal
Chirton
Folk remedies
In addition to industrial compositions, it is permissible to coat wooden furniture with folk remedies. They also carefully care for the surface, eliminating scratches and minor damage. They are considered the best of them.
Potato tubers
To polish wood, take 1 tuber, peel it and cut it in half. To do this, it is advisable to take a large potato. Then we pass it along the wood façade that needs polishing. After this, wipe the set dry with a rag. Furniture should not be cleaned with a damp cloth or sponge, as this will remove the shine and remove the polish. Lacquered interior items cannot be cleaned with soapy water, as it will damage the surface of the product.
Cutting the potatoes
Processing the coating
Wipe with a dry cloth
Burdock oil
To restore polished furniture, you need to apply oil to a cotton swab or soft cloth, and then gently wipe the wood. Upon completion of the work, wipe the treated surface with a flannel scrap.
Choosing burdock
Wipe the surface with the composition
Vegetable oil and flour
Polish wooden furniture pieces with a mixture of flour and oil. The products need to be mixed in equal proportions and then distributed over the surface of the furniture using a rag. This product polishes the surface of scratched furniture well, which after treatment acquires a well-groomed appearance and gloss.
Combining the ingredients
Wipe the surface with the composition
Table vinegar
If the set is very dirty, it can be treated with vinegar. It will add shine to glossy furniture and disguise damage. After using vinegar, as a rule, the room needs to be ventilated so that the unpleasant smell stops “haunting” the set.
Wipe down furniture with vinegar
Ventilate the room
Sauerkraut brine
The furniture is wiped with a rag soaked in brine. The stronger the brine, the better it polishes the surface. These are not all folk methods that restore the base of wooden furniture. But such recipes are considered the most effective, they last a long time, are safe and affordable.
Homemade polish - make it yourself
The advantage of homemade polishes is that you know what ingredients the product consists of. It will not harm your health or your furniture.
Let's look at several recipes for making polish at home
Recipe 1
This DIY furniture polish recipe is great for items that have been exposed with varnish.
- Take 1 cup of olive oil and a quarter cup of lemon juice. You can add a few drops of essential oil to suit your taste.
- Mix well and pour into any container with a lid.
- Apply a few drops to a clean, soft cloth and wipe down the furniture. Remove any remaining grease with a clean, dry cloth.
Recipe 2
By preparing a product for caring for a wooden piece of furniture using this method, you can remove minor damage and microcracks on furniture made from wood that is not varnished.
You will need the following ingredients:
- Vaseline oil - can be replaced with flaxseed oil;
- wax - any wax you can buy (beeswax, soy wax);
- Any essential oil of your choice - you can do without it.
Step-by-step cooking instructions:
- Prepare a water bath - take a saucepan larger in diameter so that a heat-resistant bowl or mug can fit in it. We put a pan of water on the fire and put a bowl or mug in there.
- Melt the butter and wax in a bathhouse, stirring and bringing to a homogeneous consistency.
- Cool slightly and add essential oil, stir.
- Pour into a wide-necked jar, as the mixture hardens after cooling.
Recipe 3
This DIY furniture polish removes dust and dirt very well, refreshes the color, and moisturizes the wood. It is prepared like this:
- Take 1 glass of alcohol (medicinal grade) 1 glass of vegetable oil (any you have at home).
- Pour into the bottle and shake well.
- Wet a dry, clean cloth and wipe the surface of the furniture.
Recipe 4
This kitchen appliance care product will help remove greasy stains:
- Prepare a water bath as described above.
- Take 1 glass of beer and 50 grams of beeswax - melt it all, stirring.
- Cool, pour into a jar.
- Apply a thin layer of product to a clean sponge.
- Wipe the grease stain very well.
Recipe 5
This furniture polish is also easy to make at home. It can be used on wood surfaces that are not varnished.
Prepare for him:
Cooking instructions:
- Melt the oil and wax in a water bath.
- Remove from heat. Pour in water in a thin stream, whisking with a mixer until smooth.
- Apply the cooled mixture to a rag, polish the surface until all the product is absorbed into the wood.
In addition, wax not only protects the wood, but also reveals and emphasizes the beautiful structure of the wood.
Recipe 6
If you do not have the time and opportunity to prepare and select the above recipes, we offer the simplest and most accessible to each of you.
This polish will help restore color, remove microcracks and shallow scratches.
You can quickly make furniture polish with your own hands from an ordinary chicken egg, which you always have in your refrigerator:
- Take 1 chicken egg.
- Add 2 tablespoons of water to it and beat until smooth.
- All is ready. Apply the resulting product to a soft, non-synthetic cloth and rub vigorously into the surface until a shine appears.
Helpful Tips:
- After polishing work, let the material sit for 1-2 hours. Afterwards, wipe with a dry velvet cloth and the surface will become matte.
- By treating wooden furniture using any of the above methods, you will protect it from drying out.
How to get rid of it?
You can deal with defects using wax, which removes them by polishing. Pencils for car restoration have a good effect. You can also purchase special compounds designed to combat scratches on furniture.
Wax
You can get rid of scratches using wax. Procedure:
- wash and degrease the surface to be treated;
- apply a small amount of wax to a flannel cloth;
- rub the scratched area in a circular motion;
- When the wax completely fills the recess, you need to remove its remains - use a paper napkin for this.
In addition to the creamy polish, you can use a hard wax pencil designed for caring for doors and laminate floors. To ensure that the product fills the entire surface of the scratch, it is melted in a water bath.
Wax masks defects well, but after several cleanings it will be washed off and the scratch will appear on the cabinet again. To prevent this from happening, it must be sealed. To do this, use a halo-free varnish or a laminate marker. You need to select products that match the tone of the kitchen unit.
Car pencil
To get rid of scratches on kitchen furniture, you can use a car pencil. It is chosen depending on the type of damage. So, a corrector pencil will help you cope with minor defects.
A wax pencil is more resistant to moisture and allows you to get rid of deep damage. Of course, upon closer inspection the scratch will be visible, but from afar it is not noticeable and almost invisible.
Pencil paint is the most effective tool. However, it is problematic to match it to the same tone as the kitchen, but if you manage to purchase a composition identical to the color of the set, then not even a trace of the defect will remain.
To achieve the desired result, use the pencil as follows:
- Clean the kitchen from dust and dirt.
- Degrease the area around the edges and inside the scratch.
- Shake the pencil.
- Remove the cap and insert the applicator. By pressing on the rod, it is filled.
- Guide the pencil along the damage, gently pressing on the rod. During processing it will fill and become invisible.
- Remove excess product with a dry cloth. You need to start removing them right away; if you miss the moment, the composition will harden into an unsightly lump.
- Leave the product to harden for 2 days.
When the paint adheres firmly to the surface, the kitchen is polished. Pencils have their pros and cons.
Main advantages:
- versatility - they can be used on any surface;
- safety for glossy finish;
- ease of use;
- great visual effect.
However, they also have disadvantages. So, pencil-paint is not cheap. The average price is 450 rubles. Although the manufacturer promises a water-repellent effect, after some time the scratch will appear on the kitchen surface again and the treatment will have to be repeated.
Special products for furniture sets
In addition to available products, there are special compositions on sale for removing scratches from kitchen surfaces. Top 3 best products:
Furniture pencil Novator
There are products on sale in different colors. The pencil can be used to remove minor defects, chips and cracks on both glossy and wooden surfaces. Price – 60 rubles.
Restoration marker Airchimedes
It is suitable for removing scuffs and scratches on a laminate kitchen. The pencil dries quickly, does not leave smudges, adheres well to smooth surfaces and does not fade in direct sunlight. Price 180 rubles.
Retouching for furniture Master City
The product is available in a bottle with a brush. There are different colors on sale. Scratches can be removed by painting them over. Retouching is used to remove surface defects, without indentations. Price – 150 rubles.
When choosing an anti-scratch product, you need to make sure that it is suitable for treating glossy surfaces.
Recommendations
Leading furniture manufacturers claim that it is easier to protect their products from damage in a timely manner than to restore them, and recommend:
- Use protective accessories. This is especially true for wooden countertops. Tablecloths, cutting boards, and hot pads minimize the risk of mechanical damage.
- Remove excess moisture. Wood can become deformed when exposed to water.
- Use only soft sponges and rags without an abrasive layer for cleaning. They leave micro-scratches on furniture, which will become a big problem over time.
- Choose only care products intended for this material. Compositions with aggressive and abrasive components are strictly not recommended.
It is necessary to remove stains from wooden surfaces in a timely manner, otherwise damage will appear after attempting to remove old stains.
If you are interested in how to remove small and deep scratches from various surfaces and objects, take a look at this section.
Stages of work
The wood polishing process consists of several stages. In order for the surface to look perfect after polishing, it must first be sanded, then covered with a layer of primer and only then thoroughly polished.
Surface grinding
This procedure does not cause any particular difficulties, but it takes a lot of time to give the tree a perfect look.
The surface must be free of chips, burrs, cracks and other defects. First, the wood is treated with sandpaper No. 46-60, then with abrasive material No. 80-100 and finally sanded with sandpaper No. 140-170.
After sanding, the wood becomes clean, smooth, without protruding fibers or lint.
Padding
At this stage, the prepared wood is primed using shellac polish and a linen swab. It is not recommended to use cotton or wool fabrics for these purposes; they leave behind small fibers and lint, which are clearly visible on the polished product.
To apply the primer, put a small amount of polish on a swab and begin rubbing in different directions. With this approach, small cracks and pores are most effectively filled, and impregnation occurs better.
The primed product is left to dry for 2-3 days. After the varnish has dried well, it is necessary to sand the wood with a fine-grained abrasive material. The resulting dust is removed with a rag.
Polishing
After priming, the so-called polishing is performed. A couple of drops of vegetable oil are applied to a tampon made of linen fabric (this facilitates easier sliding) and a little liquid shellac polish is poured. For work, you can further dilute the shellac-based composition (usually an 8% solution is used).
Place the tampon on the side and make smooth circular movements. Polishing is carried out in three passes, where each layer must dry, sand with fine-grained sandpaper and be cleaned of dust. A slight gloss can only be seen after applying the third layer of the product.
Polishing
To polish the wood, that is, to obtain the perfect shine, you should treat the surface of the wood with a fine-grained abrasive material (sandpaper) soaked in vegetable oil when the third layer of polishing is completely dry. After this, drip a little vegetable oil and polish onto the tampon.
The strength characteristics of a polished coating can be improved by applying not one, but several layers. At the end of sanding, it is recommended to treat the product with a soft cloth soaked in a solution of polish and water. Excess oil can be removed by wiping the wood with ethyl alcohol. At the same time, the surface becomes smoother.
Considering that the quality of polishing is affected by compliance with all the subtleties of the process, you should not reduce the number of layers applied and the time for their drying. Otherwise, this will lead to a deterioration in the decorative qualities of the coating.
Polishing of varnished wood must be carried out in strict accordance with the technological process; only then can you obtain the most effective, fairly durable surface with a mirror shine. If you have no experience in this area, then it is recommended to first practice on small samples and then move on to more expensive products.
Useful tips
Polishing is a largely creative process. However, it is better to act according to proven methods and not violate technology.
How do you polish?
ClassicFolk
It is recommended to follow some tips:
- During operation, do not apply too much force or put pressure on the machine. This may cause the coating to overheat;
- If marks or scratches are clearly visible, you should not start polishing. It is necessary to carefully prepare the surface. sometimes this is neglected, hoping that the flaws will disappear during processing. However, they will remain and will be clearly visible;
- Matte finishes do not polish. Sometimes they become covered with shiny areas, which are restored using scratch paper.
By following these simple tips, you can get high-quality coverage and avoid annoying mistakes.
Furniture polishing is a procedure that allows you to restore old products and correct errors made during operation or transportation. The polishing technology is simple, but high quality can only be achieved with skills and experience. Otherwise, the flaws in the coating will only be exacerbated. If you don’t have confidence in your abilities, it’s better to entrust the work to specialists.
The benefits of upgrading your furniture yourself
Most people who own old furniture do not want to get rid of good, durable products; they prefer to restore them, change the color, and fit them into the style of the existing interior. Some people want to add value to an item before selling it. Whatever the motives, to save money, both on repairs and on the purchase of new things, many prefer to do restoration work with their own hands. Such actions have a number of significant advantages, namely:
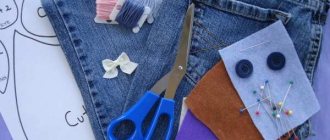
- Minor cosmetic repairs can be done using improvised means, using leftover wallpaper, textiles, leather, and other materials.
- After a high-quality update, the products will last for a long time and will not be inferior in appearance to new models.
- During the restoration process, owners can show their creativity and create an item that will complement any interior.
- With independent recovery, a person gains experience, masters interesting techniques and methods, and later will be able to use them and perform similar actions more efficiently.
Polishing technology
The wood polishing process is carried out in several stages:
- surface grinding;
- applying primer;
- polishing;
- polishing.
Surface grinding
The sanding process is not particularly difficult, but it takes a lot of time to give the wood the desired look. The wood surface intended for finishing should not have burrs, chips, cracks or other irregularities. To do this, the tree is processed in 3 stages:
- sandpaper No. 46-60;
- sandpaper No. 80-100;
- sandpaper No. 140-170,
until the surface becomes smooth and glossy.
Polishing with abrasive material
Sanding is done with a wooden block wrapped in sandpaper along the grain of the wood. After sanding, the surface is wiped with a dry, clean rag, moistened with water and wiped with a dry rag again. A pause is maintained until complete drying for 2 hours and processed with sandpaper No. 120-140 until the remaining wood fibers are completely removed. If necessary, the operation is repeated several times until the wood is given a glossy finish.
Application of primer
The priming process is carried out using a special swab by applying varnish to the wooden surface. The tampon must be made of linen fabric (does not leave fabric lint).
All work processes are performed in the following sequence:
- the swab is impregnated with varnish and with its help the entire surface of the wood is treated until a uniform coating is formed;
- a pause is maintained until the varnish is completely dry, sanded with fine-grained sandpaper and wiped with a clean dry rag;
- apply an additional 2 layers of varnish;
- a composition is prepared consisting of 1 part polish and 1 part varnish, which covers the entire surface;
- The wood is dried for 2 days.
Polishing
The polishing process consists of applying polish to wood and is performed in the following sequence:
- A small amount of vegetable oil is applied to the linen swab for better glide over the surface being treated;
- Using a swab moistened with polish, carefully wipe the entire surface;
- the processing operation is carried out 3 times with pauses after applying each layer until the polish dries completely;
- the wood is treated with fine-grained sandpaper and wiped with a dry rag (after each time the polish is applied).
Guitar Body Polishing
Polishing
In order to polish the wood to an ideal state, working operations are performed several times until the desired result is achieved.
The following work is carried out:
- the wood is treated with fine-grained sandpaper dipped in vegetable oil;
- A small amount of vegetable oil and polish is applied to the swab and the entire surface is treated (the operation is repeated several times).
When carrying out polishing operations, when varnish or polish is used, it is necessary to follow the entire technological process to create a durable, smooth, glossy finish on the wood. If you have certain skills and appropriate substances, you can finish wooden products at home.
LiveInternetLiveInternet
–Tags
–Categories
- Scrap kits (511)
- Romantic scrap sets (146)
- Children's scrap kits (115)
- Flower scrap kits (83)
- Fairytale scrap kits (66)
- Summer scrap kits (61)
- Vintage scrap kits (55)
- Spring scrap kits (50)
- Winter, Christmas and New Year scrap sets (37)
- Culinary scrap kits (24)
- Autumn scrap kits (23)
- Marine scrap kits (21)
- Scrap kits – handicrafts (12)
- Easter scrap kits (9)
- Wedding scrap sets (8)
- Others (7)
- Glamorous scrap sets (7)
- Calendars (5)
- Gothic scrap sets (4)
- Steampunk scrap kits (1)
- Everything for a diary (118)
- Design of a diary and “decoration” (67)
- flash (34)
- My designs (16)
- For beginners. (14)
- Avatars (8)
- Blog optimization (3)
- To my readers (62)
- Animation (57)
- Handicrafts (45)
- Icons (25)
- Online shopping (19)
- Interior design (18)
- Desktop wallpapers (10)
- Economics, politics, just thinking out loud.. (4)
- DIY (3)
- Frames (1)
- Html (for post design) (1)
- Home Economics (21)
- Women's tricks (7)
- Painting (181)
- Health (29)
- Interesting (54)
- Clipart (337)
- Collages (12)
- Beauty (141)
- Cooking (997)
- Sweet pastries and dough products (399)
- Master classes (305)
- Salads and snacks (196)
- Savory baked goods and dough products (169)
- Other (123)
- Dishes for children (73)
- Meat dishes (73)
- Dessert and cakes without baking (63)
- Main courses (59)
- Poultry dishes (58)
- Fish dishes (42)
- Casseroles (22)
- Canning and preparations (21)
- Cooking in a slow cooker (13)
- Borscht, okroshka, solyanka (6)
- Rabbit dishes (2)
- Fashion and beauty (27)
- Postcards (47)
- Poetry and prose (89)
- Psychology (6)
- Dividers (17)
- Frames (59)
- PNG (for photo design) (5)
- Drawing with children (1)
- Photography as art (90)
- Photoshop (87)
- Masks (12)
- Photoshop lessons (41)
- I'm a mom (66)
- Speech therapist classes (7)
Methods for polishing furniture at home
Despite its apparent complexity, polishing is not a high-tech process and is quite accessible to do it yourself. Its only drawback is that it is labor intensive; the work requires care, time and effort.
Felt
Felt
The main method of polishing a new coating is to apply a polishing compound and treat the surface with felt or felt material. To obtain a mirror shine, you have to use special devices - attachments for an electric drill or grinding machines, otherwise the procedure will take too long.
Polishing technology has been known to people for a very long time. It has been improved, supplemented, and improved over thousands of years. Today, at home, you can use different techniques, which are chosen depending on the initial condition and type of coating.
Classic polishing
Ancient polishing methods differ markedly from modern ones. In practice, this is a separate technology that is rarely used today. Simultaneous application and polishing of a varnish composition or polish is carried out. This is shellac tree resin dissolved in ethyl alcohol.
The polishing process is carried out using a swab. Take a piece of clean linen cloth the size of a handkerchief. A lump of cotton wool the size of a large plum is placed inside. A little polish is poured into it, wrapped in a cloth and the surface begins to be processed in a circular motion.
The composition impregnates the tampon and fabric and is applied in small quantities to the surface. It dries immediately on it, so you need to act quickly, without stopping. If the swab is stopped in one place, the polish will dissolve the already created layer and ruin the entire work.
Expert opinion Kokovin Dmitry Vasilievich Furniture restorer
Classic polishing is a complex procedure that requires experience and skill. In addition, it is very difficult to get natural shellac today, so this technique is rarely used. Basically, it is used by master restorers to restore antique furniture.
Traditional methods
Folk polishing methods are quite simple, but quite effective. As a rule, they involve treating the surface with soft materials using a fine abrasive, for example:
Dentifrice
Toothpaste
Chalk
Talc
To reduce heat due to friction, oil (sunflower, linseed or synthetic) is used. It is applied to the surface or to a polishing block, which eliminates the risk of overheating and damage to the varnish layer. To simplify the process, make a mixture of abrasive (chalk, tooth powder) and oil filler (linseed, sunflower oil).
Polishing pastes or compounds
In furniture production, special compounds are used to polish the surface to a mirror finish. They are rarely found on the open market, as they are supplied in large packages. It is not advisable to purchase them for household use.
However, there are effective and high-quality pastes for polishing car coatings. They are sold in small containers (1 kg, 800 g, etc.), and to treat a small area you can buy a very small amount of material.
One such composition is 3M paste, which is available in several forms:
- No. 1. Used for rough (primary) processing of surfaces after grinding. Removes small marks and abrasive marks;
- No. 2. Brings the surface to a mirror state;
- No. 3. Brings the coating to its final state and gives the surface a durable protective layer.
In addition to the basic compositions, there are intermediate ones - numbers 1.5 and 2.5. These compositions simultaneously possess the properties of lower and higher materials.
There are other polishing compounds on the market. There are hard pastes (such as GOI) that are used for polishing hard surfaces. However, most materials are made in the form of thick pastes (the consistency of sour cream or toothpaste), which are more convenient to apply and work with. They all have approximately similar qualities and allow you to effectively and quickly bring the surface to ideal condition.
Special wax
The product is professional. Wax can be purchased at any store. Can be used on varnished and polished surfaces.
There are two types of wax on sale:
- Soft . Using this product is easy and quick. The wax is carefully rubbed into the desired place. If the scratches are massive, more material will be required to remove them.
- Solid . It costs more than the soft one, but the product is effective. It is advisable to use it by people who already have experience with the product. Hard wax must be melted, applied to scratches and carefully sanded down the damaged area.
There are other available means and proven methods that you can use without compromising your health and family budget.
Industrial polishes - are they worth buying?
Industrial polishes contain special substances that fill microcracks in the furniture surface, as a result of which the structure of the material becomes even and smooth - polished.
Today, store shelves are filled with a variety of products from different manufacturers. They, to one degree or another, make care easier, but how safe and effective they are is always up to the consumer to evaluate after purchase. This is a matter of personal choice.
Furniture wax is a good alternative
You can find furniture wax on the shelves of hardware stores. This substance has been used to coat furniture for centuries. And today it ranks first in wood processing and care.
What are the advantages of using wax:
- furniture can withstand long-term loads;
- wood does not lose its texture, retaining natural warmth;
- the velvety properties of the material are preserved;
- after coating, the color of the product becomes more expressive;
- the ability to choose any tone during restoration;
- The thick consistency fits well on the surface of the wood, filling all cracks and scratches.
- furniture wax should be applied to clean, open-pore furniture (so that there are no paint coatings);
- a labor-intensive process when the surface is varnished (needs to be thoroughly cleaned).
Wax furniture polish AMWAY
This is the option when you can trust the manufacturer, because more than one housewife has already noted the effectiveness of this brand’s products for various purposes.
An excellent Amway polish, which has established itself as an ideal assistant for the care of wooden and lacquered furniture.
- creamy structure - does not flow, does not drip;
- fresh lemon aroma - non-toxic;
- convenient aerosol can;
- easy to use.
How to polish a varnished wooden surface?
The final result largely depends not only on the composition and tools used, but also on the technique
It is very important to pay attention to factors such as:
- nature of movements;
- pressure force;
- dwell time between stages.
To obtain the perfect gloss, polishing is divided into three stages, each of which has its own characteristics. At the first stage, most of the irregularities are smoothed out. A disk or swab soaked in the composition is moved over the surface of the wood in short zigzag movements, returning back in a straight line. You should move continuously. Do not hold the disk with polish at any point, because with prolonged contact the polishing solution can corrode the varnish. This will create a cloudy stain that will be very difficult to remove.
After each soaking of the swab with polishing liquid, it is returned to the surface of the wood with a sliding movement. To improve glide, a few drops of linseed oil are periodically applied to the tampon.
The wood is then processed using a sander and discs of varying degrees of grain. At the very beginning, it is recommended to use a disc with a grit of 600 or 800, gradually moving to finer ones (1000, 1200, 1500). During work, do not allow the disk to become clogged with dust. Any dust that appears is immediately removed using a vacuum cleaner or lint-free cloth. When changing the disc to a smaller one, be sure to completely remove the dust from the previous one, since along with it, particles of abrasive from the disc that was previously polished remain on the wood.
When using the machine, you should choose a moderate or low speed. At high speed, the varnish heats up and begins to stick. Polyurethane and nitro varnish are especially sensitive to overheating. These varnishes are best polished at the lowest speed or by hand. Oil and acrylic varnishes withstand heat better, so the disc rotation speed can be higher.
After the first stage, it is recommended to take a week's break so that the remaining solvent disappears and the varnish dries well. Then polishing is repeated, but a less concentrated polish is used. This time the swab is moved over the surface using movements in the shape of large figure eights.
After the second drying, which takes from 7 to 10 days, final processing is carried out. It's called polishing. They go over the wood very quickly with a swab moistened with alcohol or white spirit. This manipulation helps remove polish residue from the wood, especially its oil components, which do not have time to evaporate during the drying period.
How to Add Shine to Polished Furniture
It also happens that after cleaning or simply over time, polishing loses its shine. How, in this case, can you restore the shine of polished furniture without resorting to expensive and dangerous chemicals? There are several proven options.
Wax
The first and most popular option is wax. A piece of pure wax without impurities can not only restore the shine to the surface, but also get rid of minor scratches and damage. The main thing in this matter is not to get too carried away with rubbing, apply the wax in a thin layer, otherwise the surface will become matte and completely lose its shine.
Vinegar solution
The second option is also very simple - it is a mixture of vinegar and vegetable oil. Soak a soft, lint-free cloth with this mixture and rub the surface until shiny, then wipe with a dry cloth to remove any remaining product.
White spots from alcohol
Liquids containing alcohol leave white spots due to the chemical activity of the solution. Alcohol molecules react with the molecules of the varnish finish, destroying it, and the transparency of the varnish is impaired. Minor damage to modern varnish can be eliminated by polishing. To do this, use a thin abrasive paste to remove the damage until the polish remains intact. The varnish will become thinner, but there will be no stain.
Preventive measures: cover the tabletop of expensive furniture with organic glass cut to shape.
How to repair chips?
A chip is a significant defect that is not as easy to fix as a scratch. If a piece of wood or chipboard falls off a tabletop, drawer, or leg, you will need to restore it manually. For this we use:
- Furniture putty. It is best to use nitroester or polyester based putty. It holds much stronger than other varieties. It can even restore surfaces subject to constant stress, such as countertops and drawers. The restoration is carried out in two stages. First, apply the main layer, and after it dries, another one is applied. Excesses and irregularities are sanded with sandpaper and polished with a rag 2-3 hours after applying the putty.
- Hard wax. Suitable for restoring large chips. It is selected according to the color of the furniture; if the desired color cannot be found, take several colors and mix them. Before application, the wax is melted with a soldering iron and then sculpted onto the chipped corner. Excess wax is cleaned off with a spatula, and after hardening it is sanded. To recreate the wood pattern, furniture can be tinted with a furniture marker or paints.
- Furniture edge. If the corner edge was damaged by a chip, then after restoring the corner, it also needs to be restored. The old edge is heated with an iron and carefully removed. A new melamine tape of a suitable color is glued on top, ironing it with a hot iron.
What to look for when choosing polished furniture?
If scratches appear on polished furniture, lubricate them with shoe polish of a suitable shade, then polish with a woolen or cloth cloth
A few useful tips for caring for polished products will help preserve their appearance and also significantly increase their service life.
Dry clean all surfaces daily to avoid accumulation of dirt, dust and other foreign particles. Try not to use household chemicals, especially if you have allergies in your family. It is better to give preference to natural cleaning products; they are hypoallergenic and effectively clean any glossy finish. When cleaning, wipe the facades only with soft fabrics (flannel, velvet, suede, felt, pile, wool, etc.), with their help you will prevent scratches. Do not place hot objects (mugs, kettles, pots, irons, etc.)
etc.), or purchase special stands for them. If there are carved elements on the furniture, they should be cleaned using a soft bristle brush. To avoid tarnishing the surface, do not use alcohol, cologne or acetone to remove stains. An antistatic agent will help reduce the accumulation of dust; it should be sprayed in a thin layer after each cleaning. When arranging furniture, please note that polished items are not recommended to be placed next to heating devices. It is necessary to avoid direct sunlight on glossy surfaces so that the color does not fade over time. Monitor the humidity in the room; its lack or excess can lead to deformation of wooden elements.
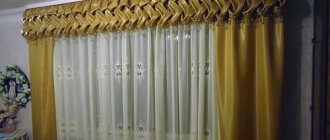
Chic set of polished furniture for the living room
Tags: wood, furniture, polish
About the author: admin4ik
« Previous entry
Safe chemicals and improvised means
The varnish coating is sensitive to abrasive cleaning agents, chemical solvents and mechanical stress. It is unacceptable to clean the polished wall or cabinet doors with a wire brush, acetone or gasoline. With such care, furniture polish will, at best, become dull, and at worst, it will crack, crumble and crumble.
Today, hardware stores offer a wide selection of specialized products for the care of polished furniture. The use of each of them gives a certain effect, which must be taken into account.
Here are some of the most popular products used to care for furniture with varnished surfaces:
- Wax-based polishes - Joy By Joy, Pronto, Chirton, Emsal.
- Compositions with a tinting effect - Pronto, 5+, Emsal.
- Products that create a protective layer are Diva, Mebelux, Luxus.
- Based on silicone - “Cinderella”, “Anti-dust”.
These tools are very easy to use. It is enough to apply a small amount of the composition on a dry cloth and polish the varnish surface to a shine.
Before starting cleaning, you need to test the product by treating a small area of the surface in an inconspicuous place.
To avoid damaging the varnish layer when removing stains, do not use hard metal brushes or scrapers. It is better to use cotton or flannel napkins, cotton pads, and soft brushes to remove dust. Sticky wax or plasticine can be removed with a wooden stick or spatula.
How to remove dirt from polished furniture
To wash dirt from home furniture, you can use a special chemical solution from the manufacturer or improvised materials. You can even wash the surface with tooth powder dissolved in ammonia.
It is also necessary to prepare means for treating the surface of the product.
Preparation of a special solution
To remove dirt from polished furniture, you can use a special solution and antistatic agent for clothing, hair shampoo and several glasses of water at room temperature.
Folk remedies are suitable for preventive cleaning.
The resulting mixture will get rid of stubborn stains, grease and dust.
Use of beer
Beer is an excellent way to remove ink stains, stubborn dirt, grease and paint marks. A dark, intoxicating drink can remove ink, and a light drink with added sugar can remove fat and the rest.
Photo: example of a polished table before and after.
When using beer as a cleaning agent, remember that furniture polishing does not tolerate icy liquids.
Olive oil or wine vinegar
If small scratches appear on the surface, it is recommended to use a mixture of olive oil and wine vinegar (or maybe some red wine).
The oil can be used on almost any surface, except those that are highly absorbent.
After mixing the solution, apply the mixture to the surface and rub it with an old toothbrush. After a few minutes, you need to wipe the cabinet or table with a flannel napkin.
Oil protects wood from moisture.
Burr oil
You can quickly remove dirt, greasy stains or white marks from varnished furniture with burdock and linseed oil. A mixture of pure gasoline, denatured alcohol and the indicated oils will be useful. It will help remove grease, stubborn dirt, scratches, paint marks, pen marks and a number of other troubles.
Polishing furniture improves its appearance and improves many functional characteristics.
In this case, the smell of the infusion will help remove denatured alcohol and a cloth napkin.
Removing stains
How to clean stains that appear on a surface coated with polish?
The following traditional methods are suitable for this:
- Adhered dirt is removed with soap. Lather a soft damp cloth and quickly wipe the contaminated surface. After this, the polishing should be wiped well with a clean felt rag.
- To clean the surface of old fingerprints, you can use raw potatoes. To do this, the potatoes are cut in half, and hand marks are processed with the cut. Then the treatment area is thoroughly rubbed with a dry cloth.
- In difficult cases, any vegetable oil will help. Soak a cotton swab in it so that the oil does not flow or drip, and wipe the stains until they are completely removed. Then the remaining fat is blotted with a paper towel, and the surface is polished with a dry cloth.
- How to remove stains left by hot objects? Fine salt is tied into a knot of thin cloth and dipped in vegetable oil. Rubbing whitish hot spots with such a knot restores the appearance of the polish.
Polishing is resistant to alcohol and solvents. Therefore, you cannot not only treat the surface with these products, but also spill them on the polish.