Wash
Considering that hats in most cases lose their original appearance after washing, it is extremely important to know not only how to shape the cap, but also how to properly care for it. There are two washing options: hand and dishwasher
The first method is more labor-intensive, but allows you to control the process from start to finish.
In the army, manual processing is most often used
When using this method, it is important to consider the type of fabric from which the headdress is made. Based on its characteristics, the cleaning solution and water temperature are selected
It is highly recommended not to wring out a military cap, as the shape may become even more deformed. A faster method is washing in the dishwasher. When choosing it, you must follow several rules:
- do not use stain removers containing chlorine;
- place the cap only on the top tier of household appliances;
- When removing heavy stains, soak the product for at least 20 minutes.
The advantage of washing in the dishwasher is that the hat is fixed in one position. It does not move in circles, as happens in a washing machine, which means it cannot become deformed. After washing, you need to straighten the cap and place it in a horizontal position. It is acceptable to use a three-liter jar to ensure even drying.
A special plastic shape will prevent damage to the shape of the cap during washing.
The caps are dishwasher safe
How to care for baseball caps so that they retain their shape and color for a long time
In order for the cap to last as long as possible, it is necessary to carefully care for it from the moment of purchase. Basic techniques:
- a new cap must be treated with any water-repellent spray (sold in shoe stores or hardware departments);
- After each wear, the baseball cap should be shaken out to get rid of the dust accumulated during the day;
- the surface of the fabric should be regularly cleaned with a sticky roller - this will help get rid of lint;
- when the smallest stain appears, you should immediately use wet wipes - the less contamination, the easier it is to deal with it without resorting to washing;
- The cap should be stored in a closed closet, flattened.
History of the creation of military uniforms
In Rus', before the advent of the standing army, there was no uniform uniform. Only with the emergence of the Streltsy regiments in the 17th century did the dress uniform acquire certain distinctive characteristics, although it was worn only on major holidays. Sagittarius wore:
- red or scarlet kaftans;
- hats with edges;
- massive boots.
Under Peter I, a regular army was created. The uniform was made in a European style. The ceremonial military uniform consisted of a camisole, caftan, stockings, tight pants, a flattened cocked hat, and capes. Made from fabric in green, red, blue shades. Later, Peter I introduced shoulder straps, as well as an officer's scarf.
Military clothing was tight and uncomfortable; soldiers spent months training to put it on. During the time of Catherine II, wigs were removed from the military. The uniform became more practical; it consisted of trousers, boots, a helmet, and a wide uniform. But under Paul I, all military attributes returned, including powdered wigs and uncomfortable uniforms.
Alexander II rejected beauty in favor of convenience and functionality. The shape has become spacious and comfortable. You could wear warm clothes underneath. Overcoats, hoods, and boots helped to survive the cold winters. Alexander III's military uniform became even simpler, warmer, and cheaper to produce. In 1907, a single-breasted jacket with a stand-up collar was introduced. The clothes were fastened with buttons, there were pockets on both sides, on the chest.
Features of foot wraps
A footcloth is a piece of durable rectangular fabric that is used to wrap the legs. The product has the same functionality as a sock and is worn with boots. The fabric for foot wraps is selected according to the time of year. For the winter period they are made from the following types of fabric:
- wool;
- bike;
- flannel.
During cold weather, footcloths made from 50% wool and 50% cotton are in demand. In summer, a cotton or cloth product is used.
It is believed that the standard size of foot wraps is 35 x 90 cm. However, this is not entirely true. Over time, the recommended product size has changed:
- since 1978, foot wraps have been made in sizes 35 x 90 cm;
- since 1983, the parameters of the finished half-pair were 50 x 75 cm;
- since 1990, the width of the product has become 15 cm smaller. The finished footcloth measured 35 x 75 cm;
- Today, according to the army regulations, the parameters of a half-pair are 45 x 90 cm.
There are also other sizes of finished footcloths. You can make it yourself by individually selecting the dimensions. To do this, a piece of the selected fabric is cut into 2 parts so that the length of the finished product allows you to wrap the foot twice.
In some situations, such products will be better than socks. Their advantages:
- dry quickly;
- easy to wash;
- do not wear out for a long time;
- self-production is possible;
- you can wear larger shoes;
- reduce sweating of the skin;
- retain heat well.
Foot wraps in hiking conditions help maintain the health of the skin - they do not allow fungal diseases to develop. The disadvantages of the product include:
- reduction in shoeing speed;
- difficulty putting on;
- inability to wear without shoes.
This item is used not only by the military, but also by people who have to live in difficult climatic conditions. Foot wraps are widely used by fishermen, hunters, and rangers.
Flannelette
FlannelWool
Machine washable
Cotton and synthetic caps with a plastic visor can be machine washed.
Moreover, you can use not only a washing machine, but also a dishwasher.
Washing machine
To prevent the baseball cap from becoming deformed during machine washing, the following rules should be followed:
- It is necessary to set the washing mode to delicate. The water temperature should not exceed 40 degrees if the product is made of natural fabrics, and 30 degrees if the cap is synthetic.
- The powder must be delicate. You can take a detergent for washing children's clothes or a special gel. When choosing a powder, you need to consider the color of the fabric.
- Do not add large amounts of detergent. Otherwise, stains will remain on the material.
- Spin should be turned off. Otherwise, the product may become deformed. This is especially true for caps with a very tight and straight visor. It may be better to wash them by hand.
Dishwasher
If your home has a dishwasher, you can wash the product in it. The big advantage of this method is that the baseball cap is fixed in one position. Therefore, the risk of deformation is much lower than when washing in a washing machine, where the cap is constantly moving inside the drum.
Instructions:
- place the dirty baseball cap on the top tier of the dishwasher (usually glasses are placed there);
- add a small amount of dishwashing detergent;
- start the wash.
If there are serious stains on the cap, it is worth pre-treating the fabric with a soap solution. To do this you will need:
- dilute shavings of laundry soap or a little stain remover in warm water;
- moisten a sponge with the resulting mixture and wipe the baseball cap;
- The rim of the cap needs to be treated especially carefully;
- in this state the product is left for 10-15 minutes.
After the allotted time, the cap is sent to the dishwasher.
Tips for beginners
The following nuances of caring for a beret can be advised to novice military personnel:
- For any beating, it is better to use a sugar solution rather than pure water.
- Soft berets fit better on the head and are easier to shape.
- A disposable razor can be useful not only for removing pellets from a beret, but also for eliminating “fluffiness”. During beating, the material begins to “wool” and the product looks unaesthetic.
- You can dry it not only on your head, but also on a ball or globe that fits in size, as well as on a three-liter glass jar turned upside down.
- To prepare a starch solution for beating berets, you need to dilute 100 g of starch in 130 g of cold water, and when all the lumps are mashed and dissolved, you can add 900 g of hot water. The solution must be stirred very well so that the starch is completely dissolved.
- If none of the above methods are suitable for beating your beret, do not despair: there are many more different methods, for example, gluing non-woven fabric, using paraffin, laundry soap, candle wax, cardboard, adhesive base and much more.
- No need to worry if you didn’t get the desired shape the first time, you can try again. Manufacturers use dense but pliable fabric for production; you should not be afraid of damaging it with frequent attempts to shape it.
- If you still encounter difficulties while beret-taking, you should ask for help in this matter - your colleagues will not refuse.
Drying a beret on a three-liter jar
Now you know how to beat a beret at home, and you will not be confused when receiving a shapeless “pancake” from the warehouse. You can tidy it up so that it becomes a symbol of pride and courage.
This article discussed simple and not so simple methods, and everyone can choose the one that suits them, based on the material of the beret, technical capabilities and weather conditions.
Starching methods
Application of starch
A potato, rice or corn product will come to the rescue. The following starching methods exist:
- Weak. You will need to use 1 teaspoon of starch per 1 liter of water. Suitable for beach hats and panama hats.
- Average. Take 1 tablespoon of product per 1 liter of liquid. Used for caps.
- Strong. Requires 2 large spoons per 1 liter of water. They resort to using this composition if they need to starch a military cap that has lost its shape.
After preparing the solution, you must follow the following algorithm:
- Cool the mixture to room temperature.
- Lower the product into it without touching the visor.
- Leave for 7 minutes.
- After time has passed, squeeze out the water a little.
- Flatten and place on jar.
- Dry.
- Go over the surface of the item with an iron.
Is gelatin effective?
This method is suitable if you need to restore the shape of a beach cap or cap. The recipe for preparing the composition is as follows:
- Take 1 teaspoon of gelatin.
- Dissolve it in 3 tbsp. l. cold water.
- When the product swells, pour in 250 ml of liquid.
- Place the mixture on the fire and wait until it boils, stirring systematically.
- Cool the resulting composition.
- Send the product that needs starch to it.
- Wait 10 minutes.
- Dry things on a blank.
Starching with sugar
To prepare the product, you need to use the following recommendations:
Dissolve 100 g of sugar in 200 ml of water. Place the liquid on the stove and wait until it boils. It is important not to overcook the composition. If it has turned yellow, it should be redone. Cool the product and carry out starching.
Will glue help?
You can straighten a cap that has lost its shape after washing using the following recipe:
- Mix 2 tablespoons of PVA glue with 4 tbsp. l. water.
- Arm yourself with a thick paint brush.
- Apply the resulting composition to the product using it.
- Wait until the item dries.
- Use an iron.
It is not recommended to use this method for starching hats made of dark fabrics. This is due to the fact that after drying, white stains are visible on the surface of the material. You should not wear a baseball cap in rainy weather as this will spoil the results.
Silicate glue
If you only have this adhesive on hand, no problem. You can also straighten your headdress using silicate glue. You need to follow the following algorithm of actions:
- Add 1 teaspoon of product to 5 liters of water.
- Dissolve.
- Place the product and leave for 15 minutes.
- Remove and dry.
Beer will come to the rescue
This method will allow you to starch a hat or military cap. You will need to pour the required amount of light beer into a convenient container, which will allow you to cover the product without a visor. Place the headdress in the liquid and wait half an hour. After the allotted time, you should take out the item and gently squeeze it out with your hands. Align and put on your head, giving the desired shape. Walk around with the cap for half an hour, remove and leave until completely dry.
Acrylic lacquer
This product is used when you need to not only straighten your cap, but also give it shine. First of all, you should put a hat on the jar and place a cloth under it so as not to stain the surface. Next you need to arm yourself with acrylic varnish and a wide brush. Apply the product evenly to the cap and leave it for 60 minutes. When the headdress is completely dry, you can put it on without fear of getting caught in the rain.
Special product
If you don’t have the time or desire to prepare your own compositions for starching caps, you can use chemicals that are sold in many stores. With their help, it is possible to quickly give the headdress the desired shape. You will need to purchase a starch spray, which you need to generously spray the baseball cap on all sides. Then you should put a cap on the jar and resort to steaming, evenly passing the device over the entire surface of the product.
https://youtube.com/watch?v=GWaAPWTo7ds
Basic methods
Manual method
It is quite easy to straighten a cap or knitted hat at home by soaking it. Dry products will need to be dipped into a basin with a pre-prepared composition and left there for a few minutes. You can also apply the prepared product using a brush; it is better to use a paint brush. First you need to prepare the required composition, then lay the item on the fabric, level it and flavor the surface with paste. Leave until completely dry and iron with a hot iron. This method will ideally help smooth out a crocheted Panama hat. You can also resort to spraying, but this method is used only for formulations that have a low concentration of starchy substances. You will need to spray the product onto the cap and immediately iron it.
Using the washing machine
To speed up the process, you can use a washing machine.
If you don’t have time to starch by hand, this method will do. It consists of 4 stages:
- Preparation of a weak adhesive.
- Pouring it into the compartment of the car where the air conditioner is added.
- Turn on the required mode and wash.
- Hanging and drying the product.
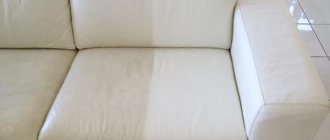
How to remove stains without ruining the item?
Ways to help deal with stains without subsequently washing the baseball cap:
- Traces of sweat can be eliminated with hydrogen peroxide. Apply it to dirty areas and leave for a couple of hours. Then remove the remains with a damp cloth. But this option is not suitable for colored material, since it will most likely fade.
- Mix salt with soda and add water until a paste is obtained. This composition is applied to the stains and rubbed with a soft brush. A mixture of only one salt does an excellent job of removing traces of grass, various drinks, food, and others.
- Several aspirin tablets are crushed to a powder and a little water is added. It is worth noting that this method will not help with old stains.
- Stubborn stains on white baseball caps can be easily removed with a mixture of acetic and citric acid. To do this, combine the ingredients in equal proportions and add 1 part of water. Apply the product to the stain.
How to starch fabric so that it stands up?
Proportions: dilute a teaspoon of starch powder in 1 liter of water. For starching shirts, napkins, tablecloths, the concentration is increased to medium: a full tablespoon of starch per liter of water.
Interesting materials:
How can I find out if the travel restriction has been lifted? How do you know if you were dreaming? How to find out the status of an application in Rosreestr? How to find out your Pension Fund branch? How to find out your administrative fines from the Ministry of Internal Affairs? How to find out your debts by last name? How to find out your tax ID urgently? How to find out your TIN in Kyrgyzstan? How to find out your UBP code? How to find out your username on Skype 2022?
We beat back step by step at home
The reverse side should be processed, not the front side.
Method 1
The most complex and expensive method. However, if performed correctly and strictly following all the instructions, the result will be a headdress that is ideal in shape and angle.
For the event you will need:
Algorithm of actions:
- tear off the lining of the beret (in some cases you can skip this step) and place the headdress in hot water for 2 minutes;
- take it out, drive off the excess water with your hands ( drive it off, without twisting or squeezing
); - after the water stops dripping, insert the cockade ( for correct placement, follow the liner inside the beret
); - put on the head, tie;
- smooth out the headdress, give it the correct shape;
- cover the beret with shaving foam without removing it from the head;
- wait a few minutes, wet your hands and start rubbing in the foam;
- give final shape;
- leave alone for 1.5 hours (no need to remove);
- after this time, remove the headdress, clean from pellets and residual traces of foam ( small signs of wear - pellets - are removed using a razor drawn along the pile
); - fill the inside with a large amount of varnish (you should not spare the product, as it will give the headdress the necessary hardness);
- cut a small rectangle out of the card, then make 2 holes in the piece for the “antennae” of the cockade, insert the cockade and tighten the “antennae” to your taste.
- smooth the left side of the beret back (while bringing your hand straight to the back of your head);
- smooth the crown to the right;
- We create a half-disc at the right ear.
Method 2
The method is suitable for military and civilians who want to flatten one side of their headgear (bevel it to one side). To do this, you literally have to break off the edge. You will need a hammer and a hard surface strong enough to withstand repeated direct hits from the tool (a barracks stool, for example).
Step-by-step instruction:
The blows should be light, but accurate. If you don’t have the skills to handle the tool or are afraid of ruining the item, use a steel spoon
. However, the process of involving her will take longer.
Method 3
A method that is relevant for the teardrop beret. Take a hat, wet it with water and quickly shake it off (no need to get too wet). Next, put the product on yourself and give it the shape prescribed in the charter. Do this until it is completely dry ( do not forget to smooth and adjust the beret from time to time, otherwise it will not dry correctly
).
When the beret becomes dry, press down the edge with pliers. If the tool is handled correctly, the part will become as sharp as required.
If the idea of wearing a wet headgear is not pleasant in itself or there are reasons to refrain from such a step, and you have a mannequin or at least a ball at hand, the circumference of which coincides with the circumference of your head, then put a beret on them. However, you need to be prepared for a not entirely correct fit - nevertheless, these objects do not correspond to the curves and structural features of your particular head.
Method 4
Soak the headdress in hot water, remove the bulk of the water with your hand, put the product on, and then give the edge a sharp shape using your fingers (punch the edge), paper clips or clothespins.
Method 6
Wash and iron through gauze (double). Before ironing, place a rolled up wet towel inside the headdress (helps create a shape). Then beat off the edges with a hammer.
Method 7
Soak for a couple of minutes in warm water. Take it out and stuff it tightly with newspapers. Ensure that the form adopted corresponds to that required by the charter. Smooth out the folds, and “bevel” the desired side and secure with clothespins. Leave until completely dry ( the item should be kept away from operating heating devices and direct sunlight
).
Method 8
- Mix 180 g of water (cold) with 100 g of starch. Mix thoroughly. Add the resulting mixture to 900 g of heated water.
- Dip the beret and give it the desired look after pulling it out. Once you achieve your goal, put it on the ball or dummy. Let dry.
What is needed for this?
Before we begin to describe beating methods, it is necessary to understand why this should be done. The beret is not only a civilian headdress, but also a uniform element in most armies of the world. However, over time, this military pride loses its shape and looks like a pancake - it’s ugly, and therefore it is beaten off. You can do this yourself. To create a beret, light and pliable materials are used, and giving it a beautiful shape, as a rule, is not difficult. So, how to hit the beret correctly.
Types and meaning
In different historical periods, the symbols of the state changed. Changes have not spared the cockade either.
It is important to note that depending on the appearance, shape, color, the meaning also changed
| Appearance | What did it symbolize? | What hats was it used on? |
| A rosette made of fabric or an oval-shaped metal plaque, black, white and orange colors | Distinctive sign of Tsarist Russia | On the band of the cap of citizens performing military service |
| Cockade made in red | A symbol of protest against the “old regime” after the events of February 1917 | Headdresses of officials and military personnel |
| Adam's head, colors – red, white, black | A symbol of fearlessness in the face of death, uncompromisingness towards enemies, salvation | Headdresses of the cavalry regiment, Cossack and hussars |
| Red Star | The pentagram denotes protection, power, perfection, and acts as a kind of amulet. Red is the color of change, revolution | Caps and caps of Red Army soldiers |
| Hammer and sickle | Represents the unity of workers and peasants of the Soviet Union, symbolizes the communist movement | Caps, budenovkas of the Red Army soldiers, commanders, commissars |
Carrying a certain semantic meaning, the cockade is an integral part of the headdress of military personnel. By looking at the emblem, you can easily determine which historical period a particular item of clothing belongs to. Along with the coat of arms and flag, the cockade symbolizes the way of life and the political direction of the state.
The ancestors of modern caps
Modern materials that appeared on the market were adopted by fashion designers.
Therefore, the cap has become one of the must-have purchases for fashionistas and fashionistas. Unique and completely new models of caps were developed, intended not only for young people, but also for older citizens. The modern cap has erased age boundaries and restrictions. She fell in love and became accessible to almost all age categories, without exception. Caps, baseball caps and bonnets are popular among men and women of all ages.
https://www.youtube.com/watch?v=L6WAuBaT9vo
The new cap looks great and pleases its owner with an interesting shape. However, like any item of clothing, after a short time it loses its appearance, gets dirty and urgently requires taking measures that will help restore its original appearance. The ones that need the most care are those worn by children, as well as summer caps. Weather conditions, which can change dramatically in a matter of minutes, can turn a wonderful, perfectly shaped cap into something unattractive.
How to get back into shape after deformation
You can give the product the desired shape using any round object or improvised means (starch, PVA glue, beer, acrylic varnish).
We use a ball, pan, ball and other round objects
To return the cap to its shape, you need to moisten it with water from a spray bottle, straighten the material and pull it onto a convex object. Suitable:
- rubber ball;
- plastic ball;
- small saucepan;
- glass jar.
Starch
To prevent the cap from losing its shape, it needs to be starched. To do this, do the following:
- Pour 100 g of potato starch into a small bowl.
- Add half a glass of cold water, and then about a liter of hot water.
- Stir until the starch is completely dissolved.
- Cool the solution to room temperature.
While the starch solution is cooling, wash the caps in soapy water with a sponge or toothbrush, and rinse with cool water. After this, dip the product into the prepared solution (the liquid should not touch the visor), soak thoroughly.
Place the cap on a suitable frame, straighten out the folds and wait until it dries completely.
PVA glue
If starch is not available, you can use PVA glue. Restoring the form will require the following actions:
- Dilute the glue with water at room temperature (1:1).
- Place the baseball cap in the solution and leave for 10-15 minutes.
- Let the excess liquid drain and leave to dry.
Do not use PVA for dark caps and baseball caps, as streaks may remain after drying.
You can give the product the desired shape using regular light beer. To do this, the drink is poured into a basin and a cap is placed there. You will need enough beer to cover the surface of the headdress by 2–3 cm. After half an hour, the baseball cap is removed, the liquid is allowed to drain, put on the frame and smoothed.
Acrylic lacquer
This method is used when things need to be given rigidity and shine. The procedure is as follows:
- Wrap a sheet of plywood in polyethylene and lay it on the floor or table.
- Place the headdress on the convex structure, place it on a sheet of plywood, straighten out the folds.
- Apply acrylic varnish to the cap with a wide brush.
- Let dry for an hour.
How to straighten out the army (military)?
Ironing an army cap allows you to straighten the fabric, which will make the item look aesthetically pleasing and neat.
The soft fabric allows you to stretch it over the tapered edge of the ironing board . Turning it so as to iron the item from all sides, it is ironed using steam.
If you don't have an ironing board, you can use other available tools. In this case, you need to put the cap on a base that allows you to iron the item from all sides.
To prevent a freshly ironed item from becoming wrinkled, it is advisable to give it time to cool and only then put it on.
Another way to restore the shape of an army cap is in the video:
Restoring the shape of a baseball cap after washing
When the fabric of a baseball cap gets wet as a result of washing, it loses its original shape. To restore it, you need to do the following:
- Moisten the fabric well.
- Place the baseball cap on a suitable frame.
- Straighten the matter as carefully as possible, as the result will depend on this.
- Leave it in this position to dry.
The following can be used as a drying frame:
- a regular 3 liter glass jar;
- a balloon of a suitable size;
- a round salad bowl turned upside down;
- special forms for hats, etc.
It is recommended to dry the cap naturally, without trying to speed up the process.
How to straighten a baseball cap after washing, video tip:
https://youtube.com/watch?v=OnIIPV3vaZ4
Using an iron
Using an iron to straighten a crumpled cap is not an easy task. Fabric items that can be ironed can be conveniently straightened using not the ironing board itself, but one of the available tools:
- arm sleeve;
- a tightly rolled hard roll of towels.
For cotton it is possible to use an iron with a steaming function, for synthetics (polyester and other materials) - without this function. The temperature of the iron is set taking into account the composition of the fabric.
When using an iron, you must avoid:
- smoothing out wrinkles;
- ironing folded items;
- deformation of the crown;
- ironing the visor.
Ironing from the front side is carried out only through gauze or other additional fabric.
Using a steamer
Using a steamer, it is even easier to iron a cap than with an iron.
In order for the item to straighten out, it is advisable to use a form: a baseball cap placed on it will straighten out under the action of a steamer and restore its shape.
The temperature regime on the device must be adjusted taking into account the material of manufacture. For synthetics – minimal, for cotton – higher.
Before you start steaming, you should make sure that the product has no contraindications to this procedure.
How to wash without having to iron?
Products with a dense upper part and a hard visor cannot be machine washed; they are cleaned by hand.
For this purpose, thorough washing in soapy water and systematic cleaning of the entire product inside and out are used. After this, the cap is rinsed. Squeezing is not necessary.
The best cleaning effect is achieved when treating difficult areas with an old toothbrush. To prevent the product from losing its shape, it can be starched. In this case, you won’t have to iron the cap at all.
A special solution is used for starching. Preparation procedure:
- Prepare a container, preferably a deep basin.
- Add starch (100 grams).
- Pour in cold water (120 grams).
- Pour in hot water (0.9 l).
- Stir until smooth.
- Leave the starch solution to cool.
- Moisten with solution. The most convenient way is to simply dip it into the prepared solution, holding it by the visor. It already has a seal and does not require additional starching.
- Place the baseball cap on a frame that fits in size.
- Straighten out very carefully.
- Leave until completely dry.
Recommendations
In order for the smoothing of the cap to be effective and without unpleasant surprises, it is recommended to adhere to the following tips:
Studying the product label is the first stage of high-quality ironing.- When ironing the product on the front side, it is recommended to add additional fabric.
- If there are decorative elements and trims, care must be taken not to catch them with the soleplate of the iron. Such areas of the cap are ironed either from the inside out or through auxiliary fabric.
- If the item is not too dirty, simply dry cleaning may be sufficient. In this case, the material will not deform.
- A poorly washed baseball cap may become stained and stained as a result of ironing, which is very difficult to remove later.
Restoring shape
You can hit a cap in various ways. Each technique differs in degree of effectiveness, duration and level of complexity. The most popular methods are treatment with starch, steam, sweet water and beer.
Iron
Typically, hats are not ironed, but an iron can be used to restore the cap to its original shape. You need to put it on the narrow spout of the ironing board, iron it through two layers of gauze and steam it well. The board can be replaced with an ordinary large three-liter jar
It is important to monitor the degree of steam supply, the impact of which should not be too strong, otherwise the glass may crack when using the can. If possible, it is better to replace the iron with a steamer
Starch
There are several ways to starch a cap yourself. The degree of starch can be low, medium or high. The latter option is suitable for military caps as it provides a high degree of rigidity. To treat a headdress with starch you need:
- dilute 2 tablespoons of powder in 1 liter of water;
- place the cap in the solution for 5-10 minutes, the visor should not be in the liquid at this time;
- lightly squeeze the material out a little, thus removing excess moisture;
- put the product to dry.
Any cap should be straightened after washing. This is necessary to prevent creases from forming. To enhance the smoothing effect, it is recommended to use a regular three-liter jar. Thanks to this method, starched hats will keep their shape much longer.
Sugar water
Sweet water fixes the shape of any headdress well. To beat off an army cap in this way, you need to dilute granulated sugar in warm water and stir it until completely dissolved. You should get a syrup.
The water temperature is allowed no more than 45-50 degrees Celsius. Sugar should be used as regular, crystalline, refined sugar, but without any additives. Brown cane is not suitable.
Sweet water is applied to the army cap using a sponge. When the material is already well wet, the headdress is straightened and put on a jar or ball of suitable size. The product must be left in this form until completely dry.
Sugar water
Shaving foam
You can smooth the cap with shaving foam. This simple method involves applying the composition to the surface of the headdress in large quantities. In order for the material to become a little more elastic and pliable, it must be completely wet. Therefore, before processing, the product is dipped in a basin of warm water.
For convenience, the cap is placed on a three-liter jar, and then shaving foam is generously applied to the headdress. After the composition has completely saturated the fabric, the cap should be left on the jar until it dries. After several hours, remove any remaining shaving foam from it with a dry cloth.
Beer
To straighten an army cap, ordinary light beer is also suitable. It must be used in such quantity that the item is completely covered with liquid. Beer is poured into a basin or large pan, then the product is placed inside and thoroughly soaked in liquid for 30 minutes. After this, you should squeeze the material out a little, without twisting the headdress in any way, smooth the surface, put it on the form (can, mannequin, ball) and hold for 30 minutes. Further drying is carried out on a flat surface.
Special spray
Modern chemicals make it much easier to restore the shape of a headdress. If a person does not know how to straighten a cap, or does not want to use sugary water, shaving foam, or beer, then a ready-made special spray will be the best choice. Most often it contains starch. This method of smoothing the product is characterized by maximum speed and simplicity.
To make an army cap, you need to spray the headdress, put it on a previously prepared form, for example, a three-liter jar or a ball of a suitable size, smooth it out to give the desired shape, and leave it until completely dry. Typically, these sprays do not contain chemicals that can cause an allergic reaction.
How to beat off a cap with shaving foam?
Method 6: shaving foam
- Use small scissors to carefully tear off the lining of the beret.
- Place in hot water to soak.
- Squeeze without twisting, but squeezing with a towel.
- Put the wet beret on your head, smooth it out and give it the desired shape.
- Apply shaving foam to the headdress without removing it from the head.
Aug 1
2022 Interesting materials:
What is Avito delivery? What is an automatic air freshener? What is an automated pick-up point? What is Band in a radio? What is white sugar? What is biological waste? What is a power supply and what is it for? What is blockade bread? What is a boiler in an apartment building? What is greater than less or equal?
Hand wash cap
Washing by hand is more gentle than washing by machine. To do this you will need powder or soap, a soft brush, a piece of white cloth or a sponge.
If there is a risk that the color of the baseball cap will fade, dip a piece of light-colored cloth in the prepared solution and rub the inside of the hat. If the fabric is dyed the color of the product, do not wash it yourself, but take it to the dry cleaner.
Advice!
To avoid damaging the stickers on the product, cover them with cling film, folded in several layers, and secure with tape.
How to wash a cap by hand:
Fill a basin with cool water if you are washing a cap made of synthetic fabric, or warm water if it is made of denim or cotton. Add 1 tbsp there. l. detergent without bleaching effect. Immerse the cap in water and begin scrubbing the most dirty areas
Pay special attention to the place where the visor meets the forehead. There are present, sebum,. Treat difficult-to-remove stains with a chlorine-free stain remover and rinse off after 20 minutes. If there are no stains, simply soak the item in a soapy solution at room temperature for 2-3 hours. Rinse the headdress under running water until it becomes clear.
Note!
Wash the visor last so that it is less exposed to water.
How to wash a wool cap
Add 1 tbsp to cool water. l. powder for woolen products, soak the cap in it for 1 hour, then gently rub the problem areas with your hands or a rag. To prevent a woolen item from shrinking, the water temperature should be less than 30°C, and air conditioning will help restore the softness of the item.
Attention!
Dissolve the powder completely in water, since undissolved granules are difficult to wash out of the threads.
Unlike natural wool, a cap knitted with synthetic threads can be machine washed on a delicate cycle.
If the hat has a fur pom-pom, wrap it in a plastic bag to prevent it from getting wet.
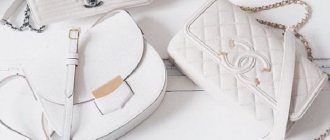
Is it possible to wash caps and baseball caps?
This question is quite natural, since such a headdress cannot be compared with an ordinary T-shirt or pants, which can be washed by hand or in a machine without any problems. But, like any other thing, the cap quickly absorbs dirt. The most vulnerable spot is considered to be the inner rim near low tide. It touches your forehead and absorbs sweat wonderfully.
How to wash a baseball cap so that it doesn’t lose its shape? First of all, you need to look at the label. Manufacturers in most cases indicate whether contact with water is acceptable, and whether the cap can be machine washed. There are several options for hats that are prohibited from washing.
Which baseball caps are not recommended to be washed?
It must be said right away that not all baseball caps can be soaked. For example, if the cast of your headdress is made of cardboard, then due to contact with water, it will quickly soften and lose its shape. In this case, it is better to resort to dry cleaning. For this:
- Using a soft bristle brush, clean dirty areas.
- Remove dust and lint from the surface using tape or a specialized roller with an adhesive attachment.
If you don’t want to bother with dry cleaning yourself, you can hire a headdress
specialists, having it dry cleaned.
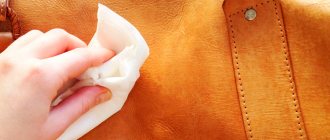
Another type of baseball cap that deteriorates after washing is leather goods. Therefore, to care for them, you need to buy the necessary product intended only for the skin.
It is advisable to know: if there is no special product for the skin nearby, and there is no way to purchase it, you need to take an ordinary onion. Divide it into 2 halves and rub the surface with the cut area. Then rub the skin until shiny using a piece of soft flannel. Let the headdress sit for two days to allow the onion smell to dissipate.
If you wait 2 days for the aroma to disappear, which is a very long time, you can turn to another good method - using a solution of ammonia (ammonia). To prepare it, you need to take a glass of drinking water and add 1 tbsp to it. this remedy. Wear gloves, take a piece of cloth, soak it in the solution and rub the contaminated areas. We use this method not only for leather caps, but also for other caps that are not allowed to be washed.
Types of fabrics and cleaning methods
Caps are made from different fabrics. Each of them has its own characteristics that should be considered before cleaning. Peculiarities:
- Synthetics: wash at low temperatures.
- Wool: wash only in cold water, rinse several times after washing, and be sure to dry on a blank.
- Corduroy: It is better not to wash, but to use the dry cleaning method. When wet, the pile should be combed with a comb or brush.
- Felt: it is preferable to clean with a cloth moistened with water and ammonia (1:1).
- Cashmere: It is better to use a dry stain remover.
- Leather: cannot be washed! You can use a solution of ammonia (1 tablespoon per 250 ml of water), which is applied to a soft textile cloth for cleaning.
Do not dry a leather cap in the sun or near hot objects.
Processing a beach hat with a brim: method five, traditional
For a hat, the most preferable is a hard or medium degree of starch.
A method known to our grandmothers is starch. There are three types of such starch: hard, medium and soft.
We will consider the middle option, in which the products, after drying, hold their shape and remain soft to the touch.
How to get your hat back into shape? Video instruction:
Recipe
We dilute one tablespoon (without a slide) of potato starch in ½ cup of cold water. Pour a liter of boiling water into a saucepan and pour in the starch solution in a thin stream, stirring constantly. Cool the resulting paste to room temperature. For soft starch, take 1 teaspoon of starch, and for hard starch, take a heaped tablespoon.
Pay attention to the quality of starch. If it is not snow-white, but contains particles of debris or has a yellowish tint, then shake it with water
After settling, drain the liquid along with any contaminants. Carry out the procedure 2-3 times until the appearance of the product becomes uniform.
Details on how to dilute starch and general recommendations on how to starch things.
Algorithm of actions:
- The entire hat or just the brim is dipped into the starch solution. In the case of a baseball cap, the visor should not be wet. Take it out and shake it gently.
- Sent to dry. A jar, a small-diameter pan, a ball, or a balloon are used as a form. If the hat has a brim, then they are pressed tightly against a horizontal surface.
- After drying, the product can be steamed if desired.
Tip: you can use the same method to starch a children's hat. The method is safe, you can carry out the procedure after each wash.
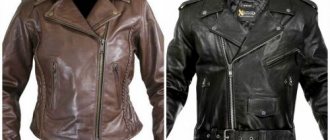
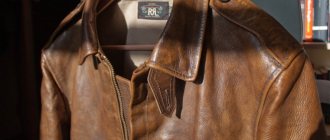
Caring for a Leather Baseball Cap
For more than one season in the CIS, men and women have been choosing leather caps. Their feature is several layers: outer and inner. The latter can be wool or made of artificial materials.
The leather cap consists of two layers.
To maintain the appearance, you will need:
- Follow storage rules. Leather products can last for many years. But you shouldn’t hang it by the clasp in the closet. It is best to place the headdress on the top shelf so that it does not change its shape.
- Use cosmetics. Now there are plenty of them: glosses, creams, wax. Careful care will allow you to wear your cap for ten seasons!
- Take the time to place the leather cap on the can. This will help maintain its shape.
You need to take care of your leather baseball cap according to the rules.
By following basic recommendations, your leather hat will retain its original appearance for many years.
How to give a new look to a coat?
Use a mushy mixture of salt and ammonia diluted in a 4:1 ratio. Apply it to the stain for 5-15 minutes, and then remove the composition with a clean, dry brush. Give me your coat
time to dry completely so that it does not lose its shape.
Interesting materials:
What is the best evaporator for iJust S? Which gel polish is better to use? Which is the best uninterruptible power supply for a gas boiler? What is the best water cooler? What is the best pendulum for a crib? Which is the best online cinema? What is the best rice for Wok? What is the best bitrate to set? What is the best thermos for tea? Which iron is better, Teflon or ceramic?
Shaping the beret
How to return a washed item to its original shape? You can restore the hat if you wash it in beer.
However, such actions must be performed in a certain sequence:
- you need to take a bottle or can of beer;
- straighten the cap in this drink, then stand for 30 minutes;
- remove from liquid and squeeze thoroughly;
- wear an army beret for some time until the uniform is acquired. In this case, you should smooth out the headdress yourself a little;
- You need to wear a military beret for some time.
The starched item is removed and placed in a safe place until completely dry.