Cleaning the calipers is important, because otherwise the car will brake poorly or not at all. The fact is that the part performs a braking function and if it malfunctions or rusts, it simply disables the brake: the pads or guides begin to jam, and the piston jams. You can do the cleaning yourself or trust the service station employees.
Rust removal sequence
To keep your brake calipers in tip-top shape, you need to clean the sliding pins regularly. Remove old oil, debris and rust, then add heat-resistant lubricant to the pin and put it back in. The entire process may take about an hour.
The following step-by-step instructions will make cleaning easy:
Remove the caliper. This is not possible if the car is at ground level, so you will first need to jack up the car
Once it is raised, loosen all the nuts on the four wheels without removing them completely. Remove the nuts on the front two wheels. Keep the nuts in a safe place. Carefully place the film on the surface and cover the cap. This process ensures that most of the vacuum is properly retained in the brake system. Loosen the line at the point where it meets the caliper. Unscrew it partially and bring the tray to collect the drops. Using a screwdriver, remove the spring clip. Loosen the bolts and remove them, then remove the caliper from the rotor. When it is completely free, you can pull out the pads. After removal, use the rubber vacuum cap and pan to collect the liquid
Place a piece of wood between the piston and the outer flange. Do-it-yourself cleaning of calipers from rust is carried out using brake fluid to remove contaminants and grease.
Use a cleaning brush and brake fluid. Spray some of the brake cleaner onto the brush and begin processing. Do not spray cleaner directly onto the calipers. The more carefully this step is performed, the better the cleaning effect will be. When finished, remove the front locking clip and close the drain valve using masking tape. Once it is closed, secure the brake hose fittings as well. Take some stiff cardboard and cut out a piece in the shape of an inverted L. You need to protect all parts of the car with plastic film. If paint gets in, the normal functioning of the braking system will be disrupted. You may need to use duct tape to hold the plastic in place. Spray the paint onto the caliper using a slow and steady motion. Take special care to prevent paint from getting between the brake pad and rotor. Leave the paint to dry before removing the plastic and cardboard. Move to the next wheel and repeat the process. Make sure the paint is completely dry before attaching the wheels. Repeat the process until the caliper is completely clean. Observe safety precautions when performing work. Any dust or dirt in the air can get on wet paint. In addition, the smoke from spray paint is dangerous if the driver inhales it, so it is recommended to wear a dust mask when working. Replace the piston and reattach the brake line, then install the brake caliper into the wheel. Once all four calipers are serviced and the wheels are installed, check the brakes. If any problems are found, contact customer service.
Types of lubricants and requirements for them
On thematic forums, hundreds of pages are devoted to choosing the “right” lubricant for guides, while theoretical calculations and practical reviews often contradict each other, which leads to even greater confusion.
Even without knowing the names of modern lubricants, you can choose a suitable product based on its technical characteristics.
The following requirements apply to lubricants for brake caliper guides:
- High operating temperatures (more than 180 °C), at which the lubricant does not melt and leaks out
- Water and chemical resistance to prevent water or brake fluid from dissolving the lubricant
- Compatible with plastic or elastomeric parts used in the caliper (e.g. for boots)
- Well-known manufacturing company: it is better if it is the same automaker that produced the car
Companies that produce guide lubricants rarely produce a wide range of materials. The exception is brake manufacturers, many of whom specialize in everything related to them.
Large automobile concerns produce professional lubricants for guides, but they are quite expensive. On the other hand, they always last a long time. Owners of Toyota cars, for example, are recommended to choose Toyota White Grease, etc.
Drivers who operate their vehicles in extreme conditions often use synthetic-based multi-purpose guide lubricants - for example, Slipkote 220-R DBC or Molykote G-3407.
The line of the German manufacturer Liqui Moly includes a red Anti-Quietsch-Paste paste. It does not affect rubber and plastic elements, but can withstand heating up to +250 °C.
Often, under the guise of a lubricant for guides, car dealerships offer Liqui Moly Bremsen Anti-Quietsch-Paste in a gray-blue color, but the manufacturer itself currently positions it as an anti-creaking paste and does not recommend its use for lubricating guides.
An inexpensive but popular finger lubricant is Very Lube. It is characterized by a wide range of operating temperatures, high adhesion to metal and relative neutrality to other materials.
The most well-known examples of foreign mineral lubricants for caliper guides are Plastilube VR 500 and Loctite LB 8106. They are thickened with bentonite, therefore they are least susceptible to temperature fluctuations.
For domestic cars, many recommend the well-known CV joint. Unlike other inexpensive Russian lubricants, it is neutral to rubber and plastic. However, its operating temperature range is not the widest.
The VAZ repair manual previously prescribed the use of UNIOL-1 waterproof lubricant for the caliper guides. Nowadays, it is practically not found on sale, but its analogue is available - calcium grease CIATIM-221. It is manufactured in accordance with GOST 9433-80 and is intended for servicing various rolling bearings. There is also a fluorinated version of CIATIM-221 - CIATIM-221F. ultrafine polytetrafluoroethylene in its composition provides this lubricant with improved extreme pressure and anti-wear properties.
CIATIM-221 is inert to rubber and polymers, but does not have the widest operating temperature range - from -60 ° C to +150 ° C, so it can hardly replace foreign-made branded lubricants. If the brakes heat up too much, it can melt and leak, so it is mainly suitable for “low-speed” domestically produced cars.
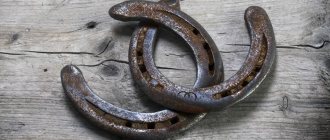
Why is corrosion dangerous and how often should it be cleaned off?
Some drivers believe that corrosion is a normal phenomenon and does not pose any threat.
The main thing is to start driving and she will remove herself. In fact, this assumption is only partially correct. Indeed, a thin layer of corrosion quickly disappears, but a thick coating that completely covers the discs cannot be dealt with in this way.
Rust is dangerous. It acts like a lubricant, increasing friction between the discs and pads. This results in reduced braking efficiency. On the road, especially when driving at high speed, this is a serious risk.
Another reason to get rid of corrosion is accelerated wear of the brake system. Corrosion acts as an abrasive, which leads to abrasion of the discs in those areas where it is most abundant.
In the future, the car will brake jerkily. If this happens, even cleaning will not be able to solve the problem. The part will have to be changed
That’s why it’s so important to get rid of corrosion in time, when the layer on the disks is still very small.
The corrosion removal procedure must be carried out in the following cases:
- The car was idle for a long time.
- The layer of rust is thick and covers non-working surfaces.
- Rust clogs the ventilation ducts. Their blockage threatens to overheat the braking system and cause rapid wear.
It is a good idea to clean the rims when changing wheels.
Helpful information
To ensure that the cleaning procedure is as effective and safe as possible, you must adhere to the following recommendations:
All work must be carried out outdoors or in a room with good ventilation.- Only plastic or glass containers can be used to soak parts. Metal basins are not suitable for this purpose.
- Blackening of the metal or the liquid in which it is soaked is a normal reaction. It indicates that the cleaning process is active.
- To speed up cleaning, you can heat the solution by lowering a boiler into it. In this case, inhalation of vapors should not be allowed.
- If it was not possible to get rid of rust the first time, repeat the procedure 1-2 more times. If necessary, you can increase the exposure time.
You can learn about methods and methods for removing rust from a car here.
Paint for brake systems
The choice of paint for the caliper depends not only on the color, but also on the durability. Wear and chemical resistance should always be taken into account when considering the best brake protector. One of the first factors to consider when purchasing paint will be the type of caliper: not all of them are suitable for painting. The first type is a floating caliper, with a piston on one side of the rotor. The second type is a sliding caliper, which is usually found in an adapter slot. It works on one piston. On the other hand, the number of cylinders used in a fixed caliper usually ranges from 2 to 8 discs. No bushing or sliding pin is required, it attaches to the bracket. Typically, the best performance calipers have more pistons and less heat retention.
Another factor to consider will be the quality of the paint. It is designed not only to change the appearance of the car, but also to protect against corrosion or scratch accumulation. Some paints are specially formulated to provide protection in extremely hot or cold weather conditions.
The third factor is a safe standard. Painting a brake caliper may affect its functionality. It may also become hotter than the engine. This is why the paint you choose should be safe and heat resistant. If it suddenly begins to peel off, it can peel off from the caliper, get into the brake system and damage it.
Consumer Reviews
VHT SP731, red brake pad paint, is specially formulated for brakes, drums and calipers. This is a brilliant product for custom rotor detailing. Ideal for any color primer as it has a clear finish. Has first-class adhesion, quick-drying. The disadvantage is that it is not the most brilliant among other analogues.
Dupli-Color BCP400. Brilliant, fast-drying red paint. Dries in less than 30 minutes. Remains resistant to cracking. Comes with brush. The downside is that the brush is not the best to use and there is no spray option.
A wide selection of anti-corrosion cleaning products will always allow the car enthusiast to choose the right option for his car. If you master the technique of cleaning brake systems from rust yourself, you can not only save money, but also reliably protect your car.
Cleaning the calipers will help eliminate jamming and involuntary braking of the car. In all types of wheeled vehicles, the braking system is the most important, as it is responsible for stopping it. According to the rules for operating motor vehicles, it is prohibited to use them with faulty brakes. To ensure that the brakes are always in order, you need to do such a procedure as cleaning the calipers once a season.
How to clean car rims without removing them from the car
When you wash the car completely, you should also clean the rims, knocking off most of the dirt. After this procedure they will become much cleaner. However, this method cannot completely remove all contaminants: brake dust, bitumen and resins will remain on the surface.
It is clear that even a stream of water under high pressure will not be able to clean all the dirt. Therefore, a special chemical should be used. It can be used to clean metal and rubber surfaces. This cleaner contains chemicals that penetrate deep microcracks, chips, and scratches. At the same time, the paintwork of the wheels does not deteriorate. Thanks to this care, your car wheels will look like new for a long time and you won’t have to spend money on restoring them.
How to clean wheel rims yourself? We remove dust and dirt with a stream of water under high pressure. While the wheels are still wet, apply a cleaning agent to the surface. It will take a little time for the oxidation reaction to take place and the contaminants to break down. You will see the composition turn reddish. This indicates that metal dust is being removed. Then you can see yellow smudges; these are oil stains breaking down. However, if the cleaner is cheap, it will not be able to remove serious contaminants such as carbon deposits.
To completely clean the surface, use a stiff brush. It will help clean the outside of the wheel; you will also need a brush to get to the internal parts. As soon as you see that a chemical reaction has begun, rub the surface.
Note! In no case should you keep the detergent composition longer than indicated in the recommendations for use. Otherwise, the varnish will be damaged, because the surface of car wheels reacts sharply to the effects of chemicals. To protect the skin of your hands from dirt, as well as the harmful effects of chemicals that are part of the detergent, you should wear rubber or latex gloves if you are going to clean your wheel wheels. DIY discs.
To protect the skin of your hands from contamination, as well as the harmful effects of chemicals that are part of the detergent, you should wear rubber or latex gloves if you are going to clean the rims with your own hands.
Preventing the appearance of rusty plaque
To prevent rust from appearing on the calipers, you must adhere to the following recommendations:
Before you begin processing, the calipers must be cleaned. To do this, use a stiff brush or sandpaper. Converters should not be applied to flaking rust.
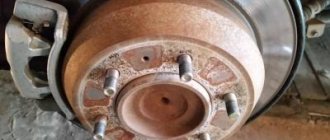
When to clean a brake disc
The threat of corrosion spreading from the discs to other parts of the car prompts its removal whenever possible. If you have to remove a wheel, it’s worth spending a little time and cleaning the brake element - removing accumulated deposits with a wire brush and treating with a rust remover.
There are cases in which it is simply necessary to clean a rusted disk:
- Long-term parking of the car on the street. Due to the constant action of moisture, the part can literally become “overgrown” with brown growths. You will need to remove them from all surfaces. Brakes on such a disc will not work reliably; the pads will need time to wear off the corrosion layer.
- The growth of a deep layer of rust on non-working parts of the part. You can periodically clean it with improvised means. But it is better to carry out complete removal followed by application of protective compounds.
- Reduction in the cross-section of channels in ventilated discs due to corrosion of internal cavities. This leads to poor cooling of the part. Removing rusty build-up will restore air flow.
What is a wheel cleaner?
Wheel rim cleaner is a chemical composition sold in many specialized auto stores in Russia that fights deep dirt, oil stains, surface rust and other defects of the product. The principle of operation of the composition is based on a chemical reaction that occurs as soon as the liquid comes into contact with the surface of the road plaque.
Wheel cleaning
The advantages of the wheel rim cleaner give manufacturers the opportunity to produce a quality product at reasonable prices for thousands of consumers, in particular:
- Stubborn road dust and dirt are cleaned without residue thanks to a special deep penetration formula.
- The alcohol composition of the substance has the effect of breaking down fatty deposits on the disc.
- Specially developed active acids allow you to break down rust stains and effectively remove them from the surface. In addition, some substances may have an electrolytic effect, which also removes this plaque from the surface.
- The disc cleaner has a polishing effect, as it contains liquid wax molecules.
- Protects the surface of the disc for a long time, creating a protective film of microscopic thickness on it.
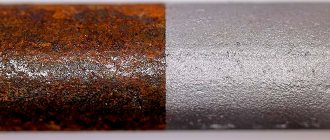
How to clean rust from calipers with your own hands?
Cleaning the calipers is important, because otherwise the car will brake poorly or not at all. The fact is that the part performs a braking function and if it malfunctions or rusts, it simply disables the brake: the pads or guides begin to jam, and the piston jams. You can do the cleaning yourself or trust the service station employees.
When should you clean the caliper?
Cleaning of brake calipers depends on the condition of the part. Any error in movement, creaking or other dubious sounds and sensations during braking indicate the need to check the entire system. Threatening signs:
- discrepancy between the brakes of two wheels is 20% or more;
- car skidding when braking.
A breakdown of the caliper, a component of the braking system, affects the speed and force of braking. Breakdowns occur due to constant temperature changes, mechanical friction, metal oxidation and layers of dirt. To repair, in most cases you only need to completely clean the part from rust and other contaminants.
In general, regular preventative checks are needed to identify various types of faults and errors that not every experienced car enthusiast will notice. During the inspection, other damage is observed: a broken piston boot, bent brake discs and pads that have come out of place. While moving, the entire system heats up and gradually destroys itself.
Electrolysis
For the procedure, it is recommended to take only special soda, not baking soda.
To clean calipers with electrolyte, you need a mixture of water and caustic or soda ash (regular baking soda will not give the necessary reaction). Energy source with direct current power from 12 to 36 A. Capacity in which the part fits. A stainless steel plate (ordinary iron will quickly become unusable) is an anode, connect “+” to it, and connect “-” to the part.
It is important to know that the container should not be made of iron, otherwise it will corrode. It is better to take a plastic bucket, basin or cut a plastic bottle
Connect the part to be cleaned to the cathode, that is, to “-”. The plate with “-” and the part with “+” should not touch, otherwise it will short out. A suitable power source would be a computer power supply, a welding unit, a car battery, or even a phone charger. True, due to strong stress they can become unusable.
Professionals note the ease and reliability of using the battery.
After preparation and connection, an immediate process begins: the liquid will foam and change color to rusty brown over the course of 3-5 hours. To increase efficiency, you can periodically change the polarity, that is, connect the part to “+”, and a stainless steel plate to “-”. After the chemical reaction is complete, remove the part from the solution. It will be metallic in color and clean. If the caliper is not completely clean, you can use a metal brush or a screwdriver to go over the remaining rust and coat it with a rust converter.
Sandblasting
Before manipulation, it is necessary to completely disassemble the assembly into parts.
Before cleaning, prepare the calipers. Carefully disassemble and separate the bracket. Protect piston holes, oil seals, dust collectors. Sandblasting is undesirable for them. This can be done using several layers of masking tape and electrical tape.
Use unnecessary washers and nuts to protect threads. And install the parts themselves on a sheet of plywood or MDF and attach them to ensure stable fixation. After cleaning, the caliper will look like new, but to maintain this condition, you can paint and oil it. The disadvantage of this method is the scratches left by sand on the surface.
That is why all the “tender” places are hidden.
Rust Prevention
Preventing the appearance of rust has a qualitative effect on the service life of the caliper and the entire machine.
The brake system should be checked regularly. The procedure consists of disassembling the part into its individual components. If they are dirty, clean them with a metal brush, and where they don’t fit, you can use a screwdriver. Clean and lubricate the surface, guides, and bracket with copper grease, the main thing is that it does not get on the brake pads and discs. Painting the components protects against new growth of rye, damage from dust and exposure to water. Spare parts lubricated with special machine oil are less susceptible to friction.
General information
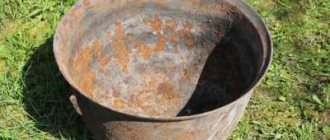
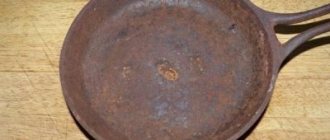
Causes of rust formation
then the following may be the reason:
- Low quality characteristics of the material. To reduce costs, unscrupulous manufacturers do not make dishes from pure cast iron, but add various inexpensive additives.
- Violation of the rules for caring for dishes. If after washing you leave the dishes wet so that they dry naturally, or constantly store the item in a room where there is a high level of humidity + no heating, then rust will appear very quickly. A similar problem occurs when regularly washing a frying pan with cold water immediately after cooking is finished.
- Rare use of utensils. Cast iron frying pans or other items made of this ferrous metal must be used regularly, otherwise the coating begins to deteriorate even without human intervention.
- There is no oil film on the surface. Fat and oil help to reliably protect products from rusting, and therefore dishes should be regularly treated with just such substances. For a similar reason, new utensils should be treated with vegetable oil before initial use.
Now let's talk about preparing the dishes for use.
Preparation for use
In order for the new product to serve the housewife for as long as possible, after purchase, special attention should be paid to preparing the dishes for cooking. To begin with, the frying pan/cauldron/saucepan should be washed with laundry soap or other dishwashing detergent.
Afterwards, wipe the cast iron with a soft towel, place it on the stove, pour in a little vegetable oil. You should heat the dishes and distribute the oil evenly over the entire surface. It is this procedure that helps close the pores in new dishes, and will also be excellent for preventing corrosion.
Please note that products that do not have plastic handles will be much more convenient to bake in the oven by pouring in oil and leaving to heat until light smoke starts to appear. You can heat an empty frying pan in the oven, and then immediately coat it with vegetable oil using a silicone culinary brush.
How to remove it?
You can deal with rust on brake discs using improvised means and the use of specialized compounds. Regardless of the chosen method of combating corrosion, the key to a successful procedure is strict adherence to the instructions.
Folk remedies for cleaning
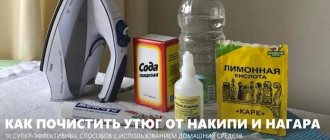
Folk remedies work no worse than professional cleaners, but are much cheaper. You can deal with rust on wheels using the following compounds:
- Lemon acid.
It is diluted in warm water. For every 10 liters you will need 50 g of preservative. The disk is completely immersed in the solution and left for 24 hours. After treatment, the product is washed with a soda solution and then with clean water (read more about removing rust using citric acid here). - Table vinegar. It is used like citric acid. For 10 liters of water you will need 250 ml of vinegar with a concentration of 9%. If the rust layer is thick, then the amount of vinegar is doubled (you can find out more here).
- Orthophosphoric acid. It can be purchased at construction stores. The discs are treated with this composition, left for 15 minutes, after which they are washed off with a soda solution and clean water.
- Soda slurry. It is convenient to treat small areas of corrosion. The product is prepared in such a way that its consistency resembles sour cream. The paste is applied to the rust, left for an hour, and then removed with a damp cloth.
- Sparkling water. To combat metal oxides, you can use Coca-Cola, Sprite or Pepsi. To increase the effectiveness of the procedure, the drink is slightly heated (up to 40 degrees). The disk is completely immersed in Cola and left for a day, after which it is removed, rinsed with clean water and dried.
All of the above products are harmless to metal, so they can be used as often as necessary.
Top 3 special lineups
You can get rid of rust using converters or removers, which are sold in auto parts stores.
They have different release forms, so when purchasing you need to pay attention to the following points:
Spray. It is chosen when you need to treat a small area of corrosion. The spray is convenient to apply, since there is no contact between the skin and the active substance.
Liquid form. Such compositions are an ideal solution for removing rust from the entire disk. The solvent is poured into a suitable container and the part is completely immersed in it.
Rust converter. Such compositions not only help dissolve corrosion, they provide additional protection of the metal from its reoccurrence
This is why it is so important to purchase formulations with added zinc.
Regardless of the product you choose, before using it for the first time, you should carefully read the instructions.
Top 3 popular compositions for removing rust from brake discs:
- Rust converter AUTOPROFIT Galvanized.
The composition is available in the form of a solution, which is bottled in convenient bottles equipped with a sprayer. The product removes rust and prevents its reappearance, creating a durable zinc coating on the surface. For 550 ml of the product you will need to pay 225 rubles. - Rust remover SYNTIROL. The product is available in liquid form. It has an immediate effect on corrosion, removing it in 4-8 minutes. The cost of 1 liter is 450 rubles.
- Rust Remover spray. The composition is completely ready for use. It is applied directly to the corroded area. After just 10 minutes you can evaluate the result. One package is enough to process 5 m2. Prices are here.
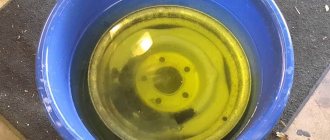
How to remove using the electrochemical method?
This is a complex but effective way to combat rust. To implement it, the following components will be required:
- current source, for example, a car battery;
- soda ash solution (1 tsp per 1 liter of water);
- plastic basin;
- stainless steel;
- wires and clamps.
Procedure:
- Connect the drive to the power source using the “+” wire.
- Immerse the part in the soda solution.
- Place a piece of stainless steel connected to the “-” terminal into the basin. The steel and the disc must not come into contact with each other.
- Turn on the battery and make sure the reaction is started. This will be indicated by the solution bubbling.
- Wait 2 hours.
- Disconnect the power source, remove the disc, rinse and dry it.
Although this method is labor intensive, it is very effective.
Creating a protective layer
How to restore the integrity of a frying pan so that rusty spots do not appear. Before first use, it is necessary to create a protective layer on the surface. This should also be done after you have cleaned a rusty cast iron frying pan. The layer will prevent the pan from rusting in the future. The procedure should not be abandoned; the quality of food preparation depends on it. Over time, the natural layer will grow and thicken, so cooking is a pleasure. Food does not stick and is fried quickly and evenly.
First, you need to wash the pan under hot water. There is no need to add detergent during washing. When heated, the dishes are completely disinfected. Do not use dishwasher. Wipe off the original finish thoroughly. Then wipe the pan dry, otherwise drops of water will cause rust to appear again.
Cast iron has a porous structure, so the pores need to be filled with oil. When heated, it will turn into a non-stick coating. The oil must be refined and odorless. It is best to use olive or flaxseed oil. They create a very strong film that will not break off and will not release harmful substances. You will also need salt, preferably rock salt.
Calcination on the stove:
- Cover the frying pan with a thick layer of salt and place on high heat;
- Stir the salt until it turns brown. Salt absorbs all harmful substances, oils and dirt. This process takes about half an hour on average;
- Then pour in the salt and rinse the dishes under hot water, but do not use detergents. Dry it.
Dip a sponge or cloth into the oil and coat the entire surface of the pan. Then pour the oil into the container and place on medium heat. Calcination will take 20-30 minutes. Then pour out the oil, wash the pan and dry it.
Calcination in the oven is the second method, more complicated, but more effective. First, take measures to protect yourself from acrid smoke. Since the procedure will take place in the oven, you should wear gloves to avoid getting burned.
- Place the empty frying pan on the heat and keep it over medium heat until it turns grey. Fill the hot metal with cold water, then pour it out. And dry the dishes;
- Next, add salt, as in the first method. Fry until dark;
- After the salt has absorbed the dirt, grease the entire frying pan, including the lid, with plenty of oil using a sponge;
- Place foil on the bottom of the oven as oil will drip from the pan. Preheat to 180 degrees. Place the pan upside down in the oven for three hours.
Before cooking for the first time, it is advisable to repeat the procedure to strengthen the layer. If cracks or chips appear on the product, this is a sign of low-quality metal that does not meet the requirements. Cast iron is not afraid of high temperatures. The best way to get rid of a cracked pan is to get rid of it.
Rub the coating with vegetable oil
Heat the oven to 180 degrees
Place in the oven
Independent work
If desired, you can do the grooving of the brake discs yourself. As indicated in the manual for domestic models, it is necessary to remove the disk and carefully process any defects that appear with a file.
Again, it is important not to overdo it and constantly monitor the thickness with a caliper
If you don’t have time for such long work, you can do it easier. Raise the car on a jack and remove the wheel. Now start the car and put it in fifth gear.
As soon as the disk begins to rotate, you can use the same file to clean it. Often, experienced car enthusiasts use a special emery disc with a large “grain”.
Upon completion of work, it is necessary to clean the disk and degrease it with a solvent.
This grinding method is one of the best for all front wheel drive vehicles. In this case, the work can be done in 1-2 hours.
When should you clean the caliper?
Cleaning of brake calipers depends on the condition of the part. Any error in movement, creaking or other dubious sounds and sensations during braking indicate the need to check the entire system. Threatening signs:
- discrepancy between the brakes of two wheels is 20% or more;
- car skidding when braking.
A breakdown of the caliper, a component of the braking system, affects the speed and force of braking. Breakdowns occur due to constant temperature changes, mechanical friction, metal oxidation and layers of dirt. To repair, in most cases you only need to completely clean the part from rust and other contaminants.
In general, regular preventative checks are needed to identify various types of faults and errors that not every experienced car enthusiast will notice. During the inspection, other damage is observed: a broken piston boot, bent brake discs and pads that have come out of place. While moving, the entire system heats up and gradually destroys itself.
What does grinding do?
High-quality groove allows:
- eliminate the runout of brake discs, which creates discomfort while driving;
- increase the service life of the entire brake mechanism (brake pads, discs);
- return the car to its previous braking efficiency;
- save money on buying new drives without compromising security.
Read about the causes of car vibration.
Many people think that it’s easier to change discs and not worry about grinding. But it's not that simple.
- First, you need to buy a pair of brake discs for one axle.
- Secondly, at the same time you will have to change the pads.
In total, the costs turn out to be quite significant, so it is much easier to spend several hundred on grooving or even do everything yourself.
What and where to lubricate
When replacing or servicing a brake caliper, you need to understand which of its elements requires lubrication and how to lubricate it correctly:
If a squeak occurs, it is necessary to lubricate the anti-squeak plates on both sides, avoiding the part facing the piston of the working cylinder.
Also, the pad pressure springs should not be forgotten. And the pads themselves can be lubricated on all sides, excluding the friction layer.
In order for the piston to move freely in the cylinder, its entire surface must be treated with an appropriate lubricating paste. But do not overdo it so that excess lubricant does not fall out of the piston boot.
We also carefully coat the caliper guides so that they move freely
It is also important not to overdo it here so that the lubricant from the guides does not get on the friction layer of the pads
All machine parts operating with a significant coefficient of friction, at high temperatures and in an aggressive environment, without the use of lubricants, will not work for a long time. This postulate largely applies to the work of the caliper. So, lubricate this disc brake element correctly and with the appropriate lubricant. This will save your nerves and help avoid many unpleasant moments.
Watch the video on the topic:
What types of lubricants are there?
If you meticulously find out who produces these lubricants, you will find out that for the famous brands indicated on the packaging, these lubricants are produced by specialized companies. But the conversation is not about them, but about how these substances are divided, and which one is better suited for lubricating the guides and other elements of the caliper.
In this case, they can be divided into several different types, each of which contains several lubricants that correspond in their characteristics to the operating conditions of various elements of the disc brake caliper.
Synthetic or mineral pastes with added metals
In the first group, it is worth considering high-temperature lubricating pastes with Anti-Seize properties. These lubricating substances contain entirely or partly a synthetic as well as a mineral base. With the addition of synthetic thickeners, submicron particles of metals such as molybdenum or copper. Also, instead of metals, solid substances of lubricants can be used, which work successfully at super-temperature values. This group includes:
- Complex lubricating paste products.
- Metal-free pastes.
- Lubricants containing copper or molybdenum disulfide.
They can be used to cover anti-squeak plates, pressure springs, and the back side of the pads.
Here you can highlight pastes from the following major brands: Huskey, Loctite, Wurth, LIQUI MOLY, Textar, Mannol Kupfer, Valvoline Cooper, Motip Koperspray, Bosch SUPERFIT.
Mineral oil based pastes
The second group includes synthetic lubricating pastes, which are based on mineral oil with the addition of a bentonite thickener, containing fatty acids and metal particles. Their distinctive feature is the absence of a dropping point with a working range from –45°C to +180°C. Excellent for lubricating brake caliper guides (fingers). Here are several such pastes from different manufacturers: ATE Plastilube, Loctite Plastilube, Molykote.
Synthetic oil based pastes
Well, the third group includes lubricating pastes intended for all moving elements of the disc brake caliper: piston in the cylinder, guides (pins), etc. They are compatible with most rubber-based materials, elastomers and plastics. They are based on highly purified synthetic oils with the addition of a stable thickener and additives with anti-wear, antioxidant and anti-corrosion properties.
Such lubricants are insoluble in water, brake fluid, acids and alkalis. They also have low volatility and high dielectric strength. These lubricating pastes are produced by the following brands: Molykote, Permatex, SLIPKOTE.
Domestic manufacturers in this segment have distinguished themselves with MS-1600 paste.
From the description it is clear that the optimal choice is lubricating pastes of the third group, because it is not for nothing that many machine manufacturers recommend them.
Treatment of cast and forged wheels against corrosion
It should be noted that the simplest processing methods are used for stamped disks. This is explained by their low cost, and therefore processing using complex, expensive technologies is impractical. And if in some cases these parts are easier to replace than to restore, then with cast and especially forged wheels everything is different due to the high cost, and when repairing them, more expensive and complex technologies are used. For example, professional cleaning of such parts, in addition to abrasive and chemical treatment, includes etching and phosphating.
The first method consists of treating parts with solutions of hydrochloric, sulfuric, phosphoric, nitric acids or caustic soda. This allows you to eliminate oxides and rust. Phosphating refers to the treatment of steel parts with iron phosphate, aluminum parts with chromium, as well as manganese phosphate and chromic anhydride. This method increases the adhesion of the paint and varnish material to the surface.
Work is carried out in a painting booth using a spray applicator. The charged powder is held on the neutral surface by electrostatic attraction. Upon completion of painting, the disc is melted in a polymerization chamber at a temperature of 190-220°C. It should be noted that painting using this technology is not feasible in domestic conditions. However, light alloy wheels can also be coated with acrylic paint, just like stamped ones.
What can be confused with souring calipers?
Many people confuse souring calipers with another problem, when the brake hose becomes kinked and the fluid cannot completely exit the caliper. As a result, the pads are in a clamped position. True, this is very rare.
One way or another, the problem must be solved, because the braking system is your safety in the car. As a result, you will spend several times less money on purchasing a caliper repair kit than if you completely replaced soured calipers with new ones.
When replacing the front brake pads, a very unpleasant surprise awaited me, in the form of a soured caliper guide (finger). Feeling sad to begin with, I decided to knock out the guide using a hammer and chisel. I don’t see any point in describing my erotic adventures, I’ll just say that I suffered for about an hour, and the damned, completely rusted piece of iron did not want to get out of its rightful place. Therefore, I made a responsible decision to remove this entire structure from the car and try to pull out the rusty finger in more suitable conditions. Which is what I will talk about in this post. Of course, there is a lot of information and recommendations for eliminating this problem. I’ll just describe my actions, in case it’s useful to someone. Like my previous post, this one is also aimed at beginners. I apologize in advance for the terrible quality of the photos, because I shot everything on my phone. And finally, I’m poor and I don’t have money for a camera! What you need: 1) Socket wrench 14; 2) Socket head for 19 + wrench; 3) WD-40 (well, what would we do without it?); 4) Adjustable gas wrench (the bigger the better. And don’t ask why!); 5) A piece of wire (rope or, for example, plastic clamps); 6) Siski Tiski, sorry. 7) Lubricant for calipers (as an option Litol-24, also not bad).
The use of folk remedies for corrosion
You can clean rust using household chemicals and substances. They are sold in hardware and grocery stores. It takes time to remove rust with their help. To use some of them, you will need a large container into which the corroded part is completely placed.
Lemon acid
You need to treat contaminants with it like this:
- Take citric acid powder at the rate of 10 grams per liter of water.
- Dissolve the powder in warm water.
- Fill the rusty disk completely with the resulting solution.
- Wait a day for the dirt to be removed.
- After removing the disc, wipe it and then rinse it with a soda solution to prevent oxidation.
Certain areas of the surface can be wiped with juice squeezed from lemon.
Vinegar
Food vinegar can remove rust. It must be poured into a container so that the disc to be cleaned is completely immersed in liquid. Let the part stand for at least 12 hours. Then rinse with soda solution and dry.
A mixture of vinegar and citric acid
Mix both solutions in equal proportions. Apply the finished mixture to small rusty deposits. Wait 1 – 2 hours, then wipe dry.
Baking soda
Dilute it with water until it becomes mushy. Place the resulting slurry on the rusty area. Wait half an hour and wipe with a rag. For larger stains, repeat several times.
Orthophosphoric acid
It is part of many rust removers, but it can be found in its pure form in hardware stores. You need to apply it like this:
- Apply with a brush or foam roller to the rusty disc.
- After foam appears, wait no more than 30 seconds.
- Wash off the resulting white film with water, wiping with a brush or cloth.
- Wipe the part dry.
It is not recommended to use strong acids - hydrochloric or sulfuric. Under their influence, undamaged areas of metal can also be removed.
Preventive actions
Naturally, removing rust from a metal surface is much more difficult than taking care in advance to prevent it from appearing. There are many tips from professionals that will help prevent corrosion on metal surfaces.
For example, to protect carpentry tools, lubricate them with a solution based on paraffin (wax) and gasoline. Moreover, for 20 grams of paraffin or wax, take 40 ml of gasoline.
Gasoline is heated in a water bath, paraffin or wax dissolves in it. The product is then used for application. It is strictly forbidden to heat it over an open fire.
And polished metal-based tools can be protected from corrosion with a similar composition. In this case, 10 g of wax or paraffin is taken per 30 ml of kerosene and the mixture is applied to the product.
Many products used to remove rust from metal surfaces include aggressive and toxic components. If handled improperly, there is a risk of getting burns to the skin or mucous membranes. It is recommended that after finishing work, do not forget to treat the products with kerosene or gasoline for prevention.
As you can see, there are many ways to solve the problem of how to remove rust from metal. If you find it difficult to tolerate contact with chemicals, you can use more gentle or natural compounds, but they are only relevant for minor corrosion.