How to clean floors with vinegar? Why wash the floor with vinegar? Vinegar is a natural remedy that is used to clean and disinfect surfaces. It destroys 99% of bacteria, 90% of viruses, and 82% of mold and its spores. Vinegar cleaner is a good solvent for dirt, grease stains and soap scum. And also an excellent odor destroyer. In addition, vinegar is inexpensive and available at any grocery store.
Vinegar will also help remove dirt from laminate flooring, one of the most common and economical floor coverings. You can find out the price of laminate flooring by calling the Master Floor company.
But, let's take a closer look at how to clean floors with vinegar.
Is it possible to wash the floor with vinegar?
Washing the floor with a vinegar solution is not only possible, but also necessary! This is the best product for cleaning such flooring. Such as laminate, linoleum, ceramic tiles and vinyl flooring. If your floors are wood. Their surface is most often covered with protective agents: wax, oil, varnish or paint. A vinegar solution will clean most of these finishes well, but may remove the wax completely. Therefore, it is very important to know what kind of coating your floors have. If you don't know this or are just not sure. Then test the effect of the cleaning solution on a small hidden area of the floor. Also, do not wash stone floors (marble, granite, slate, sandstone, etc.) with vinegar. You can damage the surface of the stone.
Preparing the vinegar solution correctly
Household vinegar is universal: it not only destroys odors and has disinfectant properties, but also removes greasy stains. Quickly and efficiently copes with even minor dirt and dust that appears on a freshly painted surface, especially after drying. Housewives love this method of cleaning the floor for its effect of enhancing color saturation.
The first thing you need to do before washing is to properly prepare the vinegar solution. The procedure is important, since too hot water or a high concentration of vinegar will only aggravate the matter and cause unsightly stains.
A vinegar solution for cleaning floors after painting is prepared as follows:
- We take a standard plastic or zinc bucket with a volume of 10 liters.
- We collect a full bucket of hot water. The most important thing when cleaning the floor is to choose the right water temperature. It should not be boiling water, but also not just warm liquid. A suitable temperature is one at which you can hold your hand in the water, but not for long - up to 5-7 seconds.
- Add 2 tablespoons of simple vinegar to the water. It is also called household or home. Concentrated acetic acid, even if it is found in the house, cannot be used.
- Mix thoroughly for 15–20 seconds.
- Let's start cleaning the floor.
By exceeding the concentration of vinegar in the solution, you can first cause the enamel to lose color and subsequently peel it off. Vinegar, even household vinegar, is a very aggressive substance and should be used extremely carefully.
Ammonia can be a high-quality and inexpensive replacement for vinegar. But the proportions are different - 1 tablespoon per 6-8 liters of water is enough. Remember that a large amount of the drug in the solution will have the opposite effect.
Vinegar 9% is the best cleaning product that manufacturers of household chemicals are silent about
Few people know that with cheap 9% vinegar you can wash almost everything in your home - from floors to a kettle with limescale. Take out your spray bottle and bookmark this article so you don’t forget the proportions of cleaning solutions.
Cleansing, disinfecting, deodorizing and adding shine - these are the 4 functions of vinegar solution
All Purpose Cleaning Solution
This solution can be used to clean faucets, sinks, walls, shower screens and fixtures, and any other surfaces that are susceptible to limescale deposits. The product is also suitable for cleaning kitchen surfaces, refrigerators, mirrors, windows and for removing organic contaminants (like vomit from a beloved cat, etc.).
Step 1. Mix vinegar and water in a 1:1 or 1:2 ratio in a spray bottle and add 20-30 drops of essential oil to the solution to your taste.
Step 2. Spray the product onto the stains and leave it to soak for 10 minutes (or 1-2 hours if the stains, such as limescale, are old).
Step 3: Wipe the surface clean.
How to descale a kettle with vinegar
Perhaps the most popular way to descale a kettle is with vinegar.
Here's how it's done:
Step 1: Empty and rinse the kettle.
Step 2. Prepare a cleaning solution of water and vinegar in a 1:1 ratio.
Step 3. Pour the solution into the kettle to the maximum mark (or almost to it).
Step 4: Start the kettle, then about halfway through the cycle, unplug it and leave it to soak for an hour.
Step 5. After an hour, run the kettle until the water completely boils.
Step 6: Drain off the vinegar solution and finally boil plain clean water in the kettle 3 times, letting it cool slightly between boiling cycles.
Step 7: Wash your kettle inside and out with dishwashing liquid and rinse.
How to clean floors with vinegar
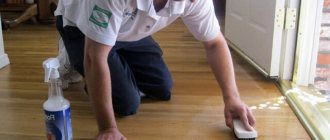
Vinegar can be used to clean almost all types of floors, including tile, laminate and wood. Here's how to do it.
Step 1: Vacuum your floors thoroughly to remove dust and dirt.
Step 2. Add half a glass of 9% vinegar to 4 liters of warm water and stir the solution.
Step 3: Wash the floors, then wait for it to dry.
How to clean a microwave with vinegar
Using vinegar, you can clean your microwave in just 10 minutes.
Step 1: Mix about 2 cups water and 2 tablespoons vinegar in a microwave safe bowl.
How to wash the floor with vinegar without consequences?
The vinegar solution is ready: the water is at the required temperature, and the amount of vinegar does not exceed two tablespoons. You can start cleaning the floor.
Recommended: Try this: Reusable cloths that will last a week
The sequence of proper floor cleaning with vinegar solution:
- Soak a soft cloth in the solution and wring it out well. Remember: too wet rags will cause new stains or permanent fading of the enamel. Therefore, the rag for washing the floor should be damp, but not wet.
- After carefully washing no more than 3 m2 of floor, you need to change the solution to fresh one. And so on until the entire freshly painted surface is washed.
- Under no circumstances should you re-rinse an already clean surface. It's better to do this in a few days. Rubbing the surface is also not recommended, because vinegar, even in low concentration, remains too active a substance that can break down some paints and varnishes.
- After the area has been treated with a vinegar solution, you should carefully wipe the floor with a cloth soaked in clean water, without adding any detergents.
It is better to use soft rags for cleaning floors and replace them after several procedures. Dirty rags with small or large debris will be the first cause of scuffs and scratches on a newly painted floor.
Vinegar 9% is the best cleaning product that manufacturers of household chemicals are silent about
Few people know that with cheap 9% vinegar you can wash almost everything in your home - from floors to a kettle with limescale. Take out your spray bottle and bookmark this article so you don’t forget the proportions of cleaning solutions.
Cleansing, disinfecting, deodorizing and adding shine - these are the 4 functions of vinegar solution
All Purpose Cleaning Solution
This solution can be used to clean faucets, sinks, walls, shower screens and fixtures, and any other surfaces that are susceptible to limescale deposits. The product is also suitable for cleaning kitchen surfaces, refrigerators, mirrors, windows and for removing organic contaminants (like vomit from a beloved cat, etc.).
Step 1. Mix vinegar and water in a 1:1 or 1:2 ratio in a spray bottle and add 20-30 drops of essential oil to the solution to your taste.
Step 2. Spray the product onto the stains and leave it to soak for 10 minutes (or 1-2 hours if the stains, such as limescale, are old).
Step 3: Wipe the surface clean.
How to descale a kettle with vinegar
Perhaps the most popular way to descale a kettle is with vinegar.
Here's how it's done:
Step 1: Empty and rinse the kettle.
Step 2. Prepare a cleaning solution of water and vinegar in a 1:1 ratio.
Step 3. Pour the solution into the kettle to the maximum mark (or almost to it).
Step 4: Start the kettle, then about halfway through the cycle, unplug it and leave it to soak for an hour.
Step 5. After an hour, run the kettle until the water completely boils.
Step 6: Drain off the vinegar solution and finally boil plain clean water in the kettle 3 times, letting it cool slightly between boiling cycles.
Step 7: Wash your kettle inside and out with dishwashing liquid and rinse.
How to clean floors with vinegar
Vinegar can be used to clean almost all types of floors, including tile, laminate and wood. Here's how to do it.
Step 1: Vacuum your floors thoroughly to remove dust and dirt.
Step 2. Add half a glass of 9% vinegar to 4 liters of warm water and stir the solution.
Step 3: Wash the floors, then wait for it to dry.
How to clean a microwave with vinegar
Using vinegar, you can clean your microwave in just 10 minutes.
Step 1: Mix about 2 cups water and 2 tablespoons vinegar in a microwave safe bowl.
Step 2. Place the bowl of solution in the microwave and run the device on high power for 5 minutes to bring the liquid to a boil.
Step 3: Let the bowl sit for another 2-3 minutes to allow the steam to loosen any dirt.
Step 4: Carefully remove the bowl and turntable.
Step 5. Wipe the microwave chamber with a sponge, starting from the “ceiling” and side walls and, of course, do not forget about the door and plate. Then wipe all surfaces clean with a kitchen towel to remove any remaining vinegar and return the clean plate to its place. Voila! The microwave is ready to use again!
How to descale an iron
We have already written about how to descale an iron using vinegar here. Here's a short summary:
Step 1. Prepare a solution of water and vinegar in a 1:1 ratio.
Step 2. Fill the iron tank with solution to about a third of its total volume.
Step 3. Place the iron vertically, heat it to maximum and leave for 5-10 minutes. All this time, the iron will chug, switching on and off - do not interfere with this process.
Step 4. Next, place a bowl under the iron and, holding the device horizontally, press the steam release button. Continue the procedure until rusty drops stop flowing from the base of the device.
Step 5. Fill the reservoir with clean water and heat the iron again to maximum. Next, follow the steps from Step 4. Repeat the procedure with clean water 1-2 more times.
How to Use Dishwashing Vinegar in the Dishwasher
Vinegar successfully replaces rinse aid in the dishwasher, preventing the appearance of whitish spots on dishes and giving them shine. However, you cannot pour vinegar solution into the rinse aid compartment (!). Solution?
By the way, you can wash the dishwasher itself with vinegar almost without your participation. All you need to do is place the bowl of solution on the top shelf and run the machine idle on the highest water temperature cycle.
How to Use Vinegar to Clean Carpets
Vinegar can also be used even to clean carpets. Here are 2 ways.
Note: Before using the vinegar solution, test the color fastness of the carpet in an inconspicuous area. Remember that this “remedy” can only be used on synthetic fiber carpets.
When can you start cleaning the floor?
The floor is painted and shiny with fresh enamel, floor paint or varnish. The question arises: when can you start washing? Answer: not immediately and not even after 2-3 days.
- First, the enamel should be given time to dry thoroughly.
- Secondly, the coloring composition must be absorbed into the wood. This process is lengthy - even with proper air circulation and constant room temperature, it takes at least two weeks.
Some home craftsmen make a mistake: after a few days they try the painted floor by touch and, if the enamel or paint does not stick to the hand, then immediately start washing it. It is not right. The topmost layer dries very quickly, within a day it feels like you can walk on the floor. But the lower layers will take time, sometimes a lot of time. Therefore, remember: you can wash the painted floor no earlier than after 1.5–2 weeks.
Cleanser Recipe
Making your own cleaner is very simple. You need to mix 1 glass of white vinegar with 4.5 liters of warm water.
To make the floor shine beautifully, add a few drops of vegetable oil to the solution. Please note that this will leave a very thin film of oil on the floor. If you use oil constantly, it will accumulate over time. To prevent this from happening, periodically wash the floor without oil. A vinegar solution will easily remove the film.
To reduce the smell of vinegar, add a few drops of an essential oil you like, such as lemon or lavender. However, remember that the vinegar smell is temporary. It will disappear as soon as the floor dries. Additionally, some essential oils can be dangerous for pets, especially cats.
What should you not do?
Never try to get rid of stains on a freshly painted floor using simple laundry soap and hot water. This is a serious mistake that will lead to new problems:
- even more divorces;
- fading of enamel;
- possible peeling of the coating.
We recommend: Gadgets versus manual cleaning: what is the best way to wash windows?
Vinegar is a proven household product that perfectly combines quality, productivity and affordability. When used correctly, a beautiful, sparkling floor surface and a long service life of the enamel or paint are guaranteed.
Why white vinegar is good as a cleaner
White vinegar is a natural cleaner that can kill 99% of bacteria, 90% of viruses and 82% of mold. It is used to dissolve dirt and soap scum and is also an excellent deodorant. It should be added that it is cheap and sold in almost every supermarket.
The vinegar solution works well on polyurethane-coated floors, but can damage waxed floors. Also, if your floor is waxed, it should not be cleaned with a water-based cleaning solution. Therefore, it is very important to know what type of flooring you have in your home. There is a quick way to check what type of flooring you have. You just need to spray water on it. If the drips remain on the surface, your floor is likely coated with polyurethane. If you're not sure what type of finish your floor has, it's important to test the new cleaning solution on a small, hidden area first to make sure it's safe.
Scientists: the incidence of COVID-19 in the Russian Federation will approach zero in early May
Talyzina’s only granddaughter followed in her footsteps: she is very similar to her
A German chef idolizes Russian solyanka during lockdown and gives the recipe
What mistakes do we make when faced with hair loss?
Don't panic if you're losing hair
Everyone knows the close relationship between the process of hair loss and the state of the psycho-emotional background. After all, stress is a factor causing hair loss, and it can also delay hair loss caused by other factors. The prospect of future baldness is one of the main reasons contributing to the appearance of neurosis, especially in women who naturally have thick hair. The longer the loss lasts, the greater the fear of losing the “last” hair becomes and the emphasis on the fact of loss increases. It is necessary to understand that severe and sudden forms of hair loss are most often the most favorable, most often they have a clear connection with the previous fever, disease, medication, etc., and in most cases they even go away on their own.
Don't wash your hair rarely
Washing your hair is an important hair care measure, especially during periods of active hair loss. Limiting the frequency of washing, especially the fear of washing your hair, is undesirable not only from a psychological point of view, but also from a health point of view. Sebaceous secretions that accumulate on the surface of the head during infrequent washing can cause inflammation of the skin and aggravate hair loss. On the contrary, trichologists recommend intensifying skin cleansing during periods of active hair loss - using active medical shampoos that regulate oiliness, peelings, and exfoliants.
You can’t limit combing your hair or “accumulate” falling hair.
The hair loss stage lasts 3 months - this is the period from the cessation of hair growth until the moment the hair leaves the scalp. If the hair is not combed out on time, then the dead hair will mechanically prevent the growth of “new” hair growing in its place.
You can't be in the sun without a hat
The role of negative influence of ultraviolet radiation on hair loss has been proven. The more intense the loss, the thinner the hair becomes, the greater the progression of the hair loss process.
Lost hair should not be collected or counted.
According to statistics from trichologists, collecting and counting hair that has left the head has only a negative effect on the course of hair loss. Collecting hair helps women focus on the process of hair loss, makes them neurotic, and in no case allows them to understand how much hair loss exceeds the daily norm.
