Lying in a warm bath - what could be more pleasant? Maybe a bath with a fragrant bomb. Buying it can be expensive, but making it yourself is quite easy and even interesting. You can make your own bomb exactly according to the recipe or turn on your creativity and create your own unique options: add different aromatic oils and components that are beneficial for the skin: dead sea salts, oils, flower petals and everything like that.
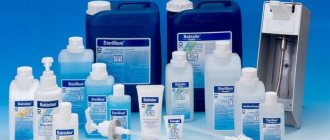
You can find some of the bomb ingredients right in your kitchen, but if you want something more beneficial for your skin, you'll have to go to a health food store or visit a specialized body care section.
You can use your creations yourself or make a great gift for friends and family. Try to make a bomb exactly according to the recipe, and when you understand the technology, experiment with the components.
What you need to know about bath bombs
Bombs come in different colors, sizes and shapes, and various additional ingredients are also used to make them. But, as a rule, the recipe necessarily contains citric acid and baking soda. It is when they come into contact with water that patterns appear on the water and that very spectacular hissing sound appears.
Bombs can come in different shapes and colors
On a note! The hissing itself can be fast and insignificant, or, on the contrary, long and fast - it all depends on the proportions of the ingredients. In the classic version, the ratio of acid and soda is 1:2.
Chic romantic bombs
Starch is also usually used for bombs. Thanks to it, the skin becomes soft and silky after taking a bath.
Interesting options for bath bombs
Most bombs are sold in the form of balls, but in reality they can be any shape (cube, animal figurines, and even a donut, as in the photo below). All you need is a suitable mold, preferably made of an elastic material (metal, plastic). Silicone molds should not be used: they stretch when filled, and therefore getting a product of the correct shape is not easy (but still possible). For example, ice cube trays and small plastic containers are good options.
Donut shaped bath bombs
Idea. If you don’t have any strong and solid molds in the house, take an egg tray - this way the bombs will have an unusual egg shape.
Egg trays as molds
On average, production takes no more than 10 minutes ; It will take a few more hours for the bombs to dry. You are already familiar with the main ingredients, but as additional ingredients you can use:
- healing mud;
- essential oils;
- sea salt;
- vegetable oils (for example, almond, olive, coconut, etc.);
- chopped herbs;
- milk;
- clay.
To give the bombs color, food coloring or mixtures of extracts of fruits, vegetables, and spices are used. You can, for example, take carrot, cherry, beet juice.
Bombs of different colors
Note! You need to be careful with essential oils - they can cause allergies. And if the bombs are intended for a child, they must be free of aggressive substances and odor.
Categories of essential oils and their combination
Variations of ingredients for making bombs at home
Below are general step-by-step instructions on how to make a bath bomb. Popular recipes will be discussed in more detail below.
General instructions for making bombs
Useful little things
In order for man-made bombs to be plastic and not crumble during the drying process, you need to take into account some important nuances when making them:
- For coloring, use only skin-safe food dyes;
- children's options are conveniently placed in shapes that imitate figures of animals, birds, etc.;
- Essential oils are not introduced into baby bombs, replacing them with extracts if desired;
- if there are not enough molds, you can remove the compacted products after 10 minutes and dry them on thick paper;
- For storage, place the effervescent figures one at a time in a small cellophane bag or wrap them in a piece of film and keep them in a dry jar.
- If the mass turns out to be crumbly, it is recommended to slightly moisten it with a spray bottle until bubbles begin to appear.
Cooking equipment
To make a homemade bomb, prepare:
- kitchen scales;
- molds (not necessarily spherical - products can be of any shape);
- large bowl;
- sieve;
- cold water, spray;
- gauze mask;
- eye protection;
- latex gloves.
Having prepared everything you need, get to work. Let's look at how to make a bath bomb. Choose one of the suggested recipes.
Benefits of the product
Bath bombs are widely used in the beauty world. They are used in SPA salons, and glamorous beauties love colored aromatic geysers during water treatments.
This tool has many advantages:
- cleanses and rejuvenates the skin;
- slows down the aging process;
- normalizes metabolism at the cellular level;
- makes the skin smooth and elastic;
- improves psycho-emotional state;
- promotes sound sleep;
- calms, relieves stress and fatigue.
Thus, a bath bomb is a comprehensive skin care, aromatherapy and stress prevention.
Recipe No. 1. Bath bombs made from baking soda and citric acid
Some of the necessary ingredients can be found in the kitchen, but if you want the bombs to be truly beneficial for your skin, you will need special body care products.
What ingredients will be needed:
- soda (300 g);
- essential oil (5-10 ml);
- citric acid (150 g);
- regular oil - sunflower, almond, olive, etc. (5 ml);
- food coloring.
Step 1 . The soda is sifted into a large bowl through a sieve (to get rid of lumps), and then mixed with citric acid.
Soda mixed with citric acid
Step 2 . Selected oils are added. Most essential oils do not cause the mixture to fizz, but sometimes it does (usually with citrus fruits). If this happens, the ingredients should be mixed as quickly as possible.
Oils are added to the bowl
Do not add essential and aromatic oils at the same time. You need to use one or the other.
Step 3 . If the bombs are multi-colored, then the finished mixture is distributed into different containers. In our example, it is divided into 3 parts.
The mixture is divided into different containers
Step 4 . You can start coloring the mixture. Food coloring is added drop by drop to achieve the desired color. To prevent the mixture from foaming, it should be quickly mixed with your hands.
Coloring mixtures
When using powder dye, it is simply added to the mixture a little at a time, followed by mixing until the desired color is obtained.
Step 5 . The mixture must be stirred until its color becomes uniform. Moreover, when using powder dye, you should mix especially carefully, as if “rubbing” the ingredients between your fingers.
The mixture should acquire a uniform shade
Step 6 . A little water is added from the spray, the mixture is stirred constantly, otherwise it will start to hiss. It is important not to overdo it with water - the mixture should be slightly crumbly, but if you squeeze it in your hand, it should hold together.
What should the mixture look like?
Step 7 . Forms are filled out. If these are 2 halves of a sphere, then a mixture is placed in each of them, after which they are connected. The halves should simply be pressed tightly - you cannot twist them. After a few minutes, the bonded mixture can be removed from the mold.
The mold halves are filled with mixture
Step 8 . The finished balls must be left for several hours in a dry and warm place.
Bombs need to be dried
Step 9 . Homemade bombs are ready. Remember that the fresher the balls, the more sizzling they will be. For storage, it is advisable to pack them in cling film. It is recommended to store unpackaged products in a dry place.
Beautifully packaged bath bombs
On a note! If you plan to give bath bombs as a gift, just choose a cute ribbon and packaging. That's it, the gift is ready!
Articles on the topic
Points on the foot
Newspaper manicure made from burnt paper. Stylish nail art!
Video - How to make a bath bomb yourself
Recipe No. 2. How to make a bath bomb with starch and dried flowers
To create these cute bombs you need to prepare a few ingredients.
Ingredients for making bombs
You will also need 1 part
of corn starch Although starch can be replaced with something else - powdered sugar, bath salts, dry milk. Oil (or several oils), 1 part.
It can be any oil - from sea buckthorn to olive. When choosing one option or another, consider the properties and the desired effect. Regular baking soda will require 2 parts (let's say 4 tbsp).
You also need 1 part
of citric acid (that is, 2 tbsp.).
Essential oil or fragrance .
Food coloring . There is no need to worry about safety: if the dyes can be eaten, then you can swim in them. Selected according to taste.
Filler – any dried flowers from a pharmacy or collected with your own hands. When the bomb disintegrates in the water, the flowers will float to the surface.
Step 1 . Citric acid is ground in a blender or coffee grinder. Here you need to act carefully when opening the lid, since small particles of acid can irritate the mucous membrane.
Step 2 . Starch, acid and soda are mixed in a suitable sized bowl.
Mixing bulk ingredients
Step 3 . Oil is added and all ingredients are thoroughly mixed. It is better to do this with gloves so as not to introduce excess moisture into the mixture.
Step 4 . A little water is added (this manufacturing method is called water-based; but this can be omitted if you use more oil for “gluing”). Water is added very carefully so that a reaction between the ingredients does not begin (the hissing will begin prematurely).
Adding water with a syringe
Step 5 . The resulting mixture is squeezed in your fist - it should be dense, but easily crumble when pressed. If the mass is too loose, add a small amount of base oil (about ½ tablespoon) or a drop of water. After this, the ingredients are mixed again.
The mixture is compressed in a fist
Step 6 . The finished mass is laid out in several containers. Flavors or essential oils and various dyes are added. This way you can get a variety of aromas and colors.
Parts are painted with different dyes
Step 7 . The mixture is compacted tightly in the molds, right to the very edges.
The mass must be compacted tightly
Here a problem may arise with choosing suitable molds. To make small bombs, use ice cube trays. For example, these.
Ice trays can be used
You can use plastic eggs from Kinder Surprise. Below is an example of how to make a bath bomb using half of such an egg.
An example of using plastic eggs from Kinder Surprise
Step 8 . The bombs are carefully shaken out, for which you need to press a little on the form. It turned out beautiful, didn't it?
Step 9 . Now let the bombs sit in a dry place for 24 hours to fully set.
Bombs should sit for a day
Homemade bath bombs
On a note. Do not use shower gel or soap after taking a bath bomb. Otherwise, all the oils that moisturize and nourish the skin will be washed off the body.
Ingredients for making
There are many recipes for making homemade bombs, but most of them start with a classic base. You will need the following components:
- baking soda;
- lemon acid;
- base oil (olive, coconut, wheat germ oil, etc.).
Only two ingredients are responsible for the “gurgling” effect - soda and citric acid. Dissolving in water, they interact with each other and the well-known chemical reaction begins. Essential oils, flavors, ground coffee, dried herbs and petals are responsible for the aroma. Fillers with a caring effect are also used: potato or corn starch, dry cream or milk, sea salt. Color is provided by food dyes, colored sea salt, coffee, cocoa, etc.
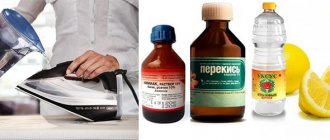
Many recipes indicate that it is better to grind citric acid into powder. Since it is volatile and can cause irritation to mucous membranes, it is recommended to wear a protective mask while grinding. The lid of the coffee grinder is also not opened immediately, but is waited for the caustic dust to settle.
Table: variations of ingredients for making bombs at home
| Ingredients | №1 | №2 | №3 | №4 |
| Basic | Baking soda | Lemon acid | Effervescent vitamin tablets* | — |
| Base oil | Wheat germ oil | Olive oil | Coconut oil | Macadamia oil |
| Dye | Powdered food colors | Liquid food coloring | Cosmetic dyes | Colored salt* |
| Essential oil | For calm and relaxation: lavender ylang-ylang rose neroli clary sage bergamot | For vigor: basil mint ginger citrus lemongrass fir | Aphrodisiacs: rose patchouli geranium sandalwood rosemary jasmine | For children: lavender tea tree fennel bergamot ylang-ylang mandarin |
| Fillers | Powdered milk and dry cream | Corn or potato starch | Magnesium sulfate or Epsom salt | Sea salt |
| Decor + aroma | Dry herbs | Dried flowers and petals | Ground coffee, cocoa powder | Bath beads |
| Additional components: | Foaming agent “Lush foam” | Polysorbate-80 | White, colored dry clay | — |
Base oil is used as a bonding component. Without it, you won’t be able to make a bomb from soda, citric acid and fillers. In addition, it cares for the skin, nourishes it and moisturizes it. It is best to use wheat germ oil as a base oil. It is light, quickly absorbed by the skin and does not clog pores. You can also use other oils as a main or additional component: grape seed, almond, jojoba, macadamia, cocoa, sea buckthorn, etc.
For beneficial aromatherapy, it is better to use only high-quality natural essential oils. You can also use food and cosmetic fragrances, which can be purchased at soap stores.
It is not advisable to use mineral oils and synthetic essential oils. They often cause allergic reactions and can negatively affect your skin and health.
Water is used rarely and in small quantities, usually to make bombs with a small amount of oil. The fact is that under the influence of moisture, soda and acid immediately begin to interact and you risk ruining your creation at the very beginning. Water is added using a fine spray from a short distance. Large drops of water may cause a reaction and the bomb will not work.
These small bath balls are used as decoration.
Powdered cream and milk are added to soften the skin while bathing. Since they are undesirable for oily and problem skin, it is better to replace them with corn or potato starch. Sea salt saturates the skin with beneficial minerals and has a beneficial effect on the body as a whole. Clay (kaolin), which can be purchased at a pharmacy, also has healing properties. Dried petals and herbs additionally saturate the water with aromas and turn bathing into a real pleasure.
Polysorbate (emulsifier) and foaming agent “Lush foam” can be found in a specialized store for preparing cosmetics. They are not required components. Thanks to polysorbate, the oil will not form a greasy film on the surface of the water and the walls of the bath, but will completely dissolve. A foaming agent will be needed to produce foam while the geyser bomb is bubbling.
Using the “Lush Foam” foaming agent you can make a foaming geyser bomb
Dyes are purely decorative. If you are afraid of allergies or you are simply against various “chemicals”, then you can do without them. The same petals, herbs, zest and coffee can give the bombs a beautiful color without harm to health. Never use pigments of dubious quality or not intended for cosmetics.
To paint bombs in the desired color, do not use artistic paints (gouache, acrylic, etc.). They can clog pores, stain your bathtub and body, and cause severe allergic reactions.
You won't need dyes if you add this colored salt to the mixture
In addition to the ingredients for cooking, you will also need:
- bomb molds;
- a small deep bowl (preferably glass or porcelain);
- gloves;
- a tablespoon for measuring ingredients and kneading;
- beaker;
- electronic kitchen scales;
- coffee grinder or mortar for grinding;
- fine spray (for water);
- cling film.
You can buy a mold at a specialized soap-making store. There you can also find bath beads, fragrances for cosmetics and a foaming agent. Instead of special molds, you can use chocolate trays, ice molds, pastry spoons for cutting out balls, muffin tins and much more. If you don't care about the appearance of the bombs, then make them with your hands, like snowballs.
This is what happens when you put fresh or dried flowers at the bottom of a mold.
A coffee grinder and mortar will be needed to grind ingredients such as citric acid and sea salt. The smaller the components, the better their adhesion to each other. Gloves are used to protect your hands from burning while working. The fact is that citric acid in direct contact can irritate sensitive skin and cause a burning sensation in areas of abrasions, hangnails and wounds. But when taking a bath using such a homemade bomb, citric acid dissolves in a large amount of water and does not have a negative effect on the skin.
Since essential oils tend to “fade out” over time, each finished bomb should be wrapped in cling film or placed in a closed, airtight bag. Ready-made “pops” are stored in a dry place.
Photo gallery: bomb making kits
Bath beads can be used to beautifully decorate effervescent balls
You can use square ice trays
Dried herbs will give the bombs a beautiful aroma, and cream will give softening properties.
Use dried rose petals and herbs instead of dyes. Instead of store-bought molds, you can use chocolate egg halves
Recipe No. 3. How to make a bath bomb with milk powder
To make such bombs at home, you should prepare:
- soda;
- citric acid;
- powdered milk (it will soften tap water and improve its quality);
- base oils;
- essential oils;
- decor and decorations (this includes not only dyes, but also dry leaves, flowers, clay, coffee, sea salt, etc.);
- dishes, molds (at your discretion);
- spray.
What you will need for homemade bombs
Step 1 . Soda and acid are mixed in a 2:1 ratio.
Dry ingredients
Other dry ingredients are added, but they should not be more than 1/3 of the volume of acid. Otherwise it won't dry out.
The ingredients need to be mixed
Step 2 . It is convenient to use disposable plastic dishes for this, in which after mixing the components you can still shake for a few minutes. The volume described in the master class is enough for one or two bombs. If you need more of them, you will have to mix with a mixer.
It is convenient to use such a container
Step 3 . Oil is added in the amount of ½ part citric acid. The example uses linseed oil.
Oil added
Step 4 . The ingredients are mixed intensively.
The components are thoroughly mixed
Step 5 . And they still mix. The oil needs to be pressed into the mass.
The oil needs to be pressed into the mixture.
Step 6 . If everything is done correctly, the mixture will have a consistency similar to wet sand. But if no oil was used at all or the mixture turned out to be crumbly, a spray bottle will come to the rescue: the composition is sprayed, after which it is quickly and thoroughly mixed. As for the volume, the proportions are as follows: if the oil was not used, you need to spray it up to 10 times, and for the volume, as in the container above, 2-3 times is enough.
Step 7 . Add fragrances or essential oils (at your discretion, but on average - 5-7 drops per bomb). The mixture is stirred again to evenly distribute the aroma.
Time to add flavoring
Step 8 . In the master class, magnolia flowers are used for decoration. The petals are laid out in shapes, but not very tightly - the mixture should cover them all.
Petals are arranged according to shapes
Another photo of the process
Step 9 . The flowers are sprinkled with the mixture on half of the mold (see photo below).
Flowers sprinkled with mixture
Step 10 . Then everything is compacted very tightly. You can do it with your hands. As a result, the completed molds should look something like this.
You need to compact it very tightly
Step 11 . The forms are left for 10-15 minutes, after which they are turned over and slightly bent. To shake out the bombs, you need to knock gently.
The molds are carefully turned over
Step 12 . The forms rise and this is what happened.
What happened after removing the molds?
Step 13 . The bombs are dried in a ventilated area (for example, on a windowsill) for 2-10 hours. This is what a dry bath bomb looks like.
Dried bath bomb
You can package them beautifully
You can package them beautifully and wrap them with ribbons.
Main effect
For a homemade bomb, it is important to select the main and additional components in the right proportion.
The basic basis of a homemade bomb is sodium bicarbonate (sodium bicarbonate) - drinking (better known as baking) soda + salt.
These substances are known for their disinfecting and anti-inflammatory properties, which helps eliminate itching and irritation. They allow the skin to gain pleasant smoothness and elasticity.
The main effect is the appearance of a geyser of bubbles when the bomb hits the water and hisses. Therefore, the next required component is powdered citric acid, which reacts with soda to neutralize it, releasing carbon dioxide.
To obtain a plastic mass, vegetable oil is added. Therefore, the basic formula is as follows: salt + soda + citric acid + oil. The remaining inclusions are designed to add fragrance.
When working, hands should be protected with rubber elastic gloves. If children over 12 years of age are involved in the activity as assistants, you need to provide them with a gauze bandage, glasses, gloves, and clothing covering their arms and legs.
Recipe No. 4. Simple fizzy bath bombs
To create bombs you will need:
- 1 glass of water;
- 2 tsp. essential oil;
- gold food powder (optional);
- 2.5 tbsp. l. almond oil;
- 1 glass of soda;
- food coloring;
- 0.5 cups of citric acid;
- 0.5 cups corn starch;
- 0.5 cups sea or epsom salt;
- a silicone baking mold, a tennis ball cut in half or a ball-shaped mold, and other necessary accessories.
Step 1 . All dry ingredients (citric acid, starch, soda, etc.) are added to a large container and then mixed thoroughly.
Dry ingredients are mixed in one bowl
Step 2 . In another bowl, mix essential and almond oils, add a little water (3/4 tablespoon). The wet ingredients are then slowly added to the dry ingredients, stirring constantly.
Adding oil
Step 3 . Food coloring is added to the resulting mixture, after which it is mixed again.
Dye is added
Dye of a different color
Step 4 . The resulting mixture is filled into silicone molds and a round mold, which, after filling, are placed in a place inaccessible to children.
Parts of the mold are filled with mixture
The halves are tightly compressed
Step 5 . Once the mixture has dried (which may take up to 2-3 days), the bath bombs are removed.
Bomb after drying
If you want, you can sprinkle some gold food powder on top. That's it, now you can finally take a bath!
Now you can take a bath
A great way to take your mind off the worries of the day
Recipe No. 5. Beautiful bath bombs as a gift
Such cute bombs can be a great gift - for example, for your mother. And if you add a scarf decorated with embroidery or a bottle of wine, you will become her favorite child!
So, the following are prepared for work:
- soda (1 glass);
- dried flowers, lavender;
- starch (0.5 cup);
- food coloring;
- citric acid (0.5 cup);
- essential oils;
- Epsom salts (0.5 cup);
- melted coconut oil (3 tsp);
- water (3 tsp);
- molds, dishes and other equipment.
Materials for making a bath bomb
Step 1 . Let's look at how to make such a bath bomb. Traditionally, all dry ingredients (soda, salt, acid, starch) are mixed in one bowl, and liquid ingredients (coconut oil, water) in another. The liquid ingredients are then slowly added to the dry ingredients and mixed thoroughly.
Dry ingredients are mixed first
Mix liquid ingredients in a small bowl
You need to mix until the consistency of the mixture resembles wet sand. Flavors and colors are added.
The ingredients are mixed
The mixture should resemble wet sand
Step 2 . The finished mixture is poured into several bowls, dyes and essential oils are added. The ingredients are mixed.
Adds color and fresh aroma
In our example, one part of the mixture is colored pink (a few drops of dye is enough) and received the aroma of plumeria flowers.
The other part turned out orange, with the addition of peach essential oil.
The other mixture turned out orange
A small amount of dried lavender is first added to each half of the mold (you can use other dried flowers).
Dried flowers are added
Step 3 . The mixture is compacted into molds. The halves of the molds are pressed against each other, after which one of the sides is removed.
Filling the mold with the mixture
Step 4 . After 5 minutes, the second part of the mold is carefully removed, after which the balls should be left to dry (8-10 hours).
Half the mold is removed
You can make 4 bombs using the ingredients above. Decorate them with colored twine or lace, and you can also attach a note of congratulations (if it’s a holiday).
Bombs are decorated with colored twine
A business idea that brings money.
When you are a beginning entrepreneur, then, as a rule, you are in search of an idea that, with minimal investment, could provide you with a constant income.
And if you're also a creative person and can turn your artistic imagination, life experiences and craft skills into something tangible, then there are a huge number of possibilities, many of which can be simply mind-boggling. One of the embodiments of this opportunity may be to build a business in the production of bath bombs. Beauty business is a niche that is worth considering as a serious business idea. According to statistical studies, in 2022 the cosmetics industry is expected to receive up to $60 billion in net income.
There are many benefits to building a bath bomb business. First of all, it is the simplicity of the technological process. You can create your own line of products in your kitchen with a few inexpensive ingredients.
Have banknotes twinkled in your eyes yet? But ambitious would-be sellers can get a piece of this growing market by learning how to make bath bombs and using their skills to sell these popular beauty products. A bath bomb is actually a delicious frothy treat that bubbles and dissolves while you bathe.
Do not rush to abandon such an idea that really brings profit. After all, you don’t need heavy equipment or expensive materials to start work. Everything can be found in your own kitchen. If you're even the slightest bit interested, spend a little more of your time digging deeper into the bath bomb business. We'll show you how to make your own bath bomb. You might be asking:
Recipe No. 6. How to make a bath bomb without water
The ingredients listed below are enough to make 3 bombs. The filler can be sea salt or starch. It is worth remembering that salt crystals are quite large in size, and therefore they must first be crushed in a mortar or coffee grinder. In addition to the filler, you also need to prepare:
- 4 tbsp. l. soda;
- 10 drops of flavoring;
- 2 tbsp. l. citric acid;
- 2 tbsp. l. sea salt;
- 1 tbsp. l. base oil (in our example it is used from wheat germ).
Step 1 . First, all the necessary ingredients are prepared and gloves are put on.
Oil Bomb Ingredients
Step 2 . Salt, acid and soda are mixed. Dye and flavor are added.
Dye is added to the mixture
Step 3 . Base oil is poured into the dry mixture. Lavender essential oil is added.
Next, add oil
Step 4 . The components are thoroughly mixed until a homogeneous mass is obtained.
Lavender essential oil
Step 5 . Now you can form the balls. One half of the mold is filled, the mixture is thoroughly compacted.
The form is filled with the finished mixture
Step 6 . The other half is filled (with a small mound). The halves are pressed tightly against each other, then, after about an hour, the molds are carefully removed. Uneven surfaces are removed, then the bombs are laid out on paper and dried for 24 hours. The balls should be stored in cling film in a dry place.
Bomb in a plastic bag
On a note! To color the mixture, you can use natural dyes - ground coffee, crushed herbs/petals, grated lemon zest, etc.
By combining colors, you can make bright and beautiful “pops”
How to make a bath bomb two-color or multi-colored? Parts of the base mixture need to be painted in different colors, and then the halves of the mold are filled accordingly.
Materials
Making your own bombs will take about 30 minutes.
For work you will need the following materials:
- latex gloves;
- large bowl;
- spoon;
- measuring cup;
- a small spray bottle filled with water;
- molds.
For molding, you can use children's molds, candy packaging, silicone baking molds, and Kinder boxes.
Many needlewomen use a plastic Christmas tree toy to make ball-shaped bombs. Using a hot knife, cut it in half, fill the halves, and then press them together.
Recipe No. 7. Grapefruit-orange bomb without starch
The ingredients below are enough to make one medium bomb. Additionally, you will need a small sprayer: with its help, water will be added in single sprays, after which the mixture must be quickly mixed.
What you will need for work:
- water (1 tsp, but this amount is approximate);
- soda (1 tbsp);
- wheat germ oil (5-7 drops);
- citric acid (1 tbsp);
- yellow liquid cosmetic dye (5 drops);
- crushed sea salt (1 tbsp.);
- orange essential oil (5 drops);
- Grapefruit flavoring (5 drops).
Step 1 . The salt is crushed in a mortar and then mixed with soda and acid.
Mixing salt, soda and citric acid
Step 2 . Dye, flavor and oils are added. The components are thoroughly mixed.
Stirring the mixture after adding dye
Step 3 . Water is added using a spray bottle, after which the mixture is mixed again. The halves of the mold are filled in turn with the prepared mixture.
When filling, the mixture must be compacted
Step 4 . After compacting tightly, the halves are connected.
Connecting halves filled with mixture
The bomb is decorated with oatmeal
Step 5 . The ball is carefully removed from the mold, all irregularities are removed. All you have to do is wait for the bomb to dry (24 hours on a piece of paper) and wrap it in cling film. Or use it right away.
Recipe No. 8. Heart bombs with white clay
An excellent option for a child. The same lavender essential oil can serve as a flavoring agent. By the way, it can be used from birth - having a calming effect, it will provide the baby with a sound and carefree sleep.
To make 6 such hearts, you need to prepare:
- 18 drops of essential oil;
- 15th century l. soda;
- 4 tsp. jojoba oil (it has a good effect on the skin and does not cause allergies or irritation);
- 6 tbsp. l. citric acid;
- 3 tbsp. l. white clay;
- 3 tbsp. l. sea salt.
You will also need a silicone mold for 6 hearts (see photo below), a sieve and a coffee grinder.
Materials and equipment
Step 1 . The soda is sifted through a sieve to remove lumps. Sea salt and acid are crushed.
Coarse sea salt needs to be crushed
Step 2 . All dry ingredients are poured into a deep bowl. Oils are added, after which everything is thoroughly mixed.
Oil added
Step 3 . The resulting mixture is filled into molds and compacted tightly.
Molds filled with mixture
Step 4 . After 3 hours, when the bombs have dried, the mold is turned over onto paper. You get hearts.
Heart bombs must dry for at least 12 hours
Step 5 . The bombs will dry out overnight and can now be wrapped in cling film.
It is better to pack the finished bombs so that they do not lose their aroma
Recipe No. 9. Chocolate Lemon Bomb
Let's look at how to make a bath bomb in the form of a “dessert” for the body with lemon and cocoa. First you need to prepare everything you need:
- 10 tbsp. l. soda;
- 30 drops of lemon essential oil;
- 5 tbsp. l. citric acid;
- 2 tbsp. l. cocoa powder;
- 3 tbsp. l. corn starch;
- 3 tbsp. l. almond oil.
Step 1 . Acid, starch and soda are combined in a bowl and mixed well. Then 1/3 of the mass is poured into another bowl and mixed with cocoa powder.
Cocoa powder mixed with other ingredients
Step 2 . Add 2 tbsp to the white mixture. l. almond butter, in brown - only 1 tbsp. l. Next, add 20 drops of essential oil to the white mixture, and 10 drops to the brown mixture. Both mixtures are thoroughly mixed.
Mixed dry ingredients
Step 3 . Bombs are created in a round shape. Different layers are laid out alternately in both halves, after which the balls are dried.
Ready-made chocolate lemon bomb
Video - Making a chocolate-lemon bomb
Answers on questions
What to do if the mixture is dry and won't dry? The mass is taken out of the molds, sprayed with water (2-3 sprays are enough), after which it is re-packed, compacted and dried.
What to do if the mixture is damp and does not dry? The mass is removed from the molds, a mixture of soda and acid (2:1) is added, everything is mixed and re-packed.
Are dry extracts necessary? Ingredients such as paprika, cocoa, coffee, etc. color the water, but will remain on the walls after taking a bath. The problem can be solved with a washcloth directly at the end of the procedure.
What difficulties can there be with sea salt? You need to be very careful with her. You should not add a large amount of salt to the main part, otherwise the mass will take a long time to dry. As for coarse sea salt, it is only suitable for decoration, otherwise the consistency will be compromised.
What forms can be used? Whatever! From children's sandbox sets to silicone baking molds and even shot glasses.
Fragrance bomb with roses