A toilet tank is a sealed container into which tap water flows in order to flush at the right time. Thanks to its extremely simple design, you can easily repair this plumbing fixture yourself. And for this you need to know how to properly disassemble and reassemble. Do you agree?
We will tell you in great detail how to disassemble a toilet flush cistern, in what order the container is dismantled and the functional mechanisms are removed from it. Let us indicate in which situations it is necessary to remove it, and in which it is enough to perform actions without disassembling.
The article presented for your review lists typical malfunctions and cases requiring mandatory intervention. We have looked at repair options for old and new models. For visual perception, the information was supplemented with photo collections, diagrams, and videos.
How to troubleshoot compact toilets
Constant leakage into the toilet
If water flows into the bowl in a thin stream all the time, it means that the fill or drain valve is not working.
If the first one breaks after filling the tank, the water does not shut off, but if the second one is faulty, the collected water is not retained by the valve. To determine which valve is not working, you need to press the drain and observe:
- If there is no leakage when you fill the water, but a trickle appears after the tank is filled, it means that the filler fittings are faulty.
- If water starts flowing immediately after pressing the flush button, the reason is the drain valve.
In very rare cases, both mechanisms do not work simultaneously. Overflow can also occur due to incorrect setting of the fill valve - how to adjust it is described at the end of the article.
What to do if the fill valve breaks down
To troubleshoot the problem, you need to remove the tank cap and remove the filling mechanism. Next, you need to unscrew the valve nut and carefully remove the rubber membrane from it. Remove rust and scale deposits from it, as well as from the valve seat, with a toothbrush, then rinse well with water. If the channel inside is clogged, clean it with a thin wire.
In old-style tanks, remove the cap from the valve, pull out the rocker arm axle and remove the problematic part. Use a thin knitting needle or wire to clean the channel and then rinse with water.
After cleaning and reassembling everything should work. If this does not happen, you will have to replace the membrane or the entire fill valve assembly.
Gaskets for this mechanism are rarely sold separately. Therefore, try simply turning the old one over: it will still serve for some time. Alternatively, you can sand it with sandpaper and then glue a circle of bicycle inner tube or other thin rubber on top.
What to do if the drain valve breaks down
First of all, you need to turn off the water, drain the liquid from the tank and, after removing the residue with a sponge or rag, remove the drain fitting. Next, you need to remove the gasket and clean it of rust. If possible, it is better to replace the gasket with a new one.
If you can’t find the same one, try turning it the other way or putting some kind of weight on top of the valve, like a large nut, so that the membrane is better pressed against the seat. If all else fails, you will have to replace the entire drain mechanism.
The tank is not filled enough
Sometimes, in filling mechanisms with a float inside the glass, the valve plug gets jammed due to rust. This leads to the fact that when filling the tank, water enters the glass from below, rather than overflowing over its edge. As a result, the valve closes prematurely and the tank does not fill to the required level.
To solve the problem, you need to turn off the water, wash off the residue and remove the filling mechanism. Next, remove the bracket and remove the valve plug from the glass. Then you need to clean the part and its seat from plaque, and also make sure that the plug fits well to the glass and moves freely.
Leaking from under the tank
Water leakage from the bottom of the tank can occur if the cone gaskets of the mounting bolts or the large rubber ring between the toilet shelf and the tank have failed.
In both cases, you need to turn off the water and press the flush, then remove the lid and remove the filler and drain fittings. After removing any remaining water, unscrew the mounting bolts and carefully inspect all seals for cracks.
It is advisable to replace the gaskets with new ones. If you can’t find the same ones, you can thoroughly clean them, dry them and install them in place, after lubricating all joints with silicone sealant.
The button gets stuck or stuck
A problem with the flush button is usually caused by the fact that when pressed fully, the stem catches on the valve mechanism and jams. However, often replacing the button itself does not give anything. There are several solutions.
https://youtube.com/watch?v=CjWq2qZaaFI
The simplest thing is to unscrew the button, press it a little, pushing it down a couple of millimeters, and then put it in place, holding it in this lightly pressed position. This way the part looks a little recessed, but thanks to the reduced stroke it will not jam at the extreme point.
Common problems
Proper installation and careful operation are essential conditions for long service life of the system. Repairs to the Cersanit toilet installation are caused by violation of the rules, hard water with a large amount of salts.
Splashes from the toilet bowl
Partial splashing of water when flushing onto the floor, walls and legs causes discomfort. Over time, drips appear on decorative coatings. The reason for the too powerful flow is an unregulated flush. The problem is typical for rimless toilets, especially when combining bowls and installations from different manufacturers.
You can fine-tune the volume by adjusting the keys or by installing a special flush limiter.
Constant leakage of water from the tank
Sometimes, some time after installation, water begins to “run away” from the tank, which increases monthly consumption. In place of a thin stream, dirty yellow deposits that are difficult to remove are formed. The cause of the malfunction is a loose bottom drain valve gasket, which is hampered by dirt or deformation due to natural aging.
The cuff that has lost its shape and elasticity is replaced. To clean the mechanism, you can press the flush button several times.
Continuous filling of the tank
If the water flow does not stop when the float is in the extreme position, it is necessary to dismantle the filling valve for inspection. A clogged mechanism just needs to be disassembled and washed. If damaged or prolonged use, replacement is necessary. The condition can be assessed by external inspection - the old intake mechanism is covered with a dark coating of water.
The flush button does not work
For mechanically controlled keys, faults are associated with the rocker block or pushers. The malfunction is solved by replacing an element that can be easily removed/installed. For pneumatic buttons with a hydraulic lift, silicone hoses may become deformed and fly off.
Source
Repair of a tank with a bottom water connection
In a tank with a bottom water connection, a membrane-type filling valve is used. This can cause problems with filling the tank if the pressure in the water supply system is low. The water pressure may not be sufficient to open the valve and fill the tank. If your system constantly maintains low pressure, then it is better to replace the diaphragm valve with a rod analogue.
Another common problem is water leaking at the entrance to the supply valve tank. Its location is such that the valve is constantly under water. If the connections are not tightly sealed, leaks are almost guaranteed.
Repairing a toilet cistern with a bottom water supply is carried out after shutting off the water supply and removing the cistern lid. After this, the problem is resolved using the same algorithms that are described for repairing models with buttons.
We have discussed how to repair a cistern with a button, with two buttons, or with a mechanical control. They differ slightly, mainly in the design of the control mechanism. The general principle of operation and repair for all devices considered is the same.
The video shows how to repair a toilet cistern with your own hands, or more precisely, the process of replacing its fittings.
Interesting, I have a question. My husband and I installed a new toilet when we were doing renovations and the tank was installed correctly and the water pressure is good when flushing, but it doesn’t always flush completely. How can this be fixed? Or is this forever? My husband reinstalled it and the same thing happened again - there is pressure, but the water does not completely wash away.
I have already repaired my tank several times and encountered the following problems: - the service life of rubber and silicone elements is extremely limited. Three years and the gasket crumbles like stale bread. Silicone turns into a petrified fossil. In this case, you will be lucky if it is standard and available for sale; - Rust. Over the same period, any metal elements - bolt heads, float lever - are covered with a thick layer, regardless of the protective coating. Remove and clean with a wire brush; — Fill valve shut-off gasket. Often it has a tricky shape and profile and is almost impossible to find on sale. Over several years, the gasket is eaten away by microparticles in tap water and ceases to block the flow. As a result, the entire valve mechanism needs to be replaced, which clearly exceeds the cost of the gasket itself.
In general, it is easier to replace the entire filling of the tank every few years.
Thank you very much for this article. Did you help solve the problem?
Rules for caring for plumbing fixtures
In order for your plumbing fixtures to serve for a long time and not fail at the most inopportune moment, it is important to take care of proper care of them. Products made from sanitary ceramics require regular cleaning, and this should be done using special chemicals.
They contain caustic alkali, which destroys accumulated organic deposits and removes rust. The cleaning product can be easily purchased at any hardware store.
However, it is not recommended to clean sanitary ceramics with products based on soda and other abrasive substances. They scratch the surface, which leads to the formation of tiny scratches on it. Dirt and rust accumulate in them quite quickly, so repeated cleanings will have to be carried out more often. Over time, it will no longer be possible to clean the plumbing fixtures.
Problems with the toilet flush mechanism often arise due to clogging by impurities present in tap water. To prevent contamination, it is recommended to install a coarse filter at the entrance of the water supply system to the apartment. This will significantly increase the trouble-free service life of all home plumbing fixtures.
Adjustment of individual elements
To install a new system responsible for filling with water, you will need the following tools:
- plastic ruler or metal tape measure;
- adjustable wrench;
- spanners;
- recently purchased fittings components.
Water can enter the tank from below or from the side. If we are talking about a lateral connection, for repairs you need to perform the following steps:
- Set the diameter of the water intake pipe.
- Choose the system that is needed for your model. This is quite simple to do - you need to remove the lid from the tank and see what kind of fittings are in it. After that, buy the same one for sure.
- After the entire structure has been purchased, you can install new water intake fittings.
- Shut off the water supply to the toilet.
- Open the lid and drain the water completely.
- Remove the old fittings.
This can be done after you unscrew the nut located on the flexible hose with a wrench. At the same time, be sure to support the entire structure. This event can be completed by one person - the main thing is to work harmoniously with both hands.
In the case where the water comes from below, you will need to struggle a lot to unscrew the nut. This can be done only with improvised materials or by first shortening a standard wrench:
- Carefully inspect the used gasket. If it has no visible damage or irregularities, it can be reused for a new structure being installed.
- The new fittings should be positioned so as not to interfere with the operation of the drain system, and also not to touch the walls of the tank itself.
- Connect the water.
- Check that the work has been completed correctly.
Gluing large cracks: methods and materials
What to do if the toilet or cistern is cracked and the crack is through? For gluing you will need a two-component epoxy resin. To carry out the work - a drill with a drill for ceramics and a grinder with a diamond-coated disk. The sequence of work occurs in the following order:
- Holes are drilled at the ends of the crack - this is necessary in order to stabilize the load and prevent further propagation of the fault;
- Next, you need to walk along the contour of the fault with a grinder so as to widen it. You need to act carefully so as not to aggravate the problem with additional chips;
- The fault area is cleared of remaining particles after cutting and drilling, and degreased with acetone;
- Next, epoxy is applied - the mixture is added in small quantities and spread with a spatula to eliminate the appearance of excess. If the resin is liquid, and a crack has formed in a vertical section, you can seal it with tape to create a recess for the resin, which will not spread over the surface.
- After complete drying, you can sand the surface with fine sandpaper.
Using the methods described above, you can repair a toilet with a flush cistern with minimal investment and in the shortest possible time.
Toilet cistern repair
If after draining the water flow does not stop, then there may be either a breakdown of the shut-off valve or a malfunction of the drain mechanism. To accurately determine the problem, you need to disassemble the tank.
Toilet barrel repair. Fixing a leak in a barrel valve
How to disassemble a toilet cistern with a button:
- The button is held in place by a locking ring. To remove it, you need to hold down the button, under it you will see small depressions. Press the screwdriver into one of the recesses and turn the ring counterclockwise;
- Carefully remove the unscrewed ring along with the plug. Below them is a release mechanism;
- To view it, you need to lift the toilet lid.
Next, you need to carefully examine the drain and exhaust valves. If the water is not held by the shut-off mechanism, it will leak after the tank is completely filled. If the malfunction is in the dial, then the float will be under the water column, and the container itself will not be able to fully fill due to a constant leak. Or, on the contrary, the tank fills up excessively and the excess ends up in the overflow, from where there is a direct outlet to the toilet.
Types of drain valves
There are 2 ways to troubleshoot such problems:
- Complete replacement of toilet flush tank fittings;
- Partial replacement (of any valve or float).
How to replace the dial valve:
First, the water in the riser is shut off. Afterwards you need to disassemble the tank and remove the lid; Using an adjustable wrench, unscrew the flexible pipe from the water outlet. Below it is the inlet of the dial tap or valve;
The device is unscrewed from the tank. A new tap is being installed in its place.
Please note that if its outlet is plastic, then there is no need to seal the threads. At the same time, if the adapter between the flexible hose from the outlet and the valve is metal, for example, brass, then a fuglent will be required; The tank is assembled in the reverse order.
The drain valve is replaced in the same way:
- The tank is disassembled and the lid is removed;
- Basically, the problem is a worn ring under the valve. Replacing it will be difficult even for a novice plumber;
- The fittings are carefully removed from the tank, the ring is removed, which seals the gap between the valve and the drain hole into the bowl. A new gasket is installed in its place. If it is not possible to buy an O-ring, you can replace it with a suitable piece of rubber or even a nylon stocking with sand. But under no circumstances seal the gap with a nail or other metal objects - this will damage the tank;
- Assembly is carried out in reverse order.
Many residents of multi-storey buildings are familiar with the discomfort associated with noise when filling the toilet tank. The problem here is too much water pressure. To get rid of the constant hum after draining, you need to adjust the dial mechanism.
- In the noise suppression tank, a small tube extends from the inlet valve. Through it, water falls to the bottom of the tank, after which the noise of the set stops. If this does not happen, then it is likely that the tube is located too high or that it is not there at all;
- To solve the problem, you need to attach a small flexible tube to the outlet of the dial valve. Its length must reach the bottom of the tank - this will allow you to forget forever about the noise of the toilet when filling water;
- If there is a tube, but it is too short, it can be lengthened or replaced with a suitable one.
It often happens that the toilet simply does not fill with water after flushing. Here the fault also lies in the dial valve. You need to turn off the water and remove the lid, after which the flexible connection is unscrewed from the supply valve. Afterwards you need to clear the tube from blockages, check the valve inlet and filter. Any stuck dirt, scale or other deposits can cause a decrease in water pressure.
Adhesive recipes
Now on the market there is a sufficient amount of professional materials and ready-made glue for ceramic restoration.
There is no need to invent a bicycle when you can buy a ready-made product that is optimally suited to the given adhesion parameters - resistant to water, vibration and other mechanical loads.
You can glue the toilet with epoxy resin, seal the seam with silicone sealant or liquid welding, and attach the broken part using industrial-type BF 2 glue. Using a ready-made adhesive composition, you will save your time and get a high-quality result.
Filling a crack with epoxy resin
Epoxy resin is one of the most effective and reliable compounds for sealing seams. As a rule, two-component polymer epoxy is available for sale - the kit includes two containers containing a hardener and a filler.
To prepare, you need to mix both components in one, clean glass, ceramic or metal container. Mixing is carried out in accordance with the recipe specified by the manufacturer on the product packaging. After mixing, the composition needs to sit for some time.
The gluing process itself is carried out as follows:
- The crack is thoroughly cleaned of debris and contaminants;
- If the chip is large or deep, you can try to treat it with sandpaper folded in half using the edge of a folded sheet, after which you need to clean the surface again with a brush;
- The gap is treated with acetone or alcohol to remove fats and other chemical contaminants, and dried with a napkin;
- Next, you need to cover the clean gap with epoxy. When applied, it is better to immediately remove excess epoxy protruding outward with a napkin;
- After drying, which can take from 30 minutes to 4 hours depending on the type of material, the surface must be treated with sandpaper with the finest grain.
If the work is done correctly, the gluing will withstand contact with water, and the toilet will last for a long time without leaking. The seam will not be as noticeable as when processing with other materials.
Bonding cracks with silicone sealant or cold welding
Silicone caulk can be found at hardware stores. It is sold in flexible tubes of various sizes, including small tubes. This is exactly the kind of sealant we will need to save our budget on materials. Cold welding can also be found at hardware stores. In appearance, it is an elastic material of a metallic color.
If you are in doubt about the best way to seal a toilet, then both of these materials have the same effectiveness and strength of connection. Cold welding is more noticeable on a white surface and, after its application, it may be necessary to tint the treated area with acrylic moisture-resistant paint or moisture-resistant varnish to match the earthenware.
Bonding cracks and chips is done as follows:
- The surface is carefully sanded and cleaned of small fragments;
- Degreasing is carried out;
- Apply silicone sealant - for work it is better to use a flat plastic spatula, which can be used to carefully apply and level the paste. Excess is removed with a napkin;
- After drying, the treated area is sanded with sandpaper.
If cold welding is used, then preparation for fixation is carried out in the same way as with sealant. Before applying, a piece of cold welding must be kneaded well so that it becomes soft like plasticine. It is better to do this with gloves, as it gets your hands dirty.
After the cold weld is ready, it is applied to the seam, pressing it with your fingers so as to fill any voids. The excess is cut off with a flat knife. After 4-5 hours, the surface can be sanded to level it and covered with white paint to hide visible defects.
What types of cisterns are there?
Knowing the specifications will allow you to choose the appropriate model. All waste tanks can be divided into groups according to various criteria.
Based on the location of the toilet cistern, the following types are distinguished:
- Monoblock - the tank and toilet bowl form a single unit. It is impossible to replace the top without replacing the entire toilet.
- Separate - the tank and toilet bowl are independent of each other.
By type of fastening there are:
- mounted models;
- attached models;
- built-in models.
The type of drain mechanism can be:
- pneumatic;
- lever;
- push-button;
- stock
For filling and draining water:
- float valves - have a valve made in the form of a piston or membrane;
- side ones are equipped with an automatic camera that looks like a glass.
Fastening
Floor standing toilet
Perhaps the most common toilet bowls, which are equally often found both at home and in various kinds of public buildings. The delivery set includes anchor bolts and clamping nuts, with the help of which the bowl is firmly fixed in place. The ease of installation captivates buyers and encourages them to equip their bathrooms with toilets of this particular type.
There are two types of floor-standing toilet designs:
- compact
- monoblock
The first option is the most popular: separating the bowl and tank makes it easy to replace one or another part in case of breakdown or choose a unique design solution. True, only if the store sells bowls, seats and tanks separately, and not together, as is most often the case.
The monoblock is a single design. This fact significantly limits the repairability of one of the leaked parts of the toilet. But toilets with a single design are cheaper than compact ones - if you are extremely limited in funds, then it makes sense to save, don’t you think?
One of the most popular models of floor-standing toilets on the Russian market is JIKA Lyra 8.2423.4.
This is a relatively inexpensive classic compact model, which due to its small size will fit perfectly into the interior of any bathroom. True, it comes without a lid, and the fact that you will have to pay another 800-900 rubles for it can rightly be attributed to the disadvantages of the product.
Other popular models:
Toilet MERIDA M 010 (Cersanit, Poland)
Comfort (Rosa)
Victoria (Roca)
Attached toilet
Many specialized experts do not classify wall-mounted toilets as a separate category, but we will take some liberties, since they still differ significantly in appearance from their classic floor-standing “brothers.” Although the type of fastening remains the same - to the floor, such products have a more massive back that fits tightly against the wall. The tank can be a classic external one or installed in the wall
A well-known model of this type is VitrA S50.
A very colorful and expressive toilet that looks like a real giant. It impresses with its massive appearance and has the remarkable ability to make any bathroom richer and more spectacular. At the same time, it is not as expensive as one might think - 4,000-45,000 rubles.
Other wall mounted toilets:
Roca Meridian
Wall-hung toilet
Practical and compact type of toilets. This allows them to be used even in the most modest-sized rooms, while saving precious centimeters. They look minimalistic and very modern, but require more complex installation compared to other types of toilets due to the use of an installation system.
The frame with the tank is attached to the floor and walls and then covered with gypsum board. The flush control is carried out using a button placed outside. Sound insulation is on your side - now the neighbors can only guess about your manipulations in the bathroom. On your side is the possible failure of the installation frame. It will not be possible to easily fix a breakdown, unlike the above types of toilets, so it is better to look only at high-quality models of wall-hung toilets with installation.
Many people are quite skeptical about this type of installation, questioning the frame’s ability to withstand a more or less significant load. And it’s completely in vain - some models of wall-hung toilets with installation are designed for a load of more than four hundred kilograms! Impressive? Well, then prepare your money: such systems cost a little more than conventional floor-mounted or wall-mounted toilets.
The popular model of the wall-hung toilet Roca The Gap, which represents a reasonable combination of price and quality.
It does not take up much space, has a non-standard shape, and amazes the eye with its emphasized geometric harmony and slightly smoothed corners.
Other popular models:
Roca Dama Senso
Vitra MOD
Cersanit DELFI Leon
Visa 8050
Roca N-Meridian
Corner toilets differ from floor-standing ones only in their placement in the bathroom. The type of fastening remains the same
For those who are persistently looking for an answer to the question of which toilet to choose, it will be useful to know about the outlet through which, in fact, your “white friend” interacts with the sewer. Many buyers of toilets do not even suspect that they may differ from each other.
How to dismantle a toilet cistern
The tank is attached to the back of the toilet bowl. It stands on a ceramic shelf with two holes, coaxial with the holes in the bottom of the container. Studs pass through them for fastening with double-sided spacers and a nut tie. The tank is connected to the bowl using a pipe. The place where they meet is insulated with a special seal to prevent water from leaking onto the floor.
The operating algorithm looks like this:
- shut off the water;
- disconnect the tube (hose);
- empty the tank, completely draining the water;
- unscrew the release button;
- remove the cover;
- The remaining water is collected with a soft cloth or absorbent sponge;
- unscrew the nuts under the shelf;
- carefully lift the container;
- moved to a place convenient for work.
Work process
How to attach a compact toilet cistern
First, a rubber cuff is applied. The service life increases with careful selection of this gasket; it protects against leakage from under the tank.
The surface of the special protrusion where the tank is attached should not contain any traces of defects. After installation work, the cuff should be in contact with the tank and shelf without gaps. To eliminate possible leaks, the cuffs must be lubricated with silicone sealant. It serves as a guarantee of additional fixation of the rubber gasket during fastening.
Once the plumbing installation work is completed, we perform a test flush
It is worth paying special attention to the process of filling the tank; if something is not satisfactory, you need to adjust the float device. If the flush tank works properly and there are no leaks, then the job was done correctly. https://www.youtube.com/embed/XxBFWHSj9Io
How to install a hinged type of tank
The flush tank is sold together with the toilet. The mounting height of the drain tank depends on the length of the pipe. A pipe with a cross-section of thirty-two millimeters can be made of plastic or metal and is connected to a water tank and toilet. Then holes are made in the wall according to the marks using a hammer drill. You can use fasteners from the kit or dowels; it is most reliable to mount them on brackets that you can buy yourself.
How to install a built-in tank
A hidden plastic tank is retracted into a special niche in the wall or installed behind a false wall made of plasterboard. Plumbing saves space in the toilet room and brightens up the modern interior. The installation process is not complicated; a support frame is used to fasten the elements - an installation; such a kit costs much more than a compact toilet. You can buy a bidet to go with the toilet.
Before installing the frame, you need to remove the pipes from the water supply and sewer system to the tank and toilet. After completing the work on fixing the dimensions of the frame frame and preparing the installation system, mark the fastening points on the wall and floor. Using a hammer drill, holes are made; you need to take into account the material of the wall so as not to damage the drill. Using anchor bolts or dowels, the frame frame is screwed to the wall.
It is important to maintain clear verticality; it is measured by the building level; compliance with this requirement is conditioned by the guarantee of uninterrupted operation of the plumbing. All plumbing elements are installed on the frame, starting from the flush cistern with toilet bowl to the siphon. The drain reservoir is connected to water
A drain button is installed in the false wall in pre-prepared holes. The flush button is double, so the system is dosed and allows you to select a full or partial flush mode of three or six liters, or six and nine liters when flushing. The mounting frame is finished with decorative materials in the form of panels. During the entire installation process, it is necessary to monitor the tightness of each element.
The drainage tank is connected to water. A drain button is installed in the false wall in pre-prepared holes. The flush button is double, so the system is dosed and allows you to select a full or partial flush mode of three or six liters, or six and nine liters when flushing. The mounting frame is finished with decorative materials in the form of panels. During the entire installation process, it is necessary to monitor the tightness of each element.
All plumbing elements are installed on the frame, starting from the flush cistern with toilet bowl to the siphon. The drainage tank is connected to water. A drain button is installed in the false wall in pre-prepared holes. The flush button is double, so the system is dosed and allows you to select a full or partial flush mode of three or six liters, or six and nine liters when flushing. The mounting frame is finished with decorative materials in the form of panels. During the entire installation process, it is necessary to monitor the tightness of each element.
Which type of toilet is more profitable?
From a financial point of view, installing a compact toilet cistern is considered more economical and simpler; all fasteners are included in the kit; you need to check their availability when purchasing. If you install the tank in a mounted or hidden model, you will need to purchase additional fasteners yourself.
How to replace an old cistern
How to properly carry out the work of installing a new tank in place of the old one?
Features of covers of foreign models
If you have a toilet, you will need a flathead screwdriver to remove the lid. Under the button you will find a nut. Unscrew it with a socket wrench and remove a small container that looks like a cup. It is held in place by pushers, and if you press them at the same time, the cup rises up. Once it is at the top, carefully remove the lid and set it aside.
The cover of the model is removed as follows: first, unscrew the two buttons, then the screw. You will need a Phillips screwdriver for this. After removing the glass, the lid can be easily removed. If you bought a “respectable” toilet from, you need to press the button inward, find the groove and pull out the structure using a flat-head screwdriver. At the bottom you will find a plastic nut that also needs to be unscrewed.
Replacement of fittings
Replacement of fittings begins with dismantling the old one. In some cases, there is no need to completely change the fittings. It is enough, for example, to change only the drain column or fill valve. If you change the column, you will have to completely remove the tank. Replacing the fill valve will not require this. In any case, you must first dismantle the old elements. Let's consider this process in full step by step using a specific example. Let's take this toilet as an experimental sample:
It can be seen that it has a one-button fitting with a bottom supply. The procedure for replacing any other one, including a rod one, for example, with a side supply, will differ little from that described. Differences in operations will be noted.
All work begins with shutting off the water at the inlet to the tank or the entire water supply branch. After this, you need to flush the water in the tank into the toilet.
1. Remove the button. In our case, it turns counterclockwise. It happens that the button is attached to the tank lid. The cover will then be removed without dismantling it. Then just move on to the second step. For rod fittings - unscrew the decorative knob on the rod and unscrew the cover that covers the hole in the tank through which the rod passes (of course, if it was screwed on).
2. Remove the cover and see this picture. In the center is a drain column. On the side there is a fill valve. If the length of the supply hose is sufficient to remove the tank and place it on top of the toilet, then move on to the next point. Otherwise, turn off the eyeliner.
3. The drain column is collapsible - consists of two parts. To make it easier to carry out work, we dismantle the upper part. To do this, turn it 90° (it will detach from the bottom part with a snap):
and take out:
The bottom of the column will remain inside. On the sides of it you can see the heads of the bolts securing the tank to the toilet.
4. Unscrew the fastening nuts under the tank. As a rule, this can be done simply by hand.
After draining, a small amount of water will remain. When the nuts are unscrewed, this water will flow out. So put a rag on it.
5. Now nothing prevents you from lifting the tank up and placing it on the toilet for the convenience of subsequent work.
There is a sealing gasket left at the landing site:
6. In our case, dismantling the tank could be done without first disconnecting the liner. If it is necessary to change the filling valve, then we perform this operation now.
Flexible hoses can be twisted and unscrewed by hand. The key is used only when absolutely necessary.
7. Unscrew the column mounting nut:
and valve mounting nut:
8. Take everything out of the tank. Here, in fact, this is the dismantled fittings:
Now you can begin installing the new fittings. All operations are performed in the reverse order, the only caveat is that for convenience, it makes sense to put the gasket between the tank and the toilet on the fastening nut before installation.
The entire operation takes five to ten minutes. Threaded connections, as mentioned, are screwed in by hand and only if necessary are tightened with a wrench.
You can endlessly try to repair old leaking fittings, being surprised every month by the huge bills for consumed water, or you can spend 10 minutes and radically solve the problem for a long time by simply replacing the fittings completely. Now you know how to do this.
How to fix broken toilets with a plastic tank
Leaking along the drain pipe collar
The rubber cuff that connects the cistern pipe to the toilet outlet dries out over time, loses its elasticity and begins to leak. Toilet repair in this case consists of replacing the problematic part. First you need to turn off the water and rinse.
If you cannot find a new part, you can install a 50/40 mm rubber reduction instead. Unlike the cuff, it is inserted inside the mouth of the toilet bowl, and is not put on top of it. Otherwise, there is no difference, and this will not affect the operation of the mechanism in any way.
As a temporary solution, you can carefully remove the old cuff, clean and dry it, and then install it, treating the joints with silicone sealant.
Leaking tank nut
Water flows through the drain pipe nut due to the gasket, which is installed from the inside of the tank. Often it is cut through by burrs from casting defects on the pipe or is displaced to the side when twisted. Also, the membrane itself may be of poor quality.
To eliminate the defect, turn off the tap at the entrance to the tank, rinse off the water and remove the drain valve by first unscrewing the decorative nut on the socket, and then the clamping nut. Next, you need to clean off the burrs along the entire surface of the gasket with a sharp knife and assemble everything in the reverse order, holding the pipe securely with your hand while tightening the nut.
If this does not help, most likely the gasket itself is of poor quality. In this case, you need to cut a new one from a suitable piece of rubber 2–2.5 mm thick, using the old part as a template or tracing the pipe with a pencil.
Leak at the drain pipe joint
Water leakage at the junction of the pipe and the drain occurs due to poor fit or deformation of the cone gasket. And it needs to be replaced with a new one. If such a gasket is not at hand, you can temporarily seal the joint with FUM tape.
Recipes for homemade adhesives
For gluing porcelain and earthenware, you can prepare your own compositions from the following components (optional):
- 1 part glass to 2 parts sifted sand. Then add 6 parts sodium silicate.
- 1 part lime to 2 parts chalk and 2.5 sodium silicate. After mixing, the composition must be applied immediately.
- 1 part turpentine to 2 parts shellac. After mixing, the composition must be heated and then cooled. Before each use, the mixture should be melted over a fire.
- The gypsum is kept in alum for 24 hours. Then the composition is dried, calcined and divided into several parts. Next, each piece is diluted in water until a creamy mixture is obtained.
It is recommended to apply the above compositions to problem surfaces immediately after preparation.
Setting up the drainage system
- Avoid damage to the float mechanism. It is quite easy to understand if there are problems with it. The main indicator is that the tank is constantly filled with water, and it immediately flows into the toilet. There are several reasons leading to this process:
- the lever is skewed (it should be horizontally 20 mm below the hole through which water is drawn).
- Eliminate constant water leaking into the toilet. Most often, this problem occurs due to the expiration of the siphon membrane. It needs to be replaced with a new one. To do this, drain the water, remove the siphon, replace the old membrane with a new one, put the siphon in place, attach it to the lever and tighten the fastening nut.
To fully adjust the drain mechanism of the toilet cistern, if it is broken, it is necessary to eliminate all these faults.
What can break inside
If the float is damaged, it stops holding water inside the tank, and it begins to overflow over its edges. In this case, the old float must be replaced with a new one. When the float is empty inside, depressurization may occur since it is constantly in contact with water.
Helpful advice! The crack or hole is temporarily sealed with a soldering iron, but after 1 or 2 months the float will still have to be replaced.
If the lever part of the float fails, it must also be completely replaced.
A defect in the fittings can be caused by improper actions of the plumber. If the installation of backlash connections was carried out with deviations from accepted standards, the fixing elements become weakened. This defect is easy to fix. Simply turn the top clockwise.
If the shut-off valve is faulty, water may leak out. Testing the shut-off valve is simple: press it slightly by hand. If water flows, it means the cause of the breakdown is in it. The fittings are disassembled, the container is cleaned, including its bottom. If necessary, replace the old gasket with a new one. The same is done when the siphon membrane is deformed.
Intake valve malfunction
The malfunction of this element is directly related to problems in the locking mechanism. At the same time, water, having filled the tank, continues to accumulate, and having reached the level, it is discharged through the overflow system.
This malfunction is diagnosed by the presence of the sound of flowing water, which appears as soon as the tank is full.
To eliminate the malfunction, it is necessary to replace the inlet assembly or install a new cuff or closing plug.
Before proceeding with the replacement, you need to do the following:
- turn off the water supply, and then remove the inlet valve - before this you will need to remove the drain button and remove the lid from the tank;
- Next you need to unscrew the plastic nut that secures the valve;
- to gain access to the closing plug, you need to unfasten the drive from the float, first uncoupling the float from the rocker arm;
- after this, you can remove the rocker arm, the reverse end of which is fixed to a plastic cup with a rubber stopper.
After inspecting the plug, you should replace it or try to change the working side and reinstall it.
Adjusting the shutter button
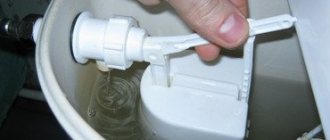
For the shutter button to work, it needs to be calibrated. This can be done by repeatedly selecting the height of the button mechanism, and then tightening it and checking the level to see if the button sits tightly on top and at the same time returns when you press it back to its original “not pressed” position. The height calibration of the button mechanism must be adjusted through the top (usually blue) mount, as shown at the very beginning of the article. When the button is pressed, the lower mount is lowered, which lifts the rubber bolt at the bottom of the tank to allow water to flow into the toilet and returns back when water is drawn back into the tank. It is this that needs to be calibrated so that the tank is tightly closed with the lid on top of the release button.
Open by yourself
An old toilet model will not present any difficulties for you: just lift the lid and unscrew the fasteners at the top of the flush mechanism.
Removing a toilet lid with a button is a more difficult task. So that you don’t have to resort to the help of strangers, we’ll look at ways to open the toilet tank yourself.
Among the available tools, prepare a slotted screwdriver, that is, a flat one, and another metal object with a flat tip.
Model No. 1 with one button on the surface of the tank lid
- Using a screwdriver, carefully and slowly turn the ring that is located around the button. Move counterclockwise and be as careful as possible to avoid damaging the surface of the lid.
- As soon as the first shift occurs, you can put the screwdriver aside and continue to unscrew the ring by hand.
- Having completely unscrewed the ring, you need to finally remove it and in the end you will get a plastic cylinder.
- You can now lift the reservoir lid slightly.
- Carefully turn it 900 so that the top of the toilet is positioned transversely to the tank.
- Once the lid is in a perpendicular position, you will be able to remove the double-sided clothespin that holds the button.
- Move one end of the clothespin to the right and the other to the left, while simultaneously rotating the clothespin along its axis.
- You can now remove the toilet lid.
- Place it carefully on a flat and stable surface so that it does not break.
- Repair faults and check all mechanisms.
- Reassemble the tank in reverse order.
One button tank
As you can see, disassembling a toilet cistern with one button is quite simple. The main thing is to follow the instructions and be extremely careful.
When repairing a toilet, a funny paradox occurs: it is always easier to disassemble than to assemble. Therefore, if you do not have instructions for assembling the mechanism, carefully remember your actions, or even better, write them down.
Model No. 2 with two buttons on the surface of the tank lid
- To disassemble the two-button mechanism, press down on one half of the button and locate the small slot on the inside side of the other button.
- Use a screwdriver to grab the slot and remove half of the button.
- Then remove the other half of the button.
- You will receive a small hole in which you will find a slotted screw - you need to remove it.
- Lift the toilet lid slightly and begin to rotate it. As in the previous instructions, place the lid across the toilet cistern.
- Now you need to remove the double-sided clothespin, one end of which move to the left, the other to the right. By rotating around its axis, the clothespin will allow you to finally disassemble the toilet tank.
- During repair work, the tank lid must be placed on a hard and stable surface so that it does not accidentally break, bringing you even more trouble.
- After completing all the repair processes, check the operation of the toilet in a disassembled state. If there are no complaints, proceed to assembling the toilet cistern.
- Assembling the tank and closing it with a lid is as easy as disassembling it - do each step of the instructions in reverse order.
Model with two buttons
If a new toilet model begins to “mope”, do not rush to get upset; you can easily fix many problems yourself.
If you want to carry out even the smallest repair work on the toilet, remember that work should only begin with the water turned off. If you do not turn off the water in the riser, you can simply flood the apartment and the neighbors below.
Reconnect the water only after assembling the plumbing to check its operation.
A leaking toilet tank is a fairly simple breakdown that requires a little time and only men’s hands
When working at home with plumbing fixtures of any kind, you need to prepare in advance a place for temporary storage of all parts and components, to exclude any contact of children and animals with toilet or bathtub components. Small parts risk being swallowed or eaten, large parts risk falling and breaking.
A leaking toilet tank is a fairly simple breakdown that requires a little time and only a man’s hands. Don’t rush to call a plumber and look for a new toilet model. Be smart and deal with the problem at home yourself, which is both cheaper and more profitable.
Instructions
The reason for dismantling the cover is the same in almost all cases - the main mechanism is located in the tank. It is responsible for both collecting water and draining it. The mechanism can break at any moment.
The container is filled to the set level, after which the water supply stops. The liquid is retained thanks to a shut-off valve. The device is activated by pressing the release button. The valve is instantly lifted by a lever and the water drains into the toilet.
The principle of the mechanism is quite simple. Almost all parts are made of plastic. Some components are made of rubber. A typical reason for dismantling is poor-quality assembly of the structure.
All sealing elements and other consumables require replacement over time. If they are not carried out, problems will arise:
- constant pouring of liquid into the toilet;
- lack of water for flushing;
- water does not pass through the drain;
- leakage directly from the tank.
With constant spouting, foreign objects may get stuck under the valve. If the tank is leaking, the reason is a failure of the inlet hose.
One-button model
If your toilet flush button starts to stick, it's time to use your home tools. To remove one button, you only need pliers as well as a flathead screwdriver.
From the outside you can see that the button is located in a ring. It is an integral part of the sleeve, which must be dismantled. The ring often has a special groove. A screwdriver is inserted into it, and the structure begins to scroll. If no groove is found, then the sleeve can be unscrewed with your fingers. Pressing the ring down tightly, you need to turn the sleeve counterclockwise
The main condition is that you should unscrew it as carefully as possible, because the elements may suffer from physical impact
It is recommended to count the number of revolutions during dismantling. This will help install the part in place faster. This way you can calculate the optimal length of the adjustable rod.
After removing the button, the lid is removed to the side and repairs to the drain mechanism itself begin.
Two-button model
A system with two buttons, like that of the Roca brand, has become widespread. Opening a toilet cistern with a double button is easy. The principle differs only in that the system is not unscrewed along with the sleeve. It is taken out separately from the glass.
You will need a screwdriver during this process. One of the buttons should be slightly pressed down, and at this time the second one should be carefully pryed off with a screwdriver. Under the button itself you can find small fasteners. They can be different:
Regardless of the modification and manufacturer, any of these fasteners can be simply removed. After this, the button is much easier to unscrew. The last step is to remove the lid from the tank.
If upon inspection the problem turns out to be much more serious, you can completely disassemble the toilet cistern with two buttons. Each step must be remembered or recorded on a mobile phone camera in order to put everything back together.
Installation
The type of wall-hung toilets is considered innovative, although it has long been installed in private houses and apartments. The design of the model looks much more solid. However, there are certain difficulties in maintaining it.
Installation involves hiding the tank in a special cavity in the wall. It is equipped in advance. The tank is carefully covered with a shield, plasterboard sheet or wood with a special lining.
Cover removal method:
- press the button at the bottom and try to pull it out with gentle up and down movements;
- unscrew all fastening screws using a screwdriver;
- release the tight latches;
- pull out the pushers (they are made of plastic);
- remove the brackets;
- dismantle the partition by removing the special clamps at the top;
- turn off the water supply at the tap;
- dismantle the rocker and valve mechanism;
- remove the latch (to do this, bend the small petals with moderate force);
- remove the top part of the tank without pulling out the drain valve (to prevent it from jamming, you should turn the part from side to side).
If you encounter problems when assembling it yourself, it is better to refer to the manufacturer's instructions for useful information. Roka and other brands provide step-by-step guides on the correct installation of plumbing fixtures and its individual parts.